Introduction & Inspiration
Get ready for what might be the most brilliant, fun, and ridiculously fast dessert hack you’ll see all summer: 10-Minute Ice Cream Pops! Imagine a perfect, thick disk of your absolute favorite premium ice cream on a stick, enrobed in a rich, snappy, semi-sweet chocolate shell that cracks perfectly with every bite. The secret? A clever technique that involves slicing a standard cardboard pint of ice cream and a super simple two-ingredient homemade “magic shell.” It’s pure genius!
My inspiration for this recipe comes from loving those classic chocolate-coated ice cream bars from the store or the ice cream truck, but wanting to enjoy them with my own favorite gourmet ice cream flavors at home, without any fuss. This method is the perfect solution – it delivers that satisfying experience with just a few minutes of active prep time.
These ice cream pops are fantastic for a spontaneous dessert craving, a fun activity to do with kids, or an effortlessly impressive treat for guests. It’s the ultimate way to enjoy a personalized, high-quality ice cream bar in minutes! It is a perfect easy dessert recipe.
Nostalgic Appeal / Comfort Factor
Chocolate-coated ice cream bars are a cornerstone of nostalgic comfort. They evoke powerful memories of childhood summers, the cheerful jingle of an ice cream truck, and the simple joy of breaking through a crisp chocolate shell to get to the creamy ice cream inside. They are a universally beloved treat.
This recipe taps directly into that deep well of comforting nostalgia but gives you the power to customize it with any ice cream flavor you love – whether it’s a classic vanilla bean, a nostalgic mint chocolate chip, or a sophisticated coffee almond fudge. The process itself is fun and playful, resulting in a familiar yet uniquely personal comfort food experience.
Making these at home brings that simple, joyful indulgence right into your kitchen with unparalleled ease. A perfect comfort food treat.
Homemade Focus
While this recipe brilliantly utilizes store-bought ice cream as its base, the homemade focus shines brightly in the clever technique and the creation of the from-scratch chocolate shell. The “homemade” magic here isn’t about long hours of labor, but about a smart, hands-on assembly process.
You’re creating your own two-ingredient “magic shell” by simply melting together chocolate and coconut oil. This homemade version is often richer and more flavorful than store-bought shell toppings. The core homemade technique is the genius method of slicing the ice cream pint to create perfect, uniform rounds, and then hand-dipping each one.
It’s a celebration of a clever homemade “hack” that allows you to create a personalized, high-quality treat with minimal ingredients and time. The homemade magic shell is key.
Flavor Goal
The primary flavor goal is the classic and perfect pairing of rich, crackly chocolate and cold, creamy ice cream. The homemade chocolate shell, made from semi-sweet chocolate and coconut oil, should be smooth and glossy, hardening almost instantly on the frozen ice cream into a snappy, satisfyingly crisp coating.
The ice cream core can be whatever flavor your heart desires, but it should be perfectly cold and creamy, providing a wonderful textural and temperature contrast to the chocolate shell.
The overall experience should be a delightful, indulgent bite that delivers that quintessential chocolate-dipped ice cream bar satisfaction, but made even better because it features your absolute favorite ice cream flavor. A perfect balance between flavour and texture.
Ingredient Insights
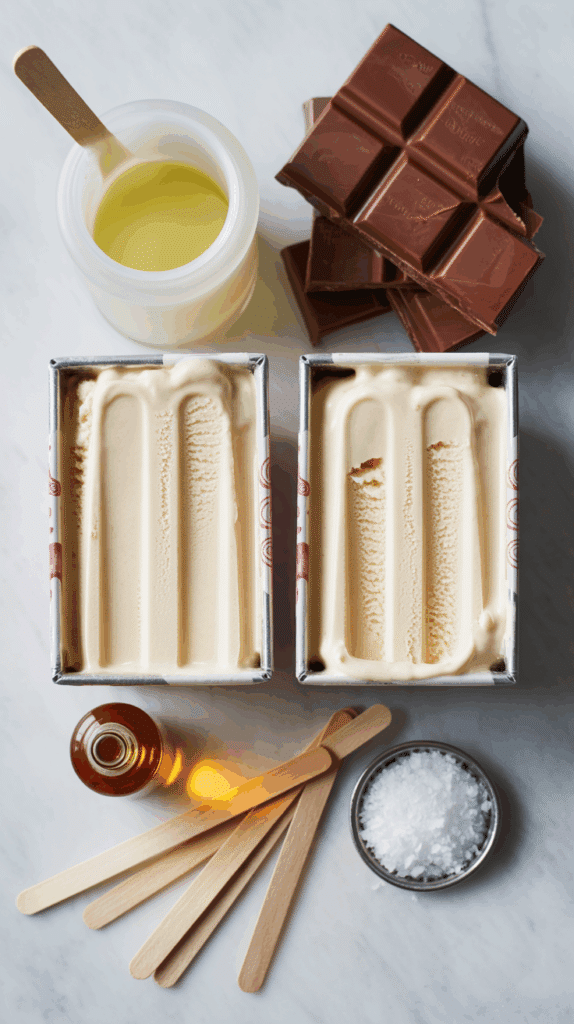
- Semisweet Chocolate (Chopped): Provides the rich chocolate flavor for the shell. Using chopped baking chocolate or good quality chocolate chips ensures a smooth and even melt. (8 ounces).
- Refined Coconut Oil (½ cup): This is the “magic” ingredient in the magic shell! Coconut oil is solid at cooler room temperatures but melts to a very thin liquid. When it hits the frozen ice cream, the cold temperature causes it to solidify almost instantly, creating that signature hard, crackly shell. Refined coconut oil is specified because it has a neutral flavor, unlike virgin or unrefined coconut oil, which would taste like coconut (which could also be delicious, if desired!).
- Pure Vanilla Extract (Optional): A small amount can be added to the melted chocolate mixture to enhance its flavor.
- Round Cardboard Pints of Ice Cream (2): The recipe’s technique is designed specifically for the standard round cardboard pint container. This allows you to slice it crosswise into perfect, uniform disks.
- Wooden Ice Pop Sticks: Standard popsicle sticks or craft sticks for the handles.
Essential Equipment
- Rimmed Baking Sheet: Lined with parchment paper and chilled in the freezer, this is your crucial landing pad for the freshly dipped pops.
- Parchment Paper: Essential for preventing the pops from sticking to the baking sheet.
- Serrated Knife: The best tool for cleanly slicing through the frozen cardboard pint container.
- Medium Microwave-Safe Bowl: For melting the chocolate and coconut oil.
- Spoon or Spatula: For stirring the chocolate shell.
- Freezer Space: You’ll need enough space for the baking sheet.
Ingredients
(Based on 1x column, makes 6 pops)
Chocolate Shell:
- ▢ 8 ounces semisweet chocolate, chopped
- ▢ ½ cup refined coconut oil
- ▢ ¼ teaspoon pure vanilla extract (optional)
- ▢ Pinch of kosher salt (optional, to enhance flavor)
Ice Cream Core:
- ▢ 2 round cardboard pints of your favorite ice cream
For Assembly:
- ▢ 6 wooden ice pop sticks

Step-by-Step Instructions
1. Prepare Your Workspace (Mise en Place):
- This is a quick recipe, so prepare everything first! Line a large baking sheet with parchment paper and place it in the freezer to get it very cold.
- Have your ice pop sticks and all other ingredients ready and within reach.
2. Make the Homemade Magic Shell:
- Combine the chopped semisweet chocolate, refined coconut oil, and optional vanilla extract and pinch of salt in a medium microwave-safe bowl.
- Microwave in 15-second increments, stirring with a spoon or spatula in between each interval, until the chocolate is about three-quarters of the way melted.
- Remove the bowl from the microwave and continue to stir the mixture until the residual heat melts the remaining chocolate completely and the shell is smooth and glossy. Set it aside briefly (if it’s very hot, let it cool for a minute or two, but it should remain very fluid).
3. Prepare the Ice Cream Pops:
- Remove one pint of ice cream from the freezer. Discard the lid.
- Using a sharp serrated knife, carefully trim a very thin slice from the side of the cardboard container. This creates a flat surface so the pint can rest securely on its side on a cutting board without rolling.
- With the container now lying on its side, carefully slice it crosswise into 3 equal, thick rounds, cutting right through the cardboard.
- Gently peel or tear the cardboard container away from each ice cream round.
- Carefully insert a wooden ice pop stick through the cut side of each ice cream disk, pushing it about halfway through.
4. Dip the Pops:
- Working quickly, one pop at a time, dip each ice cream pop into the bowl of melted chocolate shell, turning to coat all sides completely.
- Allow any excess chocolate to drip back into the bowl. The shell will begin to harden almost instantly.
- Immediately lay the chocolate-dipped pop flat on the chilled parchment-lined baking sheet in the freezer.
- Repeat the process quickly with the remaining two pops from the first pint, and then with the second pint of ice cream.
5. Freeze and Serve:
- Let the finished pops harden in the freezer for about 30 seconds to 1 minute.
- Serve them immediately and enjoy the satisfying crackle and creamy interior!
- For longer storage, wrap each individually frozen solid pop in plastic wrap and keep them in the freezer for up to 2 weeks.

Troubleshooting
- Ice Cream Melting Too Fast During Dipping: You’re not working quickly enough, or your kitchen is very warm. Have everything prepped and ready. Work with one pint at a time, keeping the other in the freezer. If the ice cream rounds become too soft, place them on the chilled baking sheet in the freezer for a few minutes to firm up before inserting sticks and dipping.
- Chocolate Shell Too Thick or Clumpy: The chocolate was overheated or seized. Melt it gently in short bursts in the microwave. If it seizes (becomes thick and grainy), it unfortunately cannot be saved for this purpose. Ensure no water gets into the chocolate. The ratio of coconut oil should make it quite fluid.
- Chocolate Shell Too Thin: Not enough chocolate, or too much coconut oil. Ensure correct measurements.
- Shell Cracking and Falling Off: This can happen if the shell is extremely thick and the ice cream contracts significantly. A standard coating should adhere well. Ensure the pop is laid gently on the chilled baking sheet.
- Difficulty Removing Cardboard: Use a sharp knife to score the cardboard to help it peel away more easily if it’s sticking.
Tips and Variations
- Work Quickly!: This is the most important tip. Have your station set up like an assembly line: sliced ice cream, sticks, bowl of chocolate, and a pre-chilled baking sheet in the freezer ready to go.
- Chilled Baking Sheet: Don’t skip this step! Placing the freshly dipped pops on a very cold, parchment-lined surface helps the bottom of the shell set instantly and prevents a mess.
- Refined vs. Unrefined Coconut Oil: The recipe correctly calls for refined coconut oil, which has a neutral taste. If you use unrefined (or virgin) coconut oil, your chocolate shell will have a distinct coconut flavor, which can be delicious if you’re pairing it with complementary ice cream flavors like chocolate, strawberry, or of course, coconut!
- Get Creative with Ice Cream Flavors: The beauty of this recipe is customization! Try mint chocolate chip, cookie dough, rocky road, strawberry, coffee, or your favorite local creamery’s specialty flavor.
- Add Toppings!: After dipping each pop in the chocolate shell, and before it completely hardens (you have about 10-20 seconds!), immediately sprinkle it with toppings like rainbow or chocolate sprinkles, finely chopped nuts, toasted coconut, or flaky sea salt.
- Different Chocolate: Experiment with milk chocolate, dark chocolate (70% or higher), or even white chocolate for the shell.
Serving and Pairing Suggestions
- Serve Immediately from the Freezer: The ultimate quick and satisfying frozen treat.
- Fun Party Dessert: A fantastic and easy dessert for a kids’ party or a casual adult gathering. You can make them ahead and have them individually wrapped and ready to go.
- Movie Night Treat: Perfect for a special movie night at home.
Nutritional Information
(Note: Estimated, per pop. This is highly variable and depends almost entirely on the nutritional information of the specific brand and flavor of ice cream you choose, as it makes up the bulk of the dessert.)
- Calories: 350-550+ per pop
- Fat: 20-35g+
- Saturated Fat: 15-25g+ (Coconut oil is high in saturated fat)
- Cholesterol: 30-60mg+
- Sodium: 50-150mg+
- Total Carbohydrates: 30-45g+
- Dietary Fiber: 1-3g+
- Sugars: 25-40g+
- Protein: 4-8g+
10-Minute Ice Cream Pops (The Ultimate Homemade Hack!)
Make delicious, chocolate-coated Ice Cream Pops in just 10 minutes! This easy hack uses a pint of your favorite ice cream and a simple homemade magic shell for a fun frozen treat.
Ingredients
(Based on 1x column, makes 6 pops)
Chocolate Shell:
- ▢ 8 ounces semisweet chocolate, chopped
- ▢ ½ cup refined coconut oil
- ▢ ¼ teaspoon pure vanilla extract (optional)
- ▢ Pinch of kosher salt (optional, to enhance flavor)
Ice Cream Core:
- ▢ 2 round cardboard pints of your favorite ice cream
For Assembly:
- ▢ 6 wooden ice pop sticks
Instructions
1. Prepare Your Workspace (Mise en Place):
- This is a quick recipe, so prepare everything first! Line a large baking sheet with parchment paper and place it in the freezer to get it very cold.
- Have your ice pop sticks and all other ingredients ready and within reach.
2. Make the Homemade Magic Shell:
- Combine the chopped semisweet chocolate, refined coconut oil, and optional vanilla extract and pinch of salt in a medium microwave-safe bowl.
- Microwave in 15-second increments, stirring with a spoon or spatula in between each interval, until the chocolate is about three-quarters of the way melted.
- Remove the bowl from the microwave and continue to stir the mixture until the residual heat melts the remaining chocolate completely and the shell is smooth and glossy. Set it aside briefly (if it’s very hot, let it cool for a minute or two, but it should remain very fluid).
3. Prepare the Ice Cream Pops:
- Remove one pint of ice cream from the freezer. Discard the lid.
- Using a sharp serrated knife, carefully trim a very thin slice from the side of the cardboard container. This creates a flat surface so the pint can rest securely on its side on a cutting board without rolling.
- With the container now lying on its side, carefully slice it crosswise into 3 equal, thick rounds, cutting right through the cardboard.
- Gently peel or tear the cardboard container away from each ice cream round.
- Carefully insert a wooden ice pop stick through the cut side of each ice cream disk, pushing it about halfway through.
4. Dip the Pops:
- Working quickly, one pop at a time, dip each ice cream pop into the bowl of melted chocolate shell, turning to coat all sides completely.
- Allow any excess chocolate to drip back into the bowl. The shell will begin to harden almost instantly.
- Immediately lay the chocolate-dipped pop flat on the chilled parchment-lined baking sheet in the freezer.
- Repeat the process quickly with the remaining two pops from the first pint, and then with the second pint of ice cream.
5. Freeze and Serve:
- Let the finished pops harden in the freezer for about 30 seconds to 1 minute.
- Serve them immediately and enjoy the satisfying crackle and creamy interior!
- For longer storage, wrap each individually frozen solid pop in plastic wrap and keep them in the freezer for up to 2 weeks.
Recipe Summary and Q&A
Summary: These 10-Minute Ice Cream Pops are a quick dessert hack. A homemade “magic shell” is made by melting together semi-sweet chocolate and refined coconut oil. A standard round cardboard pint of ice cream is laid on its side and sliced crosswise into three equal rounds. The cardboard is peeled off each round, an ice pop stick is inserted, and each ice cream disk is quickly dipped into the chocolate shell to coat. The coated pops are placed on a chilled, parchment-lined baking sheet and frozen briefly until the shell is solid, then served immediately or wrapped for storage.
Q&A:
- Q: Why do I have to use coconut oil? Can I use another oil?
- A: Coconut oil is essential for a “magic shell” because of its unique properties. It has a high saturated fat content, which makes it solid at cool room temperature and very hard when frozen. It also melts at a relatively low temperature. This combination allows it to be a fluid liquid for dipping but then harden almost instantly upon contact with the frozen ice cream. Other vegetable oils that are liquid at room temperature will not solidify in the same way.
- Q: What if I can’t find a round cardboard pint of ice cream?
- A: This specific slicing technique relies on the round, peel-able cardboard pint. If you can’t find one, you can still make these! Simply scoop your ice cream into balls or use a round cookie cutter to press softened ice cream into disks on a parchment-lined tray. Insert sticks, freeze them until rock solid, and then proceed with dipping them in the chocolate shell. It will take longer than 10 minutes, but the result is the same.
- Q: My chocolate shell seized up and became thick and pasty. What happened?
- A: Chocolate “seizes” when it comes into contact with even a tiny amount of water during the melting process, or if it’s overheated. Be sure your bowl and utensils are completely dry. When melting in the microwave, use short increments and stir frequently to avoid scorching it.
- Q: How can I make these for a large party?
- A: Set up an assembly line! Have multiple chilled, parchment-lined baking sheets ready. Make a larger batch of the chocolate shell. Work with one or two pints of ice cream at a time to prevent melting. Once a sheet is full of dipped pops, get it straight into the freezer to harden while you work on the next sheet. Once fully frozen, you can transfer them to a freezer bag or container.

