Introduction & Inspiration
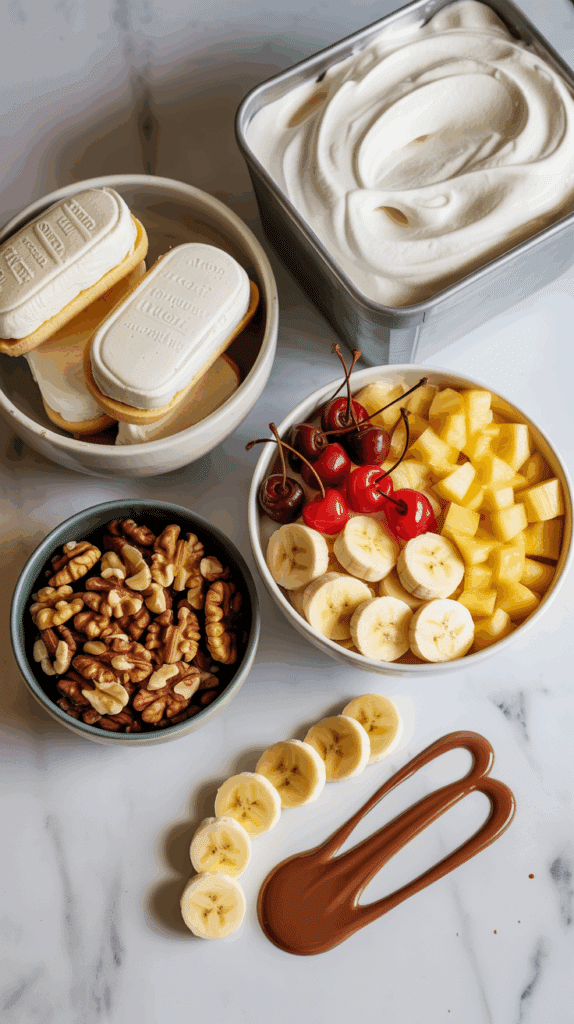
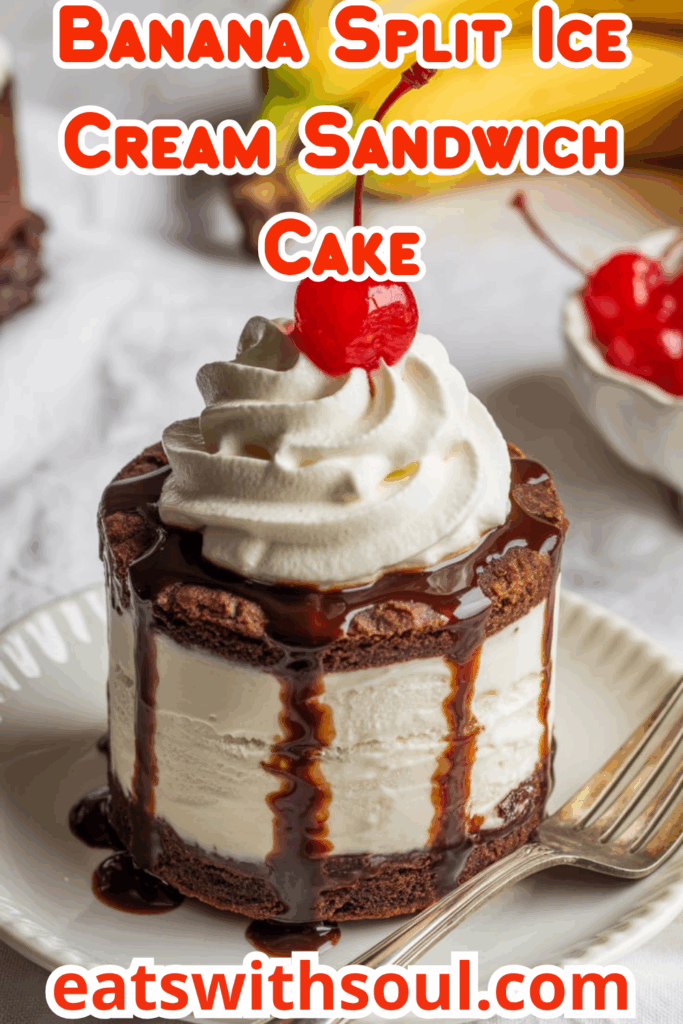
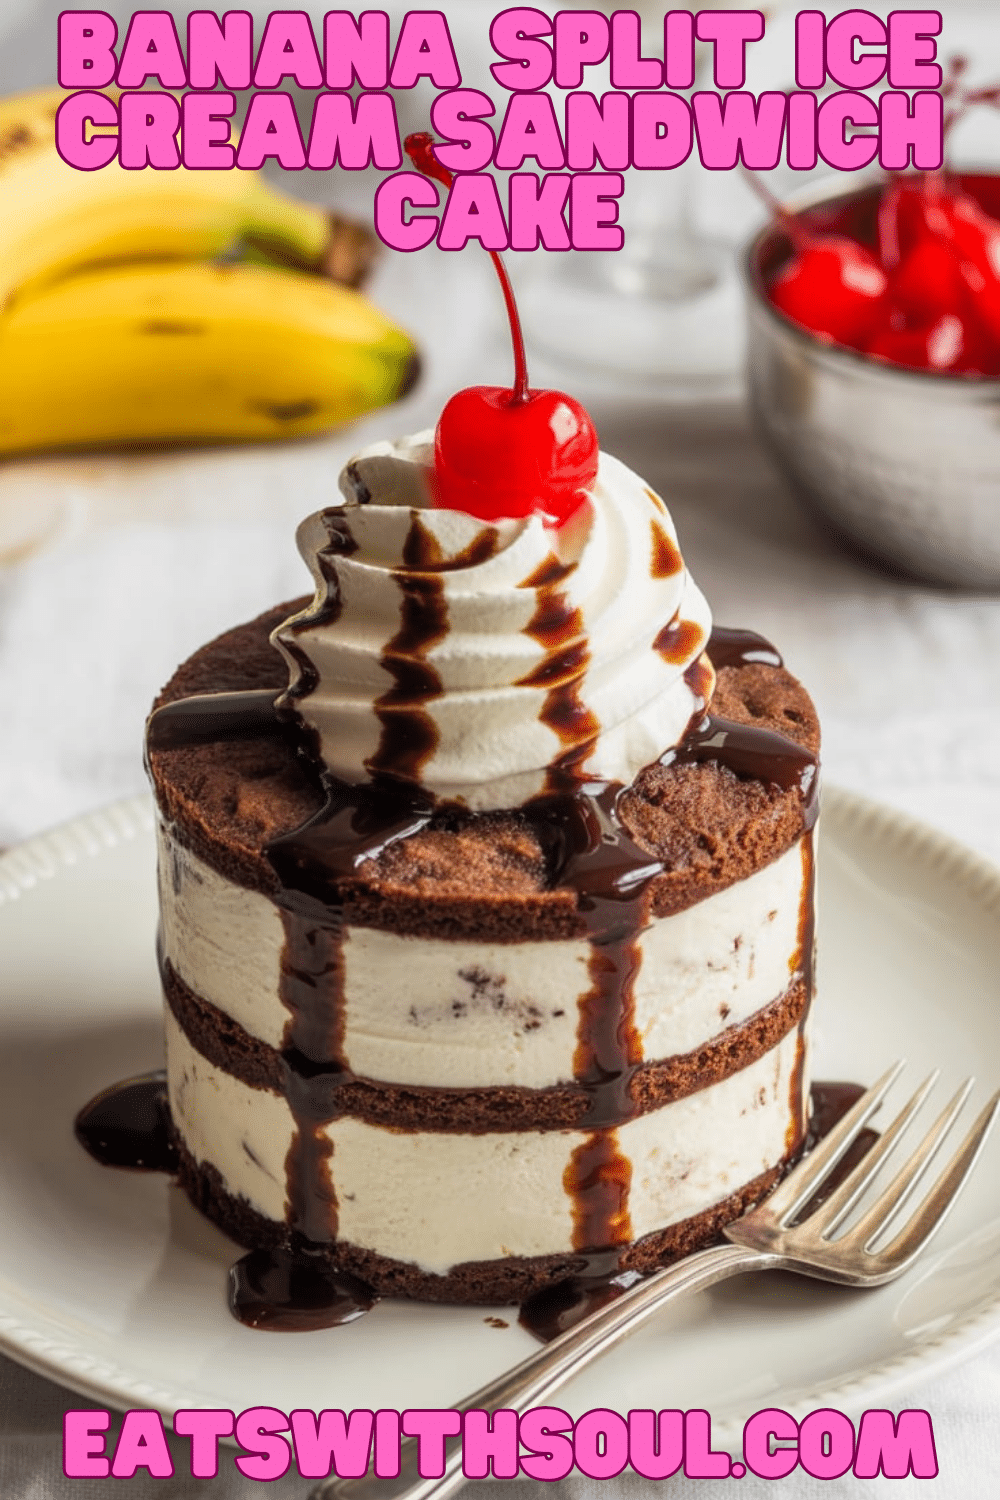
Get ready for the ultimate easy, crowd-pleasing frozen dessert that captures all the fun flavors of a classic banana split! This No-Bake Banana Split Ice Cream Sandwich Cake is pure genius – it uses simple vanilla ice cream sandwiches as the “cake” layers, sandwiching a creamy, dreamy filling loaded with crushed pineapple, sweet maraschino cherries, crunchy walnuts, and fresh banana slices. Topped with more whipped topping and classic banana split garnishes, it’s a guaranteed hit!
My inspiration for this recipe comes from wanting a super fun, festive dessert that requires absolutely no baking – perfect for summer parties, kids’ birthdays, or anytime you need an impressive treat with minimal effort. Layering ice cream sandwiches is such a clever shortcut, and combining them with those iconic banana split flavors feels like pure nostalgic joy.
This ice cream cake is incredibly simple to assemble and always disappears fast. It’s creamy, fruity, nutty, chocolatey, and just plain fun to eat! It is a perfect no-bake dessert recipe.
Nostalgic Appeal / Comfort Factor
Both banana splits and ice cream sandwiches are deeply rooted in American dessert nostalgia. Banana splits evoke images of old-fashioned ice cream parlors, long banana boats overflowing with scoops, sauces, nuts, and cherries. Ice cream sandwiches are a simple, beloved frozen treat enjoyed since childhood.
This recipe brilliantly combines the nostalgic flavors of a banana split (banana, cherry, pineapple, chocolate, nuts, vanilla cream) with the fun, familiar format of ice cream sandwiches layered into a “cake.” It’s a playful mashup that delivers pure, unadulterated comfort and happy memories.
It’s the kind of fun, easy dessert that brings smiles to faces of all ages. A perfect dessert to share with family and friends.
Homemade Focus (Easy Assembly with Shortcuts)
Let’s celebrate the art of easy assembly! This recipe relies heavily on convenient, store-bought ingredients: vanilla ice cream sandwiches, frozen whipped topping, canned pineapple, and maraschino cherries. The “homemade” magic here lies entirely in the creative assembly of these components.
You’re mixing the simple, flavorful fruit-and-nut filling yourself and carefully layering everything – sandwiches, filling, fresh bananas, more sandwiches, whipped topping, garnishes – in the baking dish. It’s homemade in the sense that you are constructing this unique dessert creation in your own kitchen.
This recipe proves that you don’t need complex baking skills to create a fun, impressive, and delicious dessert that everyone will love. It’s the perfect balance of convenience and satisfying results.
Flavor Goal
The primary flavor goal is to capture the classic medley of flavors found in a banana split, delivered in a layered ice cream cake format. You should taste the vanilla ice cream and soft chocolate wafer from the sandwiches, the sweet tang of pineapple, the distinct sweetness of maraschino cherries, the nutty crunch of walnuts, and the fresh flavor of bananas, all enveloped in light, creamy whipped topping.
The texture should be soft and frozen, easy to slice (after a brief thaw), with contrasts between the soft ice cream layers, the creamy filling, the slightly chewy fruit/nuts, and the soft banana slices. The final chocolate sauce drizzle adds another layer of classic sundae flavor.
The overall experience should be a fun, sweet, fruity, nutty, creamy frozen dessert that tastes just like a banana split in cake form! A perfect combination of flavour and texture.
Ingredient Insights
- Vanilla Ice Cream Sandwiches: The structural base and primary vanilla ice cream component. Standard rectangular sandwiches work best for layering in a 9×13 dish. About 18-20 are needed.
- Frozen Whipped Topping (Thawed): Used both in the filling and as the final topping. Provides lightness, stability, and ease. Ensure it’s fully thawed in the refrigerator before using. (Like Cool Whip).
- Crushed Pineapple (Canned): Adds tropical sweetness and tang to the filling. Must be well-drained to prevent the filling from becoming icy or watery.
- Maraschino Cherries: Provide that classic bright red color and distinct sweet, candied cherry flavor. Quartered for the filling, halved for garnish. Drain them well.
- Chopped Walnuts: Add nutty flavor and crunchy texture. Pecans could also be used. Reserve some for garnish.
- Fresh Bananas (Sliced): Essential for the banana split flavor! Use ripe but still firm bananas so the slices hold their shape. Layered inside and used for garnish.
- Garnishes (Chocolate Sauce, Extra Cherries, Walnuts): Complete the banana split look and taste! Use your favorite chocolate syrup or sauce.
Essential Equipment
- 9×13 Inch Baking Dish: The standard size for assembling this type of ice cream cake. Glass or metal works.
- Large Mixing Bowl: For combining the filling ingredients.
- Rubber Spatula: Essential for folding ingredients and spreading layers evenly.
- Knife & Cutting Board: For quartering/halving cherries, chopping walnuts, slicing bananas.
- Measuring Cups & Spoons:
- Plastic Wrap or Lid: For covering the cake during freezing.
- Metal Spatula or Sharp Knife: For cutting the frozen cake.
Ingredients
(Based on 1x column)
Main Layers & Filling:
- ▢ 18-20 vanilla ice cream sandwiches
- ▢ 16 ounces (two 8-ounce tubs) frozen whipped topping, thawed, divided
- ▢ 10 ounces can crushed pineapple, well drained
- ▢ 1 cup maraschino cherries, quartered (reserve a few for garnish)
- ▢ 1 cup chopped walnuts (reserve a handful for garnish)
- ▢ 3 bananas, sliced (reserve 1 banana for garnish)
Garnish:
- ▢ Reserved handful chopped walnuts
- ▢ Reserved maraschino cherries (approx. ¼ cup), halved
- ▢ Reserved banana slices (from 1 banana)
- ▢ Chocolate sauce for garnishing

Step-by-Step Instructions
1. Prepare the Creamy Filling Mixture:
- Ensure your frozen whipped topping is fully thawed but still cool.
- In a large mixing bowl, combine one 8-ounce tub of the thawed whipped topping, the well-drained crushed pineapple, the 1 cup of quartered maraschino cherries, and most of the chopped walnuts (reserve a small handful, about 1/4 cup, for the final garnish).
- Gently fold these ingredients together with a rubber spatula until everything is evenly combined. Set aside.
2. Assemble the First Layer:
- Arrange a single layer of unwrapped vanilla ice cream sandwiches flat on the bottom of a 9×13 inch baking dish. Place them flush against each other, side by side.
- You will likely need to cut one or two ice cream sandwiches in half with a sharp knife to fill any gaps and create an even layer covering the entire bottom of the dish.
3. Add Filling and Banana Layer:
- Pour the prepared whipped topping/pineapple/cherry/walnut mixture evenly over the first layer of ice cream sandwiches.
- Use a rubber spatula to spread the mixture gently into an even layer, reaching the edges of the dish.
- Slice about 2 of the fresh bananas. Arrange the banana slices in a single layer completely covering the creamy filling mixture.
4. Assemble the Second Layer and Top Coat:
- Place a second layer of ice cream sandwiches directly on top of the banana slices, repeating the same layout as the first layer (cutting pieces to fit as needed).
- Spread the second (remaining) 8-ounce tub of thawed whipped topping evenly over this top layer of ice cream sandwiches. Use a rubber spatula to smooth the top completely, covering all the sandwiches.
5. Add Final Garnishes:
- Decorate the top of the cake immediately (before freezing completely firms the topping).
- Slice the remaining 1 banana. Arrange the banana slices decoratively over the whipped topping.
- Sprinkle the reserved handful of chopped walnuts over the top.
- Arrange the reserved halved maraschino cherries decoratively.
- Drizzle generously with chocolate sauce.
6. Freeze Thoroughly:
- Cover the baking dish tightly with plastic wrap or a lid.
- Place the assembled ice cream sandwich cake in the freezer. Freeze for at least 6 hours, or preferably overnight, until completely firm and set.
7. Serve:
- When ready to serve, remove the cake from the freezer. You may need to let it sit at room temperature for 5-10 minutes to soften just slightly for easier cutting.
- Use a large, sharp knife or a sturdy metal spatula to cut the cake into squares or slices. Dip the knife in hot water and wipe clean between cuts for the neatest slices.
- Serve immediately. Garnish individual slices with additional whipped topping and your other favorite banana split toppings (like sprinkles or more sauce!) if desired.

Troubleshooting
- Cake Melting Too Fast During Assembly: Work quickly! Ensure whipped topping is thawed but still cold. Have all components ready before you start layering. Return dish to freezer between steps if your kitchen is very warm.
- Difficult to Cut: Cake is frozen solid. Let it sit at room temperature for 5-10 minutes before attempting to slice. Use a sturdy knife dipped in hot water.
- Bottom Layer Sticking: Didn’t use a non-stick dish, or minor sticking occurred. Briefly setting the bottom of the dish in warm water might help loosen, but work fast to avoid melting. Usually serves fine directly from dish.
- Filling Too Loose/Icy: Pineapple wasn’t drained well enough, or whipped topping was warm/overmixed. Ensure pineapple is very well drained. Use cold, thawed whipped topping and fold gently. Ensure adequate freezing time.
Tips and Variations
- Drain Pineapple WELL: Squeeze out excess juice from the crushed pineapple for the best filling consistency.
- Work Quickly: Assemble layers relatively quickly to prevent ice cream sandwiches from melting too much.
- Freeze Solid: Don’t skimp on the freezing time (6+ hours or overnight) – it needs to be fully firm to slice nicely.
- Different Sandwich Flavors: Experiment with Neapolitan, chocolate, or cookies ‘n’ cream ice cream sandwiches for variations.
- Add Sprinkles: Fold rainbow sprinkles into the filling mixture or sprinkle generously on top for extra fun.
- Other Nuts: Pecans or peanuts could substitute for walnuts.
- Sauces: Add strawberry or caramel sauce drizzles along with the chocolate sauce.
- Homemade Whipped Cream: You can use homemade sweetened whipped cream, but it’s best to stabilize it (with gelatin or cream cheese) so it holds up better when frozen and layered. Use about 4 cups total whipped cream if substituting for two 8-oz tubs.
Serving and Pairing Suggestions
- Serve Frozen: This is an ice cream cake – serve it directly from the freezer (after a brief thaw for slicing).
- Parties & Potlucks: Perfect easy, crowd-pleasing dessert, especially for summer gatherings or kids’ parties.
- Cut into Squares: Easy serving directly from the 9×13 pan.
- Extra Toppings Bar: Offer extra chocolate sauce, caramel sauce, sprinkles, nuts, and whipped cream on the side for guests to customize their slice.
Nutritional Information
(Note: Estimated, per serving, assuming 12-15 servings from a 9×13 pan. Very indulgent dessert, highly variable based on brands of sandwiches, topping, pie filling, etc.)
- Calories: 350-500+
- Fat: 15-25g+
- Saturated Fat: 8-15g+
- Cholesterol: 20-40mg+
- Sodium: 150-250mg+
- Total Carbohydrates: 45-65g+
- Dietary Fiber: 1-3g+
- Sugars: 30-45g+ (Very sweet dessert)
- Protein: 3-6g+
Easy No-Bake Banana Split Ice Cream Sandwich Cake
Make a fun and easy No-Bake Banana Split Ice Cream Sandwich Cake! Layers of ice cream sandwiches, creamy pineapple-cherry-walnut filling, bananas, and whipped topping create this perfect frozen dessert.
Ingredients
(Based on 1x column)
Main Layers & Filling:
- ▢ 18-20 vanilla ice cream sandwiches
- ▢ 16 ounces (two 8-ounce tubs) frozen whipped topping, thawed, divided
- ▢ 10 ounces can crushed pineapple, well drained
- ▢ 1 cup maraschino cherries, quartered (reserve a few for garnish)
- ▢ 1 cup chopped walnuts (reserve a handful for garnish)
- ▢ 3 bananas, sliced (reserve 1 banana for garnish)
Garnish:
- ▢ Reserved handful chopped walnuts
- ▢ Reserved maraschino cherries (approx. ¼ cup), halved
- ▢ Reserved banana slices (from 1 banana)
- ▢ Chocolate sauce for garnishing
Instructions
1. Prepare the Creamy Filling Mixture:
- Ensure your frozen whipped topping is fully thawed but still cool.
- In a large mixing bowl, combine one 8-ounce tub of the thawed whipped topping, the well-drained crushed pineapple, the 1 cup of quartered maraschino cherries, and most of the chopped walnuts (reserve a small handful, about 1/4 cup, for the final garnish).
- Gently fold these ingredients together with a rubber spatula until everything is evenly combined. Set aside.
2. Assemble the First Layer:
- Arrange a single layer of unwrapped vanilla ice cream sandwiches flat on the bottom of a 9×13 inch baking dish. Place them flush against each other, side by side.
- You will likely need to cut one or two ice cream sandwiches in half with a sharp knife to fill any gaps and create an even layer covering the entire bottom of the dish.
3. Add Filling and Banana Layer:
- Pour the prepared whipped topping/pineapple/cherry/walnut mixture evenly over the first layer of ice cream sandwiches.
- Use a rubber spatula to spread the mixture gently into an even layer, reaching the edges of the dish.
- Slice about 2 of the fresh bananas. Arrange the banana slices in a single layer completely covering the creamy filling mixture.
4. Assemble the Second Layer and Top Coat:
- Place a second layer of ice cream sandwiches directly on top of the banana slices, repeating the same layout as the first layer (cutting pieces to fit as needed).
- Spread the second (remaining) 8-ounce tub of thawed whipped topping evenly over this top layer of ice cream sandwiches. Use a rubber spatula to smooth the top completely, covering all the sandwiches.
5. Add Final Garnishes:
- Decorate the top of the cake immediately (before freezing completely firms the topping).
- Slice the remaining 1 banana. Arrange the banana slices decoratively over the whipped topping.
- Sprinkle the reserved handful of chopped walnuts over the top.
- Arrange the reserved halved maraschino cherries decoratively.
- Drizzle generously with chocolate sauce.
6. Freeze Thoroughly:
- Cover the baking dish tightly with plastic wrap or a lid.
- Place the assembled ice cream sandwich cake in the freezer. Freeze for at least 6 hours, or preferably overnight, until completely firm and set.
7. Serve:
- When ready to serve, remove the cake from the freezer. You may need to let it sit at room temperature for 5-10 minutes to soften just slightly for easier cutting.
- Use a large, sharp knife or a sturdy metal spatula to cut the cake into squares or slices. Dip the knife in hot water and wipe clean between cuts for the neatest slices.
- Serve immediately. Garnish individual slices with additional whipped topping and your other favorite banana split toppings (like sprinkles or more sauce!) if desired.
Recipe Summary and Q&A
Summary: This No-Bake Banana Split Ice Cream Sandwich Cake layers vanilla ice cream sandwiches in a 9×13 dish with a creamy filling made from whipped topping, well-drained crushed pineapple, quartered maraschino cherries, and chopped walnuts. Sliced bananas are layered over the filling, followed by another layer of ice cream sandwiches and a final layer of plain whipped topping. The cake is garnished with more bananas, cherries, walnuts, and chocolate sauce before being frozen solid for at least 6 hours.
Q&A:
- Q: Do I need to thaw the ice cream sandwiches first?
- A: No, use them directly from frozen. They form the solid layers of the cake.
- Q: Can I use homemade whipped cream instead of frozen whipped topping?
- A: Yes, but for best results in a frozen dessert like this (especially in the filling layer), it’s recommended to use stabilized homemade whipped cream (e.g., whipped with a little powdered sugar, vanilla, and dissolved gelatin or cream of tartar) so it doesn’t become icy or weep. You’ll need about 4 cups total whipped cream to replace the two 8-oz tubs.
- Q: How far in advance can I make this?
- A: This is a great make-ahead dessert! Assemble it completely, cover tightly, and store in the freezer for up to a week or even longer (though freshness is best within 1-2 weeks).
- Q: My layers slid around when cutting. How can I prevent this?
- A: Ensure the cake is frozen completely solid (overnight is best). Let it sit out for only 5-10 minutes before cutting – just enough to soften slightly. Use a large, sharp knife dipped in hot water and wiped clean between cuts.

