Introduction & Inspiration
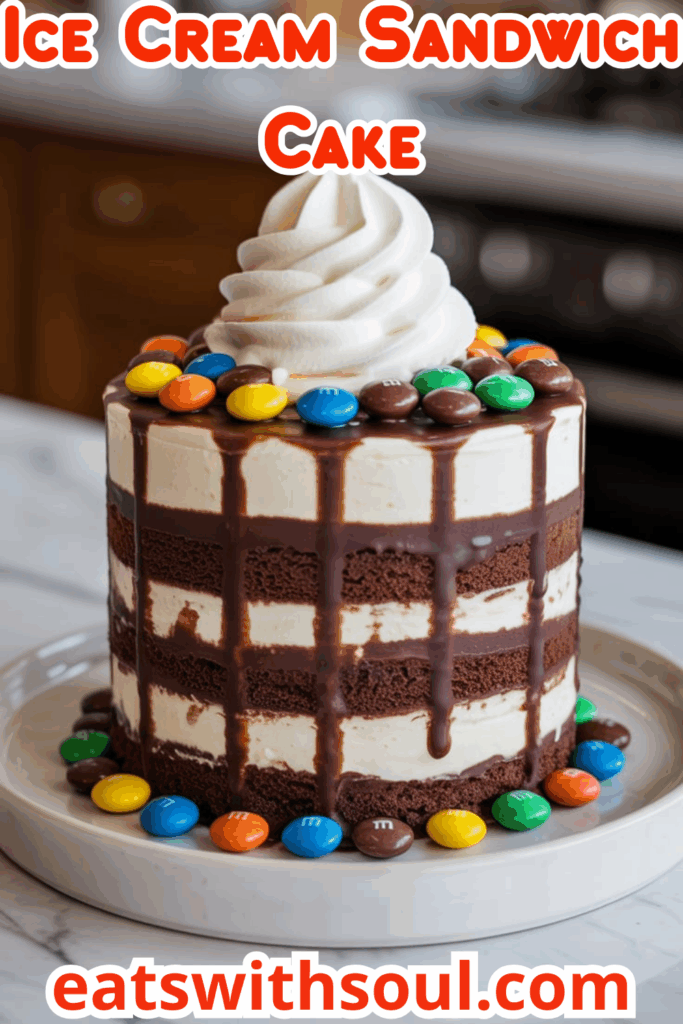
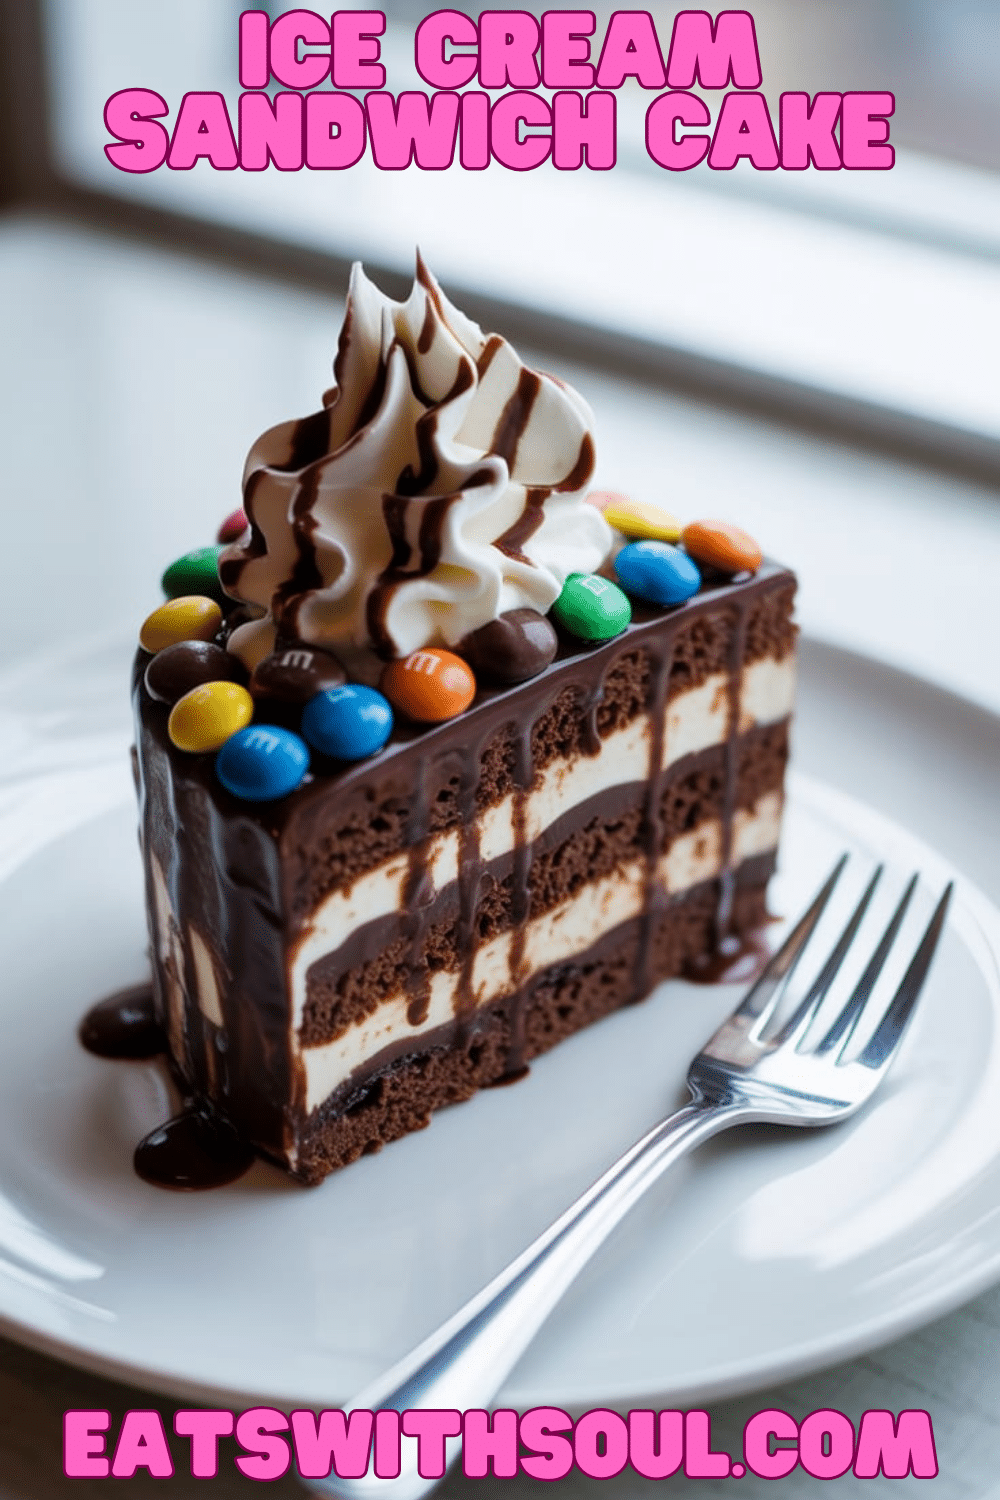
Get ready for the ultimate easy, no-bake party dessert that everyone will absolutely adore! This M&M Ice Cream Sandwich Cake is pure, unadulterated fun. We’re talking layers of classic vanilla ice cream sandwiches stacked with a creamy, dreamy filling made from Cool Whip, rich hot fudge sauce, instant chocolate pudding mix (yes, the dry mix!), and loaded with crunchy, colorful M&M’s candies. Frosted with more Cool Whip and decorated with even more M&M’s, it’s a guaranteed crowd-pleaser!
My inspiration for this recipe comes from wanting the easiest possible dessert that still feels festive and incredibly satisfying for kids and adults alike. Layering ice cream sandwiches is such a brilliant shortcut, and the unique filling comes together in minutes without any cooking. It’s perfect for birthdays or anytime you need a quick, impressive frozen treat.
This cake requires absolutely no baking, minimal mixing, and mostly just freezer time. It’s incredibly simple and always brings big smiles. It is a perfect dessert recipe for parties.
Nostalgic Appeal / Comfort Factor
Ice cream sandwiches are pure childhood nostalgia on a stick (or, well, not on a stick!). M&M’s candies are another iconic treat loved across generations. Cool Whip and instant pudding desserts also hold a special place in the realm of easy, nostalgic comfort food, often found at potlucks and family gatherings.
This recipe combines all of these comforting, familiar, and fun elements into one fantastic frozen dessert. It’s playful, colorful, sweet, and delivers the satisfying textures of soft ice cream, creamy filling, and crunchy candy bits. It’s pure, simple dessert happiness.
It’s the kind of effortless treat that’s perfect for kids’ parties or anytime you want a dose of sweet, uncomplicated comfort. A perfect fun dessert.
Homemade Focus (Super Easy Assembly)
Let’s celebrate the joy of super-easy assembly! This recipe is built entirely around convenient, store-bought ingredients – ice cream sandwiches, M&M’s, hot fudge sauce, Cool Whip, and instant pudding mix. The “homemade” magic here lies solely in the creative assembly process.
You’re mixing up the unique filling (which cleverly uses the dry pudding mix as a thickener and flavor enhancer) and carefully layering the sandwiches and filling on foil to create the cake structure. It requires absolutely no baking skill, making it truly accessible to everyone.
It’s homemade fun at its absolute easiest, perfect for getting kids involved in the kitchen and creating a festive treat with guaranteed delicious results. The perfect balance between homemade and store-bought.
Flavor Goal
The primary flavor goal is a fun, sweet, and satisfying combination of classic vanilla ice cream, soft chocolate wafers, rich chocolate fudge, creamy Cool Whip, and the distinct candy shell crunch and milk chocolate flavor of M&M’s.
The ice cream sandwiches provide the main structure and vanilla/chocolate notes. The filling layer should be creamy, chocolatey (from the fudge and pudding mix), fluffy from the Cool Whip, and studded with crunchy M&M pieces. The Cool Whip frosting adds a final light, creamy layer.
The overall experience should be a cold, creamy, sweet, chocolatey frozen dessert loaded with candy crunch – a fun and easy treat perfect for celebrations. A perfect combination of flavour and texture.
Ingredient Insights
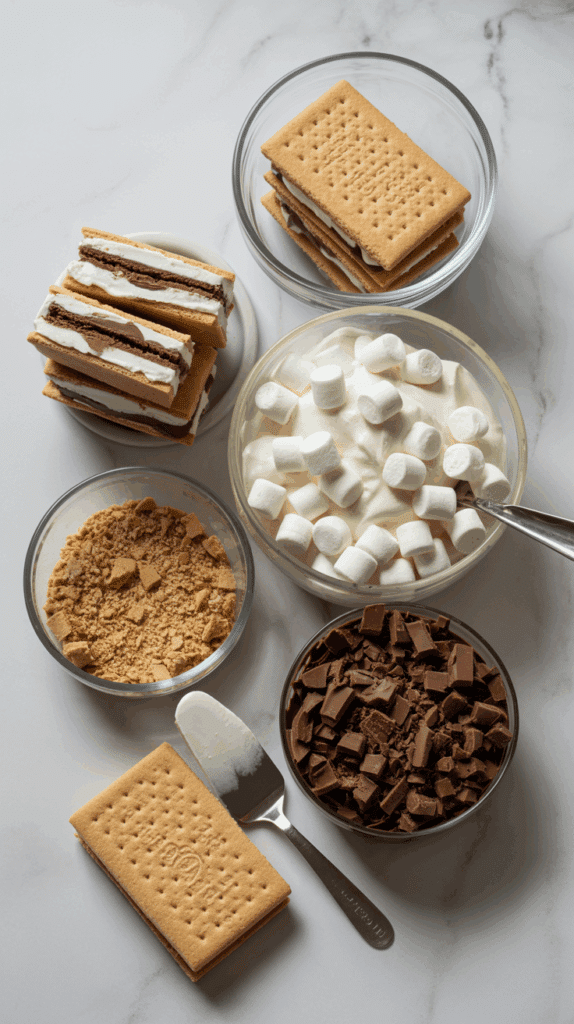
- Vanilla Ice Cream Sandwiches: The “cake” layers and base. Standard rectangular ones work best for stacking. About 12 are needed for a 3-layer structure (4 per layer).
- M&M’s Candies: Provide color, candy shell crunch, and milk chocolate flavor. A standard ~10.7 oz bag is suggested. Most are crushed for the filling, with some reserved whole/crushed for decoration. Any variety (plain, peanut, mini) could work, but plain milk chocolate is classic.
- Hot Fudge Sauce: Adds rich chocolate flavor and moisture to the filling. Use store-bought sauce, slightly warmed if very thick, but cooled before mixing.
- Cool Whip (Frozen Whipped Topping): Used both in the filling and as the frosting. Provides lightness, stability when frozen, and ease. Must be thawed in the refrigerator before using. Divided use.
- Jell-O Instant Chocolate Pudding Mix: The dry mix is used here. It acts as a thickener and adds chocolate flavor to the Cool Whip/fudge filling without requiring cooking. Ensure it’s instant, not cook & serve.
- Foil: Used as the base for assembling the cake, allowing easy wrapping for freezing.
- Optional Garnishes (Chocolate Sauce, Sprinkles): For extra decoration.
Essential Equipment
- Medium Bowl: For mixing the filling.
- Whisk or Spoon/Spatula: For stirring the filling.
- Aluminum Foil: A long piece (at least 24 inches) to build the cake on.
- Freezer Space: Enough flat space to accommodate the assembled cake.
- Spatula: For frosting the cake with Cool Whip.
- Optional: Ziploc bag and Rolling Pin: For crushing M&M’s.
Ingredients
(Based on 1x column)
Filling:
- ▢ ½ cup hot fudge sauce
- ▢ 1 cup Cool Whip (from an 8 oz tub), thawed
- ▢ 1 package Jell-O instant chocolate pudding mix (standard 3.4-3.9 oz size), dry mix only
- ▢ Approx. 3/4 of a 10.7 ounce bag M&M’s candies, crushed (reserve remaining M&M’s for decorating)
Assembly & Frosting:
- ▢ 12 vanilla ice cream sandwiches
- ▢ Remaining Cool Whip from 8 oz tub (approx. 1 cup or slightly more), thawed
- ▢ Reserved crushed and whole M&M’s
Optional Garnish:
- ▢ Chocolate sauce for drizzling
- ▢ Sprinkles

Step-by-Step Instructions
1. Prepare the Filling Mixture:
- Ensure your Cool Whip is fully thawed in the refrigerator.
- Crush about 3/4 of the bag of M&M’s candies. You can place them in a sturdy Ziploc bag and gently crush them with a rolling pin or mallet, leaving some small pieces for texture. Reserve the remaining whole and crushed M&M’s for decoration.
- In a medium bowl, whisk together the hot fudge sauce and 1 cup of the thawed Cool Whip until blended.
- Add the dry instant chocolate pudding mix to the bowl. Stir well with a spoon or spatula for about 2 minutes until thoroughly combined and slightly thickened.
- Gently stir in the crushed M&M’s. Set this filling mixture aside briefly.
2. Assemble First Layer on Foil:
- Tear off a long piece of aluminum foil (at least 24 inches). Lay it flat on your counter or a movable tray/cutting board (that will fit in your freezer).
- Arrange 4 ice cream sandwiches side-by-side (touching) on the center of the foil to form the base layer (likely forming a square or rectangle).
3. Add Filling and Repeat Layers:
- Carefully spread half of the prepared Cool Whip/fudge/pudding/M&M mixture evenly over the first layer of ice cream sandwiches.
- Arrange another 4 ice cream sandwiches on top of the filling mixture, directly aligning with the bottom layer.
- Spread the remaining half of the Cool Whip/fudge/pudding/M&M mixture evenly over the second layer of ice cream sandwiches.
- Place the final 4 ice cream sandwiches on top, again aligning with the layers below. You should now have three layers of sandwiches and two layers of filling.
4. Frost and Decorate:
- Gently frost the top and sides of the stacked ice cream sandwiches with the remaining thawed Cool Whip from the tub. Use a spatula for a smooth or swirled finish.
- Sprinkle some of the reserved crushed M&M’s over the top.
- Press the remaining reserved whole M&M’s decoratively into the top and sides of the Cool Whip frosting.
5. Freeze Thoroughly:
- Loosely wrap the entire ice cream sandwich cake with the aluminum foil it was built on (or carefully cover with additional foil/plastic wrap).
- Place the wrapped cake carefully into the freezer on a flat surface.
- Freeze for at least 4 hours, or preferably overnight, until completely firm.
6. Final Garnish and Serve:
- When ready to serve, unwrap the frozen cake.
- If desired, drizzle the top with chocolate sauce and add sprinkles for extra festivity.
- Slice the frozen cake into portions using a large, sharp knife (running the knife under hot water briefly can help make cleaner cuts).
- Serve immediately.

Troubleshooting
- Cake Melting Too Fast During Assembly: Work quickly! Have all components ready. If it’s very warm, you can briefly freeze the first layer of sandwiches/filling before adding the next layer. Ensure Cool Whip is thawed but still cold.
- Layers Sliding: Make sure sandwiches are aligned well. Freezing solid helps stabilize everything.
- Difficult to Slice: Cake is frozen rock solid. Let it sit at room temperature for 5-10 minutes before attempting to slice. Use a large, sturdy knife dipped in hot water.
- Filling Too Runny (Before Freezing): Pudding mix should thicken it considerably. Ensure correct amount of dry instant pudding mix was used and that Cool Whip was properly thawed but not warm/watery.
- Filling Too Thick (Before Freezing): Hot fudge sauce might have been very thick. Ensure it was room temp or slightly warmed before mixing.
Tips and Variations
- Work Fast: Assemble quickly to minimize melting. Building it on a tray that fits in your freezer makes transfer easy.
- Freeze Solid: Don’t skimp on the 4+ hour freezing time – it needs to be firm to slice and hold its shape.
- Crush M&M’s Gently: You want small pieces and crushed bits, not complete powder, for texture.
- Different Ice Cream Sandwiches: Try Neapolitan, chocolate chip cookie, or birthday cake flavored sandwiches!
- Different Candy/Cookies: Swap M&M’s for crushed Oreos, Reese’s Pieces, Heath bar bits, or chopped Butterfingers.
- Different Pudding Flavor: Use vanilla or cheesecake instant pudding mix for a different flavor base.
- Homemade Whipped Cream: You could substitute homemade sweetened whipped cream, but it must be stabilized (with gelatin or cream cheese) to hold up properly in the filling and when frozen. Use approximately 2 cups total whipped cream. Cool Whip is easiest for stability here.
- Shape: Arrange sandwiches differently (e.g., 3×3 for a square) depending on your preference and sandwich size/shape.
Serving and Pairing Suggestions
- Serve Frozen: This is an ice cream cake – serve directly from the freezer (after brief thaw for slicing).
- Parties & Birthdays: Perfect easy dessert for kids’ parties or casual celebrations.
- Slice into Squares or Bars: Easy serving.
- Extra Toppings: Serve with extra chocolate sauce, caramel sauce, or sprinkles on the side.
Nutritional Information
(Note: Estimated, per serving, assuming 10-12 servings. Very indulgent dessert, highly variable based on specific brands of sandwiches, fudge, candy.)
- Calories: 350-500+
- Fat: 15-25g+
- Saturated Fat: 8-15g+
- Cholesterol: 20-40mg+
- Sodium: 150-250mg+
- Total Carbohydrates: 45-65g+
- Dietary Fiber: 1-2g+
- Sugars: 30-45g+ (Very sweet)
- Protein: 3-6g+
Easy M&M Ice Cream Sandwich Cake (No-Bake!)
Make a super fun and Easy M&M Ice Cream Sandwich Cake! This no-bake dessert layers ice cream sandwiches with a creamy Cool Whip, fudge, and pudding mixture packed with M&M’s.
Ingredients
(Based on 1x column)
Filling:
- ▢ ½ cup hot fudge sauce
- ▢ 1 cup Cool Whip (from an 8 oz tub), thawed
- ▢ 1 package Jell-O instant chocolate pudding mix (standard 3.4-3.9 oz size), dry mix only
- ▢ Approx. 3/4 of a 10.7 ounce bag M&M’s candies, crushed (reserve remaining M&M’s for decorating)
Assembly & Frosting:
- ▢ 12 vanilla ice cream sandwiches
- ▢ Remaining Cool Whip from 8 oz tub (approx. 1 cup or slightly more), thawed
- ▢ Reserved crushed and whole M&M’s
Optional Garnish:
- ▢ Chocolate sauce for drizzling
- ▢ Sprinkles
Instructions
1. Prepare the Filling Mixture:
- Ensure your Cool Whip is fully thawed in the refrigerator.
- Crush about 3/4 of the bag of M&M’s candies. You can place them in a sturdy Ziploc bag and gently crush them with a rolling pin or mallet, leaving some small pieces for texture. Reserve the remaining whole and crushed M&M’s for decoration.
- In a medium bowl, whisk together the hot fudge sauce and 1 cup of the thawed Cool Whip until blended.
- Add the dry instant chocolate pudding mix to the bowl. Stir well with a spoon or spatula for about 2 minutes until thoroughly combined and slightly thickened.
- Gently stir in the crushed M&M’s. Set this filling mixture aside briefly.
2. Assemble First Layer on Foil:
- Tear off a long piece of aluminum foil (at least 24 inches). Lay it flat on your counter or a movable tray/cutting board (that will fit in your freezer).
- Arrange 4 ice cream sandwiches side-by-side (touching) on the center of the foil to form the base layer (likely forming a square or rectangle).
3. Add Filling and Repeat Layers:
- Carefully spread half of the prepared Cool Whip/fudge/pudding/M&M mixture evenly over the first layer of ice cream sandwiches.
- Arrange another 4 ice cream sandwiches on top of the filling mixture, directly aligning with the bottom layer.
- Spread the remaining half of the Cool Whip/fudge/pudding/M&M mixture evenly over the second layer of ice cream sandwiches.
- Place the final 4 ice cream sandwiches on top, again aligning with the layers below. You should now have three layers of sandwiches and two layers of filling.
4. Frost and Decorate:
- Gently frost the top and sides of the stacked ice cream sandwiches with the remaining thawed Cool Whip from the tub. Use a spatula for a smooth or swirled finish.
- Sprinkle some of the reserved crushed M&M’s over the top.
- Press the remaining reserved whole M&M’s decoratively into the top and sides of the Cool Whip frosting.
5. Freeze Thoroughly:
- Loosely wrap the entire ice cream sandwich cake with the aluminum foil it was built on (or carefully cover with additional foil/plastic wrap).
- Place the wrapped cake carefully into the freezer on a flat surface.
- Freeze for at least 4 hours, or preferably overnight, until completely firm.
6. Final Garnish and Serve:
- When ready to serve, unwrap the frozen cake.
- If desired, drizzle the top with chocolate sauce and add sprinkles for extra festivity.
- Slice the frozen cake into portions using a large, sharp knife (running the knife under hot water briefly can help make cleaner cuts).
- Serve immediately.
Recipe Summary and Q&A
Summary: This Easy M&M Ice Cream Sandwich Cake involves layering standard vanilla ice cream sandwiches on foil with a no-cook filling made from Cool Whip, hot fudge sauce, dry instant chocolate pudding mix, and crushed M&M’s candies. The assembled stack is frosted with more Cool Whip, decorated with M&M’s, wrapped in foil, and frozen solid for at least 4 hours before slicing and serving, optionally drizzled with chocolate sauce.
Q&A:
- Q: Do I make the pudding first?
- A: No! It’s crucial to use the dry instant pudding mix directly from the package. It acts as a thickener and flavor enhancer when mixed with the Cool Whip and fudge sauce; preparing it as pudding would make the filling too liquid.
- Q: Can I use homemade whipped cream instead of Cool Whip?
- A: It’s possible, but for the best stability in the filling and frosting for a frozen dessert, homemade whipped cream should be stabilized, usually with a little dissolved gelatin, cream cheese, or instant pudding powder mixed in during whipping. Cool Whip contains stabilizers that help it hold up well when frozen and thawed. You’d need about 2 cups total of prepared, stabilized whipped cream.
- Q: How far ahead can I make this cake?
- A: This is a great make-ahead dessert! Assemble it completely, wrap well in the foil (and maybe an extra layer of plastic wrap or a freezer bag), and store in the freezer for up to 1-2 weeks for best quality.
- Q: Why assemble it on foil instead of in a dish?
- A: Assembling free-standing on foil allows you to easily frost the sides of the stacked sandwiches, creating more of a “cake” look. It also makes it simple to wrap tightly for freezing. You could assemble it inside a 9×9 or similar sized dish lined with plastic wrap if preferred, then lift it out before frosting/serving.

