Introduction & Inspiration
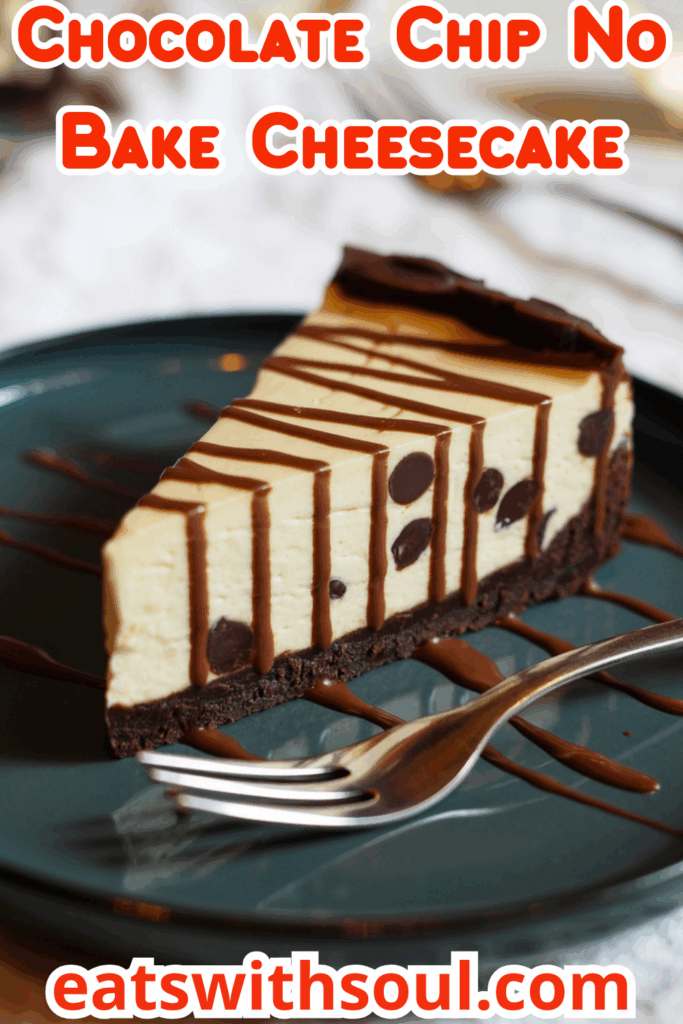
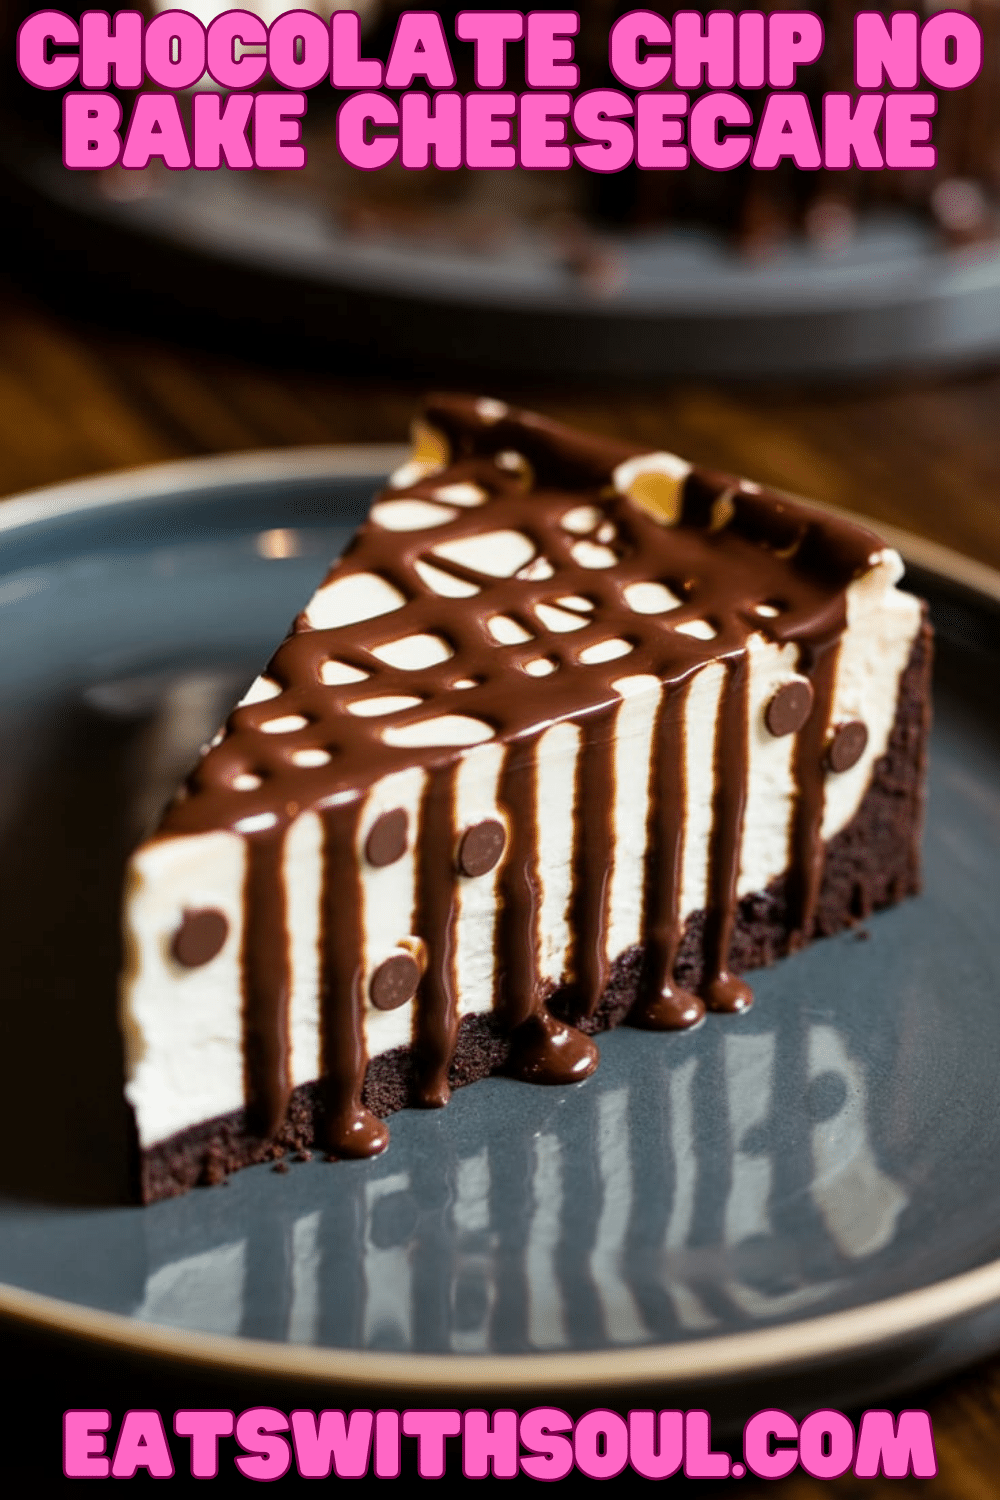
If you’re looking for an incredibly delicious cheesecake experience without even turning on your oven, then you are going to adore this No-Bake Chocolate Chip Cheesecake! It’s a dream combination of textures and flavors. Imagine a crisp Oreo cookie crust, topped with a smooth layer of rich chocolate ganache, followed by a light, fluffy, tangy cream cheese filling studded with mini chocolate chips, and finished with another drizzle of luscious ganache. It’s pure indulgence, made easy!
My inspiration for this recipe comes from wanting that decadent cheesecake experience combined with the beloved flavor of chocolate chips, all in a convenient no-bake format. Adding a layer of ganache on the bottom adds an unexpected richness that really elevates this dessert.
This cheesecake is perfect for parties, holidays, or anytime you need a showstopping dessert that requires no baking skills, just some mixing and chilling time. It’s creamy, chocolatey, tangy, and utterly irresistible! It is a perfect no-bake recipe.
Nostalgic Appeal / Comfort Factor
Cheesecake is a universally loved dessert, synonymous with celebrations, special occasions, and rich, creamy indulgence. 1 Chocolate chip cookies, of course, are peak nostalgic comfort food. This recipe beautifully marries the sophisticated comfort of cheesecake with the playful, familiar joy of chocolate chips, all built on a fun Oreo crust.
The no-bake nature also taps into the nostalgic appeal of easy “icebox” style desserts – simple to assemble and perfect for warmer weather when you don’t want to heat up the kitchen. It’s a crowd-pleasing combination of familiar flavors and textures
It feels both impressively decadent and comfortingly familiar. A perfect dessert to share.
Homemade Focus (Easy No-Bake Assembly)
While using store-bought Oreos for the crust is a fantastic shortcut, this recipe shines with its focus on homemade fillings and layers, all achieved through simple no-bake techniques. You’re creating the Oreo crust yourself, making two batches of luscious chocolate ganache from scratch, and whipping up a light and fluffy chocolate chip cheesecake filling using basic ingredients and your mixer.
The homemade focus lies in crafting these distinct layers – the crust, the ganache base, the airy cheesecake filling, the ganache topping – and assembling them carefully. Making the ganache and the cheesecake filling yourself ensures superior flavor and texture compared to pre-made mixes or fillings.
It celebrates the ease and impressive results of no-bake dessert making, proving you can create something truly special without complex baking. The homemade taste is incredible.
Flavor Goal
The primary flavor goal is a rich, balanced cheesecake experience dominated by chocolate and tangy cream cheese, with pops of mini chocolate chips throughout. The Oreo crust should provide a dark chocolatey, slightly crunchy base.
The ganache layer on the crust adds an intense hit of smooth, rich semi-sweet chocolate. The cheesecake filling should be light, fluffy, creamy, tangy, and not overly sweet, allowing the chocolate chips to shine. The final ganache drizzle adds more rich chocolate flavor and visual appeal.
The overall experience should be a delightful interplay of textures (crunchy crust, smooth ganache, fluffy filling, chip pieces) and balanced flavors (chocolate, tangy cream cheese, vanilla). A perfect balance between flavour and texture.
Ingredient Insights
For the Oreo Crust:
- Whole Oreos: Standard Oreos, including the filling, crushed finely. The filling helps bind the crust. (Recipe links to an external crust recipe, assume ~24-32 Oreos).
- Salted Butter (Melted): Binds the Oreo crumbs together and adds richness. Salted butter complements the sweetness.
For the Ganache (Layer & Topping):
- Semi-Sweet Chocolate Chips (Coarsely Chopped for layer): Provides the rich chocolate flavor. Using chips is convenient. Chopping them slightly for the main ganache layer helps them melt more evenly. Quality matters. Different amounts used for the base layer vs. the topping drizzle.
- Heavy Whipping Cream: Heated and combined with chocolate to create the smooth, rich ganache. The ratio determines how firmly it sets (more cream = softer set/drizzle).
For the Cheesecake Filling:
- Heavy Whipping Cream (Chilled): Whipped to stiff peaks separately, then folded in. This creates a much lighter, airier texture than typical no-bake cheesecakes that only use cream cheese. Must be cold.
- Cream Cheese (Softened): The essential tangy, creamy base. Use full-fat, brick-style, properly softened for a lump-free result.
- Powdered Sugar (Sifted): Sweetens the filling smoothly without graininess.
- Sour Cream: Adds extra tanginess and moisture, contributing to the classic cheesecake flavor profile. Room temperature preferred.
- Vanilla Extract: Enhances all the flavors.
- Mini Chocolate Chips: Folded into the filling for chocolate bursts in every bite. Minis distribute more evenly.
Essential Equipment
- 9-inch Springform Pan: Crucial for easy removal and showcasing the layers of a no-bake cheesecake.
- Nonstick Cooking Spray: For lightly greasing the pan.
- Food Processor (or Blender/Ziploc Bag & Rolling Pin): For crushing Oreos finely.
- Electric Mixer (Handheld or Stand Mixer with Whisk/Paddle): Essential for whipping heavy cream and beating the cream cheese filling smooth.
- Mixing Bowls (Large, Medium, Heatproof): For crust, filling components, ganache.
- Microwave or Small Saucepan: For heating cream for ganache.
- Whisk: For making ganache smooth.
- Rubber Spatula: For folding whipped cream and spreading layers.
- Offset Spatula (Optional but helpful): For spreading ganache and filling evenly.
- Measuring Cups & Spoons:
Ingredients
(Based on 1x column)
Oreo Crust: (Assumes standard recipe – adjust if linked recipe differs)
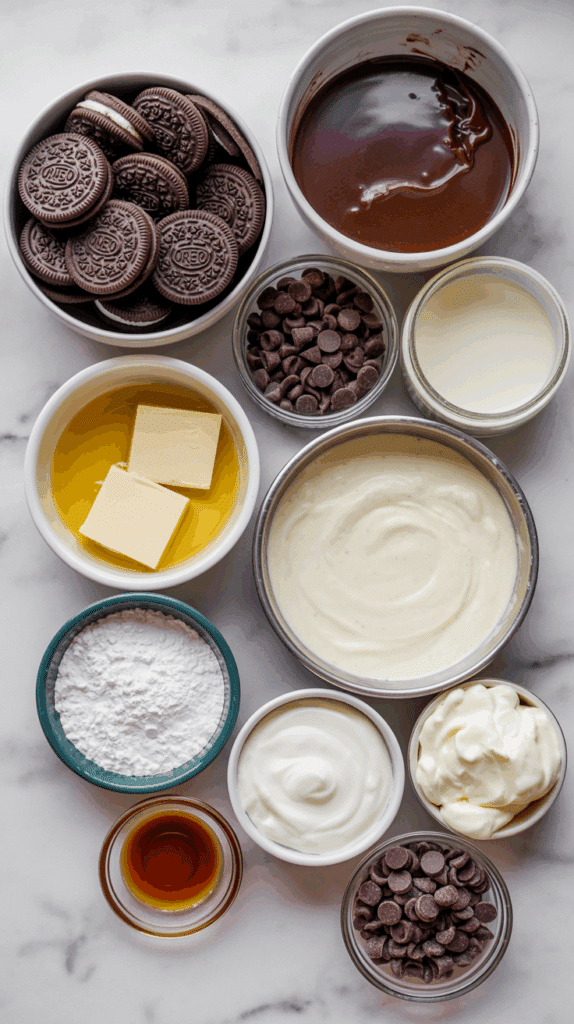
- ▢ Approx. 24-32 whole Oreos (enough for ~2 cups crumbs)
- ▢ 4-6 tablespoons salted butter, melted
Ganache Layer:
- ▢ 1 cup semi-sweet chocolate chips, perhaps coarsely chopped
- ▢ ⅓ cup heavy whipping cream
Cheesecake Filling:
- ▢ ½ cup heavy whipping cream, cold
- ▢ 20 ounces (2.5 blocks) cream cheese, softened
- ▢ ½ cup powdered sugar, sifted
- ▢ ½ cup sour cream, room temperature
- ▢ 1 tsp vanilla extract
- ▢ 1 cup mini chocolate chips
Ganache Topping:
- ▢ ⅓ cup semi-sweet chocolate chips
- ▢ 2 tbsp heavy whipping cream

Step-by-Step Instructions
1. Prepare Pan and Make Oreo Crust:
- Lightly spray the bottom and sides of a 9-inch springform pan with nonstick cooking spray.
- Place whole Oreos in a food processor and pulse until fine crumbs form. (Alternatively, crush in a sealed bag with a rolling pin).
- Add the melted butter to the Oreo crumbs and pulse or stir until the crumbs are evenly moistened, resembling wet sand.
- Transfer the crumbs to the prepared springform pan. Press firmly onto the bottom and evenly up the sides of the pan using the bottom of a measuring cup or glass.
- Place the crust in the refrigerator to chill and firm up for at least 30 minutes while you prepare the first ganache layer.
2. Make and Add Ganache Layer:
- Place the 1 cup of semi-sweet chocolate chips (chopped slightly if large) in a medium heatproof bowl.
- Heat the ⅓ cup of heavy whipping cream in a microwave-safe container (or small saucepan) in 30-second increments on high, just until the cream begins to simmer.
- Pour the hot cream over the chocolate chips. Gently stir to ensure all chocolate is covered. Let the mixture sit undisturbed for 2-3 minutes to allow the chocolate to melt.
- Gently whisk the cream and chocolate together until the ganache is completely smooth, glossy, and homogeneous.
- Pour this ganache over the chilled Oreo crust in the springform pan. Use an offset spatula to spread it into an even layer covering the crust.
- Return the pan to the refrigerator to chill for another 30 minutes, allowing the ganache layer to set slightly.
3. Prepare the Cheesecake Filling:
- Whip Cream: In a medium bowl (preferably chilled), beat the ½ cup of cold heavy whipping cream with an electric mixer until stiff peaks form. Set aside.
- Beat Cream Cheese Base: In a separate large bowl, beat the softened cream cheese with the electric mixer on medium-high speed for 2 to 3 minutes until completely smooth, light, and fluffy. Scrape down the sides of the bowl.
- Beat in the sifted powdered sugar on low speed until combined, then increase speed briefly until no lumps remain.
- Beat in the room temperature sour cream and vanilla extract until just combined.
- Combine: Gently fold the previously whipped cream into the cream cheese mixture using a rubber spatula until just combined and no streaks remain. Be careful not to deflate the whipped cream.
- Fold in the 1 cup of mini chocolate chips.
4. Assemble Cheesecake:
- Remove the chilled crust/ganache layer from the refrigerator.
- Pour the prepared chocolate chip cheesecake filling over the set ganache layer in the springform pan.
- Spread the filling into an even layer using an offset spatula or the back of a spoon.
5. Chill Thoroughly:
- Cover the springform pan carefully with plastic wrap (try not to let it touch the filling surface).
- Refrigerate the cheesecake for at least 4 hours, or preferably overnight (6-8 hours), until the cheesecake filling is completely firm and set. This is crucial for a no-bake recipe.
6. Make Ganache Topping and Decorate:
- Once the cheesecake is fully chilled and set, prepare the topping ganache. Place the ⅓ cup chocolate chips in a small heatproof bowl.
- Heat the 2 tbsp heavy whipping cream until just simmering (microwave or stovetop).
- Pour the hot cream over the chips, let sit 2-3 minutes, then whisk gently until smooth and glossy.
- Let the topping ganache cool slightly so it’s still pourable but not hot.
- Carefully run a thin knife around the edge of the cheesecake and release the springform pan sides.
- Drizzle the topping ganache decoratively over the top of the chilled cheesecake, letting it drip down the sides if desired.
7. Final Chill and Serve:
- Return the cheesecake to the refrigerator for about 15-30 minutes to allow the ganache drizzle to set.
- Keep the cheesecake refrigerated until ready to serve. Slice using a large, sharp knife dipped in hot water and wiped clean between cuts. Serve chilled.

Troubleshooting
- Crust Too Crumbly/Hard: Ratio of butter to crumbs slightly off, or pressed too hard/not hard enough. Ensure crumbs are evenly moist.
- Ganache Layer Too Hard/Soft: Chocolate-to-cream ratio determines firmness. Ensure measurements are correct. Let bottom layer set fully but don’t freeze solid before adding filling.
- Filling Lumpy: Cream cheese wasn’t fully softened, or powdered sugar wasn’t sifted. Beat cream cheese thoroughly until smooth before adding other ingredients.
- Filling Not Setting/Too Soft: Needs more chilling time! Minimum 4 hours, overnight is best. Ensure whipped cream was whipped to stiff peaks. Used granulated sugar instead of powdered (less thickening power). Cream cheese needs to be full-fat block style.
- Ganache Topping Seized/Too Thick: Overheated chocolate/cream, or water contact. Reheat very gently if needed. Add a tiny drop more warm cream if slightly too thick for drizzling.
Tips and Variations
- Room Temp/Cold Ingredients: Use softened room temp cream cheese and sour cream for smooth filling base. Use cold heavy cream for whipping.
- Folding: Gently fold whipped cream into cheese base to maintain airy texture.
- Chilling is Mandatory: Don’t rush the chilling times – they are essential for the no-bake cheesecake to set properly for slicing. Overnight yields the best results.
- Crust Options: Use chocolate graham crackers, regular graham crackers, or vanilla wafers instead of Oreos.
- Chocolate Choices: Use milk chocolate or dark chocolate chips instead of semi-sweet for ganache layers/filling chips based on preference.
- Extracts: Add 1/4 tsp peppermint extract to the filling for a mint-chip version.
- Skip Bottom Ganache: For a simpler version, omit the ganache layer between the crust and filling.
Serving and Pairing Suggestions
- Serve Chilled: Essential for maintaining the set texture of this no-bake dessert.
- Dessert: Perfect rich and creamy dessert for parties, holidays, or special occasions.
- With Coffee or Milk: Classic pairings for cheesecake and chocolate.
- Garnish: Besides ganache, top with chocolate shavings, extra mini chocolate chips, or dollops of whipped cream.
Nutritional Information
(Note: Estimated, per slice, assuming 12 slices. Very rich dessert, variable based on specific brands.)
- Calories: 500-700+
- Fat: 35-50g+
- Saturated Fat: 20-30g+
- Cholesterol: 80-120mg+
- Sodium: 250-400mg+
- Total Carbohydrates: 40-55g+
- Dietary Fiber: 2-4g+
- Sugars: 30-45g+ (High sugar)
- Protein: 6-9g+
Easy No-Bake Chocolate Chip Cheesecake
Make a decadent No-Bake Chocolate Chip Cheesecake! Features an Oreo crust, smooth ganache layer, creamy chocolate chip filling, and a ganache drizzle. An easy, impressive dessert!
Ingredients
(Based on 1x column)
Oreo Crust: (Assumes standard recipe – adjust if linked recipe differs)
- ▢ Approx. 24-32 whole Oreos (enough for ~2 cups crumbs)
- ▢ 4-6 tablespoons salted butter, melted
Ganache Layer:
- ▢ 1 cup semi-sweet chocolate chips, perhaps coarsely chopped
- ▢ ⅓ cup heavy whipping cream
Cheesecake Filling:
- ▢ ½ cup heavy whipping cream, cold
- ▢ 20 ounces (2.5 blocks) cream cheese, softened
- ▢ ½ cup powdered sugar, sifted
- ▢ ½ cup sour cream, room temperature
- ▢ 1 tsp vanilla extract
- ▢ 1 cup mini chocolate chips
Ganache Topping:
- ▢ ⅓ cup semi-sweet chocolate chips
- ▢ 2 tbsp heavy whipping cream
Instructions
1. Prepare Pan and Make Oreo Crust:
- Lightly spray the bottom and sides of a 9-inch springform pan with nonstick cooking spray.
- Place whole Oreos in a food processor and pulse until fine crumbs form. (Alternatively, crush in a sealed bag with a rolling pin).
- Add the melted butter to the Oreo crumbs and pulse or stir until the crumbs are evenly moistened, resembling wet sand.
- Transfer the crumbs to the prepared springform pan. Press firmly onto the bottom and evenly up the sides of the pan using the bottom of a measuring cup or glass.
- Place the crust in the refrigerator to chill and firm up for at least 30 minutes while you prepare the first ganache layer.
2. Make and Add Ganache Layer:
- Place the 1 cup of semi-sweet chocolate chips (chopped slightly if large) in a medium heatproof bowl.
- Heat the ⅓ cup of heavy whipping cream in a microwave-safe container (or small saucepan) in 30-second increments on high, just until the cream begins to simmer.
- Pour the hot cream over the chocolate chips. Gently stir to ensure all chocolate is covered. Let the mixture sit undisturbed for 2-3 minutes to allow the chocolate to melt.
- Gently whisk the cream and chocolate together until the ganache is completely smooth, glossy, and homogeneous.
- Pour this ganache over the chilled Oreo crust in the springform pan. Use an offset spatula to spread it into an even layer covering the crust.
- Return the pan to the refrigerator to chill for another 30 minutes, allowing the ganache layer to set slightly.
3. Prepare the Cheesecake Filling:
- Whip Cream: In a medium bowl (preferably chilled), beat the ½ cup of cold heavy whipping cream with an electric mixer until stiff peaks form. Set aside.
- Beat Cream Cheese Base: In a separate large bowl, beat the softened cream cheese with the electric mixer on medium-high speed for 2 to 3 minutes until completely smooth, light, and fluffy. Scrape down the sides of the bowl.
- Beat in the sifted powdered sugar on low speed until combined, then increase speed briefly until no lumps remain.
- Beat in the room temperature sour cream and vanilla extract until just combined.
- Combine: Gently fold the previously whipped cream into the cream cheese mixture using a rubber spatula until just combined and no streaks remain. Be careful not to deflate the whipped cream.
- Fold in the 1 cup of mini chocolate chips.
4. Assemble Cheesecake:
- Remove the chilled crust/ganache layer from the refrigerator.
- Pour the prepared chocolate chip cheesecake filling over the set ganache layer in the springform pan.
- Spread the filling into an even layer using an offset spatula or the back of a spoon.
5. Chill Thoroughly:
- Cover the springform pan carefully with plastic wrap (try not to let it touch the filling surface).
- Refrigerate the cheesecake for at least 4 hours, or preferably overnight (6-8 hours), until the cheesecake filling is completely firm and set. This is crucial for a no-bake recipe.
6. Make Ganache Topping and Decorate:
- Once the cheesecake is fully chilled and set, prepare the topping ganache. Place the ⅓ cup chocolate chips in a small heatproof bowl.
- Heat the 2 tbsp heavy whipping cream until just simmering (microwave or stovetop).
- Pour the hot cream over the chips, let sit 2-3 minutes, then whisk gently until smooth and glossy.
- Let the topping ganache cool slightly so it’s still pourable but not hot.
- Carefully run a thin knife around the edge of the cheesecake and release the springform pan sides.
- Drizzle the topping ganache decoratively over the top of the chilled cheesecake, letting it drip down the sides if desired.
7. Final Chill and Serve:
- Return the cheesecake to the refrigerator for about 15-30 minutes to allow the ganache drizzle to set.
- Keep the cheesecake refrigerated until ready to serve. Slice using a large, sharp knife dipped in hot water and wiped clean between cuts. Serve chilled.
Recipe Summary and Q&A
Summary: This No-Bake Chocolate Chip Cheesecake features an Oreo crust topped with a layer of chocolate ganache. The main filling is a blend of whipped heavy cream folded into a mixture of cream cheese, powdered sugar, sour cream, and vanilla, studded with mini chocolate chips. After thorough chilling in a springform pan, it’s topped with a final chocolate ganache drizzle.
Q&A:
- Q: Why is there a ganache layer on the bottom? Can I skip it?
- A: The bottom ganache layer adds an intense chocolate flavor right against the crust and creates a distinct textural layer. You can skip it for a slightly simpler version, pouring the cheesecake filling directly onto the chilled crust.
- Q: Do I have to use a springform pan?
- A: A springform pan is highly recommended because it allows you to remove the sides cleanly, showcasing the layers and making slicing much easier. You could try assembling it in a regular deep 9-inch pie dish lined very well with plastic wrap (with overhang) to potentially lift it out, but a springform is best.
- Q: How long does this really need to chill?
- A: Minimum 4 hours, but 6-8 hours or overnight is strongly recommended for the cheesecake filling to fully firm up and set properly for clean slicing and the best texture.
- Q: Can I use homemade whipped cream instead of Cool Whip?
- A: Yes, the recipe calls for homemade whipped cream (whipping heavy cream + powdered sugar) to be folded into the cream cheese base, which gives it a lighter texture. It does not use Cool Whip in the filling based on the instructions (though Cool Whip is mentioned as an alternative topping in the ingredients list). Ensure your homemade whipped cream reaches stiff peaks.

