Introduction & Inspiration
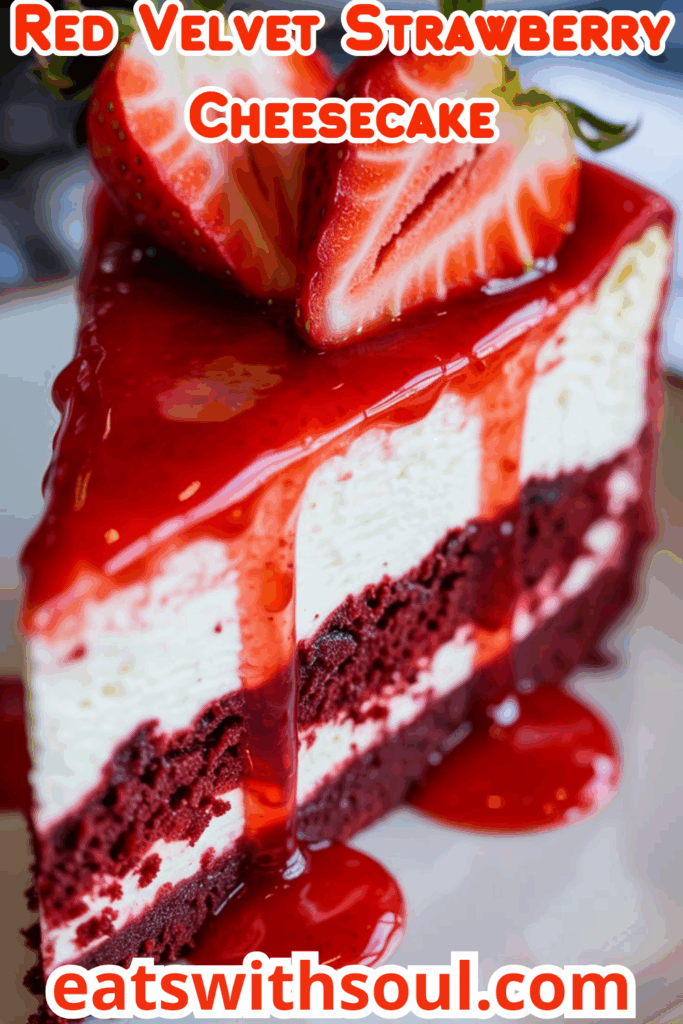
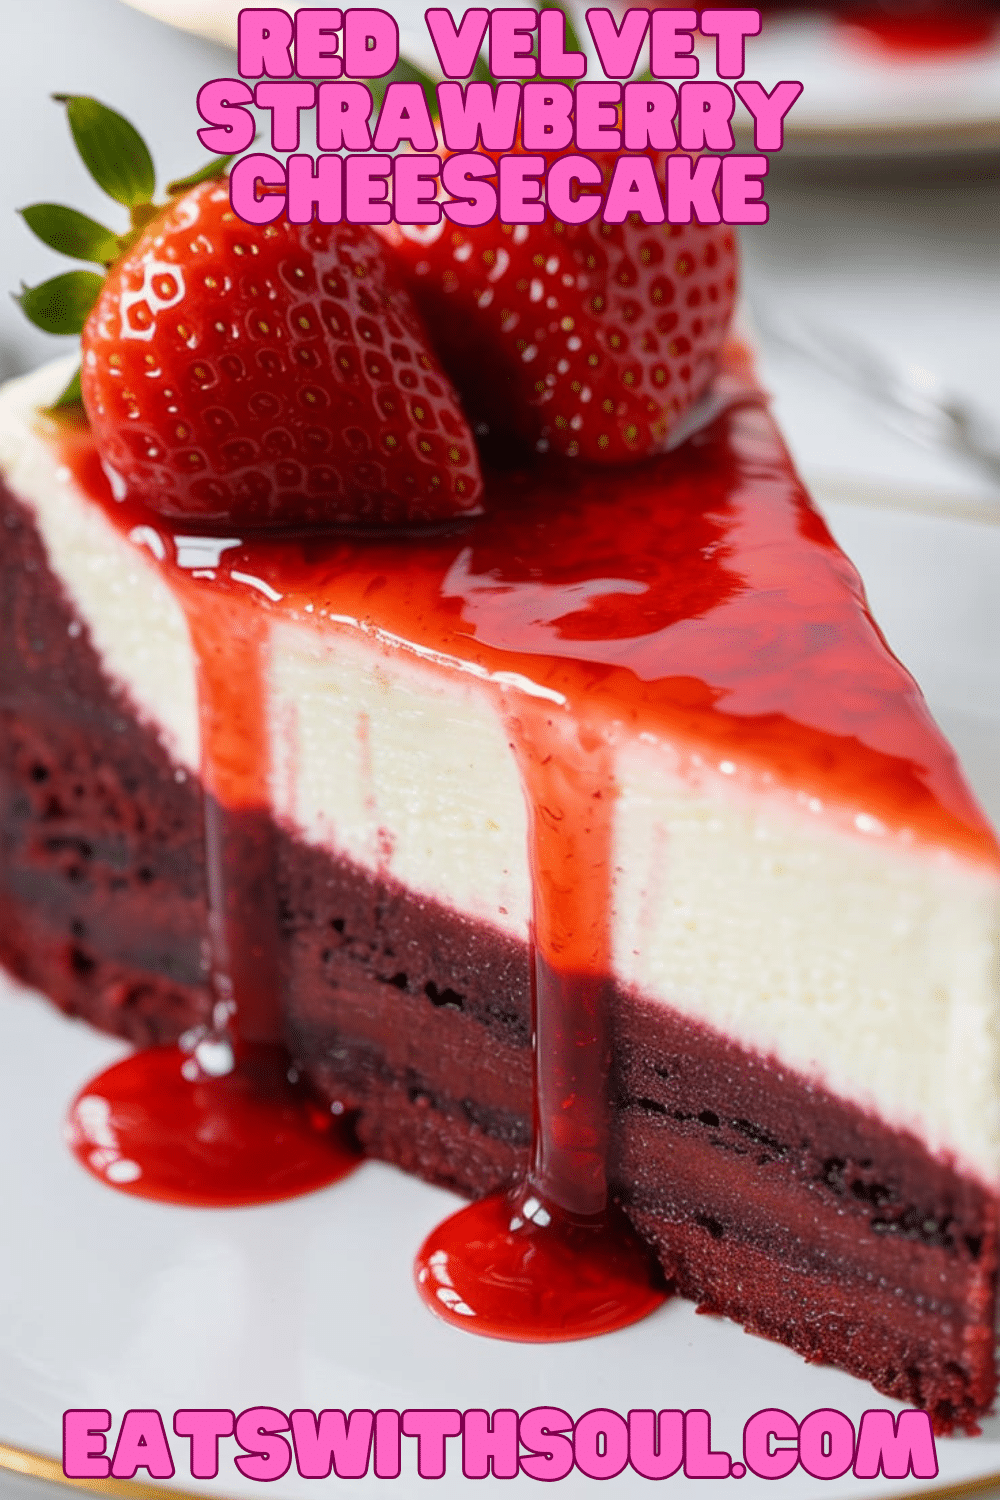
Get ready for a truly spectacular dessert that combines two all-time favorites into one glorious creation: Red Velvet Cheesecake! Imagine a moist, tender layer of classic red velvet cake forming the perfect base for a rich, smooth, and tangy baked cheesecake layer. Finished with a vibrant topping of sweet strawberry pie filling and dollops of whipped cream, it’s an absolutely stunning dessert that tastes as incredible as it looks.
My inspiration for this recipe comes from wanting the ultimate celebration dessert – something that blends the unique charm and flavor of red velvet cake with the luxurious indulgence of a classic baked cheesecake. Why choose between cake and cheesecake when you can have both in one perfect slice?
This Red Velvet Cheesecake is perfect for birthdays, holidays, anniversaries, or any occasion that calls for a truly special, showstopping dessert. It takes a bit of time with the baking and chilling, but the process is straightforward, and the results are pure decadence. It is a perfect dessert to impress.
Nostalgic Appeal / Comfort Factor
Both Red Velvet Cake and classic New York-style Cheesecake hold immense nostalgic appeal and represent peak dessert comfort for many. Red velvet cake, with its subtle chocolate notes, tanginess, and iconic color, is a beloved Southern classic often associated with celebrations. Cheesecake is the epitome of rich, creamy indulgence, a staple at parties and fine restaurants alike.
This recipe beautifully marries these two comfort food powerhouses. You get the familiar moist crumb and unique flavor of red velvet combined seamlessly with the dense, creamy, tangy satisfaction of a perfectly baked cheesecake. The strawberry topping adds a touch of fruity brightness often paired with both desserts.
It’s a dessert that feels both incredibly special and deeply comforting, delivering familiar flavors in an impressive, layered format. A perfect comfort food mashup.
Homemade Focus
This recipe is a wonderful celebration of classic homemade baking techniques. You’re crafting both the distinct red velvet cake layer and the rich cheesecake layer entirely from scratch using fundamental methods like creaming butter and sugar, properly incorporating eggs, and gently mixing batters.
Crucially, this recipe involves the technique of baking the cheesecake gently (often with a water bath, as recommended in the tips) and cooling it slowly to achieve that perfect dense, creamy, crack-free texture. Making both layers yourself ensures the best flavor and texture throughout the finished dessert.
It’s about taking the time to create distinct, delicious components from scratch and layering them into one impressive, homemade masterpiece. The homemade taste is incredible.
Flavor Goal
The primary flavor goal is a harmonious fusion of tangy, subtly chocolatey red velvet cake and rich, creamy, tangy classic cheesecake, complemented by a sweet strawberry topping. The red velvet base should be moist, tender, and provide its signature unique flavor profile.
The cheesecake layer should be dense, smooth, creamy, and distinctly tangy from the cream cheese and sour cream, balancing the sweetness. The strawberry pie filling topping adds a final layer of sweet, fruity flavor and glossy visual appeal.
The overall experience should be a decadent yet balanced dessert where the distinct flavors and textures of both red velvet cake and cheesecake shine through in each luxurious bite. A perfect balance between flavour and texture.
Ingredient Insights
For the Red Velvet Cake Base:
- Unsalted Butter (Softened) & Granulated Sugar: Creamed together for a tender cake base.
- Large Egg: Provides structure and richness. Room temperature best.
- Cocoa Powder: Just a touch for the subtle chocolate note characteristic of red velvet.
- Red Food Coloring: Provides the signature vibrant color. Liquid or gel works.
- Vanilla Extract: Enhances overall flavor.
- Buttermilk: Adds moisture and essential tang, reacting with baking soda for tenderness. Room temperature best.
- All-Purpose Flour: Provides structure.
- Salt: Balances sweetness.
- Baking Soda & White Vinegar: The reaction between these acidic (vinegar, buttermilk, cocoa) and alkaline (baking soda) ingredients creates lift and the traditional “velvety” texture.
For the Cheesecake Layer:
- Cream Cheese (Softened): The heart of the cheesecake! Use full-fat, brick-style cream cheese, fully softened to room temperature for a smooth, lump-free filling.
- Granulated Sugar: Sweetens the cheesecake layer.
- Large Eggs: Provide structure, richness, and help the cheesecake set. Room temperature incorporates best.
- Vanilla Extract: Essential flavor for classic cheesecake.
- Sour Cream: Adds moisture, richness, and extra tanginess for that classic cheesecake flavor. Full-fat recommended, room temperature best.
For the Topping:
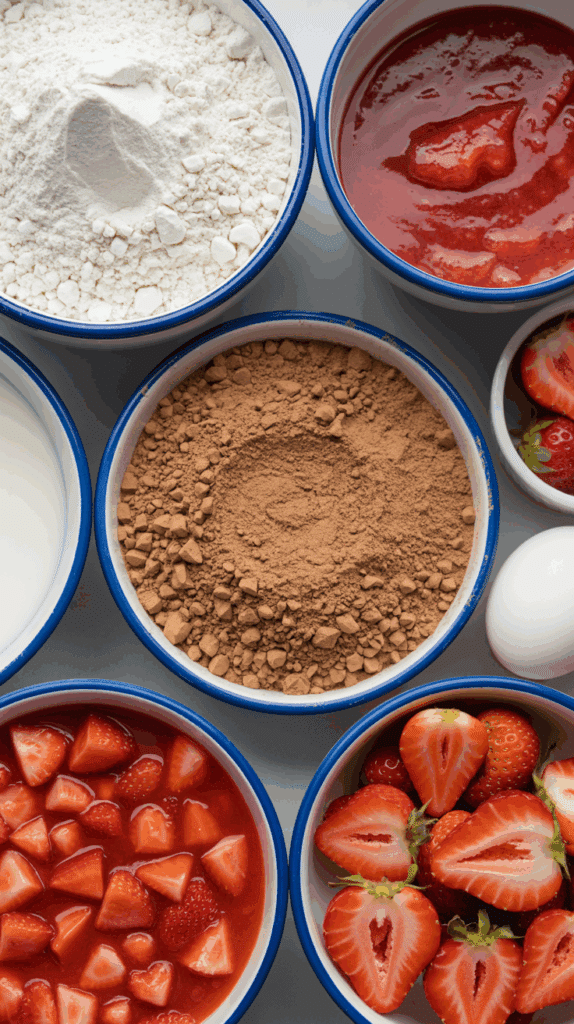
- Strawberry Pie Filling (Canned): A convenient and flavorful topping that complements both red velvet and cheesecake. Provides sweetness and fruitiness.
- Whipped Cream: For decorative garnish, adding lightness and visual appeal. Homemade or store-bought.
Essential Equipment
- 9-inch Springform Pan: Absolutely essential for baking and cleanly releasing the cheesecake.
- Parchment Paper: For lining the bottom of the springform pan.
- Electric Mixer (Stand Mixer with Paddle Recommended, or Hand Mixer): Crucial for properly creaming butter/sugar for the cake base and beating the cream cheese filling until smooth without incorporating too much air.
- Mixing Bowls (Large, Medium): For cake components and cheesecake filling.
- Sifter (Optional but Recommended): For flour/cocoa in cake and potentially sugar in cheesecake for smoothness.
- Rubber Spatula: For scraping bowls and ensuring even mixing.
- Large Roasting Pan: If using a water bath (highly recommended for cheesecake). Needs to be larger than the springform pan.
- Aluminum Foil: Heavy-duty foil needed to wrap the outside of the springform pan securely if using a water bath directly in water.
- Wire Rack: For cooling the cheesecake.
Ingredients
(Servings: 12 slices)
For the Red Velvet Cake Base:
- ▢ 1/2 cup unsalted butter, softened
- ▢ 3/4 cup granulated sugar
- ▢ 1 large egg, room temperature
- ▢ 2 tbsp cocoa powder
- ▢ 1 oz red food coloring (approx. 2 tablespoons liquid or adjust gel)
- ▢ 1 tsp vanilla extract
- ▢ 1/2 cup buttermilk, room temperature
- ▢ 1 1/4 cups all-purpose flour
- ▢ 1/2 tsp salt
- ▢ 1/2 tsp baking soda
- ▢ 1/2 tsp white vinegar
For the Cheesecake Layer:
- ▢ 3 blocks (8 oz each, 24 oz total) cream cheese, softened
- ▢ 1 cup granulated sugar
- ▢ 3 large eggs, room temperature
- ▢ 1 tsp vanilla extract
- ▢ 1/2 cup sour cream, room temperature
For the Topping:
- ▢ 1 cup strawberry pie filling (from a can)
- ▢ Whipped cream for garnish (homemade or store-bought)

Step-by-Step Instructions
(Prep Time: 30 min | Cook Time: ~70 min | Chill Time: 4+ hrs | Total Time: ~5 hrs 40 min + cooling)
1. Prepare Oven and Pan:
- Preheat oven to 325°F (163°C).
- Grease the bottom and sides of a 9-inch springform pan. Line the bottom with a circle of parchment paper. Set aside.
2. Make the Red Velvet Cake Base:
- In a large bowl using an electric mixer, cream the softened butter and 3/4 cup granulated sugar together until light and fluffy.
- Beat in the room temperature egg until well combined.
- Mix in the cocoa powder, red food coloring, and 1 tsp vanilla extract until smooth. Scrape down the bowl.
- On low speed, alternate adding the flour mixture (flour, salt, baking soda whisked together) and the room temperature buttermilk, beginning and ending with the flour mixture. Mix just until combined after each addition.
- In a tiny bowl, stir together the white vinegar and baking soda briefly (it might fizz slightly – Correction: Recipe likely means just add vinegar here, as soda is with flour. Following original text: add vinegar.) Stir the vinegar into the batter. (Traditional RV adds vinegar last or with soda). Mix gently and quickly.
- Pour the red velvet batter into the prepared springform pan and spread evenly.
- Partial Bake: Bake the base layer for 20 minutes. Remove from oven and let cool slightly on a wire rack while you make the cheesecake filling. Keep the oven on at 325°F.
3. Make the Cheesecake Layer:
- Ensure cream cheese is fully softened, and eggs/sour cream are at room temperature.
- In a large bowl using an electric mixer (clean beaters/paddle), beat the softened cream cheese on medium speed until completely smooth and creamy, scraping down the bowl often.
- Gradually add the 1 cup of granulated sugar and continue beating until smooth.
- Reduce mixer speed to low. Add the room temperature eggs one at a time, mixing just until each egg is incorporated. Do not overmix!
- Beat in the 1 tsp vanilla extract and the room temperature sour cream on low speed until just combined. Give the batter a final few folds with a spatula to ensure uniformity without overmixing.
4. Assemble and Prepare Water Bath:
- Pour the prepared cheesecake batter evenly over the slightly cooled red velvet cake base in the springform pan. Smooth the top.
- Prepare Water Bath (Recommended): Wrap the outside of the springform pan securely with 2-3 layers of heavy-duty aluminum foil to prevent leaks. Place a large roasting pan in the oven and carefully place the wrapped springform pan inside it. Pour boiling water into the roasting pan until it reaches about 1-inch up the sides of the springform pan. (Alternatively, use the pan-in-pan method described in previous cheesecake recipe).
5. Bake the Cheesecake:
- Carefully place the roasting pan with the cheesecake into the preheated 325°F (163°C) oven.
- Bake for 45–50 minutes. The cheesecake is done when the edges are set, but the center (about a 2-3 inch circle) still has a slight jiggle when the pan is gently nudged.
6. Cool Cheesecake Gradually:
- Turn the oven off completely. Leave the cheesecake in the oven with the door cracked open slightly for 1 hour. This slow cooling helps prevent cracks.
7. Cool Completely and Chill Thoroughly:
- Carefully remove the cheesecake from the oven and lift the springform pan out of the water bath. Remove the foil wrapping.
- Place the cheesecake (still in the springform pan) on a wire rack and let it cool completely to room temperature (this can take 2-3 hours).
- Once completely cool, cover the cheesecake tightly with plastic wrap and transfer it to the refrigerator.
- Chill for at least 4 hours, or preferably overnight, until completely cold and firm. Thorough chilling is essential for texture, flavor, and clean slicing.
8. Top and Serve:
- Once thoroughly chilled, run a thin knife around the edge of the cheesecake to loosen it from the ring. Carefully release and remove the springform ring.
- Just before serving, gently spoon the strawberry pie filling over the top of the cheesecake, spreading it carefully or leaving it slightly swirled.
- Decorate with dollops or swirls of whipped cream around the edges or on each slice.
- Slice with a large, sharp knife dipped in hot water and wiped clean between cuts. Serve chilled.

Troubleshooting
- Cake Base Dry: Overbaked during the initial 20-minute bake. Check it carefully.
- Cheesecake Cracked: Overmixed after adding eggs, baked at too high a temperature, cooled too quickly (skipped oven/room temp cooling stages), or didn’t use a water bath. Follow mixing/cooling steps precisely.
- Cheesecake Lumpy: Cream cheese wasn’t fully softened, or other ingredients were too cold when added. Ensure proper room temperature ingredients and beat cream cheese smooth first.
- Cheesecake Underbaked: Center too jiggly/liquid when removed from oven. Needs longer bake time. Edges set, center slight jiggle is key. Needs full chilling time to completely set.
- Water Bath Leaked: Foil wasn’t tight enough or had tears. Use heavy-duty foil and multiple layers, ensuring no gaps at the bottom seam.
Tips and Variations
- Room Temperature Ingredients: Absolutely crucial for the cheesecake layer (cream cheese, eggs, sour cream) to ensure a smooth, creamy, crack-free result.
- Don’t Overmix Cheesecake: Especially after adding eggs! Mix on low speed just until combined to avoid incorporating excess air.
- Water Bath: Highly recommended for the best cheesecake texture and preventing cracks. Ensure pan is wrapped watertight.
- Gradual Cooling: Don’t skip cooling in the turned-off oven and then at room temperature before chilling – essential for texture and preventing cracks.
- Thorough Chilling: Minimum 4 hours, but overnight is best for flavor development and firm texture for slicing.
- Topping Variations: Use cherry pie filling for a more traditional Black Forest vibe (without chocolate shavings), or top with fresh berries and a clear glaze, or chocolate ganache.
- Homemade Pie Filling: Make your own strawberry or cherry compote/filling if preferred over canned.
Serving and Pairing Suggestions
- Serve Chilled: Essential for proper cheesecake texture.
- Special Occasions: A definite showstopper dessert perfect for holidays, birthdays, and celebrations.
- With Coffee: Cuts through the richness beautifully.
- Elegant Presentation: Use decorative whipped cream piping and perhaps a few chocolate curls (though not strictly Black Forest without them).
Nutritional Information
(Provided estimate per slice, assuming 12 slices. Rich dessert.)
- Calories: ~470 kcal (Further estimation based on typical ingredients)
- Fat: 25-35g+
- Saturated Fat: 15-25g+
- Cholesterol: 150-200mg+
- Sodium: 300-450mg+
- Total Carbohydrates: 40-55g+
- Dietary Fiber: 1-2g+
- Sugars: 30-45g+
- Protein: 6-9g+
Decadent Red Velvet Cheesecake with Strawberry Topping
Bake a showstopping Red Velvet Cheesecake! This recipe features a moist red velvet cake base topped with a rich, creamy baked cheesecake layer and finished with strawberry pie filling.
Ingredients
(Servings: 12 slices)
For the Red Velvet Cake Base:
- ▢ 1/2 cup unsalted butter, softened
- ▢ 3/4 cup granulated sugar
- ▢ 1 large egg, room temperature
- ▢ 2 tbsp cocoa powder
- ▢ 1 oz red food coloring (approx. 2 tablespoons liquid or adjust gel)
- ▢ 1 tsp vanilla extract
- ▢ 1/2 cup buttermilk, room temperature
- ▢ 1 1/4 cups all-purpose flour
- ▢ 1/2 tsp salt
- ▢ 1/2 tsp baking soda
- ▢ 1/2 tsp white vinegar
For the Cheesecake Layer:
- ▢ 3 blocks (8 oz each, 24 oz total) cream cheese, softened
- ▢ 1 cup granulated sugar
- ▢ 3 large eggs, room temperature
- ▢ 1 tsp vanilla extract
- ▢ 1/2 cup sour cream, room temperature
For the Topping:
- ▢ 1 cup strawberry pie filling (from a can)
- ▢ Whipped cream for garnish (homemade or store-bought)
Instructions
(Prep Time: 30 min | Cook Time: ~70 min | Chill Time: 4+ hrs | Total Time: ~5 hrs 40 min + cooling)
1. Prepare Oven and Pan:
- Preheat oven to 325°F (163°C).
- Grease the bottom and sides of a 9-inch springform pan. Line the bottom with a circle of parchment paper. Set aside.
2. Make the Red Velvet Cake Base:
- In a large bowl using an electric mixer, cream the softened butter and 3/4 cup granulated sugar together until light and fluffy.
- Beat in the room temperature egg until well combined.
- Mix in the cocoa powder, red food coloring, and 1 tsp vanilla extract until smooth. Scrape down the bowl.
- On low speed, alternate adding the flour mixture (flour, salt, baking soda whisked together) and the room temperature buttermilk, beginning and ending with the flour mixture. Mix just until combined after each addition.
- In a tiny bowl, stir together the white vinegar and baking soda briefly (it might fizz slightly – Correction: Recipe likely means just add vinegar here, as soda is with flour. Following original text: add vinegar.) Stir the vinegar into the batter. (Traditional RV adds vinegar last or with soda). Mix gently and quickly.
- Pour the red velvet batter into the prepared springform pan and spread evenly.
- Partial Bake: Bake the base layer for 20 minutes. Remove from oven and let cool slightly on a wire rack while you make the cheesecake filling. Keep the oven on at 325°F.
3. Make the Cheesecake Layer:
- Ensure cream cheese is fully softened, and eggs/sour cream are at room temperature.
- In a large bowl using an electric mixer (clean beaters/paddle), beat the softened cream cheese on medium speed until completely smooth and creamy, scraping down the bowl often.
- Gradually add the 1 cup of granulated sugar and continue beating until smooth.
- Reduce mixer speed to low. Add the room temperature eggs one at a time, mixing just until each egg is incorporated. Do not overmix!
- Beat in the 1 tsp vanilla extract and the room temperature sour cream on low speed until just combined. Give the batter a final few folds with a spatula to ensure uniformity without overmixing.
4. Assemble and Prepare Water Bath:
- Pour the prepared cheesecake batter evenly over the slightly cooled red velvet cake base in the springform pan. Smooth the top.
- Prepare Water Bath (Recommended): Wrap the outside of the springform pan securely with 2-3 layers of heavy-duty aluminum foil to prevent leaks. Place a large roasting pan in the oven and carefully place the wrapped springform pan inside it. Pour boiling water into the roasting pan until it reaches about 1-inch up the sides of the springform pan. (Alternatively, use the pan-in-pan method described in previous cheesecake recipe).
5. Bake the Cheesecake:
- Carefully place the roasting pan with the cheesecake into the preheated 325°F (163°C) oven.
- Bake for 45–50 minutes. The cheesecake is done when the edges are set, but the center (about a 2-3 inch circle) still has a slight jiggle when the pan is gently nudged.
6. Cool Cheesecake Gradually:
- Turn the oven off completely. Leave the cheesecake in the oven with the door cracked open slightly for 1 hour. This slow cooling helps prevent cracks.
7. Cool Completely and Chill Thoroughly:
- Carefully remove the cheesecake from the oven and lift the springform pan out of the water bath. Remove the foil wrapping.
- Place the cheesecake (still in the springform pan) on a wire rack and let it cool completely to room temperature (this can take 2-3 hours).
- Once completely cool, cover the cheesecake tightly with plastic wrap and transfer it to the refrigerator.
- Chill for at least 4 hours, or preferably overnight, until completely cold and firm. Thorough chilling is essential for texture, flavor, and clean slicing.
8. Top and Serve:
- Once thoroughly chilled, run a thin knife around the edge of the cheesecake to loosen it from the ring. Carefully release and remove the springform ring.
- Just before serving, gently spoon the strawberry pie filling over the top of the cheesecake, spreading it carefully or leaving it slightly swirled.
- Decorate with dollops or swirls of whipped cream around the edges or on each slice.
- Slice with a large, sharp knife dipped in hot water and wiped clean between cuts. Serve chilled.
Recipe Summary and Q&A
Summary: This Red Velvet Strawberry Cheesecake features a baked red velvet cake layer as the base in a springform pan. A classic baked cheesecake filling (cream cheese, sugar, eggs, vanilla, sour cream) is poured over the base and baked in a water bath until set. The cheesecake is cooled gradually and chilled thoroughly (preferably overnight) before being topped with strawberry pie filling and whipped cream for serving.
Q&A:
- Q: Does this taste more like red velvet cake or cheesecake?
- A: It should offer distinct flavors of both! You’ll get the subtle chocolatey tang of the red velvet cake in the base layer, combined with the rich, dense, tangy creaminess of the classic cheesecake layer on top, all complemented by the strawberry topping.
- Q: Why bake the red velvet layer first?
- A: Partially baking the cake base ensures it’s sturdy enough to support the heavy, wet cheesecake batter poured on top without becoming overly soggy or mixing into the cheesecake layer.
- Q: Do I absolutely need a water bath?
- A: While you can bake cheesecake without one, a water bath provides moist, even heat that significantly helps prevent cracks and results in a creamier, more evenly cooked texture. It’s highly recommended for the best results with traditional cheesecake.
- Q: Can I use a different topping instead of strawberry pie filling?
- A: Yes! Cherry pie filling would be classic for a Black Forest feel. Fresh berries tossed in a light glaze, chocolate ganache, or caramel sauce would also be delicious alternatives.

