Introduction & Inspiration
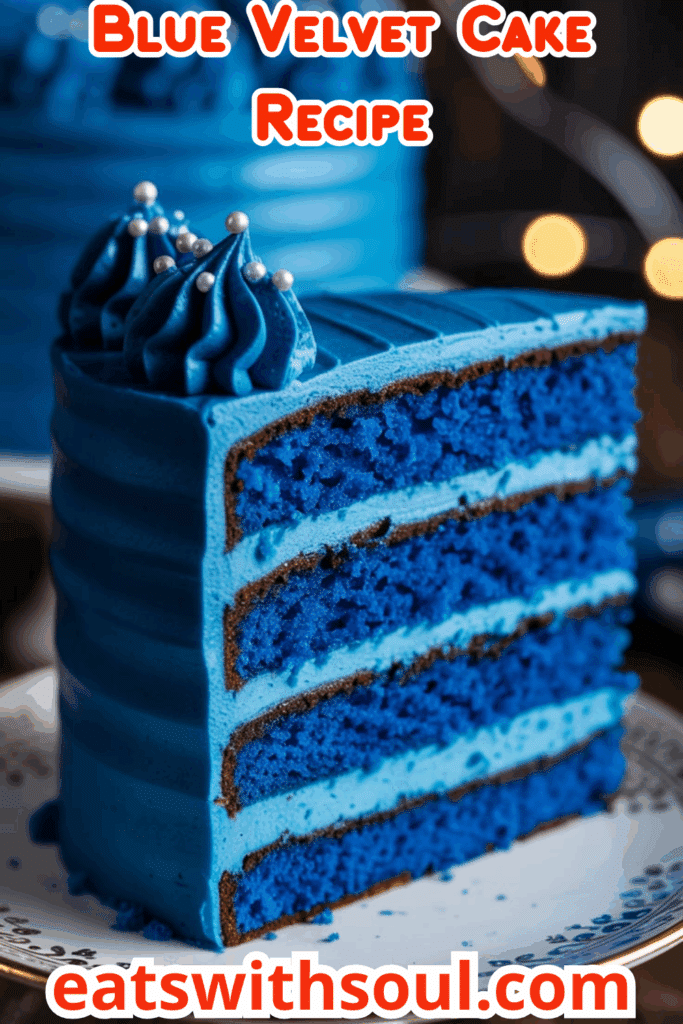
Move over, red velvet, there’s a cool new cousin in town – the Blue Velvet Cake! This recipe guides you through creating a wonderfully moist, tender, and visually striking layer cake with a beautiful blue crumb. Made from scratch with oil, buttermilk, and a touch of vinegar for that signature “velvet” texture, and just a hint of cocoa for depth, it’s then ready to be slathered in your favorite classic cream cheese frosting.
My inspiration for this recipe comes from loving the unique texture of velvet cakes and wanting to explore a different, fun color palette. The deep blue, sometimes with a violet undertone, makes for an incredibly impressive cake for special occasions, themed parties, or just when you want to bake something unique and delightful.
This cake is perfect for birthdays, celebrations, or anytime you’re looking to create a memorable dessert. The from-scratch process is straightforward, and the result is a beautifully colored, tender, and delicious cake. It is a perfect celebration cake.
Nostalgic Appeal / Comfort Factor
Velvet cakes, with their famously soft and tender crumb and often subtle tang, are a beloved American classic. While Red Velvet is the most iconic, the “velvet” concept promises a specific, delightful texture. Pairing any velvet cake with tangy cream cheese frosting is a match made in comfort food heaven.
This Blue Velvet version takes that comforting texture and familiar frosting pairing and gives it a fun, modern, and visually exciting twist. It’s playful, surprising, and still delivers on the satisfying qualities of a well-made homemade cake. It’s perfect for creating new traditions and fun memories.
It’s a cake that sparks joy with its color and satisfies with its classic velvet texture and taste. A perfect cake to make an impression.
Homemade Focus
This Blue Velvet Cake recipe is all about crafting a beautiful and delicious cake entirely from scratch. We’re not using a mix here; instead, we’re carefully combining ingredients like flour, cocoa, oil, buttermilk, and vinegar, along with leaveners, to achieve that specific, desirable “velvet” texture and subtle flavor profile.
The homemade focus lies in understanding how these ingredients interact – the oil for moisture, the buttermilk and vinegar for acidity and tenderness, the sifted dry ingredients for a fine crumb. You also have complete control over achieving that perfect shade of blue with gel food coloring. The (separately prepared) cream cheese frosting is another key homemade component.
It celebrates the rewarding process of creating a stunning layer cake from basic ingredients, showcasing classic baking techniques. The homemade taste is incredible.
Flavor Goal
The primary flavor goal is a moist, tender cake with a very subtle chocolate note from the cocoa powder, a slight tang from the buttermilk and vinegar (characteristic of velvet cakes), and a balanced sweetness, all enhanced by vanilla. The blue color is primarily for visual appeal and shouldn’t impart any significant flavor.
The cake crumb should be soft, fine, and exceptionally moist. When paired with the suggested cream cheese frosting (recipe not included here, but implied as the classic pairing), the tangy, sweet, and creamy frosting should perfectly complement the cake’s subtle flavors and tender texture.
The overall experience should be a visually striking, incredibly moist, and tender cake with a classic velvet character and a delightful balance of flavors. A perfect balance between flavour and texture.
Ingredient Insights
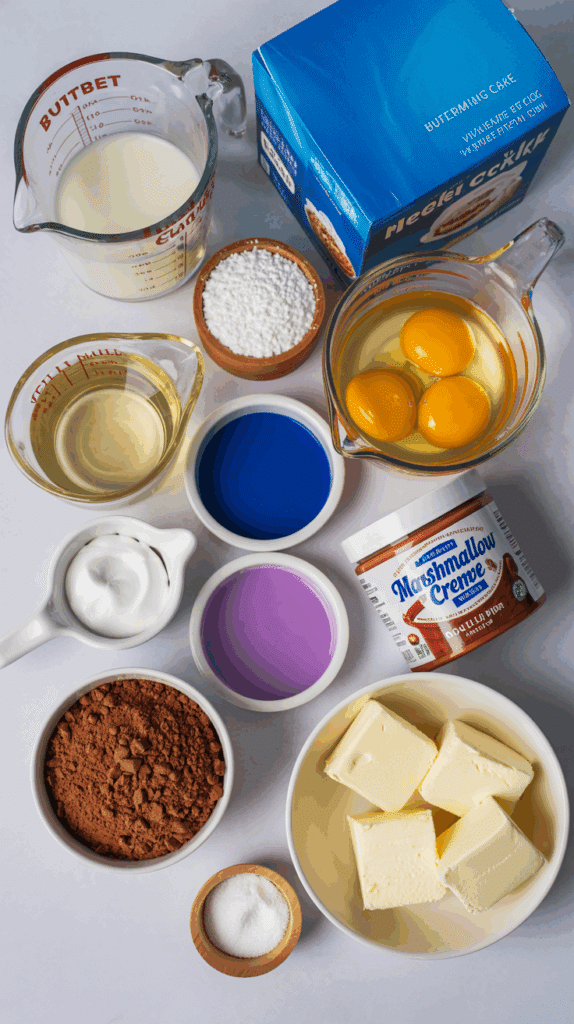
- All-Purpose Flour: Provides the main structure for the cake.
- Unsweetened Cocoa Powder: Just two tablespoons are used, not for a strong chocolate flavor, but to provide the traditional subtle chocolatey depth, reddish-brown undertones (which interact with the blue dye), and slight acidity common in velvet cakes.
- Baking Powder & Baking Soda: Leavening agents. Baking soda reacts with the acidic buttermilk and vinegar to create a tender crumb and help with the rise.
- Salt: Balances sweetness and enhances flavors.
- Granulated Sugar: Sweetens the cake and contributes to its texture.
- Vegetable Oil: Key for creating an incredibly moist cake crumb that stays moist longer than butter-based cakes. Use a neutral oil.
- Large Eggs (Room Temperature): Provide structure, richness, and binding. Room temperature helps them incorporate evenly into the batter.
- Vanilla Extract: Enhances the overall flavor profile.
- Buttermilk (Room Temperature): Adds significant moisture, tanginess, and activates the baking soda for tenderness. Room temperature is crucial for proper batter emulsion.
- White Vinegar: Adds extra acidity to react with baking soda, contributing further to tenderness and the characteristic “velvet” tang.
- Royal Blue Gel Food Coloring & Violet Gel Food Coloring (Optional): Essential for achieving the desired blue hue. Gel colors are highly concentrated and provide vibrant color without adding excess liquid. The violet helps deepen the blue and prevent it from looking too teal or greenish (cocoa can make blue look greenish).
Essential Equipment
- Two 8- or 9-inch Round Cake Pans: For baking the layers.
- Parchment Paper (Recommended): For lining the bottoms of the cake pans for easy release.
- Grease & Flour (or Baking Spray): For preparing the pans.
- Electric Mixer (Handheld or Stand Mixer): For beating sugar and oil, and incorporating eggs and other ingredients smoothly.
- Large Mixing Bowl: For dry ingredients.
- Separate Medium Bowl: For initial mixing of wet ingredients.
- Sifter: For flour and cocoa powder to ensure a fine crumb and prevent lumps.
- Whisk: For combining dry ingredients.
- Rubber Spatula: For scraping the bowl and ensuring even mixing.
- Wire Cooling Racks: Essential for cooling the cake layers completely before frosting.
- Toothpick or Cake Tester: For checking cake doneness.
Ingredients
(Based on 1x column)
- ▢ 2½ cups all-purpose flour
- ▢ 2 tbsp unsweetened cocoa powder
- ▢ 1½ tsp baking powder
- ▢ ½ tsp baking soda
- ▢ ½ tsp salt
- ▢ 1½ cups granulated sugar
- ▢ 1 cup vegetable oil
- ▢ 2 large eggs, at room temperature
- ▢ 1 tsp vanilla extract
- ▢ 1 cup buttermilk, at room temperature
- ▢ 1 tbsp white vinegar
- ▢ 1–2 tsp royal blue gel food coloring
- ▢ Optional: 1–2 drops violet gel food coloring
(Cream Cheese Frosting ingredients are not provided in this specific recipe text, but it is the recommended pairing).

Step-by-Step Instructions
1. Prepare Oven and Pans:
- Preheat your oven to 350°F (175°C).
- Grease and flour two 8-inch or 9-inch round cake pans thoroughly. For extra insurance against sticking, line the bottoms with circles of parchment paper, then grease and flour the parchment as well. Set aside.
2. Sift and Combine Dry Ingredients:
- In a large mixing bowl, sift together the all-purpose flour, unsweetened cocoa powder, baking powder, baking soda, and salt.
- Whisk these dry ingredients together until they are well combined.
3. Mix Initial Wet Ingredients:
- In another large bowl (or the bowl of your stand mixer), beat the granulated sugar and vegetable oil together with an electric mixer on medium speed until smooth and well combined. (Note: Oil and sugar won’t get “light and fluffy” like butter and sugar, just well mixed).
- Add the room temperature eggs one at a time, beating well after each addition until incorporated.
- Stir in the vanilla extract.
4. Add Food Coloring:
- Add the royal blue gel food coloring (start with 1 tsp, add more up to 2 tsp for desired intensity) to the wet mixture. If using, add 1-2 drops of violet gel food coloring – this helps achieve a deeper, truer blue and counteracts any greenish tones from the cocoa. Mix until the color is evenly distributed.
5. Prepare Buttermilk Mixture and Combine Batter:
- In a separate small cup or bowl, stir together the room temperature buttermilk and the white vinegar.
- With the mixer on low speed, begin to alternate adding the dry ingredient mixture and the buttermilk/vinegar mixture to the main wet ingredient bowl. Start with about one-third of the dry ingredients, mix until just barely combined.
- Add about half of the buttermilk mixture, mix until just combined.
- Repeat with another third of the dry ingredients, then the remaining buttermilk mixture, and finally end with the last third of the dry ingredients.
- Mix on low speed only until just combined after each addition. Scrape down the sides and bottom of the bowl with a rubber spatula to ensure all ingredients are incorporated, but be very careful not to overmix.
6. Bake the Cake Layers:
- Divide the prepared batter evenly between the two prepared cake pans. Smooth the tops gently.
- Bake for 25–30 minutes, or until a wooden skewer or toothpick inserted into the center of each cake layer comes out clean or with a few moist crumbs attached.
- Let the cakes cool in the pans on wire cooling racks for 10 minutes.
7. Cool Completely and Frost:
- After 10 minutes, carefully run a thin knife around the edges of the pans if needed, then invert the cake layers onto the wire cooling racks. Peel off the parchment paper.
- Let the layers cool completely (at least 1-2 hours) before attempting to frost.
- Once completely cool, frost the cake layers with your favorite cream cheese frosting (recipe for frosting not included in this text, but it’s the classic pairing). Assemble as a two-layer cake.
- Slice and serve!

Troubleshooting
- Cake Dry/Dense: Overbaking is a common culprit. Check for doneness at the lower end of the time range. Overmixing the batter after adding flour develops too much gluten. Ensure accurate liquid/oil measurements.
- Cake Sunken in Middle: Oven door opened too early, underbaked, or oven temperature fluctuations.
- Color Uneven or Not Vibrant: Food coloring not fully mixed into the wet ingredients, or not enough gel color used. Gel paste colors are best for intensity. The small amount of cocoa can slightly affect the final blue shade – violet helps counteract this.
- “Velvet” Texture Lacking: Ensure buttermilk and vinegar were used, and baking soda is fresh. These acidic components reacting with the leavener contribute to the signature texture. Don’t overmix.
Tips and Variations
- Room Temperature Ingredients: Crucial for buttermilk and eggs to ensure they emulsify properly into the batter for the best texture.
- Don’t Overmix! This is the golden rule for tender velvet cakes (and most cakes!). Mix just until the ingredients are combined, especially after adding the flour.
- Gel Food Coloring: Essential for achieving vibrant color without adding too much liquid to the batter. Paste or gel is much better than liquid food coloring. Adjust amounts to reach desired shade.
- Cocoa Powder: Use natural unsweetened cocoa powder. The small amount is traditional for velvet cakes and contributes to the texture and flavor nuance.
- Frosting Choice: Classic cream cheese frosting is the perfect pairing. A simple vanilla buttercream would also work.
- Add Sprinkles: Fold in some blue or silver sprinkles into the batter for a funfetti effect.
- Layer Cake Options: This recipe makes two 8- or 9-inch layers. You could bake it in a 9×13 pan for a sheet cake (adjust baking time, likely 30-40 minutes).
Serving and Pairing Suggestions
- Serve at Cool Room Temperature: For the best cake texture and frosting consistency.
- Celebrations: Perfect for birthdays, themed parties (winter wonderland, ocean themes, etc.), or any occasion needing a pop of color.
- With Milk: The classic pairing for a slice of cake.
- Simple Decoration: The vibrant blue color is often decoration enough! A smooth coat of white cream cheese frosting provides a beautiful contrast.
Nutritional Information
(Note: Estimated, per slice of unfrosted cake, assuming 12 slices from two 8-inch layers. Frosting will add significant calories/fat/sugar.)
- Calories: 300-400
- Fat: 18-25g
- Saturated Fat: 3-6g
- Cholesterol: 30-50mg
- Sodium: 300-400mg
- Total Carbohydrates: 35-45g
- Dietary Fiber: 1-2g
- Sugars: 20-30g
- Protein: 3-5g
Homemade Blue Velvet Cake with Cream Cheese Frosting
Bake a stunning homemade Blue Velvet Cake! This from-scratch recipe features a moist, tender crumb with a hint of cocoa and a beautiful blue hue, perfect with cream cheese frosting.
Ingredients
(Based on 1x column)
- ▢ 2½ cups all-purpose flour
- ▢ 2 tbsp unsweetened cocoa powder
- ▢ 1½ tsp baking powder
- ▢ ½ tsp baking soda
- ▢ ½ tsp salt
- ▢ 1½ cups granulated sugar
- ▢ 1 cup vegetable oil
- ▢ 2 large eggs, at room temperature
- ▢ 1 tsp vanilla extract
- ▢ 1 cup buttermilk, at room temperature
- ▢ 1 tbsp white vinegar
- ▢ 1–2 tsp royal blue gel food coloring
- ▢ Optional: 1–2 drops violet gel food coloring
(Cream Cheese Frosting ingredients are not provided in this specific recipe text, but it is the recommended pairing).
Instructions
1. Prepare Oven and Pans:
- Preheat your oven to 350°F (175°C).
- Grease and flour two 8-inch or 9-inch round cake pans thoroughly. For extra insurance against sticking, line the bottoms with circles of parchment paper, then grease and flour the parchment as well. Set aside.
2. Sift and Combine Dry Ingredients:
- In a large mixing bowl, sift together the all-purpose flour, unsweetened cocoa powder, baking powder, baking soda, and salt.
- Whisk these dry ingredients together until they are well combined.
3. Mix Initial Wet Ingredients:
- In another large bowl (or the bowl of your stand mixer), beat the granulated sugar and vegetable oil together with an electric mixer on medium speed until smooth and well combined. (Note: Oil and sugar won’t get “light and fluffy” like butter and sugar, just well mixed).
- Add the room temperature eggs one at a time, beating well after each addition until incorporated.
- Stir in the vanilla extract.
4. Add Food Coloring:
- Add the royal blue gel food coloring (start with 1 tsp, add more up to 2 tsp for desired intensity) to the wet mixture. If using, add 1-2 drops of violet gel food coloring – this helps achieve a deeper, truer blue and counteracts any greenish tones from the cocoa. Mix until the color is evenly distributed.
5. Prepare Buttermilk Mixture and Combine Batter:
- In a separate small cup or bowl, stir together the room temperature buttermilk and the white vinegar.
- With the mixer on low speed, begin to alternate adding the dry ingredient mixture and the buttermilk/vinegar mixture to the main wet ingredient bowl. Start with about one-third of the dry ingredients, mix until just barely combined.
- Add about half of the buttermilk mixture, mix until just combined.
- Repeat with another third of the dry ingredients, then the remaining buttermilk mixture, and finally end with the last third of the dry ingredients.
- Mix on low speed only until just combined after each addition. Scrape down the sides and bottom of the bowl with a rubber spatula to ensure all ingredients are incorporated, but be very careful not to overmix.
6. Bake the Cake Layers:
- Divide the prepared batter evenly between the two prepared cake pans. Smooth the tops gently.
- Bake for 25–30 minutes, or until a wooden skewer or toothpick inserted into the center of each cake layer comes out clean or with a few moist crumbs attached.
- Let the cakes cool in the pans on wire cooling racks for 10 minutes.
7. Cool Completely and Frost:
- After 10 minutes, carefully run a thin knife around the edges of the pans if needed, then invert the cake layers onto the wire cooling racks. Peel off the parchment paper.
- Let the layers cool completely (at least 1-2 hours) before attempting to frost.
- Once completely cool, frost the cake layers with your favorite cream cheese frosting (recipe for frosting not included in this text, but it’s the classic pairing). Assemble as a two-layer cake.
- Slice and serve!
Recipe Summary and Q&A
Summary: This Homemade Blue Velvet Cake is a from-scratch layer cake featuring a tender, moist crumb achieved using oil, buttermilk, and vinegar, with a subtle hint of cocoa. The batter is colored with royal blue and optional violet gel food coloring before being baked in two round pans. Once cooled completely, the layers are typically frosted with cream cheese frosting.
Q&A:
- Q: What makes a “velvet” cake?
- A: “Velvet” refers to the cake’s very soft, fine, moist, and tender crumb. This texture is often achieved through a chemical reaction involving acidic ingredients (like buttermilk, vinegar, and traditionally the type of cocoa powder used) and baking soda, along with fats like oil which contribute to moistness.
- Q: Why use oil instead of butter in the cake?
- A: Oil generally produces a moister cake with a more tender crumb that stays moist longer than cakes made solely with butter, especially in recipes like velvet cakes where moisture is key.
- Q: How do I get the best blue color?
- A: Use good quality gel or paste food coloring, as they are highly concentrated. Royal blue is a good starting point. Adding a tiny touch of violet gel (literally just what clings to a toothpick) can deepen the blue and prevent it from looking too teal or greenish, which can sometimes happen when blue interacts with the yellowish tones in other ingredients or the slight brown from cocoa.
- Q: Can I make this as cupcakes?
- A: Yes, this batter should work well for cupcakes. Fill liners about 2/3 full and bake for approximately 15-20 minutes, or until a toothpick comes out clean. Adjust yield accordingly (likely 20-24 cupcakes).
