Introduction & Inspiration
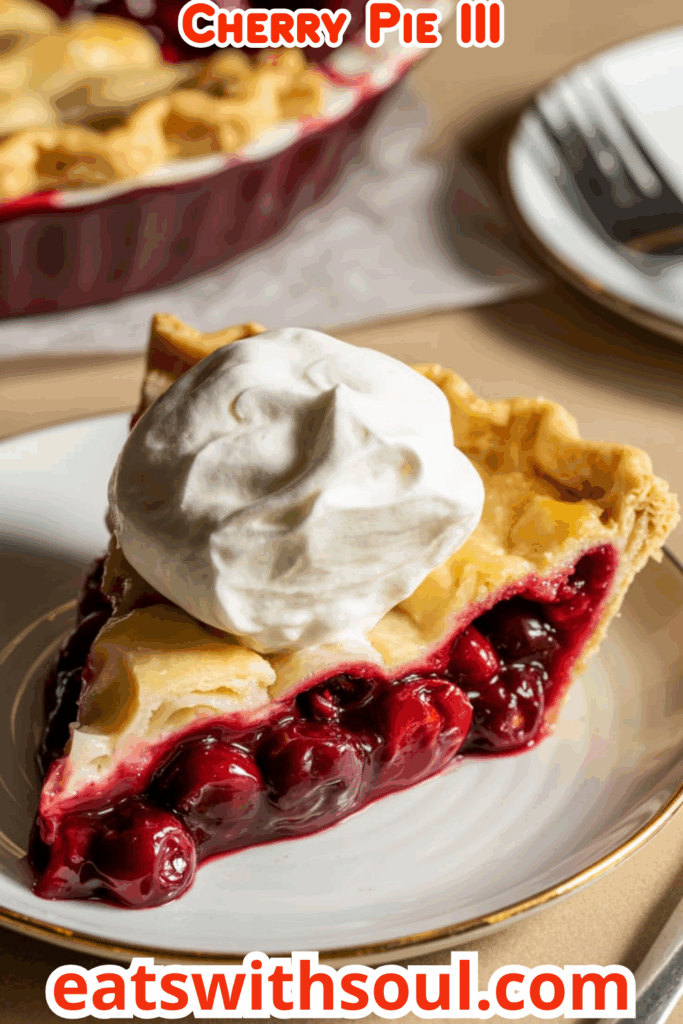
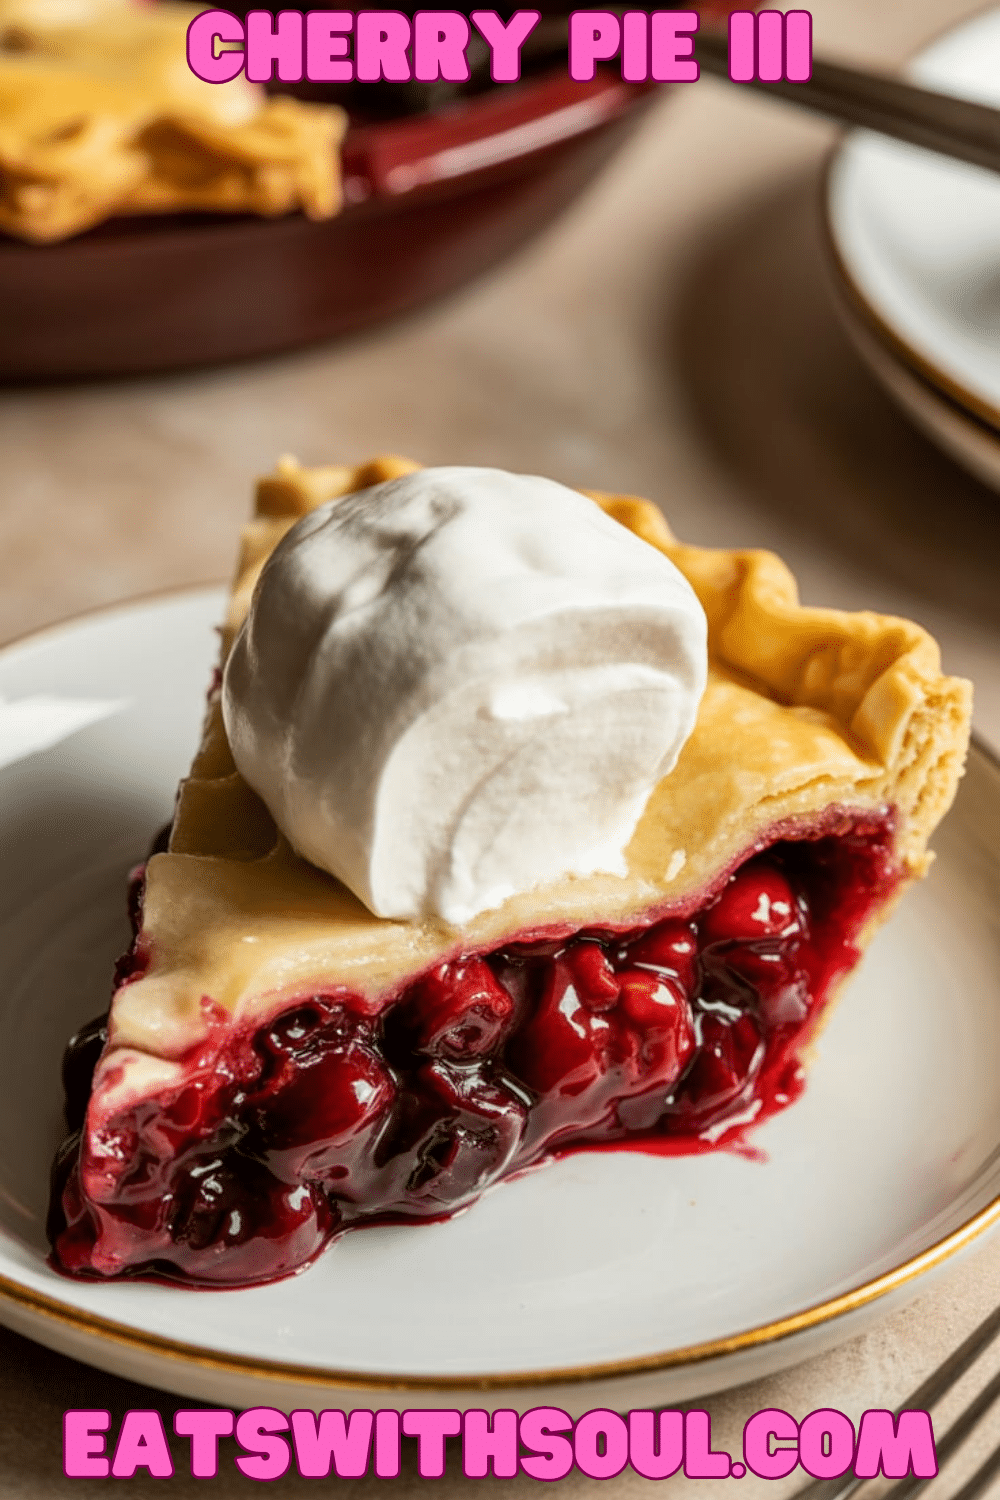
There are few desserts as iconic and universally loved as a classic, homemade Cherry Pie, and this recipe, which I’ll affectionately call “Cherry Pie the Third” (as a nod to its simple name in my recipe box!), is a true gem. Imagine a wonderfully flaky, tender double crust, made the old-fashioned way with chilled shortening, cradling a vibrant, bubbling filling of sweet-tart sour cherries, perfectly thickened and subtly enhanced with a whisper of almond extract. It’s the quintessential American dessert, perfect for any celebration or simply a comforting slice of home.
My inspiration for this recipe comes from a deep appreciation for traditional pie-making and the unparalleled taste of a pie made completely from scratch. While it takes a little time and care, the process of making your own crust and cooking the fresh fruit filling is so rewarding, and the flavor is simply unmatched.
This Cherry Pie is perfect for holidays like the Fourth of July or Thanksgiving, summer picnics, or anytime you want a truly special, homemade dessert that celebrates the wonderful flavor of cherries. Served warm with a scoop of vanilla ice cream, it’s pure bliss! It is a perfect dessert recipe.
Nostalgic Appeal / Comfort Factor
Homemade cherry pie holds a powerful nostalgic appeal for many, evoking images of grandma’s kitchen, Fourth of July celebrations, classic diners, and the comforting aroma of fruit and pastry baking. It’s a symbol of American home baking, representing simple pleasures and heartfelt traditions.
This recipe, with its flaky double crust and vibrant sour cherry filling, taps directly into that deep comfort and nostalgia. The sweet-tart balance of the cherries, the buttery richness of the crust, and the subtle hint of almond create a flavor profile that is both timeless and deeply satisfying.
Making this pie feels like connecting with a cherished culinary heritage, creating a dessert that is all about simple, honest, comforting goodness. A perfect comfort food dessert.
Homemade Focus
This recipe is a wonderful celebration of traditional, from-scratch pie making. You’ll be crafting the flaky double pie crust yourself using the classic technique of cutting chilled shortening into flour and bringing it together with cold water. The vibrant cherry filling is also made from scratch, cooking down pitted sour cherries with sugar and cornstarch until perfectly thickened, then flavoring it with butter and almond extract.
The homemade focus lies in these fundamental pie-making steps: creating a tender, flaky crust, and preparing a fresh, perfectly balanced fruit filling. These homemade components are key to achieving the superior taste and texture that define a truly great cherry pie.
It’s about taking the time to create each element with care, resulting in a classic dessert that showcases the delicious rewards of homemade baking. The homemade taste is incredible.
Flavor Goal
The primary flavor goal is a perfect harmony between a flaky, tender, slightly salty pie crust and a bright, sweet-tart sour cherry filling with a subtle almond accent. The crust should be golden brown and provide a satisfying textural contrast to the soft filling.
The sour cherry filling should be juicy but not runny, with the cornstarch providing just the right amount of thickening. The sugar should balance the natural tartness of the sour cherries, and the almond extract should add a delicate, complementary aromatic note. The small amount of butter enriches the filling.
The overall experience should be a classic, perfectly balanced cherry pie – sweet, tart, fruity, with a wonderfully flaky crust in every bite. A perfect balance between flavour and texture.
Ingredient Insights
For the Pie Crust:
- All-Purpose Flour: Provides the structure for the crust.
- Salt: Balances the richness of the shortening and enhances flavor.
- Shortening (Chilled): Creates a very tender and flaky crust. MUST be cold and cut into small pieces or worked into the flour until it resembles coarse crumbs. Lard or a butter/shortening combination can also be used for different crust characteristics.
- Cold Water: Essential for bringing the dough together without developing too much gluten, which keeps the crust tender. Use ice water for best results.
For the Cherry Filling:
- Pitted Sour Cherries: The star! Sour cherries (also called tart cherries or pie cherries like Montmorency) have the best flavor for pies, as their tartness balances the sugar beautifully. About 2 cups needed. Fresh are ideal when in season. Frozen (thawed and well-drained) or good-quality canned sour cherries (drained, packed in water or light syrup, not pie filling) can also be used – adjust sugar if cherries are sweetened.
- White Sugar: Sweetens the tart cherries and helps create the syrupy filling.
- Cornstarch: The primary thickener for the cherry juices, ensuring the filling sets up nicely and isn’t too runny.
- Butter: Adds a touch of richness and smoothness to the filling.
- Almond Extract: A classic pairing with cherries, it adds a wonderful, subtle aromatic complexity. Vanilla extract can be substituted if preferred.
- (Non-Aluminum Saucepan): Important for cooking acidic fruit fillings like cherry, as aluminum can react and impart a metallic taste.
Essential Equipment
- Mixing Bowl (Large): For making the pie dough.
- Pastry Blender or Two Knives/Fingers: For cutting the shortening into the flour.
- Measuring Cups & Spoons:
- Plastic Wrap: For chilling the pie dough disks.
- Rolling Pin: To roll out the pie dough.
- Lightly Floured Surface: For rolling out dough.
- 9-inch Pie Dish: Standard size. Glass, ceramic, or metal works.
- Medium, Non-Aluminum Saucepan: Crucial for cooking the acidic cherry filling.
- Spoon or Spatula: For stirring the filling.
- Baking Tray/Sheet: Placed in the oven to preheat and to bake the pie on; helps create a crisp bottom crust and catches any potential drips.
- Sharp Knife: For cutting vents in the top crust and slicing the pie.
- Pie Crust Shield or Aluminum Foil Strips (Optional): To protect crust edges from over-browning.
Ingredients
(Original recipe yields 8 servings)
Pie Crust:
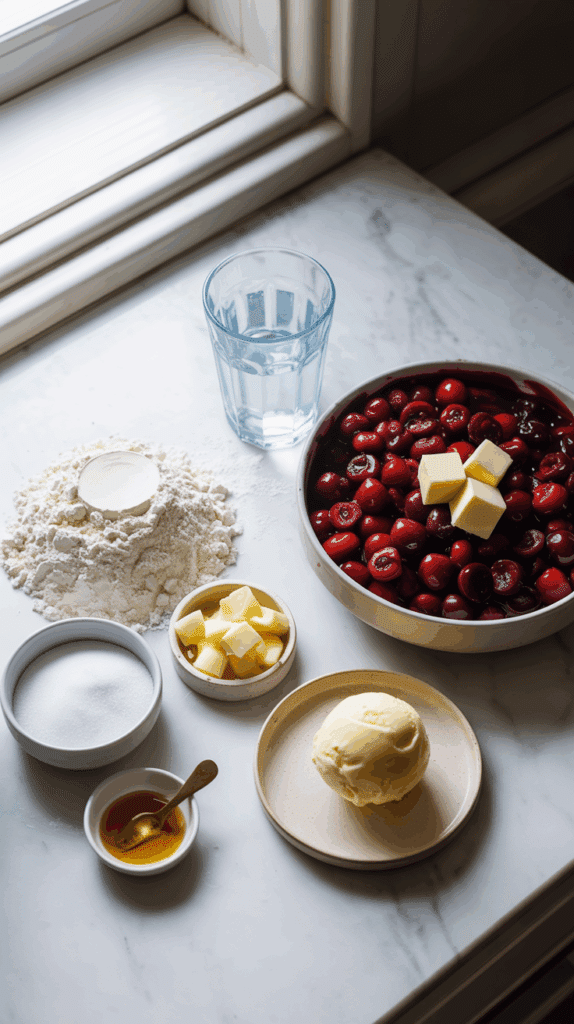
- ▢ 2 cups all-purpose flour
- ▢ 1 pinch salt (approx. 1/4 to 1/2 teaspoon)
- ▢ 1 cup shortening, chilled and cut into pieces
- ▢ ½ cup cold water (ice water recommended)
Cherry Filling:
- ▢ 2 cups pitted sour cherries (fresh, or thawed & well-drained frozen, or well-drained canned)
- ▢ 1 ¼ cups white sugar (adjust slightly if using sweetened canned cherries)
- ▢ 10 teaspoons cornstarch (which is 3 tablespoons + 1 teaspoon)
- ▢ 1 tablespoon butter
- ▢ ¼ teaspoon almond extract
Optional for Serving:
- ▢ Vanilla ice cream

Step-by-Step Instructions
1. Prepare the Pie Dough:
- Mix Dry Ingredients: In a large mixing bowl, whisk together the 2 cups of all-purpose flour and the pinch of salt.
- Cut in Shortening: Add the chilled, cubed shortening to the flour mixture. Using a pastry blender, two knives in a crisscross motion, or your fingertips, cut the shortening into the flour until the mixture resembles coarse crumbs with some pea-sized pieces of shortening still visible.
- Add Cold Water: Gradually sprinkle the ½ cup of ice-cold water over the mixture, one tablespoon at a time, mixing lightly with a fork after each addition, just until the dough starts to come together and forms a shaggy ball. Be careful not to add too much water or overwork the dough.
- Divide and Chill: Divide the dough in half. Gently form each half into a flat disk. Wrap each disk tightly in plastic wrap. Refrigerate for at least 30 minutes to 1 hour (or longer) to allow the gluten to relax and the fat to firm up. This makes it easier to roll and results in a flakier crust.
2. Prepare for Baking:
- While the dough chills (or after chilling), preheat your oven to 375°F (190°C).
- Place a baking tray or baking sheet on a lower-middle rack in the oven to preheat. Baking the pie on a preheated tray helps ensure a crisp bottom crust.
3. Roll Out Bottom Crust:
- On a lightly floured surface, take one chilled disk of pie dough. Roll it out from the center outwards into an approximately 11-inch circle, large enough to fit your 9-inch pie dish with some overhang.
- Carefully transfer the rolled dough to the 9-inch pie dish. Gently press it into the bottom and up the sides. Do not stretch the dough. Place the pie dish with the bottom crust back in the refrigerator to stay cool while you prepare the filling and top crust.
4. Prepare Top Crust:
- Roll out the remaining disk of dough on a lightly floured surface into another 11-inch circle for the top crust.
- You can leave it flat, or cut it into strips for a lattice top if you prefer. Carefully transfer the rolled top crust (or strips) to a plate or small baking sheet and place it in the refrigerator to stay chilled until needed.
5. Make the Cherry Filling:
- In a medium, non-aluminum saucepan, combine the 2 cups of pitted sour cherries, 1 ¼ cups white sugar, and 10 teaspoons (3 tbsp + 1 tsp) cornstarch.
- Stir gently to combine and allow the mixture to stand for about 10 minutes. This allows the cherries to release some of their juices, which will help dissolve the sugar and cornstarch.
- Place the saucepan over medium heat. Bring the mixture to a boil, stirring constantly but gently to prevent scorching and ensure the cornstarch fully incorporates.
- Once boiling, reduce the heat to low and continue to simmer, stirring constantly, for about 1 minute, or until the juices thicken noticeably and become translucent.
- Remove the saucepan from the heat. Stir in the 1 tablespoon of butter and ¼ teaspoon of almond extract until the butter is melted and combined.
- Allow the cherry filling to cool to lukewarm (about 15-20 minutes, stirring occasionally). It should not be piping hot when added to the crust.
6. Assemble the Pie:
- Remove the pie dish with the bottom crust from the refrigerator.
- Pour the cooled (lukewarm) cherry filling evenly into the prepared pie crust.
- Carefully place the chilled top crust circle over the filling. (Or arrange lattice strips if making a lattice top).
- Trim and Crimp: Trim the excess dough from both the top and bottom crusts, leaving about a ½ to 1-inch overhang. Fold the overhang under itself and crimp the edges decoratively to seal the pie.
- Cut Vents: Using a sharp knife, cut several small slits (vents) in the top crust to allow steam to escape during baking. This prevents the crust from puffing up excessively or bursting.
7. Bake the Pie:
- Carefully place the assembled pie onto the preheated baking tray in the oven.
- Bake for 45 to 55 minutes, or until the crust is beautifully golden brown and you can see the cherry filling bubbling through the vents.
- If the crust edges start to brown too quickly before the filling is bubbly and the bottom crust is cooked, you can loosely shield the edges with strips of aluminum foil or a pie crust shield.
8. Cool Thoroughly:
- Once baked, carefully remove the pie from the oven. Place it on a wire cooling rack.
- Allow the Cherry Pie to cool for several hours (at least 2-3 hours, preferably 4+) before slicing and serving. This is very important! The filling needs time to fully set and thicken as it cools; slicing a hot pie will result in a runny mess.
9. Serve:
- Once completely cooled and set, slice the pie into wedges.
- Serve at room temperature or slightly warm (reheat slices gently if desired). It’s absolutely classic and delicious served with a scoop of vanilla ice cream! Enjoy!

Troubleshooting
- Tough Crust: Overworked the dough, or too much water added. Handle dough minimally, use ice water sparingly.
- Soggy Bottom Crust: Filling too hot/wet when added, or didn’t bake on a preheated baking sheet. Cool filling to lukewarm. Preheated sheet helps crisp bottom.
- Filling Too Runny: Didn’t use enough cornstarch, didn’t cook filling long enough on stovetop to thicken, or pie sliced while still too warm. Ensure cornstarch is measured accurately and filling simmers/thickens. Cool pie completely before slicing.
- Filling Too Thick/Gummy: Too much cornstarch, or cooked too long on stovetop.
- Crust Edges Burnt: Oven too hot, or baked too long without shielding. Use foil strips or pie crust shield.
- Pie Overflowing: Filling too full, or vents not large enough. Don’t overfill. Ensure adequate steam vents. Bake on sheet to catch drips.
Tips and Variations
- Chilled Ingredients for Crust: Keep shortening and water ice cold for the flakiest crust. Don’t overhandle the dough.
- Cool Filling Before Adding to Crust: Adding hot filling to a cold crust can make the crust soggy. Let filling cool to lukewarm.
- Preheated Baking Sheet: Helps the bottom crust bake properly and get crispy.
- Almond Extract: A little goes a long way! It’s a classic pairing with cherries but can be strong.
- Sour Cherry Source: Fresh sour cherries (Montmorency are common) are ideal in season. Good quality frozen (thawed and well-drained) or canned (packed in water or light syrup, well-drained) sour cherries work well. Adjust sugar if using sweetened canned cherries.
- Sweet Cherries: If using sweet cherries (like Bing or Rainier), reduce the sugar in the filling significantly (perhaps to 1/2 – 3/4 cup) and consider adding more lemon juice (1-2 tbsp) for tartness.
- Spices: Add 1/4 teaspoon of ground cinnamon or a pinch of nutmeg to the cherry filling for a warmer spice note.
- Lattice Top: For a decorative touch, cut the top crust into strips and weave a lattice pattern.
- Egg Wash: For an extra golden and shiny top crust, whisk an egg with 1 tablespoon of water and brush it lightly over the top crust before baking. Sprinkle with coarse sugar if desired.
Serving and Pairing Suggestions
- Serve Warm or Room Temperature: Classic cherry pie is delicious either way.
- A La Mode: A scoop of vanilla bean ice cream is the quintessential pairing!
- With Whipped Cream: A dollop of lightly sweetened whipped cream is also lovely.
- Holiday Dessert: Perfect for Thanksgiving, Christmas, Fourth of July, or Pi Day!
- Comfort Food Classic: Enjoy a slice anytime you need a comforting, fruity treat.
Nutritional Information
(Note: Estimated, per slice, assuming 8 slices. Variable based on crust thickness, cherry type, sugar amount.)
- Calories: 400-550+
- Fat: 20-30g+
- Saturated Fat: 8-15g+ (higher if using all-butter crust, shortening is different)
- Cholesterol: 10-20mg+ (mainly from butter in filling/crust)
- Sodium: 200-350mg+
- Total Carbohydrates: 55-75g+
- Dietary Fiber: 2-4g+
- Sugars: 30-45g+ (High sugar content)
- Protein: 3-5g+
Classic Homemade Cherry Pie (Double Crust!)
Bake a timeless Classic Homemade Cherry Pie! This recipe features a flaky, shortening-based double crust and a vibrant, sweet-tart filling made with sour cherries and a hint of almond.
Ingredients
(Original recipe yields 8 servings)
Pie Crust:
- ▢ 2 cups all-purpose flour
- ▢ 1 pinch salt (approx. 1/4 to 1/2 teaspoon)
- ▢ 1 cup shortening, chilled and cut into pieces
- ▢ ½ cup cold water (ice water recommended)
Cherry Filling:
- ▢ 2 cups pitted sour cherries (fresh, or thawed & well-drained frozen, or well-drained canned)
- ▢ 1 ¼ cups white sugar (adjust slightly if using sweetened canned cherries)
- ▢ 10 teaspoons cornstarch (which is 3 tablespoons + 1 teaspoon)
- ▢ 1 tablespoon butter
- ▢ ¼ teaspoon almond extract
Optional for Serving:
- ▢ Vanilla ice cream
Instructions
1. Prepare the Pie Dough:
- Mix Dry Ingredients: In a large mixing bowl, whisk together the 2 cups of all-purpose flour and the pinch of salt.
- Cut in Shortening: Add the chilled, cubed shortening to the flour mixture. Using a pastry blender, two knives in a crisscross motion, or your fingertips, cut the shortening into the flour until the mixture resembles coarse crumbs with some pea-sized pieces of shortening still visible.
- Add Cold Water: Gradually sprinkle the ½ cup of ice-cold water over the mixture, one tablespoon at a time, mixing lightly with a fork after each addition, just until the dough starts to come together and forms a shaggy ball. Be careful not to add too much water or overwork the dough.
- Divide and Chill: Divide the dough in half. Gently form each half into a flat disk. Wrap each disk tightly in plastic wrap. Refrigerate for at least 30 minutes to 1 hour (or longer) to allow the gluten to relax and the fat to firm up. This makes it easier to roll and results in a flakier crust.
2. Prepare for Baking:
- While the dough chills (or after chilling), preheat your oven to 375°F (190°C).
- Place a baking tray or baking sheet on a lower-middle rack in the oven to preheat. Baking the pie on a preheated tray helps ensure a crisp bottom crust.
3. Roll Out Bottom Crust:
- On a lightly floured surface, take one chilled disk of pie dough. Roll it out from the center outwards into an approximately 11-inch circle, large enough to fit your 9-inch pie dish with some overhang.
- Carefully transfer the rolled dough to the 9-inch pie dish. Gently press it into the bottom and up the sides. Do not stretch the dough. Place the pie dish with the bottom crust back in the refrigerator to stay cool while you prepare the filling and top crust.
4. Prepare Top Crust:
- Roll out the remaining disk of dough on a lightly floured surface into another 11-inch circle for the top crust.
- You can leave it flat, or cut it into strips for a lattice top if you prefer. Carefully transfer the rolled top crust (or strips) to a plate or small baking sheet and place it in the refrigerator to stay chilled until needed.
5. Make the Cherry Filling:
- In a medium, non-aluminum saucepan, combine the 2 cups of pitted sour cherries, 1 ¼ cups white sugar, and 10 teaspoons (3 tbsp + 1 tsp) cornstarch.
- Stir gently to combine and allow the mixture to stand for about 10 minutes. This allows the cherries to release some of their juices, which will help dissolve the sugar and cornstarch.
- Place the saucepan over medium heat. Bring the mixture to a boil, stirring constantly but gently to prevent scorching and ensure the cornstarch fully incorporates.
- Once boiling, reduce the heat to low and continue to simmer, stirring constantly, for about 1 minute, or until the juices thicken noticeably and become translucent.
- Remove the saucepan from the heat. Stir in the 1 tablespoon of butter and ¼ teaspoon of almond extract until the butter is melted and combined.
- Allow the cherry filling to cool to lukewarm (about 15-20 minutes, stirring occasionally). It should not be piping hot when added to the crust.
6. Assemble the Pie:
- Remove the pie dish with the bottom crust from the refrigerator.
- Pour the cooled (lukewarm) cherry filling evenly into the prepared pie crust.
- Carefully place the chilled top crust circle over the filling. (Or arrange lattice strips if making a lattice top).
- Trim and Crimp: Trim the excess dough from both the top and bottom crusts, leaving about a ½ to 1-inch overhang. Fold the overhang under itself and crimp the edges decoratively to seal the pie.
- Cut Vents: Using a sharp knife, cut several small slits (vents) in the top crust to allow steam to escape during baking. This prevents the crust from puffing up excessively or bursting.
7. Bake the Pie:
- Carefully place the assembled pie onto the preheated baking tray in the oven.
- Bake for 45 to 55 minutes, or until the crust is beautifully golden brown and you can see the cherry filling bubbling through the vents.
- If the crust edges start to brown too quickly before the filling is bubbly and the bottom crust is cooked, you can loosely shield the edges with strips of aluminum foil or a pie crust shield.
8. Cool Thoroughly:
- Once baked, carefully remove the pie from the oven. Place it on a wire cooling rack.
- Allow the Cherry Pie to cool for several hours (at least 2-3 hours, preferably 4+) before slicing and serving. This is very important! The filling needs time to fully set and thicken as it cools; slicing a hot pie will result in a runny mess.
9. Serve:
- Once completely cooled and set, slice the pie into wedges.
- Serve at room temperature or slightly warm (reheat slices gently if desired). It’s absolutely classic and delicious served with a scoop of vanilla ice cream! Enjoy!
Recipe Summary and Q&A
Summary: This Classic Homemade Cherry Pie features a double crust made with chilled shortening and cold water. The filling is made by cooking pitted sour cherries with sugar and cornstarch on the stovetop until thickened, then stirring in butter and almond extract. The cooled filling is poured into the bottom pie crust, topped with the second crust (vented), and baked on a preheated baking tray at 375°F until the crust is golden brown and the filling is bubbly. The pie must cool for several hours to fully set before slicing.
Q&A:
- Q: Can I use sweet cherries instead of sour cherries?
- A: Yes, but you will need to significantly reduce the amount of sugar in the filling, as sweet cherries are much less tart. Start with about 1/2 to 3/4 cup of sugar and adjust to taste. You might also want to add 1-2 tablespoons of lemon juice to the filling to provide some necessary tartness.
- Q: Why do I need to use a non-aluminum saucepan for the cherry filling?
- A: Cherries are acidic. Cooking acidic foods in reactive metal pans like aluminum can sometimes cause the food to pick up a metallic taste or discolor. Using a non-reactive saucepan (like stainless steel, enamel-coated cast iron, or ceramic) prevents this.
- Q: My pie filling is always runny. How can I fix that?
- A: Ensure you are using the correct amount of cornstarch and that you bring the filling to a full boil while stirring constantly on the stovetop, then simmer for the specified minute to allow the cornstarch to fully activate and thicken. Most importantly, the pie must cool completely for several hours before slicing – this is when the filling truly sets up.
- Q: How do I prevent the bottom crust from being soggy?
- A: Baking the pie on a preheated baking sheet helps to cook and crisp the bottom crust more effectively. Also, ensure your cherry filling has cooled to lukewarm before adding it to the unbaked crust, as very hot filling can start to make the crust steam and become soggy.

