Introduction & Inspiration
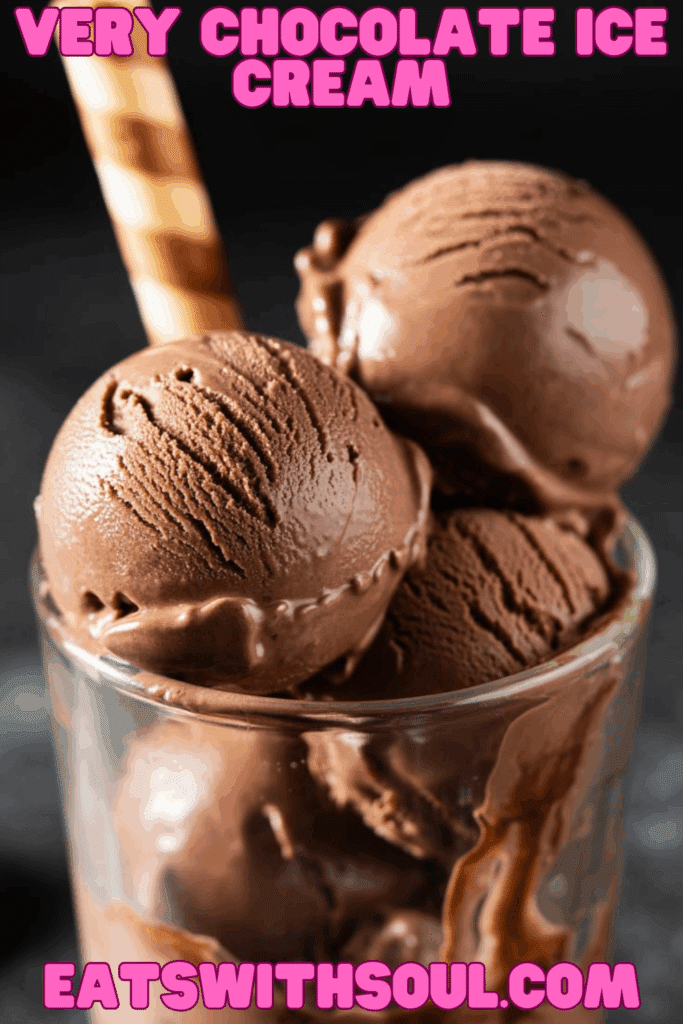
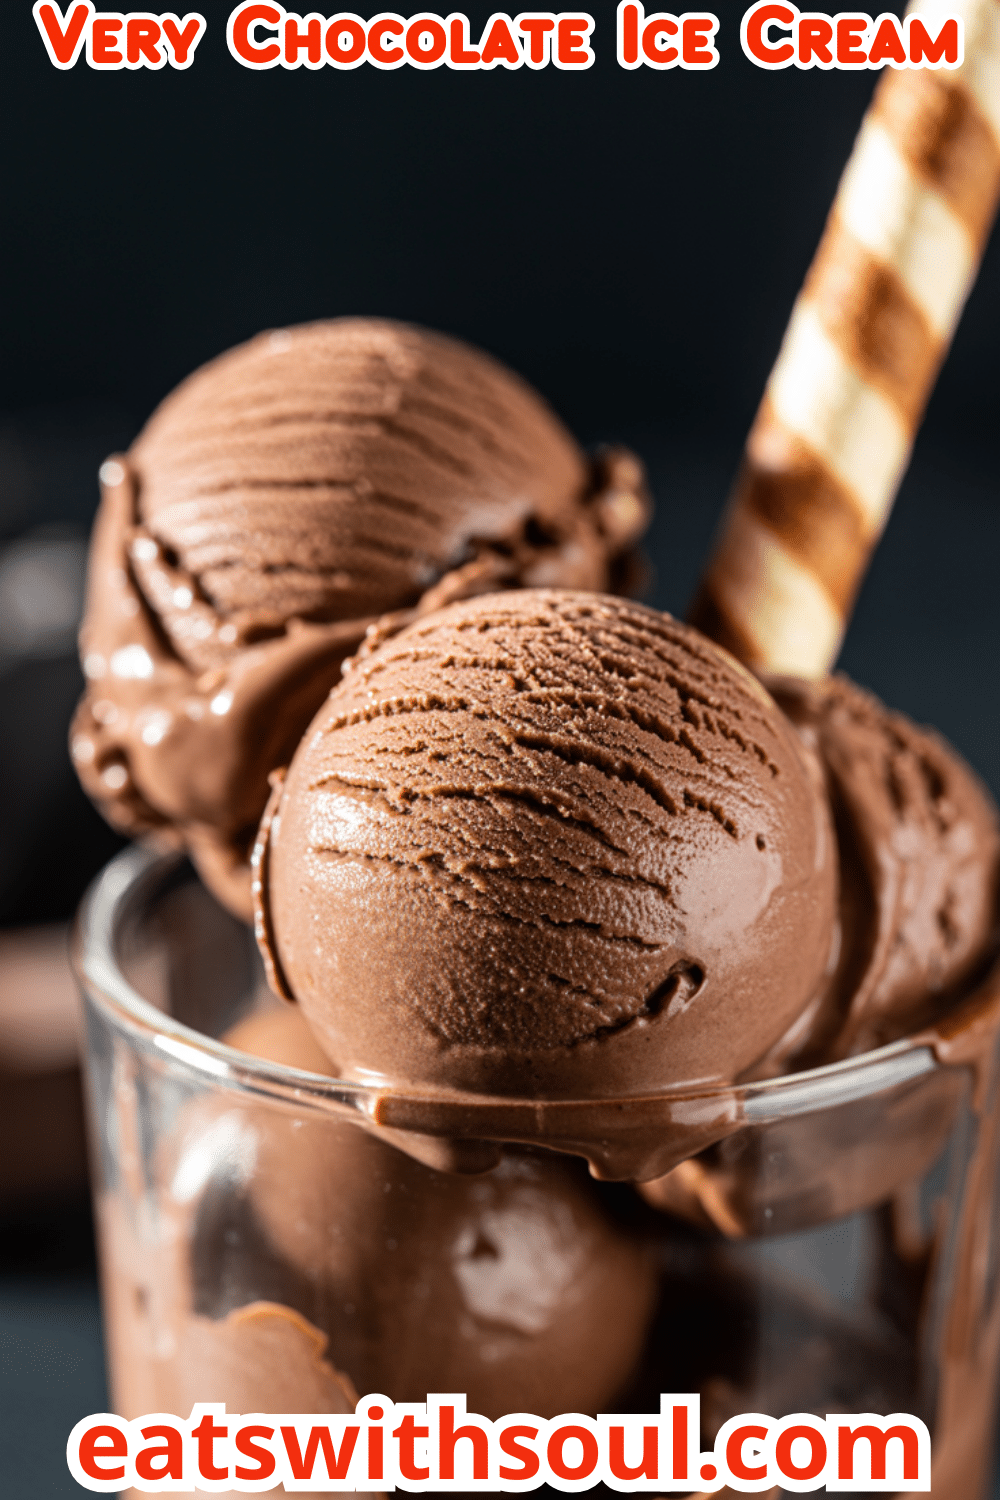
Prepare for what might just be the most intensely chocolatey, luxuriously creamy homemade ice cream you’ve ever tasted! This “Very Chocolate Ice Cream” lives up to its name, delivering a double dose of chocolate goodness. We start by creating a rich cooked custard base with milk, sugar, egg yolks, and unsweetened cocoa powder, then melt in real semisweet chocolate for an extra layer of deep flavor. Finished with heavy cream and vanilla, then churned in an ice cream maker, it’s pure, unadulterated chocolate bliss.
My inspiration for this recipe comes from a lifelong quest for the perfect homemade chocolate ice cream – one that’s not just chocolate-flavored, but truly, deeply, very chocolate. Using both cocoa powder for foundational flavor and melted chocolate for richness and texture is the secret here.
This ice cream is perfect for serious chocolate lovers, special occasions, or anytime you want a truly decadent frozen treat. Making it from scratch is so rewarding, and the flavor is simply unparalleled. It is a perfect recipe for chocolate ice cream aficionados.
Nostalgic Appeal / Comfort Factor
Chocolate ice cream is the quintessential comfort food dessert, beloved by all ages and holding a powerful nostalgic connection to childhood summers, birthday parties, ice cream parlors, and simple, happy indulgences. There’s something universally comforting about a scoop of rich, creamy chocolate ice cream.
This homemade version takes that classic comfort to an even higher level. The process of making the custard base, the aroma of melting chocolate, and the anticipation of churning your own ice cream adds to the satisfying experience. It delivers a richer, more intense chocolate flavor than many store-bought varieties, tapping into that pure chocolate craving.
It’s a taste of pure, homemade joy and deep chocolate satisfaction. A perfect comfort food dessert.
Homemade Focus
This recipe is a wonderful celebration of classic, from-scratch ice cream making. You’re creating a traditional cooked egg yolk custard base – a fundamental technique for achieving rich, smooth, and creamy ice cream. This involves carefully tempering the egg yolks to prevent scrambling and gently cooking the custard until it thickens.
The homemade focus shines in the careful selection of both cocoa powder and real semisweet chocolate to build layers of chocolate flavor. Chilling the base thoroughly before churning is another key homemade step for optimal texture. While an ice cream maker does the final freezing, the heart of this recipe lies in crafting that perfect chocolate custard base.
It’s about taking simple, quality ingredients and transforming them through classic techniques into a truly premium, homemade frozen dessert. The homemade taste is incredible.
Flavor Goal
The primary flavor goal is an intensely rich, deep, and complex chocolate flavor, balanced by appropriate sweetness, with an exceptionally smooth and creamy texture. The combination of unsweetened cocoa powder and melted semisweet chocolate should provide layers of chocolate notes – from slightly bitter and deep to richly sweet.
The egg yolk custard base contributes to a luxurious, dense creaminess and rich mouthfeel. The heavy cream adds further richness and helps achieve a perfectly scoopable frozen texture. Vanilla extract should enhance the chocolate without overpowering it.
The overall experience should be the ultimate homemade chocolate ice cream: intensely chocolatey, incredibly smooth, luxuriously creamy, and perfectly sweet. A perfect balance between flavour and texture.
Ingredient Insights
- Milk: Forms the liquid base of the custard. Whole milk is recommended for richness.
- Sugar (Granulated): Provides sweetness and also affects the texture of the frozen ice cream (lowers freezing point, contributing to scoopability).
- Unsweetened Cocoa Powder: Provides deep, foundational chocolate flavor. The type (natural or Dutch-process) can slightly affect the final color and flavor profile; both work.
- Salt: A small amount enhances the chocolate flavor and balances the sweetness.
- Egg Yolks (Lightly Beaten): Crucial for a rich, creamy, classic custard-style ice cream. They act as an emulsifier, creating a smoother texture and preventing large ice crystals. Tempering them carefully is key.
- Semisweet Chocolate (Chopped): Melted into the hot custard, it adds another layer of intense chocolate flavor, richness, and contributes to the smooth texture. Use good quality chocolate for best results. Chopping it helps it melt evenly.
- Heavy Cream (Chilled): Essential for the final richness and creamy texture of the ice cream. Added after the custard base is completely chilled.
- Vanilla Extract: Enhances the chocolate flavor and adds aromatic depth.
Essential Equipment
- Medium Saucepan (Heavy-Bottomed Recommended): For making the custard base. A heavy bottom helps prevent scorching.
- Small Bowl: For placing the lightly beaten egg yolks before tempering.
- Whisk: Essential for combining ingredients smoothly and for tempering the eggs.
- Heatproof Bowl (Preferably Chilled, or set over an ice bath): For pouring the hot custard into to cool down quickly.
- Rubber Spatula or Wooden Spoon: For stirring custard.
- Ice Cream Maker: Essential for churning the ice cream base to achieve the correct frozen texture. Ensure the freezer bowl is frozen solid according to manufacturer’s directions (usually 24 hours).
- Freezer-Safe Container with Lid: For storing the finished churned ice cream.
- Measuring Cups & Spoons:
Ingredients
(Original recipe yields 8 servings)
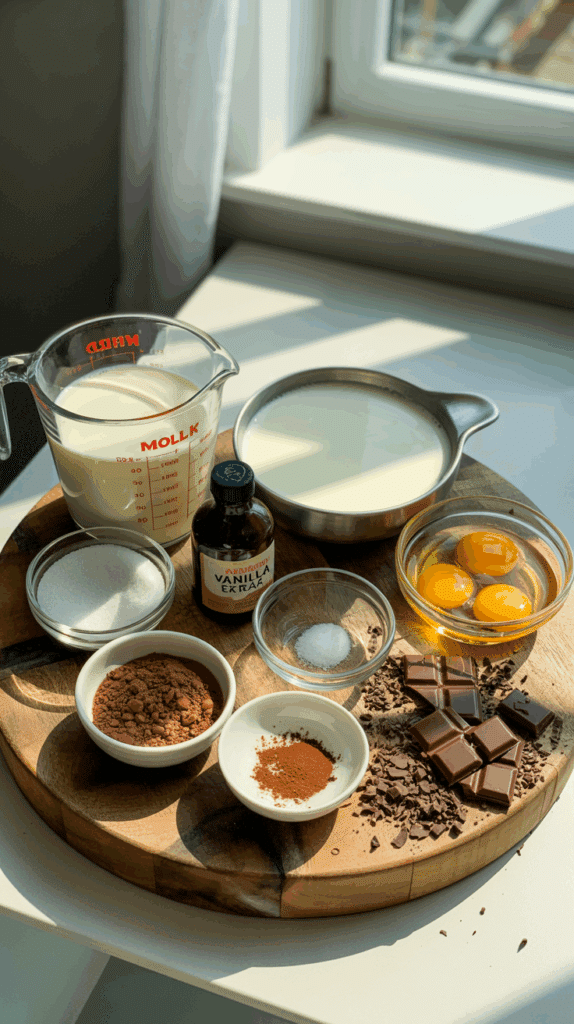
- ▢ 1 cup milk (whole milk recommended)
- ▢ ¾ cup granulated sugar
- ▢ 2 tablespoons unsweetened cocoa powder
- ▢ ¼ teaspoon salt
- ▢ 3 large egg yolks, lightly beaten
- ▢ 2 ounces semisweet chocolate, finely chopped
- ▢ 2 cups heavy cream, chilled
- ▢ 1 teaspoon vanilla extract

Step-by-Step Instructions
1. Prepare the Custard Base:
- Gather all your ingredients. Lightly beat the egg yolks in a small bowl and set aside. Have a medium, heatproof bowl (preferably one that can be set in an ice bath later) ready for chilling the custard.
- In a medium saucepan, combine the milk, granulated sugar, unsweetened cocoa powder, and salt.
- Place the saucepan over medium heat. Bring the mixture to a gentle simmer, whisking or stirring constantly to dissolve the sugar and cocoa powder and prevent scorching. Do not bring to a rapid boil.
2. Temper the Egg Yolks:
- Once the milk mixture is hot and simmering gently, remove it temporarily from the heat.
- Very slowly pour about 1/2 cup of the hot milk mixture into the bowl with the lightly beaten egg yolks, whisking the yolks constantly as you pour. This gradual addition of hot liquid is called tempering, and it prevents the egg yolks from scrambling.
- Once the first 1/2 cup is whisked in, gradually whisk the tempered egg yolk mixture back into the saucepan with the remaining milk mixture.
3. Cook the Custard:
- Return the saucepan to medium-low heat.
- Cook, stirring constantly with a wooden spoon or heatproof spatula (scraping the bottom to prevent sticking), until the custard thickens enough to coat the back of the spoon. If you draw a line with your finger across the spoon, the line should hold. This can take several minutes. Do not let the mixture boil, or the eggs may curdle.
4. Melt in Chocolate:
- Remove the thickened custard from the heat immediately.
- Add the finely chopped semisweet chocolate to the hot custard. Stir gently and continuously until the chocolate is completely melted and the mixture is smooth and glossy.
5. Chill the Custard Base Thoroughly:
- Pour the hot chocolate custard mixture into the chilled heatproof bowl you set aside earlier (or place the bowl you poured it into over an ice bath to speed cooling).
- Let it cool at room temperature for a bit, then cover the surface directly with plastic wrap (to prevent a skin from forming) and refrigerate until completely cold. This usually takes at least 2 hours, but longer (4-6 hours or overnight) is even better. Stir the custard occasionally as it chills in the fridge if you’re not using an ice bath. The base must be very cold before churning.
6. Finish Base and Churn:
- Once the chocolate custard base is thoroughly chilled, remove it from the refrigerator.
- Stir in the 2 cups of chilled heavy cream and the 1 teaspoon of vanilla extract until well combined.
- Pour this final ice cream base mixture into the freezer bowl of your ice cream maker.
- Churn according to the manufacturer’s directions for your specific machine, typically for 20-30 minutes, or until the ice cream is thickened, creamy, and has increased in volume (resembling soft-serve).
7. Freeze Solid:
- Transfer the churned ice cream to a freezer-safe container with a lid.
- Cover and place in the freezer for at least 2-4 hours, or until firm enough to scoop.
- Serve scoops of your Very Chocolate Ice Cream and enjoy!

Troubleshooting
- Custard Curdled/Scrambled Eggs: Milk mixture too hot when tempering eggs, or eggs added back to pan too quickly, or custard boiled during final cooking. Temper very slowly, cook custard gently, do not boil. If slightly curdled, sometimes vigorously whisking off-heat or quickly straining through a fine-mesh sieve can save it.
- Ice Cream Icy/Not Smooth: Custard base not chilled thoroughly enough before churning; ice cream maker bowl not frozen solid enough; too much water content (e.g., low-fat milk). Ensure base is very cold. Follow ice cream maker instructions precisely for freezing bowl. Use whole milk/heavy cream.
- Chocolate Not Melting Smoothly: Chocolate pieces too large, or custard not hot enough when chocolate added. Chop chocolate finely. Ensure custard is hot off the stove. Stir gently until fully melted.
- Too Sweet/Not Chocolatey Enough: Adjust sugar/cocoa/chocolate amounts slightly next time to your preference. Using bittersweet chocolate instead of semi-sweet will yield a less sweet, more intense flavor.
Tips and Variations
- Temper Eggs Carefully: This is the most crucial step for a smooth custard. Go slowly and whisk constantly.
- Chill Base Completely: Don’t rush the chilling of the custard base – it’s essential for proper churning and texture. Overnight chilling is ideal.
- Quality Chocolate & Cocoa: Using good quality cocoa powder and semisweet chocolate will make a noticeable difference in the final flavor.
- Chocolate Variations:
- Darker Chocolate: Use bittersweet chocolate instead of semi-sweet for a deeper, less sweet flavor.
- Milk Chocolate: Use milk chocolate for a sweeter, milder ice cream (might need to slightly reduce sugar).
- Add Mix-Ins: After churning, when ice cream is soft-serve consistency, gently fold in mini chocolate chips, brownie bits, chopped nuts (pecans, walnuts, almonds), or a swirl of fudge or caramel sauce before transferring to the freezer container.
- Coffee Kick: Dissolve 1-2 teaspoons of instant espresso powder in the initial hot milk mixture for a mocha flavor.
- Different Extracts: Add 1/4 – 1/2 teaspoon of almond extract or peppermint extract along with the vanilla for flavor variations.
Serving and Pairing Suggestions
- Serve in Bowls or Cones: The classic way!
- A La Mode: Perfect alongside warm brownies, chocolate lava cakes, or fruit pies.
- Sundaes: Top with hot fudge sauce, whipped cream, nuts, sprinkles, and a cherry!
- Milkshakes: Blend scoops with a little milk for an ultra-rich chocolate milkshake.
- Coffee Pairing: The rich chocolate is wonderful with a cup of coffee or espresso.
Nutritional Information
(Note: Estimated, per 1/2 cup serving, assuming 8 servings from recipe. Very rich dessert.)
- Calories: 350-450+
- Fat: 25-35g+
- Saturated Fat: 15-22g+
- Cholesterol: 100-140mg+ (from egg yolks and cream)
- Sodium: 100-150mg+
- Total Carbohydrates: 25-35g+
- Dietary Fiber: 1-3g+
- Sugars: 20-30g+
- Protein: 4-6g+
Rich & Decadent Very Chocolate Ice Cream (Homemade!)
Make incredibly rich and “Very Chocolate” Ice Cream at home! This recipe features a cooked custard base with cocoa powder and melted semisweet chocolate, churned to creamy perfection.
Ingredients
(Original recipe yields 8 servings)
- ▢ 1 cup milk (whole milk recommended)
- ▢ ¾ cup granulated sugar
- ▢ 2 tablespoons unsweetened cocoa powder
- ▢ ¼ teaspoon salt
- ▢ 3 large egg yolks, lightly beaten
- ▢ 2 ounces semisweet chocolate, finely chopped
- ▢ 2 cups heavy cream, chilled
- ▢ 1 teaspoon vanilla extract
Instructions
1. Prepare the Custard Base:
- Gather all your ingredients. Lightly beat the egg yolks in a small bowl and set aside. Have a medium, heatproof bowl (preferably one that can be set in an ice bath later) ready for chilling the custard.
- In a medium saucepan, combine the milk, granulated sugar, unsweetened cocoa powder, and salt.
- Place the saucepan over medium heat. Bring the mixture to a gentle simmer, whisking or stirring constantly to dissolve the sugar and cocoa powder and prevent scorching. Do not bring to a rapid boil.
2. Temper the Egg Yolks:
- Once the milk mixture is hot and simmering gently, remove it temporarily from the heat.
- Very slowly pour about 1/2 cup of the hot milk mixture into the bowl with the lightly beaten egg yolks, whisking the yolks constantly as you pour. This gradual addition of hot liquid is called tempering, and it prevents the egg yolks from scrambling.
- Once the first 1/2 cup is whisked in, gradually whisk the tempered egg yolk mixture back into the saucepan with the remaining milk mixture.
3. Cook the Custard:
- Return the saucepan to medium-low heat.
- Cook, stirring constantly with a wooden spoon or heatproof spatula (scraping the bottom to prevent sticking), until the custard thickens enough to coat the back of the spoon. If you draw a line with your finger across the spoon, the line should hold. This can take several minutes. Do not let the mixture boil, or the eggs may curdle.
4. Melt in Chocolate:
- Remove the thickened custard from the heat immediately.
- Add the finely chopped semisweet chocolate to the hot custard. Stir gently and continuously until the chocolate is completely melted and the mixture is smooth and glossy.
5. Chill the Custard Base Thoroughly:
- Pour the hot chocolate custard mixture into the chilled heatproof bowl you set aside earlier (or place the bowl you poured it into over an ice bath to speed cooling).
- Let it cool at room temperature for a bit, then cover the surface directly with plastic wrap (to prevent a skin from forming) and refrigerate until completely cold. This usually takes at least 2 hours, but longer (4-6 hours or overnight) is even better. Stir the custard occasionally as it chills in the fridge if you’re not using an ice bath. The base must be very cold before churning.
6. Finish Base and Churn:
- Once the chocolate custard base is thoroughly chilled, remove it from the refrigerator.
- Stir in the 2 cups of chilled heavy cream and the 1 teaspoon of vanilla extract until well combined.
- Pour this final ice cream base mixture into the freezer bowl of your ice cream maker.
- Churn according to the manufacturer’s directions for your specific machine, typically for 20-30 minutes, or until the ice cream is thickened, creamy, and has increased in volume (resembling soft-serve).
7. Freeze Solid:
- Transfer the churned ice cream to a freezer-safe container with a lid.
- Cover and place in the freezer for at least 2-4 hours, or until firm enough to scoop.
- Serve scoops of your Very Chocolate Ice Cream and enjoy!
Recipe Summary and Q&A
Summary: This “Very Chocolate Ice Cream” is a Philadelphia-style (egg yolk based) homemade ice cream. A custard base is made by heating milk, sugar, cocoa powder, and salt, then tempering in lightly beaten egg yolks. The custard is cooked gently until thickened, removed from heat, and chopped semisweet chocolate is melted in. This base is thoroughly chilled, then combined with cold heavy cream and vanilla extract before being churned in an ice cream maker until creamy and frozen.
Q&A:
- Q: What does “tempering” egg yolks mean and why is it important?
- A: Tempering is the process of gradually raising the temperature of the egg yolks by slowly whisking in a small amount of the hot milk mixture. This prevents the yolks from cooking too quickly and scrambling when they are added back into the hot liquid in the saucepan, ensuring a smooth custard.
- Q: Can I make this ice cream without an ice cream maker?
- A: While an ice cream maker provides the best creamy texture by incorporating air and freezing quickly, you can attempt a no-churn method. Pour the final chilled base into a shallow freezer-safe container. Freeze, and stir vigorously with a fork or whisk every 30-45 minutes for the first 2-3 hours to break up ice crystals. The texture will be icier and denser than churned ice cream but still delicious.
- Q: What kind of cocoa powder is best? Natural or Dutch-process?
- A: Either will work, but they yield slightly different results. Natural cocoa powder (like standard Hershey’s) is acidic and provides a classic, sharp chocolate flavor. Dutch-process cocoa is treated to neutralize acidity, resulting in a darker color and a smoother, milder, less bitter chocolate flavor. This recipe, using only 2 tbsp, will likely work fine with either.
- Q: How long will homemade ice cream keep in the freezer?
- A: For best quality, homemade ice cream is typically best enjoyed within 1-2 weeks when stored properly in an airtight, freezer-safe container. It can last longer but may develop ice crystals or absorb freezer odors over time.

