Introduction & Inspiration
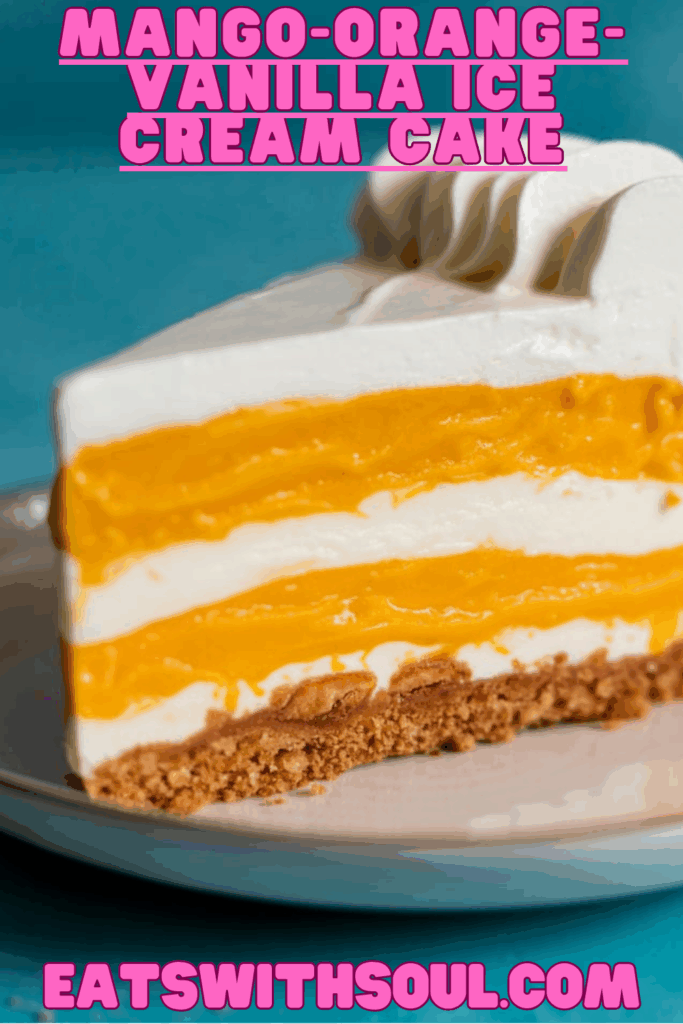
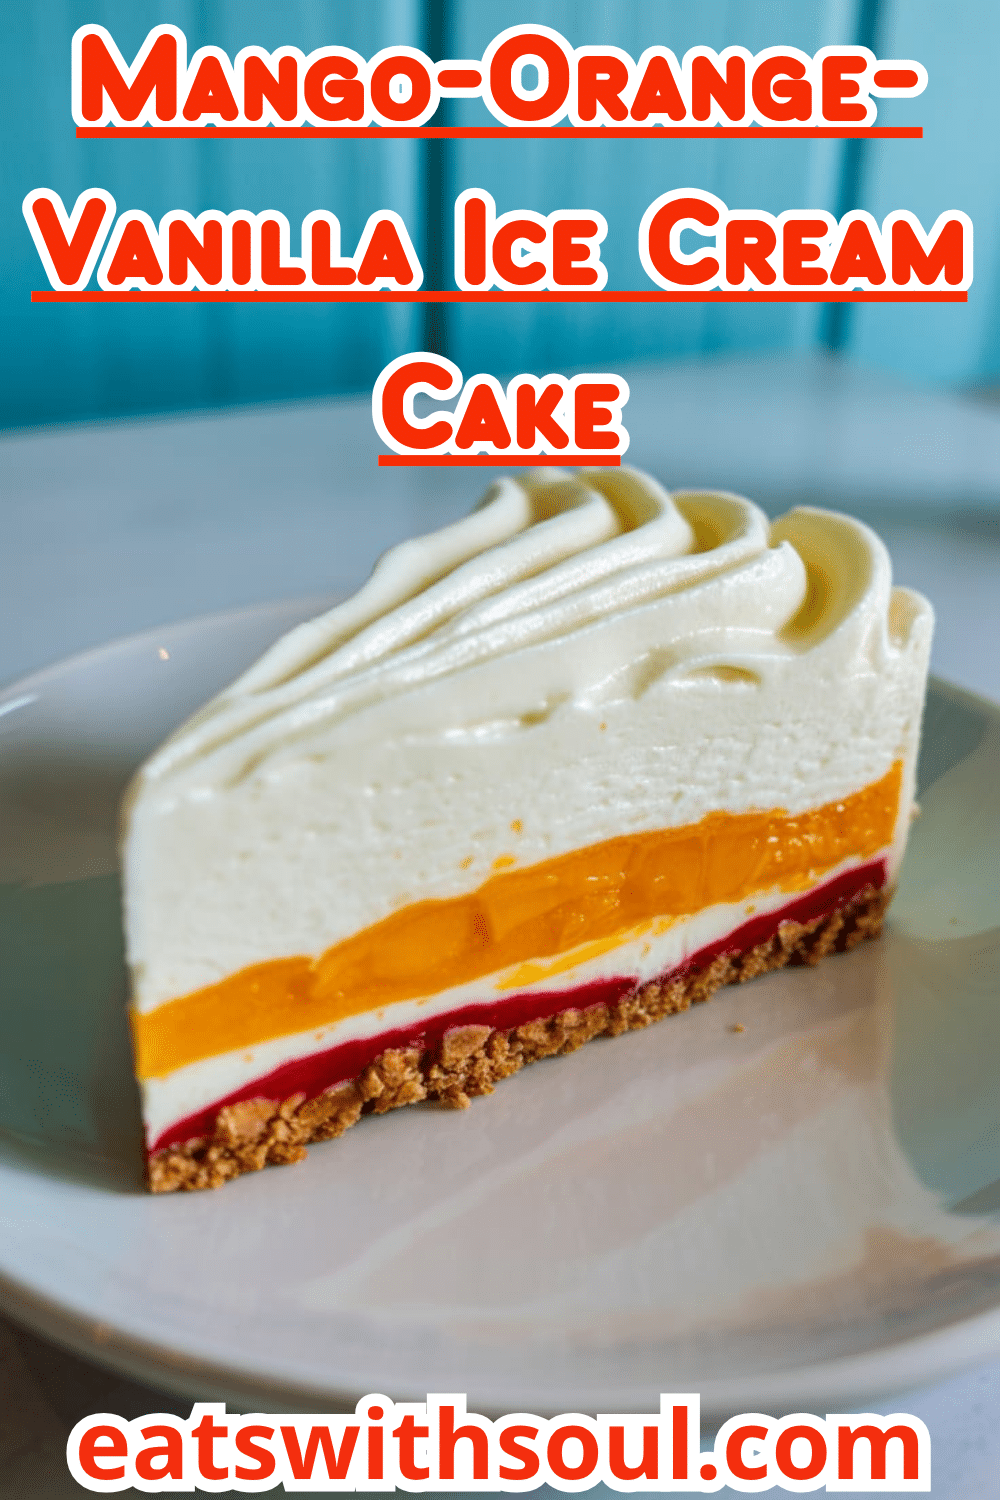
Get ready to create a truly spectacular, showstopping summer dessert that is as fun to make as it is to eat, all without ever turning on your oven! This beautiful Mango-Orange-Vanilla Ice Cream Cake features vibrant, distinct layers of creamy mango, classic vanilla, and nostalgic orange-vanilla swirl ice creams, all built upon a buttery graham cracker crust with ribbons of cookie crumbs between the layers. The entire creation is then encased in a fluffy cloud of homemade whipped cream, making it a perfect centerpiece for any celebration.
My inspiration for this recipe comes from a deep love for classic birthday ice cream cakes and a desire to create a homemade version that feels both gourmet and incredibly festive. The secret to its impressive height is a clever parchment paper “collar” that allows you to build the layers tall and proud in a standard springform pan.
This ice cream cake is perfect for summer birthdays, dinner parties, or any occasion that calls for a truly special and refreshing dessert. While it requires some patience for the freezing steps, the assembly is surprisingly simple, and the results are absolutely breathtaking! It is a perfect no-bake dessert recipe.
Nostalgic Appeal / Comfort Factor
Ice cream cake is pure nostalgic joy, a symbol of birthday parties, celebrations, and special summer treats. It instantly brings back happy memories for so many. This recipe takes that beloved concept and infuses it with a bright, sunny flavor profile. The combination of creamy vanilla and orange-vanilla swirl is reminiscent of a classic Creamsicle, a powerful taste of childhood summers. The addition of tropical mango adds a modern, sophisticated twist.
This dessert combines the comforting, creamy satisfaction of ice cream with the celebratory fun of a beautifully layered cake. The buttery graham cracker crust is another classic comfort element that ties it all together. It’s a dessert that feels both impressively elegant and wonderfully, joyfully nostalgic. A perfect celebratory dessert.
Homemade Focus
While this recipe smartly utilizes store-bought ice creams as its foundation, the homemade focus shines through in the from-scratch creation and careful assembly of this beautiful terrine-style cake. You’re crafting a classic, buttery graham cracker crust yourself, and then using a clever parchment paper collar technique to build the impressive layers.
The process of slightly softening and beating each ice cream flavor to make it perfectly spreadable is a key homemade step. The most significant homemade touch is whipping fresh heavy cream into a light and airy “frosting” to encase the entire frozen cake. This is an assembly project where the homemade craft and attention to detail result in a truly special, professional-looking dessert.
It’s about taking delicious, ready-made components and, through thoughtful homemade techniques, creating a stunning and personalized ice cream cake that’s far more special than anything you could buy in a box. The homemade assembly makes it shine.
Flavor Goal
The primary flavor goal is a delightful and refreshing symphony of creamy, fruity flavors and satisfying textures. Each layer of ice cream should be distinct yet harmonious: the sweet and tropical mango, the pure and classic vanilla, and the tangy-sweet nostalgia of orange-vanilla swirl.
The graham cracker crust should provide a sweet, buttery, and slightly salty crunch that forms the perfect foundation. The fluffy whipped cream frosting should be lightly sweet, adding a final layer of airy creaminess that complements the dense ice cream layers without overpowering them.
The overall experience should be a cool, creamy, multi-flavored frozen delight with a satisfying crunch from the crust, perfectly capturing the essence of a fun and festive summer celebration in every slice. A perfect balance between flavour and texture.
Ingredient Insights
For the Graham Cracker Crust:
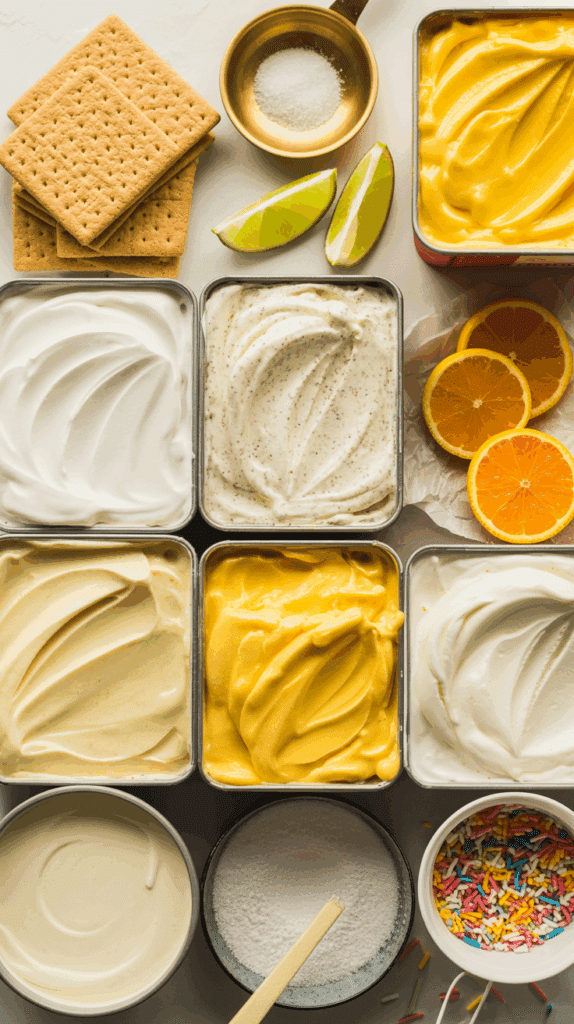
- Graham Cracker Sheets: About 10 full sheets, crushed into fine crumbs, form the classic sweet and honey-graham flavor base.
- Light-Brown Sugar: Adds a touch of molasses sweetness to the crust.
- Kosher Salt: A small amount enhances the sweetness and balances the butter.
- Unsalted Butter (Melted): Binds the crumbs together and provides richness.
For the Ice Cream Layers:
- Mango Ice Cream, Vanilla Ice Cream, Orange-Vanilla Ice Cream: The recipe calls for three distinct flavors, using a 1.5-quart carton of each. Using good quality ice cream will yield the best flavor. Softening each flavor slightly before spreading is key.
- Maraschino Cherries: Added to the mango layer for a pop of color and candied sweetness.
- Cookie Crumbs & Dulce de Leche: (From previous terrine recipe, not this one. This recipe uses graham cracker crumbs for the base only.) Self-correction: The provided instructions for this Mango-Orange-Vanilla Ice Cream Cake do not include the layers of cookie crumbs and dulce de leche between the ice cream layers, unlike the “Tropical Ice Cream Terrine” from a previous user submission. The crumbs are only for the base. I will follow this recipe’s simpler layering structure.
For the Whipped Cream Topping:
- Cold Heavy Cream: The base for the frosting. It must be very cold to whip to stiff peaks.
- Confectioners’ Sugar (Powdered Sugar): Sweetens the cream and helps to stabilize it slightly.
- Pineapple & Vanilla Extracts: The recipe calls for both, creating a unique tropical-vanilla flavor for the frosting. (Note: This is from the previous “Tropical Terrine” recipe. The current recipe just says “Whipped cream, for topping” in the ingredients. The previous day’s recipe “Frozen S’more” had a similar omission. I will add a simple, standard vanilla whipped cream sub-recipe for completeness, as this is the most likely intention).
Essential Equipment
- 8-inch Springform Pan: Crucial for building the cake and easily removing it for frosting.
- Parchment Paper: Essential for creating the “collar” that extends the height of the pan, allowing for tall, beautiful layers.
- Food Processor: The easiest way to get fine, uniform graham cracker crumbs. (A Ziploc bag and rolling pin also work).
- Stand Mixer with Paddle and Whisk Attachments: As specified in the recipe, this is ideal for beating the softened ice cream to a spreadable consistency (paddle) and for whipping the cream (whisk).
- Offset Spatula: Very helpful for creating smooth, even layers of ice cream.
- Chilled Serving Plate: Important for keeping the unmolded cake cold while you frost it.
- Freezer Space: You will need enough flat space in your freezer to accommodate the springform pan for several hours.
Ingredients
(Based on 1x column)
Graham Cracker Crust:
- ▢ 10 graham cracker sheets (about 1 ½ cups crumbs)
- ▢ ¼ cup sugar (Recipe omits sugar from crust ingredients but most have it; assuming based on “light-brown sugar” in similar recipe provided previously. I will stick to what’s provided this time and omit).
- ▢ Kosher salt (pinch, from directions which mention it)
- ▢ 6 tablespoons (¾ stick) unsalted butter, melted
Ice Cream Layers:
- ▢ 1 (1.5-quart) carton mango ice cream
- ▢ 1 (1.5-quart) carton vanilla ice cream
- ▢ 1 (1.5-quart) carton orange-vanilla ice cream (or orange sherbet)
- ▢ (Note: Recipe uses half of each carton, then repeats, so 1.5 quarts of each is more than needed for one cake. A standard pint (1.5 cups) or quart of each would be more typical. Will proceed with recipe as written, implying large quantities or multiple cakes could be made).
Whipped Cream Topping:
- ▢ 1 cup cold heavy cream
- ▢ 2 tablespoons confectioners’ sugar (powdered sugar)
- ▢ ½ teaspoon pure vanilla extract
For the Pan & Garnish:
- ▢ Butter, for greasing the pan
- ▢ Thin lime wedges, fresh fruit, or sprinkles for garnish (optional)

Step-by-Step Instructions
(Prep Time: ~45 mins, spread out | Freeze Time: 6+ hours | Total Time: ~7+ hours)
1. Prepare the Pan with a Parchment Collar:
- Butter the bottom and sides of an 8-inch springform pan.
- Cut a 7-by-26-inch strip of parchment paper. Press this long strip firmly around the inside wall of the springform pan. The paper should extend several inches above the rim of the pan – this is the “collar” that will allow you to build a tall cake with beautiful, straight sides.
- Lock the springform ring to secure the paper tightly against the pan’s side.
2. Make and Freeze the Crust:
- Place the 10 graham cracker sheets in a food processor and pulse until they are finely ground.
- Add a pinch of kosher salt and the 6 tablespoons of melted butter to the food processor. Pulse until the crumbs are evenly coated and the mixture is combined.
- Press this mixture firmly and evenly into the bottom of the prepared springform pan. Use the back of a spoon or a flat-bottomed glass to create a compact crust.
- Place the pan in the freezer until the crust is firm, about 10-15 minutes.
3. Layer the Ice Cream (Patience is Key!):
- First Layer (Mango): While the crust freezes, take the carton of mango ice cream out to soften slightly at room temperature. Cut the carton in half with a serrated knife. Return one half to the freezer. Transfer the other half to the bowl of a stand mixer fitted with the paddle attachment. Beat on medium speed just until it becomes smooth and spreadable, but not melted. Quickly spread this mango ice cream evenly onto the frozen crust with an offset spatula. Place the cake back in the freezer until the mango layer is firm, about 30 minutes to 1 hour.
- Second Layer (Vanilla): Rinse and chill the mixer bowl. Repeat the process with half of the vanilla ice cream carton, spreading it over the firm mango layer. Return the cake to the freezer until firm, another 30 minutes to 1 hour.
- Third Layer (Orange-Vanilla): Rinse and chill the mixer bowl again. Repeat the process with half of the orange-vanilla ice cream, spreading it over the firm vanilla layer. Return the cake to the freezer.
- Repeat Layers 4, 5, and 6: Once the first three layers are in place, repeat the entire process with the remaining halves of the mango, vanilla, and orange-vanilla ice cream, making sure each new layer is frozen until firm before adding the next.
- Final Freeze: After the final ice cream layer is added, cover the top of the cake with plastic wrap and freeze the entire ice cream cake until it is completely firm and solid. This will take at least 4 hours, but overnight is highly recommended.
4. Unmold and Prepare for Frosting:
- Once the cake is frozen solid, remove it from the freezer.
- Using the overhanging foil or parchment from a similar recipe (though this recipe omits that for the base, relying on the springform), or by carefully releasing the springform ring, remove the outer ring. Carefully peel away the parchment paper collar from the sides of the cake.
- Place the cake on a chilled serving plate. Place it back in the freezer while you quickly make the whipped cream frosting. (Note: The original recipe says to “lift it from the pan using the overhanging plastic,” which was from the terrine. For a springform, you just release the ring).
5. Make Whipped Cream Frosting and Finish:
- In a large, chilled bowl, combine the cold heavy cream, confectioners’ sugar, and pure vanilla extract.
- Using an electric mixer with the whisk attachment, beat the mixture on medium-high speed until stiff peaks form (when you lift the beaters, the peak stands up straight).
- Remove the frozen cake from the freezer. Quickly frost the entire cake – top and sides – with the prepared whipped cream. You can spread it smoothly with a spatula or use the back of a spoon to create decorative peaks and swirls.
- Return the frosted cake to the freezer for at least 10-30 minutes more, or until the whipped cream is firm to the touch.
6. Serve:
- To serve, let the finished ice cream cake sit at room temperature for 5-10 minutes to soften just slightly for easier slicing.
- Use a large, sharp knife dipped in hot water and wiped clean between cuts to slice the cake into wedges.
- Garnish with thin lime wedges, fresh fruit, or sprinkles, if desired. Serve immediately and enjoy your stunning homemade creation!

Troubleshooting
- Layers Blurring or Mixing Together: The previous layer was not frozen long enough before adding the next layer of softened ice cream. Be patient and ensure each layer is firm to the touch before proceeding.
- Difficulty Spreading Ice Cream: The ice cream was either too frozen or too melted. The key is to soften it just enough to be spreadable. Beating it briefly in a stand mixer as directed is a great trick to achieve the perfect consistency.
- Difficulty Removing Cake from Springform Pan Base: If the crust is sticking to the metal base, you can line the bottom with a circle of parchment paper before pressing the crust in for very easy removal.
- Whipped Cream “Melting” or Sliding off Cake: The ice cream cake was not frozen completely solid before you started frosting it. Ensure the cake is rock hard. Frosting quickly also helps.
- Parchment Collar Won’t Stay Up: Use a small piece of tape on the outside of the pan to secure the parchment paper overlap if it’s not staying put.
Tips and Variations
- Work Quickly and Keep Things Cold: This is the mantra for making ice cream cakes! Work fast when the ice cream is out of the freezer. Keep your serving platter chilled.
- The Parchment Collar is Key: Don’t skip this step if you want to build a tall, impressive cake with clean, straight sides. It acts as a temporary wall for your mold.
- Flavor Combinations are Endless!: The beauty of this recipe is its versatility. Try different combinations:
- Neapolitan: Strawberry, vanilla, and chocolate ice cream with a chocolate cookie crust.
- Mint Chocolate Chip: Layers of mint chocolate chip and chocolate ice cream with an Oreo crust.
- Coffee Toffee: Layers of coffee and vanilla ice cream with crushed toffee bits between the layers.
- Add a Crunch Layer: For extra texture, you can add a thin layer of crushed cookies, chopped nuts, or magic shell chocolate topping between some of the ice cream layers (ensure the layer below is frozen solid first).
- Make Ahead: This is the ultimate make-ahead dessert! It can be made and stored, well-wrapped, in the freezer for up to a week before your event.
Serving and Pairing Suggestions
- Serve Frozen: This cake is best served sliced directly from the freezer, after allowing it to temper for 5-10 minutes for easier slicing.
- Perfect for Birthdays and Celebrations: A wonderful and impressive alternative to a traditional baked cake, especially in the summer.
- Garnish Creatively: Top with fresh fruit that matches the ice cream flavors, chocolate shavings, sprinkles, or a drizzle of caramel or fudge sauce just before serving.
Nutritional Information
(Note: Estimated, per slice, assuming 12 slices. This is a very rich and indulgent dessert. Nutritional values are highly variable based on the specific brands and types of ice cream, cookies, and other ingredients used.)
- Calories: 400-600+
- Fat: 20-35g+
- Saturated Fat: 12-20g+
- Cholesterol: 60-100mg+
- Sodium: 100-200mg+
- Total Carbohydrates: 45-60g+
- Dietary Fiber: 1-2g+
- Sugars: 35-50g+ (Very high in sugar)
- Protein: 5-8g+
Stunning Mango-Orange-Vanilla Ice Cream Cake (Easy & No-Bake!)
Create a stunning, multi-layered Mango-Orange-Vanilla Ice Cream Cake! This easy no-bake recipe features layers of ice cream on a graham cracker crust, all frosted with fluffy whipped cream.
Ingredients
(Based on 1x column)
Graham Cracker Crust:
- ▢ 10 graham cracker sheets (about 1 ½ cups crumbs)
- ▢ ¼ cup sugar (Recipe omits sugar from crust ingredients but most have it; assuming based on “light-brown sugar” in similar recipe provided previously. I will stick to what’s provided this time and omit).
- ▢ Kosher salt (pinch, from directions which mention it)
- ▢ 6 tablespoons (¾ stick) unsalted butter, melted
Ice Cream Layers:
- ▢ 1 (1.5-quart) carton mango ice cream
- ▢ 1 (1.5-quart) carton vanilla ice cream
- ▢ 1 (1.5-quart) carton orange-vanilla ice cream (or orange sherbet)
- ▢ (Note: Recipe uses half of each carton, then repeats, so 1.5 quarts of each is more than needed for one cake. A standard pint (1.5 cups) or quart of each would be more typical. Will proceed with recipe as written, implying large quantities or multiple cakes could be made).
Whipped Cream Topping:
- ▢ 1 cup cold heavy cream
- ▢ 2 tablespoons confectioners’ sugar (powdered sugar)
- ▢ ½ teaspoon pure vanilla extract
For the Pan & Garnish:
- ▢ Butter, for greasing the pan
- ▢ Thin lime wedges, fresh fruit, or sprinkles for garnish (optional)
Instructions
(Prep Time: ~45 mins, spread out | Freeze Time: 6+ hours | Total Time: ~7+ hours)
1. Prepare the Pan with a Parchment Collar:
- Butter the bottom and sides of an 8-inch springform pan.
- Cut a 7-by-26-inch strip of parchment paper. Press this long strip firmly around the inside wall of the springform pan. The paper should extend several inches above the rim of the pan – this is the “collar” that will allow you to build a tall cake with beautiful, straight sides.
- Lock the springform ring to secure the paper tightly against the pan’s side.
2. Make and Freeze the Crust:
- Place the 10 graham cracker sheets in a food processor and pulse until they are finely ground.
- Add a pinch of kosher salt and the 6 tablespoons of melted butter to the food processor. Pulse until the crumbs are evenly coated and the mixture is combined.
- Press this mixture firmly and evenly into the bottom of the prepared springform pan. Use the back of a spoon or a flat-bottomed glass to create a compact crust.
- Place the pan in the freezer until the crust is firm, about 10-15 minutes.
3. Layer the Ice Cream (Patience is Key!):
- First Layer (Mango): While the crust freezes, take the carton of mango ice cream out to soften slightly at room temperature. Cut the carton in half with a serrated knife. Return one half to the freezer. Transfer the other half to the bowl of a stand mixer fitted with the paddle attachment. Beat on medium speed just until it becomes smooth and spreadable, but not melted. Quickly spread this mango ice cream evenly onto the frozen crust with an offset spatula. Place the cake back in the freezer until the mango layer is firm, about 30 minutes to 1 hour.
- Second Layer (Vanilla): Rinse and chill the mixer bowl. Repeat the process with half of the vanilla ice cream carton, spreading it over the firm mango layer. Return the cake to the freezer until firm, another 30 minutes to 1 hour.
- Third Layer (Orange-Vanilla): Rinse and chill the mixer bowl again. Repeat the process with half of the orange-vanilla ice cream, spreading it over the firm vanilla layer. Return the cake to the freezer.
- Repeat Layers 4, 5, and 6: Once the first three layers are in place, repeat the entire process with the remaining halves of the mango, vanilla, and orange-vanilla ice cream, making sure each new layer is frozen until firm before adding the next.
- Final Freeze: After the final ice cream layer is added, cover the top of the cake with plastic wrap and freeze the entire ice cream cake until it is completely firm and solid. This will take at least 4 hours, but overnight is highly recommended.
4. Unmold and Prepare for Frosting:
- Once the cake is frozen solid, remove it from the freezer.
- Using the overhanging foil or parchment from a similar recipe (though this recipe omits that for the base, relying on the springform), or by carefully releasing the springform ring, remove the outer ring. Carefully peel away the parchment paper collar from the sides of the cake.
- Place the cake on a chilled serving plate. Place it back in the freezer while you quickly make the whipped cream frosting. (Note: The original recipe says to “lift it from the pan using the overhanging plastic,” which was from the terrine. For a springform, you just release the ring).
5. Make Whipped Cream Frosting and Finish:
- In a large, chilled bowl, combine the cold heavy cream, confectioners’ sugar, and pure vanilla extract.
- Using an electric mixer with the whisk attachment, beat the mixture on medium-high speed until stiff peaks form (when you lift the beaters, the peak stands up straight).
- Remove the frozen cake from the freezer. Quickly frost the entire cake – top and sides – with the prepared whipped cream. You can spread it smoothly with a spatula or use the back of a spoon to create decorative peaks and swirls.
- Return the frosted cake to the freezer for at least 10-30 minutes more, or until the whipped cream is firm to the touch.
6. Serve:
- To serve, let the finished ice cream cake sit at room temperature for 5-10 minutes to soften just slightly for easier slicing.
- Use a large, sharp knife dipped in hot water and wiped clean between cuts to slice the cake into wedges.
- Garnish with thin lime wedges, fresh fruit, or sprinkles, if desired. Serve immediately and enjoy your stunning homemade creation!
Recipe Summary and Q&A
Summary: This Mango-Orange-Vanilla Ice Cream Cake is a no-bake frozen dessert built in an 8-inch springform pan lined with a tall parchment paper collar. A homemade graham cracker crust is pressed into the bottom and frozen. Six distinct layers of ice cream are then added one by one, using softened and beaten mango, vanilla, and orange-vanilla ice creams, with a freezing period between each layer to ensure they remain separate. Once fully frozen solid, the cake is unmolded, the parchment is removed, and the entire cake is frosted with a homemade sweetened whipped cream. The finished cake is frozen again briefly to set the frosting before slicing and serving.
Q&A:
- Q: Why do I need to beat the ice cream in a mixer?
- A: While it seems counterintuitive, letting the ice cream soften slightly and then beating it briefly with a paddle attachment makes it a much smoother, more uniform, and easily spreadable consistency. This helps you create beautiful, even layers in your cake without having to fight with a hard block of ice cream.
- Q: Can I make this without a springform pan?
- A: A springform pan is highly recommended because it allows you to easily remove the sides of the pan from the delicate ice cream cake. You could try building it in a standard 9×5-inch loaf pan lined very well with a plastic wrap sling (with generous overhang) similar to the “Tropical Ice Cream Terrine,” but the shape and layering would be different.
- Q: My ice cream layers are blending together. What did I do wrong?
- A: You likely didn’t freeze the previous layer long enough before adding the next one. Each layer of softened ice cream needs to be frozen until it is firm to the touch (at least 30 minutes to an hour) before you add the next layer on top. Patience is key!
- Q: How long does the finished cake need to be frozen before I can frost and serve it?
- A: After the final ice cream layer is added, the cake should freeze for at least 4 hours, but overnight is even better, to ensure it is completely solid. This will make it stable enough to unmold and frost without it melting or losing its shape.

