Is there any dessert more beautiful, more classic, or more quintessentially homemade than a stunning Apple Pie with a perfectly woven lattice crust? It may look like an impressive creation from a professional pastry chef, but this is your ultimate, step-by-step guide to mastering the art of the lattice and creating a true, show-stopping holiday centerpiece at home.
This isn’t just a recipe; it’s a complete masterclass in creating a flawless, from-scratch apple pie. We’ll guide you through the secrets to an incredibly flaky, all-butter crust and a game-changing technique for a thick, jammy, apple filling that will never, ever be watery or create a soggy bottom. But the real star is our detailed, foolproof tutorial on weaving a beautiful lattice top that will make you feel like a true baker.
Table of Contents
Table of Contents
Recipe Overview: The Ultimate Holiday Showstopper
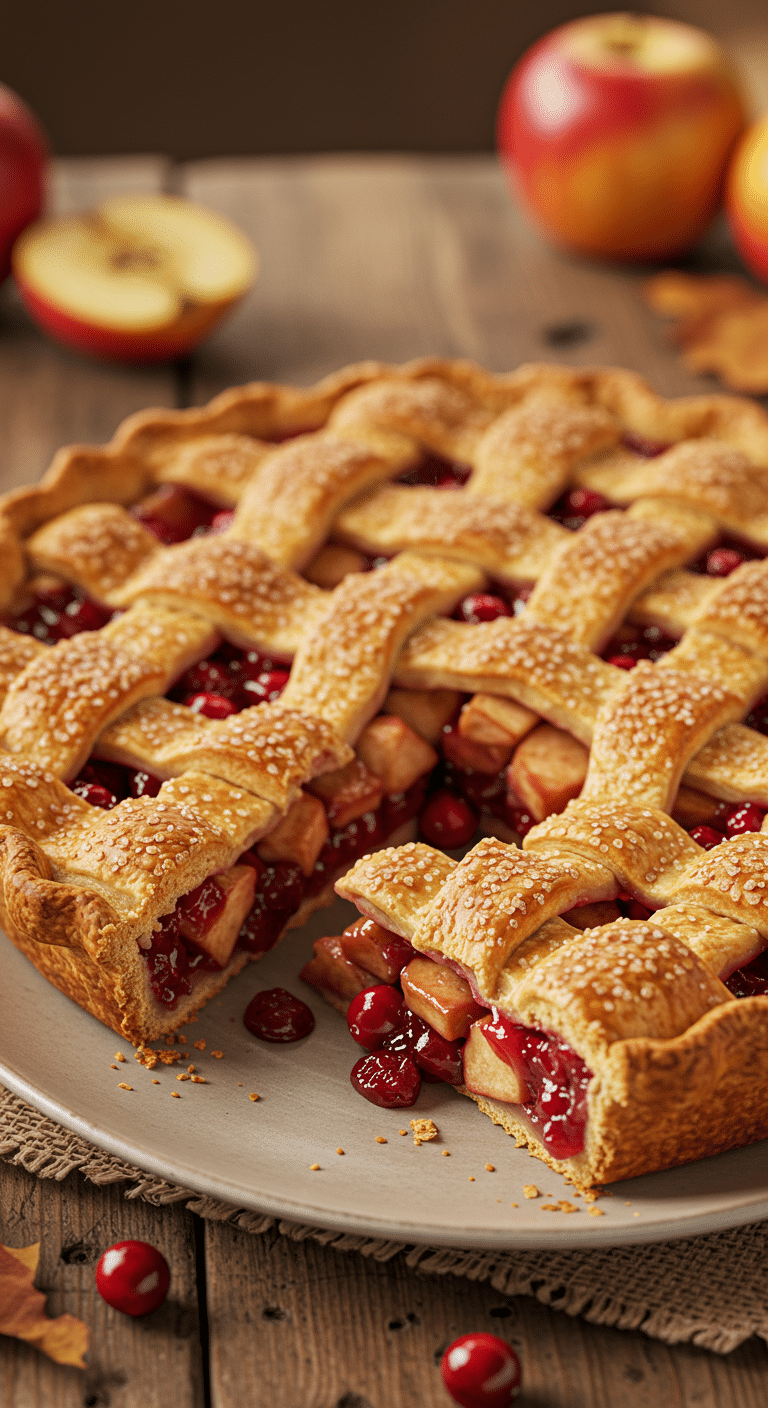
What makes this Lattice Apple Pie so spectacular is its perfect combination of a classic, comforting flavor and a stunning, bakery-worthy presentation. The from-scratch, all-butter pie crust provides a rich and flaky base and topping. The professional technique of pre-cooking the apples and reducing their juices guarantees a perfectly set, non-runny filling every single time. And the beautiful, woven lattice crust is the ultimate, elegant finish that makes this pie a true work of art.
| Metric | Time / Level |
| Total Time | 5 hours (includes chilling and cooling) |
| Active Prep Time | 1 hour |
| Difficulty Level | Intermediate |
| Servings | 8 slices |
The Essential Ingredients for a Perfect Pie
This recipe is built from classic, high-quality ingredients where technique makes all the difference.
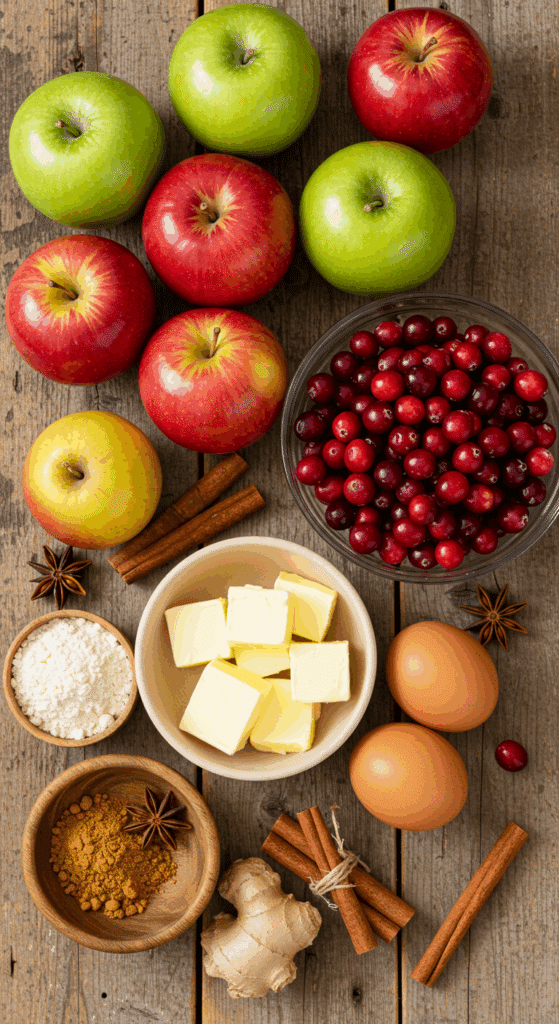
- The All-Butter Pie Crust: The flaky, tender foundation of our pie.
- Cold Unsalted Butter: The absolute key to a flaky crust. It is crucial that your butter is very cold and cut into small pieces. These cold pieces of butter will create steam as the pie bakes, which is what creates all those beautiful, flaky layers.
- The Binders: An egg adds richness and structure to the dough, while a touch of cold water helps to bind everything together.
- The “No-Soggy-Bottom” Apple Filling:
- Baking Apples: For the best pie with a complex flavor and a texture that is tender but not mushy, it’s best to use a mix of different firm baking apples, like the suggested Golden Delicious, Cortland, or Mutsu. A combination of a firm-sweet apple (like a Honeycrisp) and a firm-tart apple (like a Granny Smith) is a fantastic choice.
- Lemon Juice: A squeeze of fresh lemon juice not only adds a bright, tart flavor that balances the sweetness but also prevents the apples from browning as you peel and slice them.
- The Thickener & Spices: A little bit of cornstarch is stirred into the finished filling to help thicken the juices into a beautiful, jammy sauce. A classic and comforting blend of cinnamon and ginger provides the perfect warm spice notes.

Step-by-Step to the Best Lattice Apple Pie
This recipe is a rewarding baking project. Follow these detailed steps for a perfect, show-stopping result.
Part 1: The Perfect All-Butter Pie Crust
Step 1: In a food processor, pulse the 2 1/2 cups of all-purpose flour, the 4 teaspoons of sugar, and the 1/4 teaspoon of salt to combine. Add the 14 tablespoons of cold, diced butter and pulse until you have pea-sized pieces.
Step 2: Add the beaten egg and cold water mixture and pulse just until the dough begins to come together.
Step 3: Turn the dough out, divide it in half, form each half into a flattened disc, and wrap it tightly in plastic wrap. Refrigerate for at least 1 hour.
Part 2: The Perfect No-Soggy-Bottom Apple Filling
Step 1: In a large bowl, put the 2 tablespoons of fresh lemon juice. Peel, core, and cut your apples into 1/2-inch thick wedges. As you slice them, toss them in the bowl with the lemon juice. Add the 2/3 cup of sugar and toss to combine evenly.
Step 2: In a large skillet, melt the 4 tablespoons of unsalted butter over medium-high heat. Add the sugared apples and cook, stirring, for about 2 minutes, until the sugar has dissolved and the mixture begins to simmer.
Step 3: Cover the skillet, reduce the heat to medium-low, and let the apples cook for about 7 minutes, until they have softened slightly and have released most of their juices.
Step 4: Strain the apples in a colander set over a medium bowl, catching all of that delicious apple juice.
Step 5: Return the juices to the skillet. Add the cinnamon and ginger and simmer the juices over medium heat for about 10 minutes, until the liquid has reduced and thickened into a beautiful, lightly caramelized syrup.
Step 6: In a medium bowl, toss the slightly cooled, pre-cooked apples with the reduced juice. Stir in the 2 tablespoons of cornstarch. Let this filling cool completely.
Part 3: A Step-by-Step Guide to Weaving the Perfect Lattice
Step 1: On a lightly floured surface, roll out one of your chilled dough discs into a 12-inch circle. Ease the dough into a 9-inch pie pan.
Step 2: Spoon the completely cooled apple filling into the pie shell.
Step 3: Roll out the second disc of dough into a similar-sized circle. Use a pizza cutter or a fluted pastry wheel to cut the dough into even, 1/2-inch thick strips.
Step 4 (Weave the Lattice):
- Lay about 5-6 strips vertically and evenly spaced across the pie.
- Fold back every other vertical strip (the 1st, 3rd, 5th, etc.) to the halfway point.
- Lay one of the remaining strips horizontally across the center of the pie.
- Unfold the vertical strips back over the new horizontal strip.
- Now, fold back the opposite set of vertical strips (the 2nd, 4th, 6th, etc.).
- Lay another horizontal strip across the pie, parallel to the first one.
- Unfold the vertical strips. Repeat this over-under pattern until the entire pie top is woven.
Step 5: Trim the excess ends from the strips of dough. Pinch the bottom crust edge and the lattice edge together, and then flute the edge decoratively with your fingers.
Part 4: Chilling and Baking Your Masterpiece
Step 1: Brush the entire surface of the lattice and the edges with a beaten egg wash and then sprinkle generously with coarse sugar. Refrigerate the assembled pie for at least 30 minutes to chill the pastry one last time.
Step 2: While the pie is chilling, place a baking sheet on a rack positioned in the lower third of your oven and preheat the oven to 375°F (190°C).
Step 3: Bake the chilled pie on the preheated baking sheet for 50 to 60 minutes. The pie is perfectly done when the crust is a deep golden brown and the filling is thick and bubbling vigorously up through the lattice.
Pro Tip: If the edges of your crust begin to brown too quickly, you can cover them with a pie shield or strips of aluminum foil.
Step 4 (The Most Important Step!): Let the pie cool on a wire rack for at least 3 hours before slicing. This crucial step allows the hot, jammy filling to cool down and set up properly, which is the secret to a perfect, clean slice.

The Perfect Lattice Apple Pie (A Step-by-Step Guide!)
A from-scratch recipe for a classic apple pie with a beautiful, decorative lattice crust. The recipe includes instructions for a homemade all-butter pie dough, which can be prepared either by hand or in a food processor. A key feature is the unique filling method, where the apples are first pre-cooked on the stovetop to release their juices. These juices are then strained and reduced into a thick, caramelized syrup before being tossed back with the apples and spices. This technique creates a deeply flavorful, not-too-watery filling and helps prevent a soggy bottom crust.
- Prep Time: 50 minutes
- Cook Time: 1 hour 20 minutes
- Total Time: 7 hours 40 minutes (includes chilling and cooling)
- Yield: 8 servings
- Category: Dessert
- Method: Baking
- Cuisine: American
- Diet: Vegetarian
Ingredients
- For the Dough:
- 2 1/2 cups all-purpose flour
- 4 teaspoons sugar
- 1/4 teaspoon fine salt
- 14 tablespoons (1 3/4 sticks) cold unsalted butter, diced
- 1 large egg, lightly beaten with 2 tablespoons cold water
- Up to 1 tablespoon more cold water
- For the Filling:
- 2 tablespoons freshly squeezed lemon juice
- 3 pounds baking apples (e.g., Golden Delicious, Cortland, Mutsu)
- 2/3 cup sugar, plus more for sprinkling
- 1/2 stick (4 tablespoons) unsalted butter
- 1/4 teaspoon ground cinnamon
- Generous pinch of ground nutmeg
- 1 large egg, lightly beaten (for egg wash)
Instructions
- Make the Dough: In a food processor or a large bowl, combine the flour, sugar, and salt. Add the cold, diced butter and pulse or work with your fingers until the mixture resembles coarse meal with pea-sized bits of butter. Add the egg and water mixture and mix until the dough just comes together.
- Divide the dough in half, form each into a disk, wrap in plastic, and refrigerate for at least 1 hour.
- Make the Filling: Peel, core, and slice the apples. In a large bowl, toss them with the lemon juice and 2/3 cup of sugar.
- Melt the butter in a large skillet over medium-high heat. Add the apples and cook, covered, for about 7 minutes until they soften and release their juices.
- Strain the apples in a colander set over a bowl, catching the juices. Return the juices to the skillet and simmer for about 10 minutes, until thickened and lightly caramelized.
- Toss the cooked apples with the reduced juice and spices. Let the filling cool completely (at least 1 hour).
- Assemble the Pie: Preheat the oven to 375°F and place a baking sheet on a lower rack.
- On a floured surface, roll one dough disk into a 12-inch circle and fit it into a 9-inch pie pan. Roll out the second disk and cut it into 1/2-inch thick strips.
- Pour the cooled apple filling into the crust. Weave the dough strips over the filling to create a lattice top. Trim and crimp the edges.
- Brush the lattice and edges with the egg wash and sprinkle with sugar. Refrigerate the assembled pie for at least 30 minutes.
- Bake: Bake the pie on the preheated baking sheet for 50 to 60 minutes, until the crust is golden and the filling is bubbly.
- Let the pie cool on a wire rack for at least 3 hours before serving to allow the filling to set.
Notes
- This pie requires multiple chilling steps for the dough and the final assembled pie, which is key to a flaky crust and a well-set filling.
- The technique of pre-cooking the apples and reducing their juices is crucial for a thick, flavorful filling that won’t make the bottom crust soggy.
- Baking the pie on a preheated baking sheet helps to ensure a crisp bottom crust and catches any potential drips from the bubbling filling.
Storage and Make-Ahead Tips
An apple pie is a fantastic dessert to make ahead for a holiday or special occasion.
- Make-Ahead: The pie dough can be made up to 3 days in advance and stored, well-wrapped, in the refrigerator. The apple filling can also be made completely up to 2 days in advance and stored in an airtight container in the refrigerator. You can also assemble the entire unbaked pie, cover it tightly, and refrigerate it for up to 24 hours before baking.
- Storage: Store the finished, cooled pie, covered loosely, at room temperature for up to 2 days. For longer storage, you can keep it in the refrigerator for up to 5 days.
For more recipe follow my Pinterest account
Creative Recipe Variations
- Add a Festive Cranberry Twist: For a beautiful color and a delicious sweet-tart flavor combination that is perfect for the holidays, you can add 1 to 1 1/2 cups of fresh or frozen cranberries to the skillet to cook along with the apples.
- Add a Nutty Crunch: For a wonderful, buttery crunch and extra texture, you can add 3/4 cup of toasted, chopped pecans or walnuts to the apple filling before you assemble the pie.
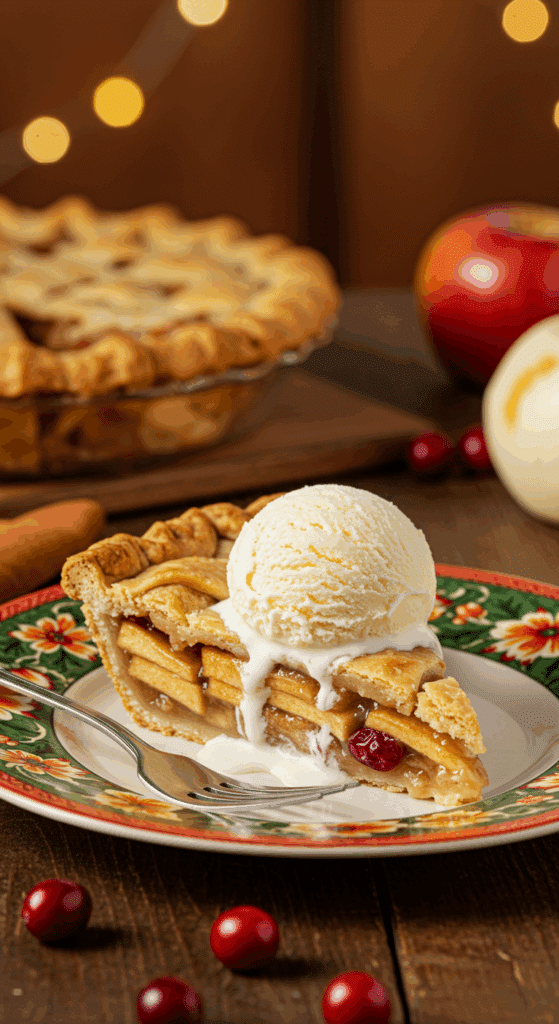
- Make it a Salted Caramel Apple Pie: For an even more decadent and delicious treat, you can serve each warm slice with a generous drizzle of your favorite store-bought or homemade salted caramel sauce.
Enjoy a True American Classic!
You’ve just created a truly special, from-scratch dessert that is the very definition of American comfort food. This perfect apple pie, with its incredibly flaky all-butter crust and its thick, jammy, and intensely flavorful filling, is a rewarding baking project that is guaranteed to be a massive hit. It’s the kind of timeless dessert that creates lasting memories.
We hope you enjoy every last, perfect, flaky, and delicious bite!
If you enjoyed making this recipe, please leave a comment below or share it with a friend who loves to bake!
Frequently Asked Questions (FAQs)
Q1: What is the secret to a lattice crust that doesn’t break or get messy?
The key is to work with cold, well-chilled dough. Cold dough is much firmer and easier to cut and handle. If your dough strips become too soft and sticky while you are weaving, don’t be afraid to place the entire pie back in the refrigerator for 10-15 minutes to firm everything up before you continue.
Q2: How do I get my lattice strips all the same width?
For perfectly uniform strips, a ruler and a pizza cutter or a fluted pastry wheel are your best friends. Simply lay your ruler on your rolled-out dough and use it as a guide to cut perfectly straight, even strips.
Q3: How does this recipe guarantee that my pie won’t have a soggy bottom crust?
The brilliant technique of pre-cooking the apples and reducing their juices is the key. By cooking the apples on the stovetop first, you are releasing a significant amount of their water before the filling ever goes into the pie crust. By then reducing that juice down to a thick syrup, you are concentrating the flavor and removing even more water. This results in a thick, jammy filling that won’t make your bottom crust soggy.
Q4: How do I know for sure when my fruit pie is fully baked?
There are two key visual cues for a perfectly baked fruit pie. First, the crust should be a deep, rich golden brown all over, not pale. Second, and most importantly, the filling should be thick and bubbling vigorously up through the openings in your lattice crust. Seeing that thick, bubbly filling is the sign that the cornstarch has been activated and the pie will set up perfectly as it cools.
Q5: Can I use a store-bought pie crust for this recipe to save time?
Yes, for a convenient shortcut, you can absolutely use a high-quality, store-bought refrigerated pie crust. The recipe will make enough for one double-crust pie.

