Can’t decide which classic pie to make for Thanksgiving this year? Are you torn between a sweet and tart Apple Pie, a gooey and nutty Pecan Pie, or a creamy and spiced Pumpkin Pie? With this incredible, show-stopping Apple-Pumpkin-Pecan Pie, you don’t have to choose! This is the ultimate holiday dessert mash-up, a legendary “three-in-one” creation that combines all of your favorite Thanksgiving flavors into one magnificent, unforgettable pie.
This isn’t just a recipe; it’s a guide to creating a true, edible centerpiece that will be the talk of your holiday feast. It may look like an ambitious project, but with a few smart shortcuts, a clear game plan, and our step-by-step guide, it’s a completely achievable and incredibly rewarding baking adventure. Get ready to bake the one pie to rule them all!
Table of Contents
Table of Contents
Recipe Overview: The Ultimate Thanksgiving Dessert
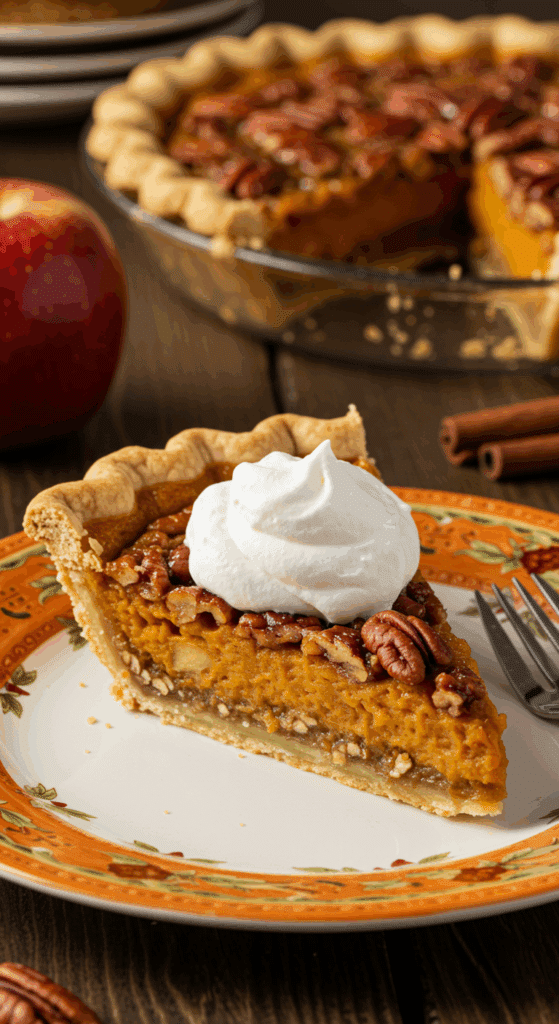
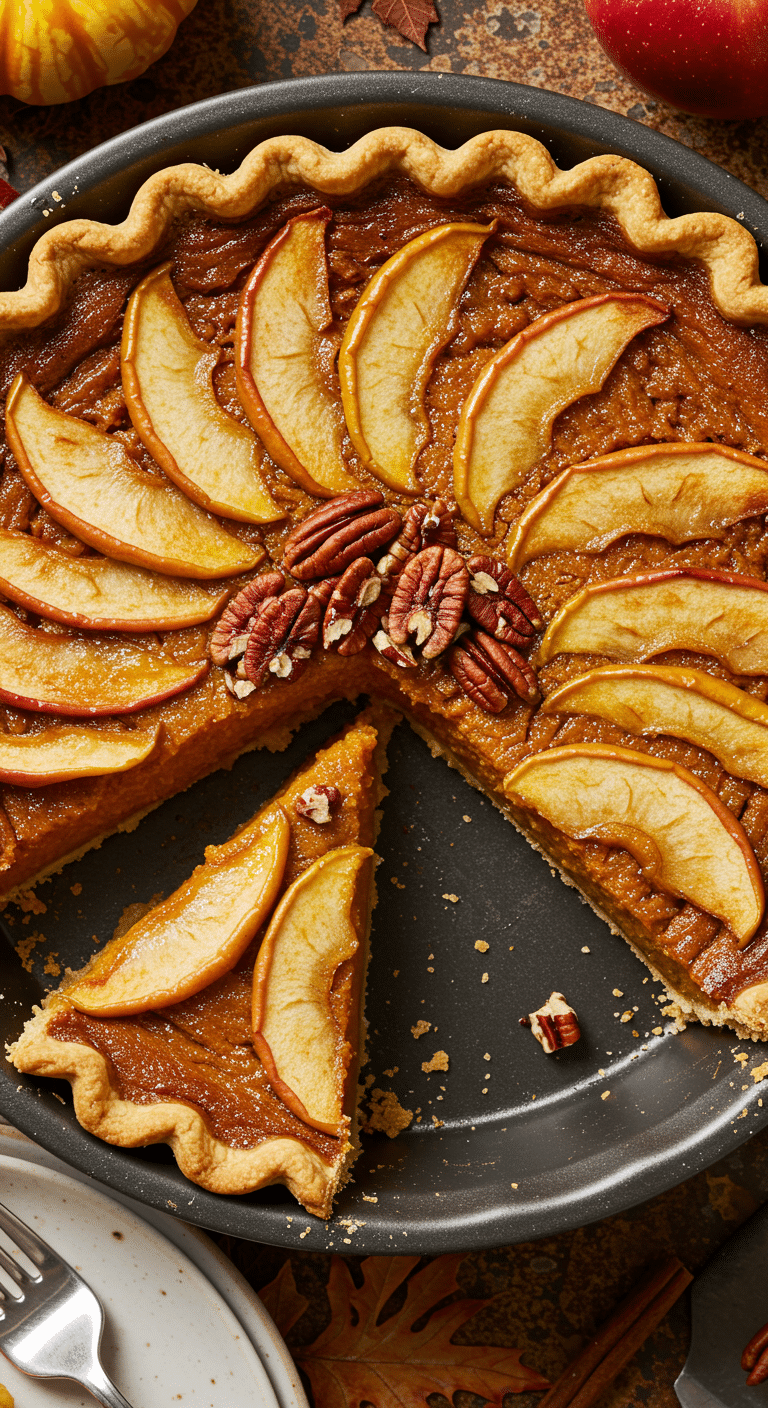
What makes this Apple-Pumpkin-Pecan Pie so legendary is its brilliant and ambitious construction, which allows three distinct pie fillings to coexist in a single, beautiful crust. The secret lies in a clever, multi-stage baking process that creates a stable foundation for each layer. The bottom is a rich and gooey pecan pie, which is then topped with a beautiful border of tender, cooked apples, and a center of silky, classic pumpkin pie custard. It’s the perfect make-ahead dessert for the host who wants to go the extra mile and truly wow their guests.
| Metric | Time / Level |
| Total Time | 5 hours (includes cooling) |
| Active Prep Time | 1 hour 30 minutes |
| Difficulty Level | Advanced |
| Servings | 10-12 |
Your Holiday Baking Game Plan (Make-Ahead Schedule)
The key to this show-stopping pie is to not do it all at once! Here is your stress-free timeline.
- Up to 3 Days Ahead: Prepare the apple pie filling completely. Let it cool and store it in an airtight container in the refrigerator.
- Up to 2 Days Ahead: Prepare the pecan pie filling and the pumpkin pie filling. Store them in separate airtight containers in the refrigerator.
- 1 Day Before Thanksgiving: Prepare and par-bake the pie crust. Bake the pecan layer. Let it cool, then assemble the apple and pumpkin layers on top. Cover and chill the assembled, unbaked pie overnight.
- On Thanksgiving Day: Simply bake the finished pie as directed!
The Essential Ingredients for This Masterpiece
This recipe is built from four perfect, from-scratch components.
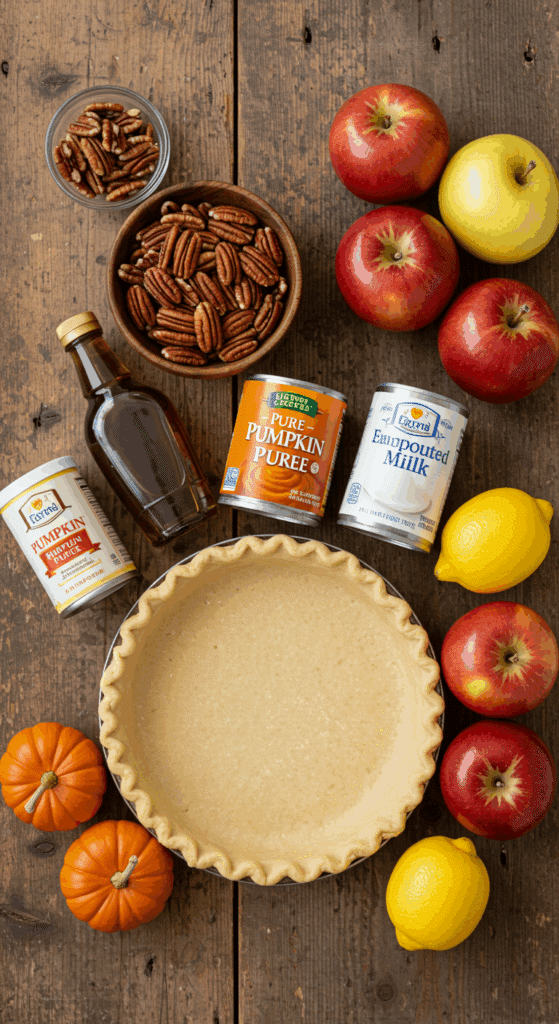
- The Pie Crust: The sturdy, flaky foundation. To make this ambitious project easy, the recipe uses a store-bought refrigerated pie crust. This is a fantastic shortcut that allows you to focus on the delicious fillings. It’s crucial to par-bake (or blind-bake) the crust to ensure it stays crisp under all those layers.
- The Pecan Pie Layer: The rich and gooey base. This is a classic, from-scratch pecan pie filling made with light corn syrup, brown sugar, eggs, and toasted pecans.
- The Apple Pie Layer: The sweet and tart border. A from-scratch, pre-cooked filling made with a mix of firm baking apples, like Granny Smith and Gala, ensures a perfect, jammy texture that isn’t watery.
- The Pumpkin Pie Layer: The creamy, spiced center. A classic, un-cooked pumpkin custard made with pure pumpkin purée, evaporated milk, eggs, and a classic pumpkin pie spice.

Step-by-Step to the Ultimate Holiday Pie
Let’s break this incredible project down into simple, manageable parts.
Part 1: Prepare and Par-Bake the Pie Crust
Step 1: First, position your oven rack in the middle of the oven and preheat to 350°F (175°C).
Step 2: On a lightly floured surface, roll out your pie dough into a 10-inch round. Ease the dough into a 9 1/2-inch deep-dish pie pan. Fold the overhanging dough under itself and crimp the edges decoratively. Chill the pie shell for 30 minutes.
Step 3: While the crust is chilling, spread your 1 1/3 cups of pecan halves on a baking sheet and bake for 8 to 10 minutes, until they are golden and fragrant. Let them cool. Coarsely chop 1/3 cup of the pecans for the final garnish and set them aside.
Step 4 (Blind Bake the Crust): Line the chilled pie crust with foil and fill it with pie weights or dried beans. Bake on a baking sheet for 15 to 18 minutes, until the edges are just barely golden.
Step 5: Carefully remove the foil and weights. Brush the bottom and edges of the dough all over with the beaten egg white. This helps to seal the crust and keep it from getting soggy. Continue to bake for another 8 to 10 minutes, until the bottom of the crust is also a light golden brown. Let the crust cool completely on a wire rack.
Part 2: Prepare the Three Classic Pie Fillings
Step 1 (The Pecan Filling): In a medium bowl, whisk together the 1/2 cup of corn syrup, the 1/3 cup of brown sugar, the 3 tablespoons of melted butter, the 1 large egg, and 1/4 teaspoon of salt.
Step 2 (The Apple Filling): In a large nonstick skillet over medium heat, melt the 2 tablespoons of butter. Add the sliced apples, the 2 tablespoons of granulated sugar, and the 1 tablespoon of lemon juice. Cook, stirring occasionally, for about 10 minutes, until the apples are soft but still hold their shape. Stir in the 1 teaspoon of flour and let the filling cool completely.
Step 3 (The Pumpkin Filling): In a medium bowl, whisk together the 1 cup of pumpkin purée, the 1/2 cup of heavy cream, the 1/3 cup of granulated sugar, the 1 large egg, and the 1/2 teaspoon of pumpkin pie spice until smooth.
Part 3: The Grand Assembly and Final Bake
Step 1 (Bake the Pecan Layer First!): Scatter the remaining 1 cup of whole, toasted pecans in the bottom of your cooled, par-baked pie shell. Pour the prepared pecan filling mixture over the pecans. Bake at 350°F for 20 to 25 minutes, until the pecan filling is just set. Transfer the pie to a wire rack and let it cool until it is just cool to the touch.
Pro Tip: This initial bake of the pecan layer is the most brilliant and crucial step of the recipe! It creates a firm, stable base inside your pie shell that will support the other two fillings and prevent the bottom crust from ever getting soggy.
Step 2 (Assemble the Top Layers): Carefully pile the cooled apple mixture up and around the outer edge of the cooled pie, directly on top of the set pecan filling. Leave about an 8-inch well in the center of the pie. This apple ring will act as a delicious “dam.”
Step 3: Pour the prepared pumpkin pie filling into the center of the pie, with the apples as a border.
Step 4 (The Final Bake): Bake the entire pie for 50 minutes to 1 hour. The pie is perfectly done when the pumpkin center is set, with just a very slight jiggle when you gently nudge the pan. If the crust edges get too brown, you can cover them with a pie crust shield or some strips of aluminum foil.
Step 5 (The Crucial Cool-Down!): Let the pie cool completely on a wire rack for at least 3-4 hours before slicing.
To serve, sprinkle the reserved 1/3 cup of chopped pecans around the pie, snug up against the apple filling. Slice and serve with generous dollops of fresh, unsweetened whipped cream.

The Ultimate “All-in-One” Apple Pumpkin Pecan Pie
An ambitious and impressive dessert, this ‘Apple-Pumpkin-Pecan Pie’ combines three classic Thanksgiving pies into a single, multi-flavored creation. The dish is built in a single, deep-dish pie crust that is first par-baked. The bottom layer is a classic gooey pecan pie filling, which is baked until just set. A ring of pre-cooked, cinnamon-spiced apple pie filling is then arranged around the edge of the pie, and the center is filled with a creamy pumpkin pie custard. The entire pie is baked again until all fillings are set, creating a unique slice with three distinct flavors.
- Prep Time: 1 hour 30 minutes
- Cook Time: 2 hours
- Total Time: 6 hours 30 minutes (includes all chilling and cooling)
- Yield: 8-12 servings
- Category: Dessert
- Method: Baking
- Cuisine: American
- Diet: Vegetarian
Ingredients
- For the Crust:
- 1 prepared pie dough round
- 1 large egg white
- For the Pecan Pie Filling:
- 1 1/3 cup pecan halves
- 1/2 cup light corn syrup
- 1/3 cup packed light brown sugar
- 3 tablespoons unsalted butter, melted
- 1 large egg
- Pinch of fine salt
- For the Apple Pie Filling:
- 3 Granny Smith apples
- 2 tablespoons granulated sugar
- 1 tablespoon lemon juice
- 2 tablespoons unsalted butter
- 1 teaspoon all-purpose flour
- For the Pumpkin Pie Filling:
- 1 cup pure pumpkin puree
- 1/2 cup heavy cream
- 1/3 cup granulated sugar
- 1 large egg
- 1/2 teaspoon pumpkin pie spice
- For Serving:
- Unsweetened whipped cream
Instructions
- Prepare the Crust: Preheat the oven to 350°F. Fit the pie dough into a 9 1/2-inch deep-dish pie pan and crimp the edges. Chill for 30 minutes.
- Line the chilled crust with foil and fill with pie weights. Bake for 15-18 minutes. Remove the foil and weights, brush the crust with the egg white, and bake for another 8-10 minutes until lightly golden. Let it cool completely.
- Make the Pecan Filling: Toast 1 1/3 cup of pecans for 8-10 minutes. Reserve 1/3 cup for garnish. Place the remaining 1 cup in the bottom of the cooled pie shell.
- Whisk the corn syrup, brown sugar, melted butter, egg, and salt. Pour this mixture over the pecans in the crust. Bake for 20-25 minutes until just set. Let cool to the touch.
- Make the Apple Filling: While the pecan layer cools, peel, core, and slice the apples. Toss with sugar and lemon juice. Melt butter in a large skillet, add the apples, and cook for about 10 minutes until tender. Stir in the flour and let the filling cool completely.
- Make the Pumpkin Filling: In a medium bowl, whisk together the pumpkin puree, heavy cream, granulated sugar, egg, and pumpkin pie spice until smooth.
- Assemble the Final Pie: Arrange the cooled apple mixture in a ring around the edge of the pie, on top of the pecan layer, leaving an 8-inch well in the center.
- Pour the pumpkin pie filling into the center well.
- Bake the entire pie at 350°F for 50 minutes to 1 hour, until the pumpkin center has a slight jiggle. If the crust browns too quickly, cover the edges with foil.
- Let the pie cool completely on a wire rack for several hours. Garnish with the reserved chopped pecans and serve with whipped cream.
Notes
- This is a complex, multi-stage recipe that requires making and cooling several different components before final assembly.
- A deep-dish pie pan is essential to accommodate all three filling layers.
- Par-baking the crust and then baking the pecan layer separately are key steps to ensure all layers are cooked properly without the bottom crust becoming soggy.
- The pie must cool completely for several hours to allow all the fillings, especially the pumpkin custard, to set properly.
Storage and Make-Ahead Tips
- Make-Ahead: As outlined in our “Game Plan” above, this is the perfect dessert to make in stages over a few days to make your holiday baking completely stress-free.
- Storage: The finished pie must be stored in the refrigerator because of the custard fillings. Cover it loosely with plastic wrap and it will keep for up to 4 days.
For more recipe follow my Pinterest account
Enjoy The Ultimate Holiday Dessert!
You’ve just created a truly epic, show-stopping dessert that is the very definition of a holiday centerpiece. This “Every Flavor” Thanksgiving Pie is a perfect symphony of all the classic tastes and textures of the season. It’s a rewarding baking project that is guaranteed to be the most memorable and most talked-about dessert you’ll ever make.
We hope you and your loved ones enjoy every last, perfect, and delicious bite!
If you enjoyed making this recipe, please leave a comment below or share it with a friend who is ready for a holiday baking adventure!
Frequently Asked Questions (FAQs)
Q1: How do the three different fillings not run into each other and make a mess?
The secret is the brilliant, multi-stage baking process! By baking the pecan pie layer first, you are creating a solid, stable “floor” inside the pie crust. The pre-cooked apple filling is very thick and jammy, so it easily forms a sturdy “border” or “dam.” This allows you to simply pour the liquid pumpkin pie filling into the center well, and everything will hold its shape beautifully as it bakes.
Q2: Is it absolutely necessary to par-bake the pie crust first?
Yes, it is the most important step for the foundation of this pie! A process called “blind-baking” or “par-baking” is the only way to ensure your bottom crust is perfectly crisp, flaky, and fully cooked. With three very wet fillings on top, an unbaked crust would become a very soggy, gummy mess.
Q3: Can I make this with a from-scratch pie crust instead of the refrigerated kind?
Yes, you absolutely can! If you have a favorite, from-scratch pie crust recipe that makes a standard single-crust pie, it will be perfect for this recipe. Just be sure you are using a deep-dish pie pan to accommodate all the delicious fillings.
Q4: Can I use different kinds of apples for the apple filling?
Yes, a mix of apples is fantastic! The recipe’s suggestion of using a mix of a firm-tart apple like Granny Smith and a firm-sweet apple like Gala or McIntosh is a perfect combination for both a complex flavor and a texture that is tender but not mushy.
Q5: What is the best way to get clean, neat slices of this pie?
The most important step is to let the pie cool completely for several hours. This allows all the different custard and fruit fillings to fully set. Then, use a long, sharp, thin-bladed knife. For extra-clean cuts, you can run the blade of the knife under hot water and wipe it completely dry between each and every slice.

