Do you want all the delicious, comforting, homemade flavor of a classic apple pie, but without the stress of a perfect pie pan, a finicky top crust, and fussy crimped edges? This incredible, from-scratch Flat Apple Pie, also known as a rustic Apple Galette, is your new best friend. It’s a stunning, free-form dessert that proves rustic is not only beautiful but also so much easier!
This isn’t just a recipe; it’s your ultimate guide to mastering the most forgiving and elegant pie you’ll ever make. We’ll show you the simple secrets to an incredibly flaky, from-scratch pie crust, and how to pile it high with a simple, sweet-tart apple filling. The beauty of a galette is in its simplicity—just fold the edges of the dough up and over the fruit to create a beautiful, golden-brown crust. It’s a show-stopping dessert that anyone can master.
Table of Contents
Table of Contents
Recipe Overview: All the Flavor of Pie, But Way Easier
What makes this Flat Apple Pie, or Apple Galette, so spectacular is its foolproof, rustic nature and its classic, crowd-pleasing flavor. A galette is a French term for a free-form tart that is baked directly on a baking sheet, which makes it perfect for bakers of all skill levels. This recipe features an incredibly flaky, from-scratch crust made with a classic combination of both butter and shortening, and a simple, fresh apple filling that bakes up into a beautiful, jammy centerpiece. It’s the perfect dessert for any fall or holiday gathering.
| Metric | Time / Level |
| Total Time | 2 hours 30 minutes |
| Active Prep Time | 30 minutes |
| Difficulty Level | Easy |
| Servings | 8 |
The Essential Ingredients for This Rustic Pie
This recipe is made from two simple, from-scratch components.
- The Perfect Flaky Pie Crust: The sturdy, yet tender foundation of our galette.
- The Fats (Butter & Shortening): This recipe uses a classic, foolproof blend for the best of both worlds. Cold unsalted butter provides a rich, delicious, savory flavor, while chilled vegetable shortening has a higher melting point, which creates an incredibly tender and extra-flaky texture that is very easy to work with.
- Ice Water & Apple Cider Vinegar: It is absolutely essential that the water you use is ice-cold. The vinegar is a classic trick that helps to tenderize the gluten, making the crust even more flaky.
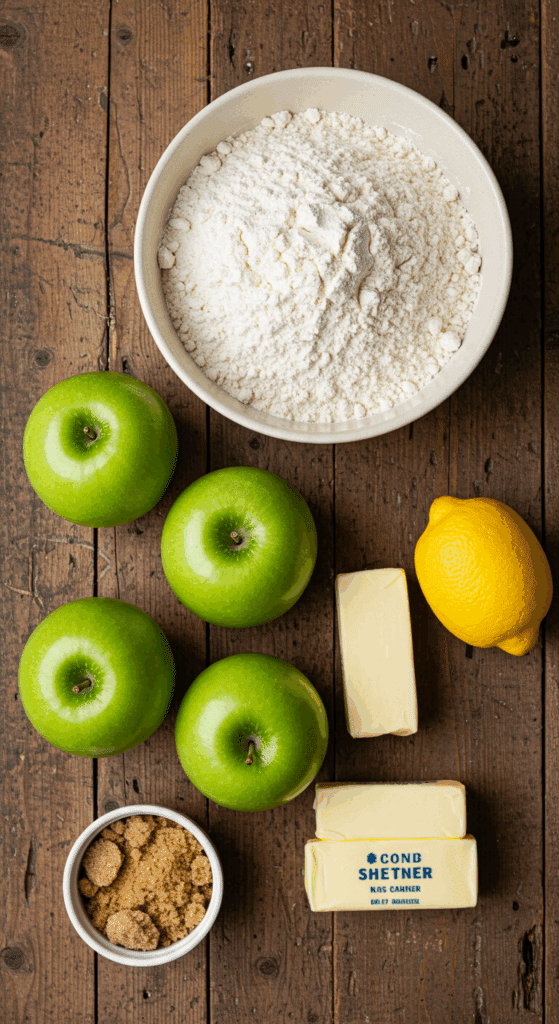
- The Fresh Apple Filling:
- Granny Smith Apples: For a classic pie or galette, a firm, tart apple like a Granny Smith is the perfect choice. Its tartness holds its own against the sugar, and its firm texture ensures it becomes tender without turning into a mushy applesauce during the long bake.
- Brown & Granulated Sugar: A combination of both sugars provides a complex sweetness, with the brown sugar adding a lovely, deep, caramel-like flavor.
- Lemon Juice & Flour: A squeeze of fresh lemon juice adds a bright, tart flavor and prevents the apples from browning. A few tablespoons of all-purpose flour is the simple secret that thickens the apple juices as they bake, creating a perfect, jammy sauce.

Step-by-Step to the Perfect Apple Galette
This recipe is a rewarding baking project. Follow these detailed steps for a perfect, show-stopping result.
Part 1: Make the Perfect Flaky Pie Crust
Step 1: In a large bowl, combine the 3 cups of all-purpose flour and the 1 teaspoon of salt.
Step 2: Add in the 1 1/2 sticks of cold butter and the 3/4 cup of chilled shortening. Using a pastry blender or your fingertips, quickly “cut” the fats into the flour until the mixture resembles coarse crumbs or tiny pebbles.
Step 3: In a small bowl, lightly beat the 1 egg with a fork. Add it to the flour mixture. Next, add the 5 tablespoons of cold water and the 1 tablespoon of distilled white vinegar.
Step 4: Stir the mixture together with a fork until it is just combined and begins to form a shaggy dough. Turn the dough out onto a clean surface and gently bring it together into a ball.
Step 5: Divide the dough in half, form each half into a flattened disc, wrap them in plastic wrap, and chill them in the refrigerator. This recipe will make two galettes!
Part 2: Prepare the Fresh Apple Filling
While the dough is chilling, prepare your filling.
In a large bowl, stir together the sliced Granny Smith apples, the 1/2 cup of brown sugar, the 1/2 cup of granulated sugar, the 2 tablespoons of all-purpose flour, the 1/4 teaspoon of salt, and the juice of 1/2 a lemon.
Toss everything together until the apple slices are evenly and thoroughly coated.
Part 3: Assemble Your Rustic Galette
Step 1: Preheat your oven to 375°F (190°C).
Step 2: On a lightly floured surface, use a rolling pin to roll one of your chilled pie crusts out into a large circle, about 12 inches in diameter. Don’t worry if the edges are a little ragged—that’s part of the rustic charm!
Step 3: Carefully transfer the rolled-out dough to a large baking sheet lined with parchment paper.
Step 4: Mound half of the prepared apple mixture into the center of the dough circle, leaving a clean, 2- to 3-inch border of dough all the way around.
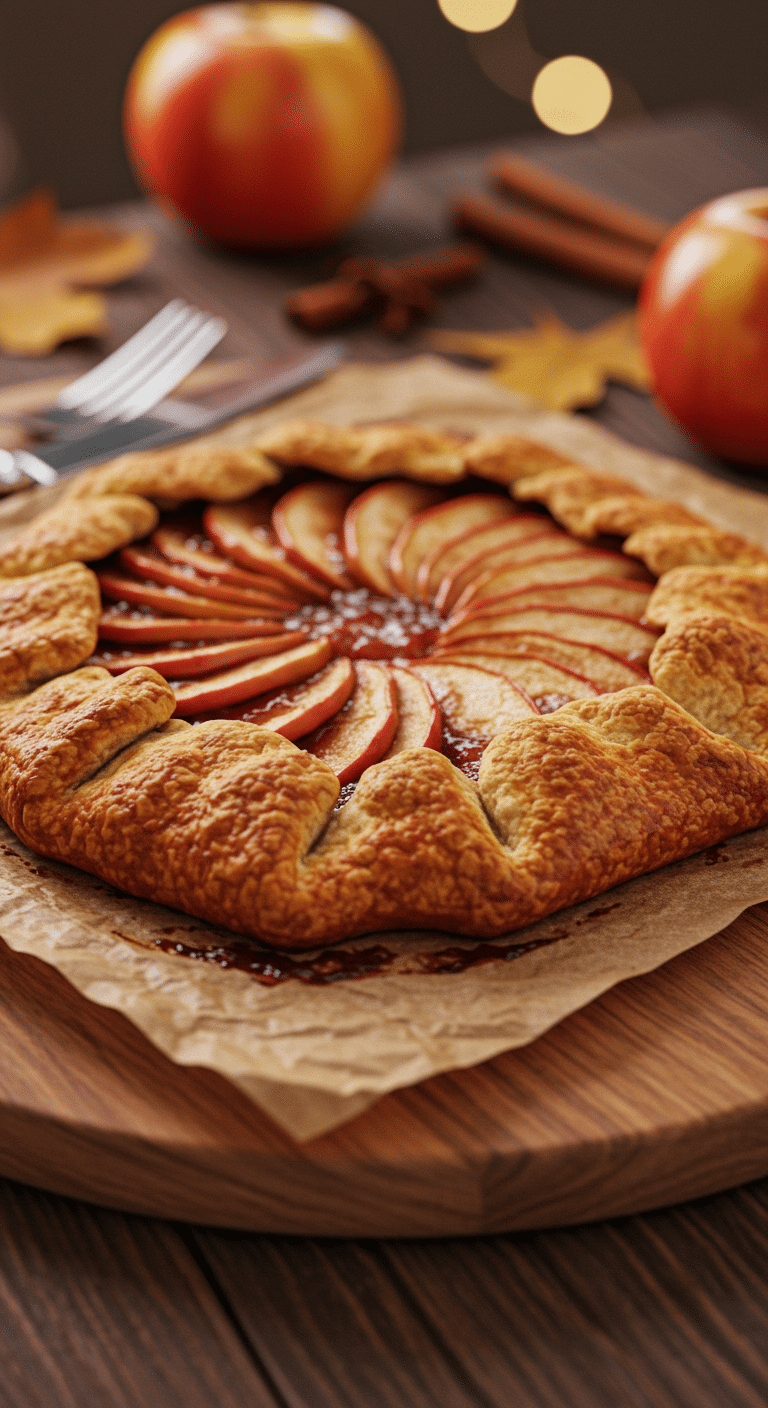
Step 5: Now for the rustic fold! Gently fold the border of the dough up and over the filling, overlapping the dough slightly as you go around the circle to create a beautiful, rustic crust that encases the apples.
Step 6: Dot the top of the exposed apples with small chunks of the 6 tablespoons of butter.
Step 7: Repeat this assembly process with the second disc of dough and the remaining half of the apple mixture on a separate baking sheet.
Part 4: Bake to Golden, Bubbly Perfection
Bake the galettes for 30 to 40 minutes.
The galettes are perfectly done when the crust is a deep golden brown and beautifully crisp, and the filling is hot and bubbling vigorously in the center. If the crust edges appear to be browning too quickly, you can cover them loosely with some strips of aluminum foil.
Let the galettes cool on the baking sheet for at least 20 minutes before slicing. This important resting period allows the hot, jammy filling to cool down and set up slightly.
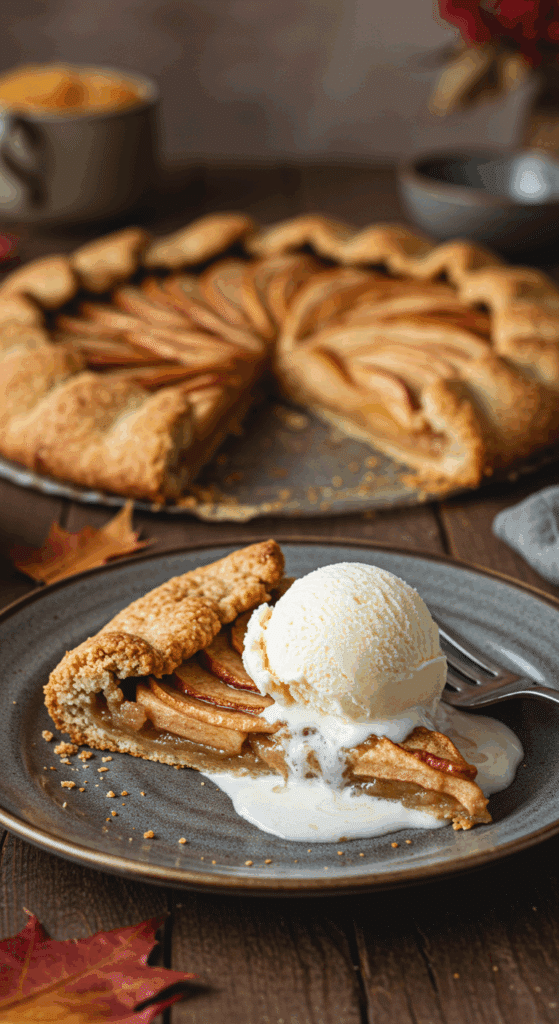
Use a pizza cutter to slice the galettes into wedges and serve warm.

The Best Rustic & Easy Apple Galette (Flat Apple Pie!)
A recipe for a rustic, free-form apple pie, also known as a galette. The recipe includes instructions for a from-scratch ‘Perfect Pie Crust’ made with a combination of butter and shortening for a flaky texture. The crust is rolled into large circles, piled with a simple filling of sliced Granny Smith apples tossed with brown and granulated sugars, and then the edges are folded up and over the filling to create a rustic border. The pies are dotted with butter and baked on a sheet pan until the filling is bubbly and the crust is golden.
- Prep Time: 40 minutes
- Cook Time: 35 minutes
- Total Time: 1 hour 45 minutes (includes chilling time)
- Yield: 8-12 servings (2 galettes)
- Category: Dessert
- Method: Baking
- Cuisine: American
- Diet: Vegetarian
Ingredients
- For the Perfect Pie Crust:
- 3 cups all-purpose flour, plus more for dusting
- 1 teaspoon salt
- 1 1/2 sticks (12 tbsp) cold butter
- 3/4 cup vegetable shortening
- 1 egg
- 5 tablespoons cold water
- 1 tablespoon distilled white vinegar
- For the Flat Apple Pie:
- 5 Granny Smith apples, peeled and sliced
- 1/2 cup firmly packed brown sugar
- 1/2 cup granulated sugar
- 2 tablespoons all-purpose flour
- 1/4 teaspoon salt
- Juice of 1/2 lemon
- 6 tablespoons butter
Instructions
- Make the Pie Crust: In a large bowl, combine the flour and salt. Add the butter and shortening. Using a pastry cutter, work the fats into the flour until the mixture resembles small pebbles.
- Lightly beat the egg, then add it to the mixture along with the cold water and vinegar. Stir until just combined.
- Divide the dough in half, form each half into a disk, wrap in plastic, and chill for at least 30 minutes.
- Assemble the Galettes: Preheat the oven to 375°F.
- In a large bowl, stir together the sliced apples, brown sugar, granulated sugar, flour, salt, and lemon juice.
- On a floured surface, roll out each chilled dough disk into a large circle. Place each circle on a large baking sheet.
- Place half of the apple mixture on one crust and the other half on the second crust, leaving a 2 to 3-inch border around the edges.
- Fold the edges of each crust up and over the apple mixture, creating a rustic, free-form pie.
- Dot the tops of the apple filling with chunks of the butter.
- Bake: Bake for 30 to 40 minutes, until the filling is golden and bubbly. If the crust browns too quickly, cover the edges with foil.
- Let the galettes cool slightly, then slice into wedges with a pizza cutter to serve.
Notes
- The instructions for making the pie crust were incomplete in the article; a standard chilling step has been added.
- This recipe makes two separate rustic pies, or galettes.
- Baking the galettes on a baking sheet is essential, as some juices may bubble out during cooking.
- The recipe suggests using a pizza cutter for easy slicing.
Storage and Make-Ahead Tips
A galette is a fantastic dessert to prepare for a dinner party.
- Make-Ahead: The pie dough can be made up to 3 days in advance and stored, well-wrapped, in the refrigerator. The apple filling can also be prepared a day in advance and stored in an airtight container in the refrigerator.
- Storage: A baked galette is at its crispiest and best on the day it is made. However, you can store any leftovers, covered loosely, at room temperature for up to 2 days.
- Reheating: To bring back some of the crispiness of the crust, you can gently reheat the galette or individual slices in a 350°F oven for about 5-10 minutes.
For more recipe follow my Pinterest account
Creative Recipe Variations
This simple and delicious galette is a wonderful base for your own creative and seasonal twists.
- Add a Drizzle of Caramel: For an even more decadent and delicious treat, you can drizzle the entire warm, finished galette with your favorite store-bought or homemade salted caramel sauce just before serving.
- Add a Nutty Crunch: For a wonderful textural contrast, you can sprinkle about 1/2 cup of chopped pecans or walnuts over the top of the apples before you fold up the crust.
- Use a Different Fall Fruit: This rustic galette method is also absolutely fantastic with firm, ripe pears, beautiful plums, or a festive mix of apples and fresh cranberries.
Enjoy Your Rustic, Elegant Dessert!
You’ve just created a truly special, show-stopping dessert that is the very definition of rustic elegance. This Flat Apple Pie, or Apple Galette, is a perfect harmony of flaky pastry and sweet, tender fruit. It’s a rewarding and impressive project that proves that sometimes, the most beautiful dishes are also the most simple to create.
We hope you enjoy every last, perfect, flaky, and delicious bite!
If you enjoyed making this recipe, please leave a comment below or share it with a friend who loves an easy, impressive dessert!
Frequently Asked Questions (FAQs)
Q1: What is the difference between a galette, a crostata, and a pie?
A pie is traditionally baked in a pie pan and often has a top and a bottom crust. A galette is the French term for a rustic, open-faced, free-form tart that is baked directly on a baking sheet, like this recipe. A crostata is the traditional Italian name for a very similar style of rustic, free-form tart. In modern baking, the terms “galette” and “crostata” are often used interchangeably.
Q2: How do I keep my galette from getting a soggy bottom?
There are two key secrets. First, be sure to use firm baking apples that are not overly juicy. Second, the flour that you toss with the apples is a key thickener that will help the juices to thicken into a jammy sauce as they bake. For extra insurance, you can also bake your galette on a preheated baking sheet, which will help to crisp up the bottom crust quickly.
Q3: What are the best apples for baking a galette?
For a galette, you want to use a firm apple that will hold its shape during baking and not turn into a mushy applesauce. A firm, tart apple like a Granny Smith is the classic and perfect choice, as its tartness beautifully balances the sweetness of the sugar. Other great, firm apple varieties that work well include Honeycrisp, Braeburn, and Pink Lady.
Q4: Can I make this ahead of time?
A galette is at its absolute crispiest and best when it is served on the day it is baked. The best make-ahead method is to prepare the components separately and store them as directed in the “Make-Ahead Tips” section above. This allows you to do a quick, 10-minute assembly on the day of your event, which will give you the best, freshest result.
Q5: Can I use a food processor to make the pie crust?
Yes, a food processor is a fantastic and fast way to make this pie crust. Simply pulse the dry ingredients to combine, add your cold fats and pulse until you have pea-sized pieces, and then add the liquid and pulse just until the dough comes together.

