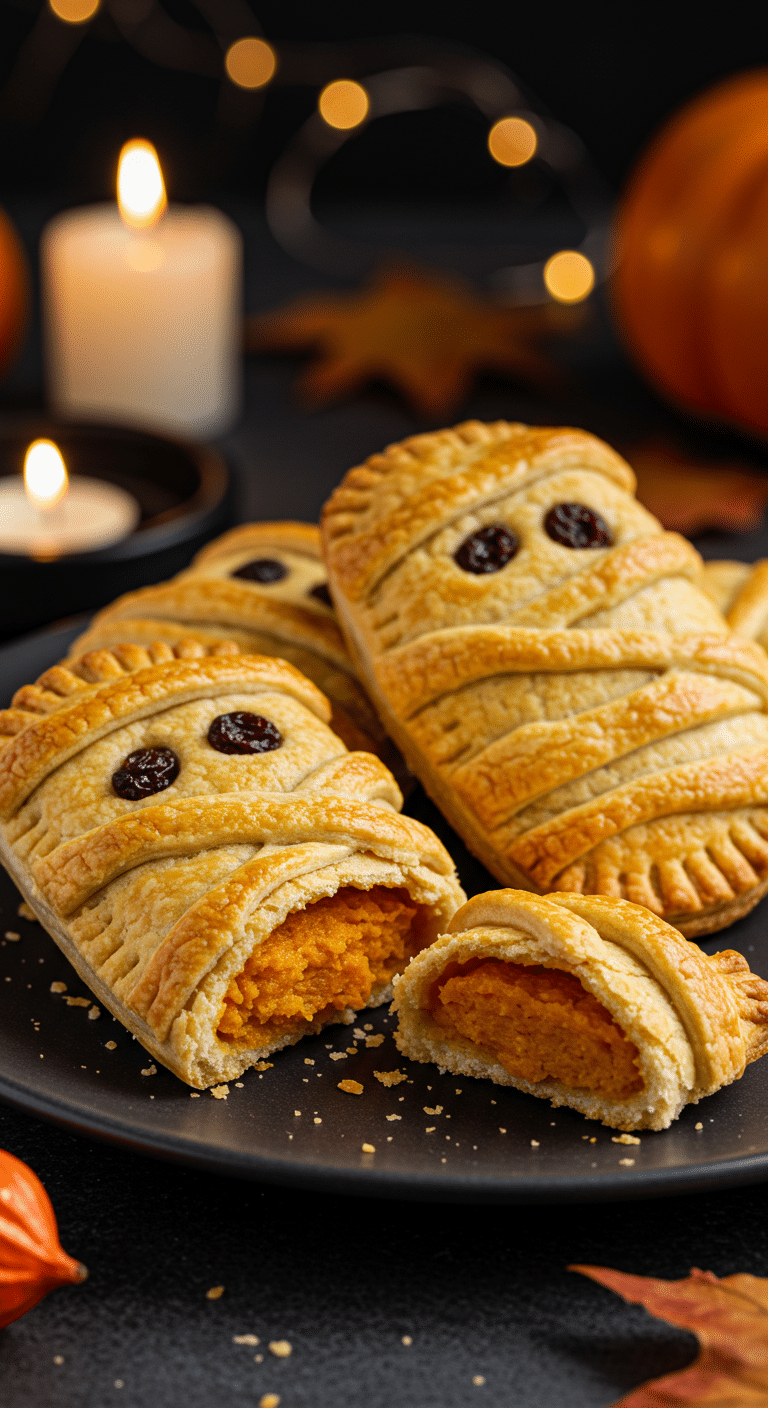
Get ready to bake up the most adorably spooky and unbelievably delicious treat for your next Halloween celebration! These incredible, super-easy “Mummy” Hand Pies are the ultimate festive bake. We’re talking a flaky, buttery pie crust, wrapped up like a spooky mummy and filled with a rich, creamy, and warmly spiced pumpkin pie filling. They are a guaranteed, crowd-pleasing hit that is as fun to make as it is to eat!
This isn’t just a recipe; it’s a guide to your new favorite Halloween tradition. We’ll show you the simple secrets to creating these spooky snacks using just a handful of store-bought shortcuts and pantry staples. Perfect for a Halloween party, a fall bake sale, or a fun weekend baking project with the kids, these mummy pies are a must-make for the spooky season.
Table of Contents
Table of Contents
Recipe Overview: The Ultimate Spooky & Sweet Halloween Treat
What makes these Mummy Hand Pies so spectacularly fun is their brilliant, easy-to-make design and their classic, crowd-pleasing flavor. This recipe is a masterpiece of festive simplicity. The “mummies” are individual, handheld pies made from a convenient, store-bought refrigerated pie crust. The filling is a luscious, no-cook, from-scratch pumpkin pie filling, made extra creamy and easy with sweetened condensed milk. The real magic, however, is in the decoration. Thin strips of the pie crust are layered over the filling to create the most incredible, flaky, buttery, and golden-brown mummy “bandages,” with two cute little raisin “eyes” peeking out.
| Metric | Time / Level |
| Total Time | 45 minutes |
| Active Prep Time | 20 minutes |
| Difficulty Level | Easy |
| Servings | 6 hand pies |
The Mummy’s Innards: The Essential Ingredients
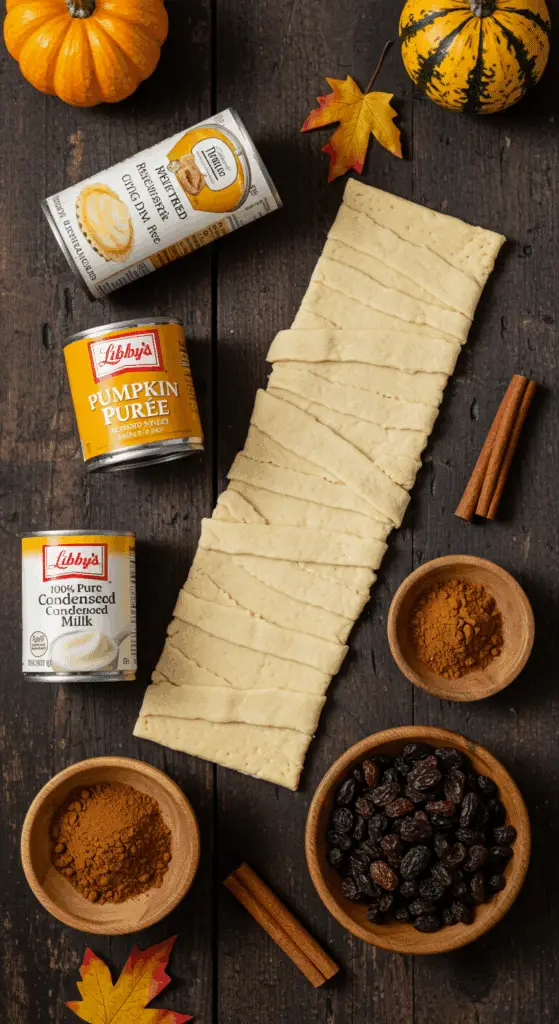
This iconic party treat uses a handful of smart shortcuts and pantry staples to create its signature spooky look and cozy fall flavor.
- The Pie Crust “Bandages”:
- Refrigerated Pie Crusts: This is the key to an incredibly easy and impressive treat! A box of your favorite brand of store-bought, refrigerated pie crusts makes a wonderfully flaky, buttery, and golden-brown pastry with zero extra work.
- The Creamy Pumpkin Pie Filling:
- Canned Pumpkin: It is crucial to use 100% pure pumpkin purée, not pumpkin pie filling, which already contains added sugars and spices.
- Sweetened Condensed Milk: This is a brilliant shortcut! A little bit of sweetened condensed milk adds the perfect amount of sweetness and an incredible, rich and creamy texture to our simple, no-cook filling.
- The Spices: A classic, warm, and perfectly balanced fall spice blend of cinnamon, ginger, and nutmeg gives the filling that signature, cozy pumpkin pie flavor.
- The Spooky Decorations:
- Raisins: A few simple raisins are all you need to create the perfect, spooky “eyes” for each of your mummies, peeking out from between the bandages.
- The Golden Finish: A simple egg wash (a beaten egg with a little water) is the professional secret to a beautiful, deep golden-brown color and a lovely, shiny finish on the baked pastry.

Step-by-Step to the Best Mummy Hand Pies
This fun and festive treat is incredibly simple to prepare.
Step 1: Make the Pumpkin Pie Filling and Prepare the Dough
Step 1: First, preheat your oven to 350°F (175°C).
Step 2: In a medium bowl, stir together the 1/4 cup of canned pumpkin, the 2 tablespoons of sweetened condensed milk, the 1/4 teaspoon of ground cinnamon, the 1/4 teaspoon of ground ginger, the 1/4 teaspoon of ground nutmeg, and a pinch of salt.
Step 3: On a lightly floured surface, roll out one of your pie crusts into a rectangle that is about 9×12 inches. Use a knife to square off the crust, and reserve the scraps for decorating. Cut the pie crust into 6 equal rectangles, each about 3×6 inches. Transfer these to a parchment-lined baking sheet.
Step 4: Roll out your second pie crust to the same thickness. Use a pizza cutter or a sharp knife to cut it into thin strips that are about 1/4-inch wide.
Part 2: Assemble and Decorate Your Mummies
Step 1: Add 1 heaping tablespoon of the prepared pumpkin filling to the center of each of your rectangular crusts on the baking sheet. Use the back of a spoon to spread out the filling, leaving about a 1/2-inch border around all the edges.
Step 2: In a small bowl, lightly beat the 1 large egg with 1 tablespoon of water. Use a pastry brush to brush the edges of the pies with the egg wash.
Step 3 (The Fun Part!): Artfully layer the thin strips of dough over the filling, varying the angle of each strip to create a rustic and spooky “mummy” look.
Step 4: Use a fork to press down and seal the edges of the pies. Use a paring knife to trim any excess overhang from the bandage strips.
Step 5: Lightly brush the tops of the hand pies (the “bandages”) with more of your egg wash.
Step 6: Add two raisins to each hand pie for the “eyes,” tucking them in between two of the bandage strips so they are peeking out.
Part 3: Bake to Golden Perfection
Bake, rotating the pan halfway through for an even color, for 20 to 25 minutes, until the mummy hand pies are a beautiful, deep golden brown and the crust is flaky.
Let the pies cool on a baking rack for a few minutes. You can serve them as is, or you can decorate them with a simple icing by whisking together 1/2 cup of confectioners’ sugar with about 1/2 teaspoon of water and drizzling it over the top.

Mummy Hand Pies (Perfect Halloween Treat!)
An easy and festive recipe for ‘Mummy Hand Pies,’ a perfect Halloween treat that uses refrigerated pie crusts as a convenient shortcut. The hand pies are filled with a simple, sweet pumpkin pie-style filling made with canned pumpkin, sweetened condensed milk, and warm spices. The ‘mummy’ effect is created by layering thin strips of pie dough in a crisscross pattern over the filling. The pies are then decorated with raisin ‘eyes,’ brushed with an egg wash, and baked until golden brown.
Ingredients
- 1/4 cup canned pumpkin
- 2 tablespoons sweetened condensed milk
- 1/4 teaspoon ground cinnamon
- 1/4 teaspoon ground ginger
- 1/4 teaspoon ground nutmeg
- Kosher salt
- 2 refrigerated pie crusts, thawed if frozen
- All-purpose flour, for dusting
- 1 large egg
- 12 raisins
- 1/2 cup confectioners’ sugar (optional, for icing)
Instructions
- Preheat the oven to 350°F. Line a baking sheet with parchment paper.
- In a medium bowl, stir together the pumpkin puree, sweetened condensed milk, cinnamon, ginger, nutmeg, and a pinch of salt to create the filling.
- On a lightly floured surface, roll out one pie crust into a 9-by-12-inch rectangle. Cut the crust into 6 equal rectangles (each about 3-by-6 inches). Place these on the prepared baking sheet.
- Roll out the second pie crust. Cut it into thin strips about 1/4 inch wide.
- Add 1 heaping tablespoon of the pumpkin filling to the center of each rectangular crust, spreading it out but leaving a 1/2-inch border.
- Lightly beat the egg with 1 tablespoon of water to make an egg wash. Brush the edges of the pies with the egg wash.
- Layer the thin strips of dough over the filling, varying the angles to create a ‘mummy’ look. Press the edges with a fork to seal and trim any overhang.
- Lightly brush the tops of the hand pies with the egg wash. Press two raisins into each hand pie for the ‘eyes.’
- Bake for 20 to 25 minutes, rotating the pan halfway through, until golden brown. Let the pies cool on a baking rack for about 5 minutes.
- If desired, make a simple icing by combining the confectioners’ sugar with 1/2 teaspoon of water. Drizzle the icing over the hand pies before serving.
Notes
- This is a fun, creative recipe that is very easy to make using store-bought refrigerated pie crusts.
- The crisscrossing strips of dough are key to creating the ‘mummy bandage’ look.
- The optional icing adds another layer of sweetness and decoration to the finished treats.
Storage and Make-Ahead Tips
These Mummy Hand Pies are the perfect make-ahead party treat!
- Make-Ahead: For a super-fast and impressive party snack, you can prepare the entire recipe and fully assemble the raw hand pies on your baking sheet up to 24 hours in advance. Simply cover the baking sheet tightly with plastic wrap and store it in the refrigerator until you are ready to bake them.
- Storage: Store any leftover baked hand pies in an airtight container at room temperature for up to 3 days.
- Reheating: The best way to reheat the hand pies and bring back some of their original flaky texture is on a baking sheet in a hot 350°F oven for just 5-8 minutes.
For more recipe follow my p interest account
Creative Recipe Variations (“Make it Your Own Potion!”)
- Use a “Bloody” Filling: For a spookier and more gruesome mummy, you can substitute the pumpkin filling with an equal amount of your favorite cherry or raspberry pie filling.
- Use a Different Spooky “Eye”: If you’re not a fan of raisins, you can easily substitute them with a mini chocolate chip or a classic, edible candy eyeball for a different but equally spooky look.
- Make some Savory Mummies: For a delicious, savory appetizer version, you can fill your hand pies with a mixture of shredded chicken, cheese, and a little bit of marinara or a buffalo chicken dip.
Enjoy Your Ultimate Spooky & Sweet Halloween Treat!
You’ve just created a truly special treat that is a perfect harmony of fun, classic ingredients and delicious, satisfying flavors. These classic “Mummy Hand Pies” are a testament to the power of a simple, creative idea to become an instant party favorite and a treasured holiday tradition. It’s a rewarding and deeply satisfying recipe that is sure to make your Halloween party a memorable one.
We hope you enjoy every last, perfect, and delicious bite!
If you enjoyed making this recipe, please leave a comment below or share it with a friend who loves an easy and impressive meal!
Frequently Asked Questions (FAQs)
Q1: What is the absolute, number one secret to a flaky, not tough, pie crust when you are working with store-bought dough?
The secret is to keep your dough as cold as possible! Be sure to work with the dough straight from the refrigerator, and to handle it as little as possible with your warm hands. This is the key that will ensure all the little pockets of fat in the dough stay solid, which is what creates those beautiful, flaky layers when it bakes.
Q2: Can I make these Halloween hand pies ahead of time for a party?
Yes, this is a perfect make-ahead appetizer! You can fully assemble the unbaked hand pies on a baking sheet, cover them tightly, and keep them in the refrigerator for up to 24 hours. When your party starts, you can simply brush them with the egg wash and pop them in the oven so they are served hot and fresh.
Q3: How do I keep my hand pies from leaking their filling in the oven?
The key is to not overfill them and to get a good seal around the edges. Be sure to leave a 1/2-inch border of dough around your filling, and after you have placed the top strips, use the tines of a fork to press down firmly and seal the bottom and top crusts together all the way around.
Q4: Can I make these in an air fryer?
Yes, an air fryer is a fantastic way to make these! Simply preheat your air fryer to 350°F (175°C). Place the assembled hand pies in a single layer in your air fryer basket. You will likely need to work in batches. Cook for about 8-10 minutes, until they are a deep golden brown and the crust is cooked all the way through.
Q5: What is the difference between canned pumpkin purée and pumpkin pie filling?
It is very important to use 100% pure pumpkin purée for this recipe. Canned pumpkin pie filling is a pre-made mixture that already contains added sugars and spices, so it would make your final filling much too sweet.

