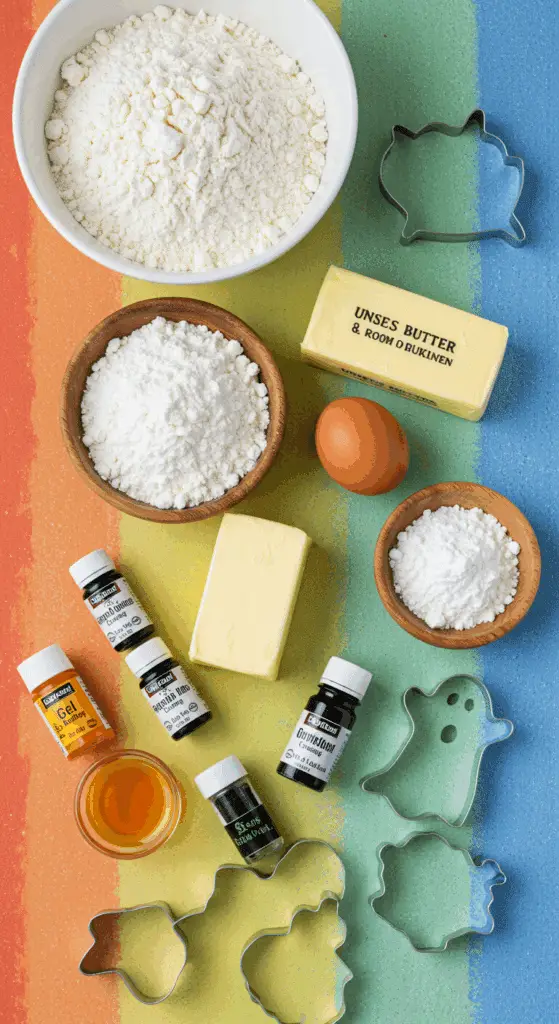
Get ready to bake up a batch of the most festive, fun, and beautifully decorated treats for your next Halloween celebration! This incredible, from-scratch Halloween Sugar Cookie recipe is your ultimate guide to creating stunning, edible works of art. We’re talking buttery, crisp-edged, and tender cutout cookies, transformed into spooky cats, ghoulish ghosts, perfect pumpkins, and classic candy corn with a simple and foolproof royal icing.
This isn’t just a recipe; it’s a guide to your new favorite Halloween baking project. We’ll show you the simple but crucial secrets to a perfect, no-spread sugar cookie that holds its shape beautifully, and the easy, professional technique of outlining and flooding with royal icing for a flawless, glossy finish. This is a show-stopping cookie that is as fun to decorate as it is to eat, making it a guaranteed hit for any ghoulish gathering.
Table of Contents
Table of Contents
Recipe Overview: The Ultimate Fun & Festive Halloween Baking Project
What makes these Halloween Sugar Cookies so spectacularly fun is their brilliant, professional-looking decoration and their classic, buttery flavor. This recipe is a masterpiece of festive creativity. The cookie itself is a classic, from-scratch no-spread sugar cookie, which is the perfect, sturdy canvas for decorating. The magic happens with the royal icing. We’ll show you how to create two simple consistencies—a thick “outline” icing and a thinner “flood” icing—which is the number one secret to that beautiful, smooth, and professional-looking finish. This guide includes detailed, step-by-step instructions for creating four adorable, classic Halloween designs: cats, ghosts, pumpkins, and candy corn.
| Metric | Time / Level |
| Total Time | 9 hours (includes chilling & drying) |
| Active Prep Time | 1 hour 30 minutes |
| Difficulty Level | Intermediate |
| Servings | About 2-3 dozen cookies |
The Cookie Decorator’s Workshop: Essential Ingredients & Tools
This iconic party treat uses a handful of classic baking staples and a few key decorating tools.
- The No-Spread Sugar Cookie Dough:
- Room Temperature Butter & Egg: It is crucial that both your butter and your egg are at room temperature. This is the secret that allows them to emulsify properly with the sugar to create a smooth, uniform dough and a tender, crisp-edged cookie.
- The Perfect Royal Icing:
- Meringue Powder: This is the secret to a simple, foolproof, and perfectly safe royal icing! Meringue powder is a pasteurized, dried egg white product that you can find in the baking aisle of most grocery stores or craft stores. It whips up with confectioners’ sugar and water to create a beautiful, smooth, and hard-drying icing that is perfect for detailed piping work.
- Gel Food Coloring: For the most vibrant, intense colors without thinning out your icing, it is essential to use a concentrated gel food coloring.
- The Key Equipment:
- Halloween Cookie Cutters: A set of fun, festive cookie cutters is essential for this project.
- Piping Bags & Tips: For the most control and the neatest results, it is highly recommended to use disposable piping bags and a few small, round decorating tips (like a #1 and a #2 tip).
The Dark Arts of Cookie Decorating: The Secret to Perfect No-Spread Cookies
The number one, non-negotiable secret to perfect cutout cookies that hold their shape and have sharp, clean edges is to keep your dough cold. This recipe brilliantly incorporates multiple chilling steps. Chilling the dough solidifies the butter, which is the key that prevents your cookies from spreading out into sad, unrecognizable blobs in the hot oven.

Step-by-Step to the Best Halloween Sugar Cookies
This fun and festive project is a joy to prepare.
Part 1: The No-Spread Sugar Cookies
Step 1: In a medium bowl, whisk together the 2 1/2 cups of all-purpose flour, the 1/4 teaspoon of baking powder, and the 1/4 teaspoon of fine salt. Step 2: In the bowl of a stand mixer, beat the 1 1/2 sticks of room temperature butter and the 3/4 cup of granulated sugar on a medium speed for about 5 minutes, until the mixture is very light and fluffy. Step 3: Beat in the 1 large, room temperature egg and the 1 teaspoon of pure vanilla extract until the mixture is creamy. Step 4: Reduce the mixer speed to low and gradually add the flour mixture, beating until it is just combined. Step 5: Divide the dough in half, pat each piece into a 1-inch thick disk, and wrap each one in plastic wrap. Refrigerate until the dough is firm, which will take about 1 hour. Step 6: Position your oven racks in the upper and lower thirds of the oven and preheat to 350°F (175°C). Line two baking sheets with parchment paper. Step 7: Roll out one disk of the chilled dough between two sheets of parchment paper until it is about 1/8-inch thick. Cut out your desired Halloween shapes with cookies cutters and arrange them about 2 inches apart on your prepared baking sheets. Step 8: Bake for 10 to 12 minutes, rotating the pans halfway through, until the cookies are just turning a light golden brown on the bottom. Let the cookies cool completely on a wire rack.
Part 2: The Royal Icing and the Art of Decorating
Step 1: While the cookies are cooling, prepare your icing. In the bowl of a stand mixer, beat the 4 cups of confectioners’ sugar, the 1/4 cup of meringue powder, and 1/3 cup of water on a medium-high speed for 5 to 6 minutes, until the mixture is very thick and holds stiff peaks. Step 2: Divide your icing into small bowls and use your gel food coloring to create your desired colors (black, white, orange, yellow, green). Step 3 (The Secret to a Perfect Finish!): For each color, you will need two consistencies. The thick icing that you have now is your “outline” icing. Transfer some of this thick icing to a piping bag with a very fine, #1 round tip. To make your “flood” icing, add a very small amount of water (about 1/4 teaspoon at a time) to the remaining icing in the bowl until it is the consistency of honey. Transfer this thinner, flood icing to a piping bag with a slightly larger, #2 round tip. Step 4 (The Fun Part!): To decorate your cookies, first use your thick outline icing to pipe a border around the edge of your cookie shape. Then, immediately use your thinner flood icing to fill in the center of that border. You can use a toothpick to help spread the flood icing and to pop any air bubbles. Step 5: Let your flooded cookies dry and harden completely before you add any of the final, detailed decorations on top. This can take 6 hours, or up to overnight.
Detailed Decorating Instructions:
- For the Cats: Outline and flood the cat shape with black icing. Let it harden completely. Then, use a thick yellow icing to pipe on two pointy eyes.
- For the Ghosts: Outline and flood the ghost shape with white icing. Let it harden completely. Then, use a thick black icing to pipe on a spooky face.
- For the Pumpkins: Outline and flood the pumpkin shape with orange icing. Let it harden completely. Then, use a thick green icing to pipe on a stem and some curly vines.

Halloween Sugar Cookies (with Royal Icing!)
A from-scratch recipe for classic, decorated ‘Halloween Sugar Cookies.’ This project features a simple butter and sugar cut-out cookie dough that is chilled, rolled, and cut into various festive shapes like ghosts, cats, and pumpkins. The baked and cooled cookies are then elaborately decorated using a homemade royal icing made with meringue powder. The recipe provides detailed, multi-step instructions for creating intricate designs for each shape, utilizing both thick icing for outlining and a thinner ‘flood’ icing for filling.
Ingredients
- For the Cookies:
- 2 1/2 cups all-purpose flour
- 1/4 teaspoon baking powder
- 1/4 teaspoon fine salt
- 1 1/2 sticks (12 tablespoons) unsalted butter, at room temperature
- 3/4 cup granulated sugar
- 1 large egg, slightly beaten
- 1 teaspoon pure vanilla extract
- For the Royal Icing:
- 4 cups confectioners’ sugar
- 1/4 cup meringue powder
- Gel food coloring (e.g., black, orange, yellow, green, white)
Instructions
- Make the Cookie Dough: In a stand mixer, beat the butter and sugar until light and fluffy. Beat in the egg and vanilla. On low speed, gradually add a mixture of the flour, baking powder, and salt until a dough forms. Divide the dough in half, pat into disks, wrap in plastic, and refrigerate for at least 1 hour.
- Bake the Cookies: Preheat the oven to 350°F. Line baking sheets with parchment. Roll out one chilled dough disk to 1/8-inch thickness. Cut out Halloween shapes and arrange them on the prepared baking sheets. Bake for 10 to 12 minutes, until the bottoms are just golden. Let the cookies cool completely on a wire rack. Repeat with the remaining dough.
- Make the Royal Icing: In a stand mixer, beat the confectioners’ sugar, meringue powder, and 1/3 cup of water on medium-high speed for 5 to 6 minutes, until stiff peaks form. Divide the icing into separate bowls and color as desired with gel food coloring.
- Decorate the Cookies: To decorate, you will need two consistencies of icing. For ‘flood’ icing, thin a portion of the colored icing with a little water at a time until it flows back together within 10 seconds of a knife being run through it.
- Use the thicker icing in a piping bag with a small tip to pipe an outline around your cookie shape. Then, use the thinner ‘flood’ icing to fill in the outline. Let the base layer of flood icing harden completely, which can take 6 hours or up to overnight.
- Once the base is dry, use the thicker icing to pipe on final details like faces, stems, or decorative dots. Let these details harden for about 1 hour.
Notes
- Special Equipment: The recipe requires Halloween cookie cutters and piping bags with various small round tips.
- This is a multi-day project due to the extensive chilling times for the dough and the long drying times required for the royal icing.
- Chilling the dough at multiple stages is a crucial step to ensure the cookies hold their intricate shapes and do not spread during baking.
- The article references a ‘Cook’s Note’ that is not provided in the text.
Storage and Make-Ahead Tips
These Halloween Sugar Cookies are the perfect make-ahead party treat!
- Make-Ahead: The unbaked cookie dough can be made and stored, well-wrapped, in the refrigerator for up to 3 days, or in the freezer for up to 3 months.
- Storage: Store the finished, decorated cookies in a single layer in an airtight container at room temperature for up to 2 weeks.
For more recipe follow my pinterest account
Frequently Asked Questions (FAQs)
Q1: What is the absolute, number one secret to making cutout cookies that don’t spread and lose their shape in the oven?
The secret is cold dough and chilling! This recipe uses multiple chilling steps. By keeping the butter in the dough as cold and as solid as possible, you are guaranteeing that your cookies will hold their beautiful, sharp, and detailed shape when they hit the heat of the oven.
Q2: What is the difference between “outline” icing and “flood” icing?
This is the key to professional-looking decorated cookies! The “outline” icing is a very thick, stiff consistency (like toothpaste) that you use to pipe a “dam” around the edge of your cookie. The “flood” icing is a much thinner consistency (like honey) that you use to fill in, or “flood,” the area inside that dam. The thick outline holds the thin flood icing in place, which is the secret that allows it to dry to a perfectly smooth, flat, and glossy finish.
Q3: Can I make these Halloween cookies ahead of time for a party?
Yes, these are a perfect make-ahead party treat! You can bake the cookies completely and store them, undecorated, in an airtight container for up to a week. The royal icing decorations will also last for a very long time, so you can decorate them several days in advance.
Q4: Can I make this recipe without a stand mixer?
Of course! You can easily make both the cookie dough and the royal icing in a large bowl with a good electric hand mixer.
Q5: What is meringue powder?
Meringue powder is a fantastic baking staple that is made from pasteurized, dried egg whites, with a little cornstarch and some stabilizers. It is the secret to a very easy, stable, and completely food-safe royal icing without the need for raw egg whites. You can find it in the baking aisle of most major grocery stores or craft stores.

