Ready to unleash your inner mad scientist and create the most ghoulishly gorgeous, spectacularly spooky, and unbelievably delicious centerpiece for your Halloween party? A dessert so creative and gory, it will have everyone screaming with delight? This incredible, show-stopping Stuffed Crispy Rice Cereal Brain is the ultimate festive creation! We’re talking a giant, edible brain, crafted from chewy, crispy rice treats, with a hidden, surprise filling of rich, decadent, homemade chocolate mousse. Frosted with a “bloody” pink buttercream, this is a true Halloween masterpiece that is as fun to make as it is to eat!
This isn’t just a recipe; it’s a guide to your new favorite edible Halloween project. We’ll show you the simple but brilliant secrets to sculpting with crispy treats and creating a stunning, three-dimensional dessert that looks impressive but is secretly simple to assemble. This is a guaranteed, crowd-pleasing hit that will be the undisputed star of any haunted gathering.
Table of Contents
Table of Contents
Recipe Overview: The Ultimate Spooky & Gory Halloween Centerpiece
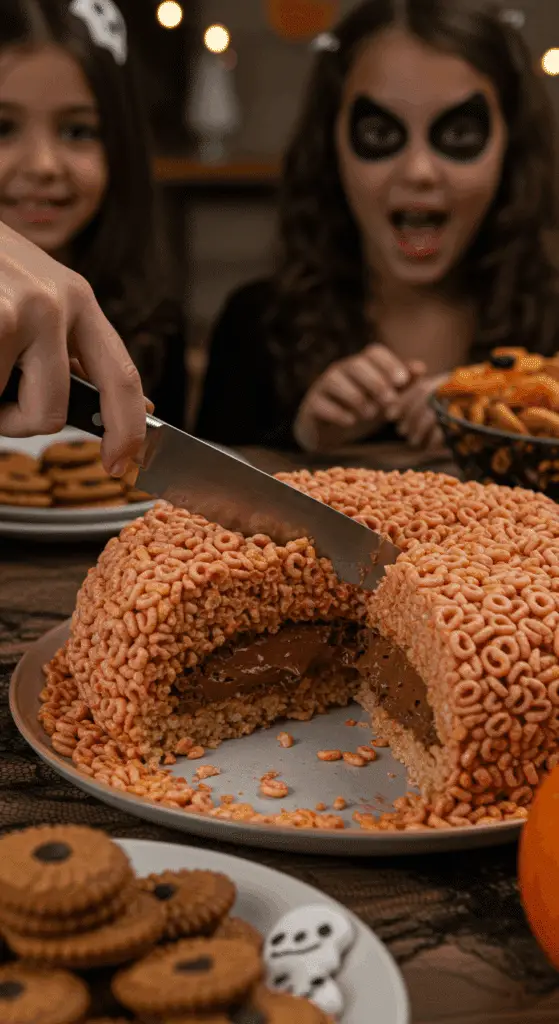
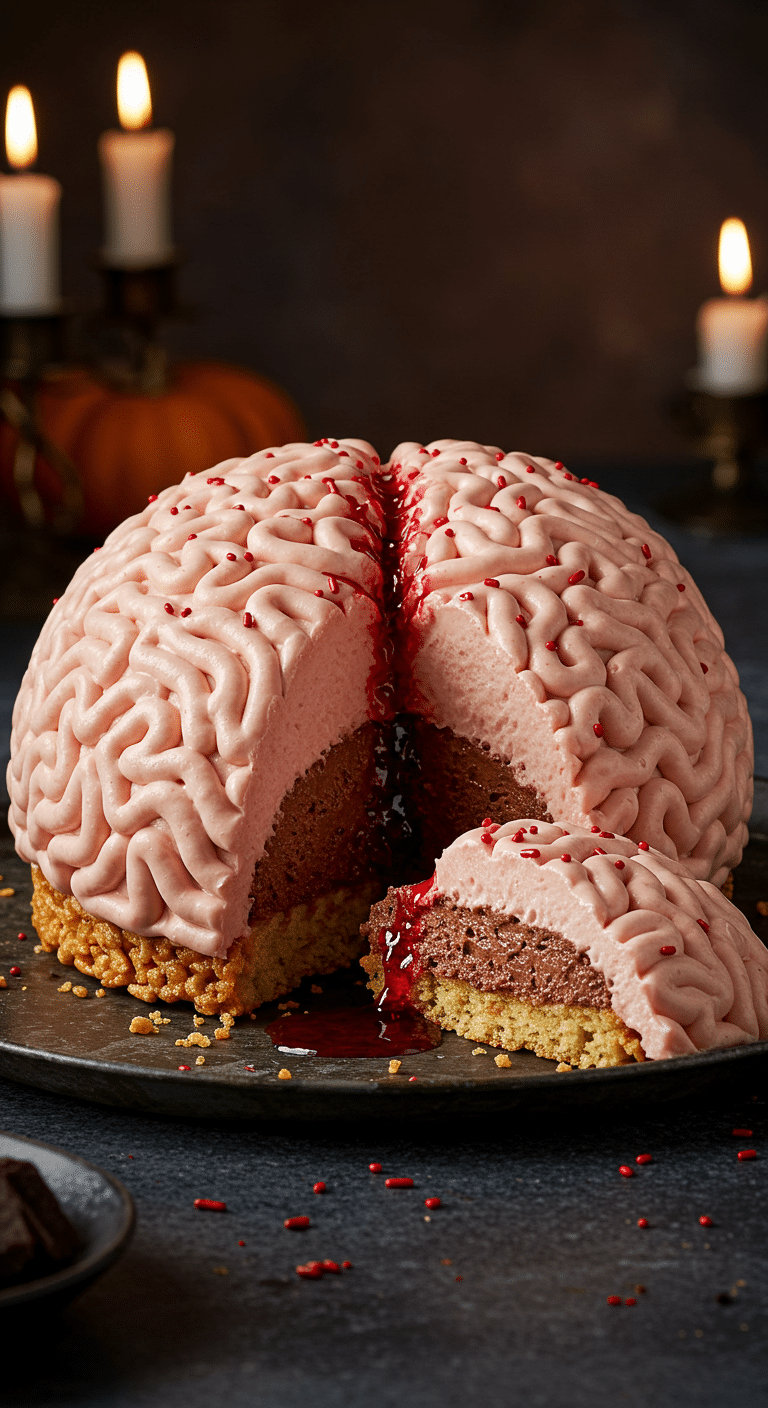
What makes this Crispy Rice Cereal Brain so spectacularly fun is its brilliant, sculptural design and its incredible, multi-layered texture. This recipe is a masterpiece of festive creativity. The “brain” itself is a giant, hollow shell made from a classic, soft and chewy crispy rice treat. The real magic, however, is what’s hidden inside. The crispy shell is filled with a luscious, airy, and decadent, from-scratch chocolate mousse. The entire creation is then sealed, chilled, and decorated with a creepy, “bloody,” and sweet pink buttercream frosting, which is piped on in a squiggly pattern to create the realistic brain texture.
| Metric | Time / Level |
| Total Time | 3 hours (includes chilling) |
| Active Prep Time | 1 hour |
| Difficulty Level | Intermediate |
| Servings | 12-16 |
The Mad Scientist’s Laboratory: The Essential Ingredients
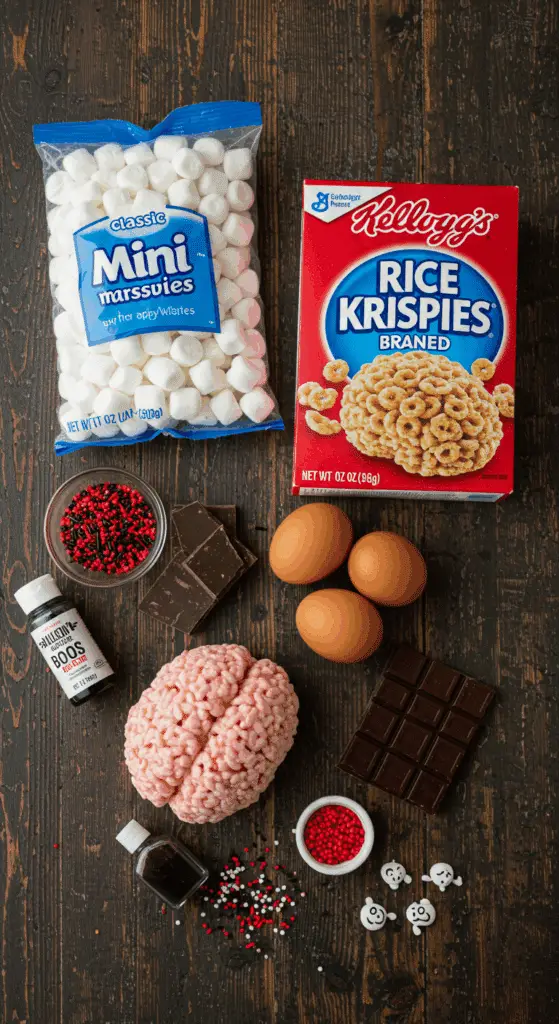
This iconic party treat uses a handful of high-quality ingredients and smart techniques to create its signature spooky look.
- The Surprise Chocolate Mousse Filling:
- This is a classic, light, and airy French-style mousse made from melted semisweet chocolate, whipped cream, and a rich, egg-based pâte à bombe. This creates a truly decadent and gourmet surprise inside your crispy treat shell.
- The Crispy Rice Cereal “Brain”:
- A classic, from-scratch crispy treat mixture is made from melted butter, fresh marshmallows, and a whole box of crispy rice cereal.
- The “Bloody” Buttercream Frosting:
- A classic, fluffy American buttercream is made from softened butter, confectioners’ sugar, and a splash of milk. A few drops of red gel food coloring give it the perfect, creepy, “bloody” pink hue.
- The Key Equipment:
- Nested Bowls: The secret to the incredible shape is a simple, homemade mold that you can make with just two different-sized, heatproof bowls and some nonstick spray.
The Dark Arts of Dessert Sculpture: The Secret to a Perfect Creation
This recipe uses a few simple but crucial techniques that guarantee a flawless, delicious result.
- The Mousse: The secret to a light and airy, not dense, chocolate mousse is to gently fold your whipped cream and your egg foam into your melted chocolate. Do not stir or whisk vigorously, as this will deflate all the beautiful air you have incorporated.
- The Crispy Treat Shell: The number one secret to handling the sticky, warm marshmallow mixture is to generously grease your hands and your bowls with nonstick cooking spray. This creates a non-stick barrier that will allow you to mold and shape the warm treats without them sticking to you.
- The Piping Technique: The key to the realistic brain texture is to use a piping bag to create long, squiggly, and random back-and-forth lines of frosting all over the surface of the chilled crispy treat shell.

Step-by-Step to the Best Stuffed Crispy Rice Brain
This fun and festive project is a joy to prepare.
Part 1: Create the Secret Chocolate Mousse Filling
Step 1: In a cold bowl, whip your 1 cup of heavy cream to soft peaks. Set this aside in the refrigerator.
Step 2: In a double boiler (or a heatproof bowl set over a saucepan of simmering water), melt your 6 ounces of semisweet chocolate and 3 tablespoons of butter together until smooth. Set this aside.
Step 3: In a separate heatproof bowl, beat your 1 large egg, 2 yolks, and a pinch of salt with an electric mixer until light. Slowly add the 1/3 cup of granulated sugar. Set this bowl over your simmering water and whisk constantly for 3 to 5 minutes, until the mixture is very fluffy and hot to the touch.
Step 4: Remove the egg mixture from the heat and whip it until it is cool and thick.
Step 5: Whisk a quarter of your egg foam into the melted chocolate to lighten it. Then, gently fold in the remaining egg foam, followed by the cold whipped cream. Keep your finished mousse in the refrigerator.
Part 2: Sculpt the Crispy Rice Cereal “Brain” Shell
Step 1: Add your 1 bag of mini marshmallows and 3 tablespoons of butter to a large pot over a medium-low heat. Cook, stirring, until everything has melted. Add your 1 box of crispy rice cereal and mix to combine.Step 2: While the cereal mixture is still warm, spray the inside of a medium bowl and your hands with nonstick spray. Line the inside of the bowl with a 2-inch-thick layer of the cereal mixture.Step 3: Spray the outside of a smaller bowl with nonstick spray and place it in the center of your cereal shell, pressing it down to compress and even out the cereal layer.Step 4: Once the cereal has set, spoon your chilled chocolate mousse into the center of the shell.Step 5: Use your remaining cereal mixture to create a flat “lid” and lay it over the mousse, pressing the sides to seal the brain completely. Refrigerate the entire creation until it is chilled, for about 15 minutes.
Part 3: The “Bloody” Buttercream and Gory Details
Step 1: To make the frosting, in a large bowl, beat the 3 sticks of room temperature butter, the 4 1/2 cups of confectioners’ sugar, a pinch of salt, and the 1 tablespoon of vanilla extract until smooth. Add 2 to 4 tablespoons of milk until the frosting has a nice, spreadable consistency. Mix in enough of your red food coloring to make the frosting a creepy, cotton-candy pink.Step 2: Transfer your finished frosting to a piping bag that has been fitted with a medium plain tip.Step 3: Invert your chilled crispy treat brain onto a platter or a baking sheet.Step 4 (The Fun Part!): Pipe your pink frosting all over the top of the cereal shell in a squiggly, brain-like pattern.Step 5: Use a butter knife to make a 1-inch line down the very center of the brain. Top this “gash” with your red sprinkles for a final, gory touch.

Stuffed Crispy Rice Cereal Brain (A Halloween Showstopper!)
An elaborate and spooky dessert centerpiece, this ‘Stuffed Crispy Rice Cereal Brain’ is perfect for a Halloween party. The recipe features a shell molded from crispy rice cereal treats, which is then filled with a rich, homemade chocolate mousse. The entire ‘brain’ is sealed with more of the cereal mixture, chilled, and then decorated with a light pink buttercream frosting that is piped on to create the brain’s distinctive folds. A line of red sprinkles is added down the center for a final gory touch.
Ingredients
- For the Chocolate Mousse:
- 1 cup heavy cream
- 6 ounces semisweet chocolate, chopped
- 3 tablespoons unsalted butter
- 1 large egg plus 2 large egg yolks
- Pinch of kosher salt
- 1/3 cup granulated sugar
- For the Frosting:
- 1 1/2 pounds confectioners’ sugar
- 3 sticks (1 1/2 cups) unsalted butter, at room temperature
- Pinch of kosher salt
- 1 tablespoon pure vanilla extract
- 2 to 4 tablespoons milk
- Bright red gel food coloring
- Red sprinkles
- For the Rice Cereal Treat Shell:
- One 10-ounce bag mini marshmallows
- 3 tablespoons unsalted butter
- One 12-ounce box crisp rice cereal
- Nonstick cooking spray
Instructions
- Make the Chocolate Mousse: Whip the heavy cream to soft peaks and set aside. Melt the chocolate and butter together over a double boiler. In a separate heatproof bowl, beat the egg, yolks, and salt, then gradually add the sugar. Whisk this egg mixture constantly over the simmering water until it becomes fluffy and hot (3-5 minutes). Remove from heat and whip until cool and thick. Gently fold the egg foam into the melted chocolate, then fold in the whipped cream. Refrigerate the mousse.
- Make the Frosting: In a stand mixer, beat the confectioners’ sugar, butter, and salt on low speed. Add the vanilla, increase the speed, and beat until smooth. Adjust the consistency with milk. Tint the frosting a cotton-candy pink with the red food coloring. Transfer to a piping bag.
- Make the Rice Cereal Treat Shell: In a large pot, melt the marshmallows and butter over medium-low heat. Stir in the crispy rice cereal until fully combined.
- Assemble the Brain: Spray a medium bowl and your hands with nonstick spray. While the cereal mixture is warm, line the bowl with a 2-inch-thick layer of it. Press a smaller greased bowl into the center to compress the shell.
- Once the shell has set, remove the smaller bowl and spoon the chilled chocolate mousse into the center. Flatten the remaining cereal mixture to create a ‘lid’ and press it over the mousse to seal the brain. Refrigerate for about 15 minutes.
- Decorate: Invert the chilled brain onto a platter. Pipe the pink frosting on top in a brain-like, squiggly pattern. Use a knife to make a line down the center and top the line with red sprinkles.
Notes
- Special Equipment: A piping bag fitted with a medium plain tip is required for the frosting decoration.
- This is a complex, multi-component dessert that makes an impressive party centerpiece.
- The chocolate mousse involves a classic technique of cooking eggs over a double boiler to ensure a safe and stable foam.
- The crispy rice treat shell is cleverly molded using two different-sized bowls.
Storage and Make-Ahead Tips
- Make-Ahead: This is a perfect make-ahead centerpiece! You can prepare and fully assemble and decorate the entire brain up to 2 days in advance and store it in the refrigerator.
- Storage: Store the finished brain, well-covered, in the refrigerator for up to 5 days.
For more recipe follow my pinterest account
Frequently Asked Questions (FAQs)
Q1: What is the absolute, number one secret to a light and airy, not dense, chocolate mousse?
The secret is to gently fold, not stir. By using a large rubber spatula to gently fold your light and airy whipped cream and egg foam into your heavy, melted chocolate, you are preserving all the beautiful air bubbles you have created. This is the key that will give your final mousse a wonderfully light and delicate texture.
Q2: Can I make this ahead of time for a Halloween party?
Yes, absolutely! This is an ideal make-ahead dessert. You can prepare the entire recipe up to 2 days in advance and keep it, well-covered, in the refrigerator.
Q3: Can I make this with a different kind of filling?
Of course! If you’re short on time, you can substitute the homemade chocolate mousse with about 3 to 4 cups of your favorite store-bought chocolate pudding, a no-bake cheesecake filling, or even some softened ice cream (just be sure to serve it immediately from the freezer!).
Q4: What is the best way to pipe the frosting to make it look like a brain?
The key is to embrace the messiness! Simply pipe long, random, and squiggly back-and-forth lines all over the surface of each “hemisphere” of your crispy treat shell. A final, straight line down the very center is the key that will define the two halves of the brain.
Q5: How do I get beautiful, clean slices of this dessert?
The secret is to use a large, sharp, serrated knife (like a bread knife) and to clean the blade of the knife between each cut. This will allow the knife to glide through all the different, sticky layers, creating a perfect, clean slice every single time.

