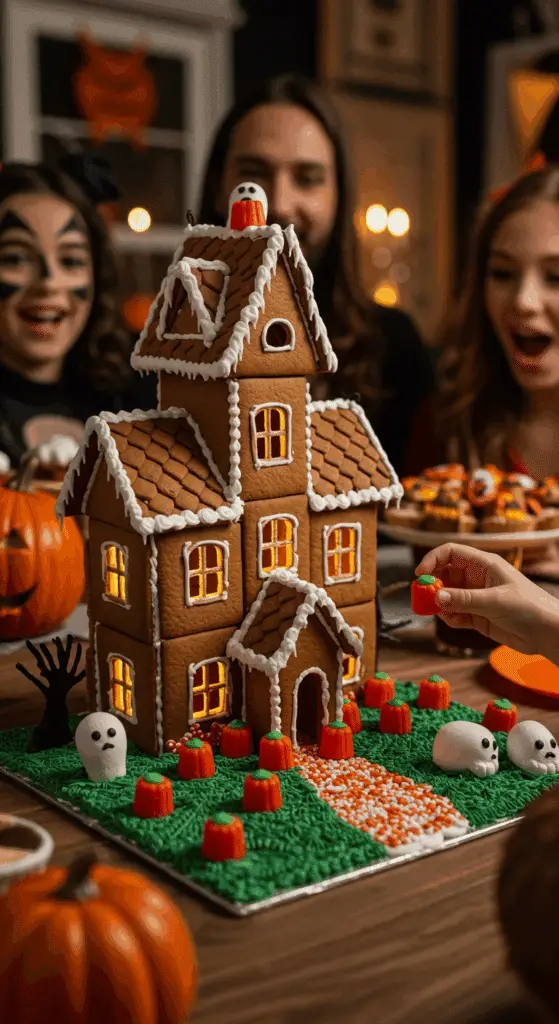
Ready to construct the most ghoulishly gorgeous, spectacularly spooky, and unbelievably delicious centerpiece for your next Halloween celebration? A show-stopping edible haunted mansion that is as fun to create as it is to admire? This incredible, from-scratch Haunted Gingerbread House is the ultimate festive project! We’re talking a sturdy, warmly spiced gingerbread house, held together with a quick-setting candy “mortar,” and decorated with creepy cocoa-dusted roof tiles, spooky peering eyes, monster arms, and a whole landscape of edible horrors.
This isn’t just a recipe; it’s a guide to your new favorite Halloween tradition. While it looks like a masterpiece of confectionery art, we’ll show you the simple but crucial secrets to a sturdy, no-spread gingerbread and all the fun, easy tricks for creating the most impressive haunted decorations. This is a guaranteed, crowd-pleasing hit that is perfect for a weekend project with the whole family.
Table of Contents
Table of Contents
Recipe Overview: The Ultimate Spooky & Edible Halloween Centerpiece
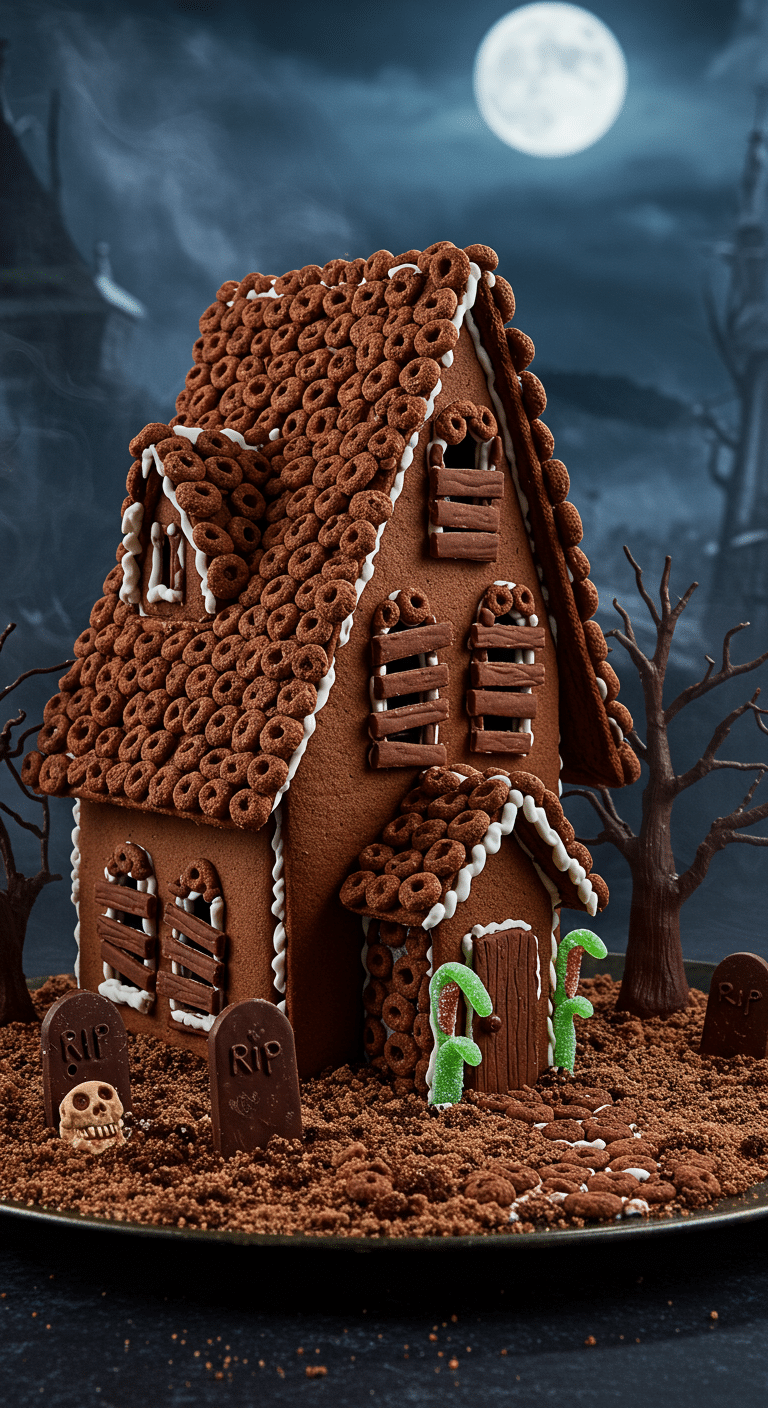
What makes this Haunted Gingerbread House so spectacularly fun is its brilliant, architectural design and its classic, cozy flavor. This recipe is a masterpiece of edible, spooky art. The house itself is made from a sturdy, from-scratch gingerbread, rich with molasses and warm spices. The “mortar” is a quick-setting and rock-hard melted candy wafer “glue.” The real magic, however, is in the decorations. The spooky, dilapidated roof is tiled with cocoa-dusted cereal squares. The entire house is then brought to life (or, death!) with a whole host of creepy-crawly creations: menacing monster arms, spooky boarded-up windows, candy pumpkins, pretzel ladders, and a terrifying graveyard complete with chocolate tombstones.
| Metric | Time / Level |
| Total Time | 5 hours (includes chilling & assembly) |
| Active Prep Time | 2 hours |
| Difficulty Level | Intermediate |
| Servings | 1 haunted house |
The Haunted Pantry: The Essential Ingredients & Tools
This iconic party centerpiece uses a handful of high-quality ingredients and a few key tools to bring your haunted vision to life.
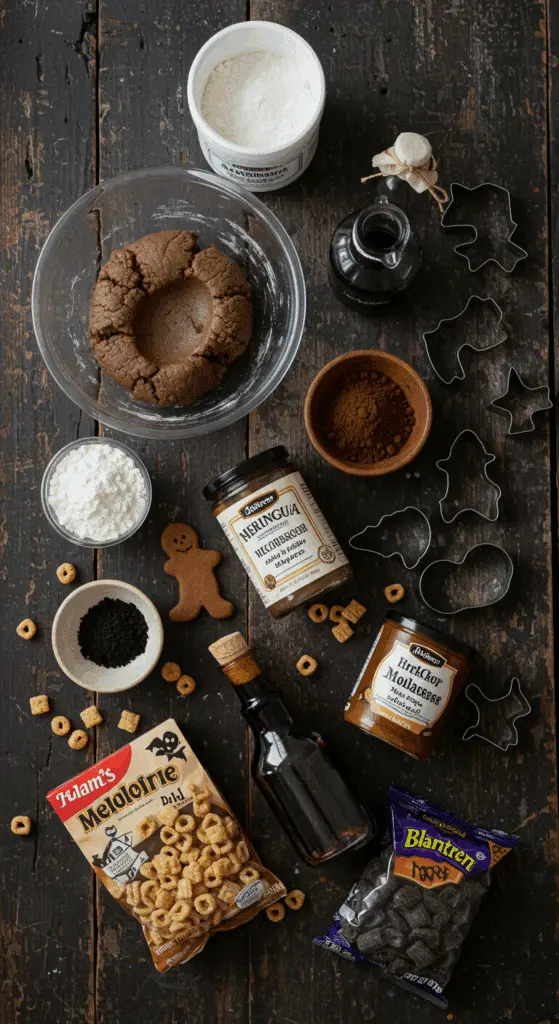
- The Sturdy Gingerbread:
- The Spices: A classic, warm, and perfectly balanced fall spice blend of ginger and cinnamon is the key to that signature, cozy gingerbread flavor.
- Molasses & Dark Brown Sugar: The secret to a gingerbread that has a beautiful, deep color, a wonderfully complex flavor, and a perfectly crisp texture for building.
- The “Cement” (White Candy Melts!): The secret to a quick and easy assembly! Using melted white candy wafers as your “glue” is a fantastic trick. It sets up much faster than a traditional royal icing, which means you don’t have to wait as long for your walls to dry.
- The Spooky Decorations: This is where your inner ghoul can shine!
- The “Shingles”: A box of woven corn cereal squares (like Crispix® or Chex®) is tossed with cocoa powder to create the perfect, creepy, and dilapidated-looking roof tiles.
- The “Boarded-Up” Windows: A brilliant and easy hack! A few chocolate chews (like Tootsie Rolls®) are simply kneaded together, rolled flat, and cut into small “planks” to board up your windows.
- The Key Equipment: A gingerbread house template (you can find these online or create your own!), a few piping bags, and a large, sturdy base for your house are essential.
The Dark Arts of Construction: The Secret to a Sturdy Haunted House
The number one, non-negotiable secret to a gingerbread house that doesn’t collapse is patience and a rock-hard glue.
- Chill the Dough: You must chill your gingerbread dough thoroughly. This is the key that will prevent your cut-out shapes from spreading in the oven and will ensure your pieces fit together perfectly.
- Re-Cut While Warm: This is a brilliant, professional secret! By placing your paper templates back on top of your hot, freshly baked gingerbread pieces and re-trimming the edges, you are guaranteeing perfectly straight lines and sharp corners for a flawless assembly.
- Build in Stages and DRY!: The most crucial step! You must assemble your four walls, “glue” them together, and then let them dry completely for at least 10-15 minutes before you even attempt to add the heavy roof pieces. Propping the walls with some heavy cans while they dry is a great trick.

Step-by-Step to the Best Haunted Gingerbread House
This fun and festive project is a joy to prepare.
Part 1: Bake the Spooky Gingerbread Pieces
Step 1: In a large bowl, sift together 3 1/2 cups of the flour, the ginger, cinnamon, baking soda, and salt.
Step 2: In the bowl of a stand mixer, beat the 1 cup of room temperature butter until creamy. Add the 3/4 cup of brown sugar and 1/2 cup of molasses and mix until combined. Beat in the 1 large egg and the 1/2 teaspoon of vanilla extract.
Step 3: Gradually add the dry ingredients to the wet and mix until a thick dough forms. If the dough is sticky, mix in more flour until it can be easily handled.
Step 4: Divide the dough in half, roll each piece to a 1/4-inch thickness between two sheets of parchment paper, and chill it for at least 30 minutes.
Step 5: Preheat your oven to 350°F (175°C). Use your templates to cut out all your house pieces. Bake for 15 minutes. While the cookies are still warm, re-cut them with your templates for a perfect shape. Let the pieces cool completely.
Part 2: Assemble the Haunted House and Decorate
Step 1: To make your “glue,” melt your 12 ounces of white candy wafers in the microwave. Transfer the melted candy to a piping bag with the tip snipped off.Step 2: Assemble the four walls of your house, using the melted candy to glue the edges together. Use cans from your pantry to prop up the walls and let them dry for at least 10 minutes.Step 3: Once the walls are sturdy, use the melted candy to attach the two roof pieces.Step 4: To make the “shingles,” toss your 2 cups of woven corn cereal in a bag with the 2 tablespoons of cocoa powder. Use your melted candy to glue the cereal squares onto the roof in overlapping rows.
Part 3: The Ghoulish Grand Design
Once your house is fully assembled, it’s time for the fun part! Use your melted black, green, and orange candy melts to create all the spooky decorations.
- For the Windows & Door: Pipe your window and door shapes onto a piece of parchment paper and let them harden before you glue them onto your house.
- For the Monster Arms: Pipe the spooky, green arms onto parchment paper, sprinkle them with green sanding sugar, and add a chocolate sprinkle “claw” before they set.
- For the Pumpkins: Dip round gumballs in your melted orange candy and add a small chocolate chew “stem.”
- For the Trees: Pipe spooky, bare tree shapes with your melted black candy over a wafer cookie “trunk.”

Haunted Gingerbread House (A Spooky Halloween Project!)
An elaborate and festive recipe for creating a completely edible ‘Haunted Gingerbread House,’ perfect as a showstopper centerpiece for a Halloween party. The project begins with a from-scratch, spiced gingerbread cookie dough, which is cut using a template and baked to form the walls and roof of the house. The house is then assembled using melted candy wafers as ‘glue’ and placed on a landscape of ‘dirt’ made from crushed chocolate cookies. The detailed spooky decorations are all homemade, including cereal ‘roof tiles,’ candy ‘windows’ and a ‘door,’ green candy ‘monster arms,’ candy ‘pumpkins,’ chocolate ‘trees,’ a pretzel ‘ladder,’ and a ‘graveyard’ made from chocolate bars.
Ingredients
- For the Gingerbread Cookie Dough:
- 3 1/2 to 4 cups all-purpose flour
- 2 teaspoons ground ginger
- 1 1/2 teaspoons ground cinnamon
- 1 teaspoon baking soda
- 1/2 teaspoon salt
- 1 cup (2 sticks) unsalted butter, at room temperature
- 3/4 cup packed dark brown sugar
- 1/2 cup molasses
- 1 large egg
- 1/2 teaspoon vanilla extract
- For Assembly & Decorations:
- 12 ounces white candy melting wafers
- 1 cup ready-made chocolate frosting
- 12 cream-filled chocolate sandwich cookies, crushed
- 2 cups woven corn cereal squares
- 2 tablespoons cocoa powder
- 12 ounces black candy melting wafers
- Candy buttons
- Black food color marker
- 3 ounces green candy melting wafers & 1/4 cup green sanding sugar
- 3 ounces orange candy melting wafers
- Chocolate sprinkles, chocolate chews, gumballs
- 3 chocolate-filled rolled wafer cookies & black sanding sugar
- 4 pretzel sticks
- 3 chocolate snack cake cupcakes
- 2 mini break-apart chocolate bars
Instructions
- Make and Bake the Gingerbread: Make a spiced gingerbread dough and chill for 30 minutes. Roll the dough to 1/4-inch thickness. Using a printed template, cut out the shapes for the house walls and roof. Bake at 350°F for 15 minutes. While still warm, re-cut the shapes using the templates for clean edges. Let cool completely.
- Assemble the House: Melt the white candy wafers. Use the melted candy as ‘glue’ to assemble the four walls of the house on a large cake board or platter that has been frosted and covered with crushed cookie ‘dirt.’ Let the walls set for 10 minutes.
- Attach the two roof pieces with more melted candy, holding them in place until they set.
- Decorate the House: Coat the corn cereal squares in cocoa powder. Use melted candy to ‘glue’ the cereal squares onto the roof in overlapping rows to create ’tiles.’
- Make the windows and door by melting black candy wafers and piping them into shapes on parchment paper, following a template. Attach them to the house with more melted candy. Create fanged details on the door with white melted candy.
- Create ‘monster arms’ from melted green candy and decorate with sanding sugar and chocolate sprinkle ‘claws.’ Attach them to the sides of the house.
- Create ‘boards’ for the windows from flattened chocolate chews.
- Create the Landscape: Make ‘pumpkins’ by dipping gumballs in melted orange candy. Make ‘scary trees’ by covering rolled wafer cookies in melted black candy and black sanding sugar; stand them up in upside-down snack cakes. Make ‘tombstones’ from pieces of a chocolate bar set in dabs of frosting. Arrange all decorations around the house.
- Add final details like a pretzel ladder, piped spiderwebs, and drawn-on cracks with a food color marker.
Notes
- Special Equipment: This project requires a 14-inch cake board, disposable piping bags, and printable templates for the house pieces.
- This is a large, multi-day edible craft project that requires significant time for assembly and for the various candy components to set.
- Re-cutting the gingerbread pieces while they are still warm is a key professional tip that ensures all the pieces will fit together perfectly.
- Melted candy wafers are the primary ‘glue’ used for all assembly and decoration.
Storage and Make-Ahead Tips
This Haunted Gingerbread House is the ultimate make-ahead project!
- Make-Ahead: The best way to tackle this project is to break it up over several days. You can bake all your gingerbread pieces up to a week in advance and store them in an airtight container. You can also make all your candy decorations several days in advance.
- Storage: The finished, decorated gingerbread house will last as a beautiful (and mostly edible!) centerpiece at room temperature for up to 2 weeks.
For more recipe follow my pinterest account
Frequently Asked Questions (FAQs)
Q1: What is the absolute, number one secret to a gingerbread house that doesn’t collapse?
The secret is to let your four assembled walls dry completely before you even think about adding the roof pieces. Be patient! Allowing the melted candy “glue” to harden for at least 10 to 15 minutes is the key that will create a strong, stable foundation that can support the heavy roof.
Q2: Can I use royal icing instead of melted candy for the “glue”?
Yes, you can! A classic, stiff royal icing is the traditional choice for gingerbread house construction. The main difference is that a royal icing will take several hours to dry completely, while the melted candy wafers will set up and become hard in just a few minutes.
Q3: Can I make this with a store-bought gingerbread house kit?
Yes, absolutely! If you’re short on time, a store-bought kit is a fantastic shortcut. You can simply use all of the fun and spooky decorating ideas from this guide to elevate your kit into a truly unique and impressive haunted masterpiece.
Q4: What is the best way to get a really dark, spooky gingerbread?
The secret is a combination of a dark, robust molasses (not a light or a fancy one) and a rich dark brown sugar. For an even darker, almost-black gingerbread, you can substitute about 1/2 cup of the all-purpose flour with a black cocoa powder.
Q5: What should I do with my leftover gingerbread dough?
You can re-roll the scraps and use some fun, Halloween-themed cookie cutters to make a whole batch of delicious gingerbread cookies!

