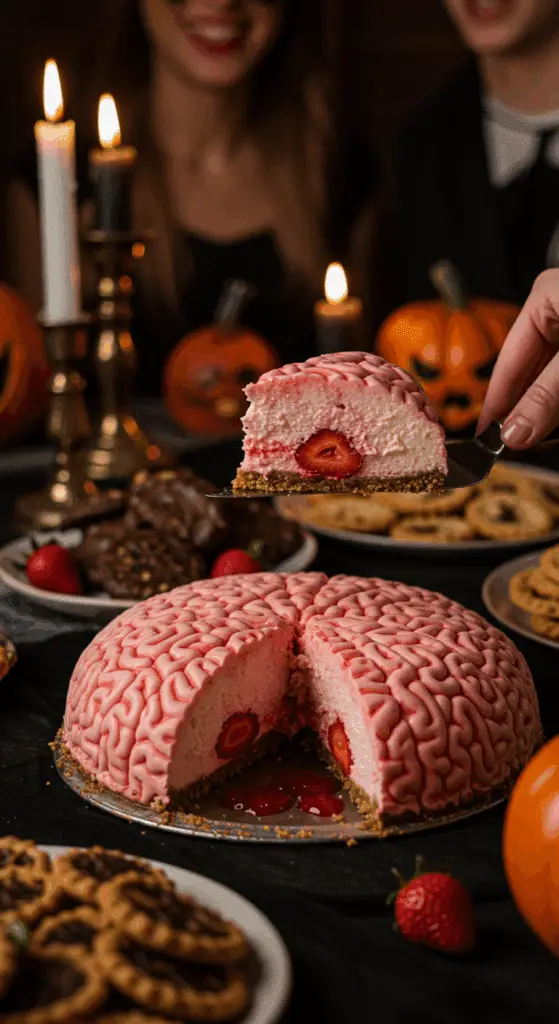
Ready to create the ultimate show-stopping, edible centerpiece for your next Halloween party? A dessert so gory, so dramatic, and so unbelievably delicious, it will have all your guests losing their minds? This incredible, No-Bake Strawberry Cheesecake Brain is that perfect recipe! We’re talking a rich, creamy, no-bake cheesecake, cleverly molded into a realistic brain shape, with a hidden, surprise core of bloody strawberry “guts” that spill out when you cut the first slice.
This isn’t just a recipe; it’s a guide to your new favorite edible Halloween horror show. It looks like a masterpiece from a professional effects artist, but we’ll show you the simple but brilliant secrets to creating this stunning dessert at home with no baking required. This is a guaranteed, crowd-pleasing hit that is as fun to make as it is to serve.
Table of Contents
Table of Contents
Recipe Overview: The Ultimate Spooky & Gory No-Bake Dessert
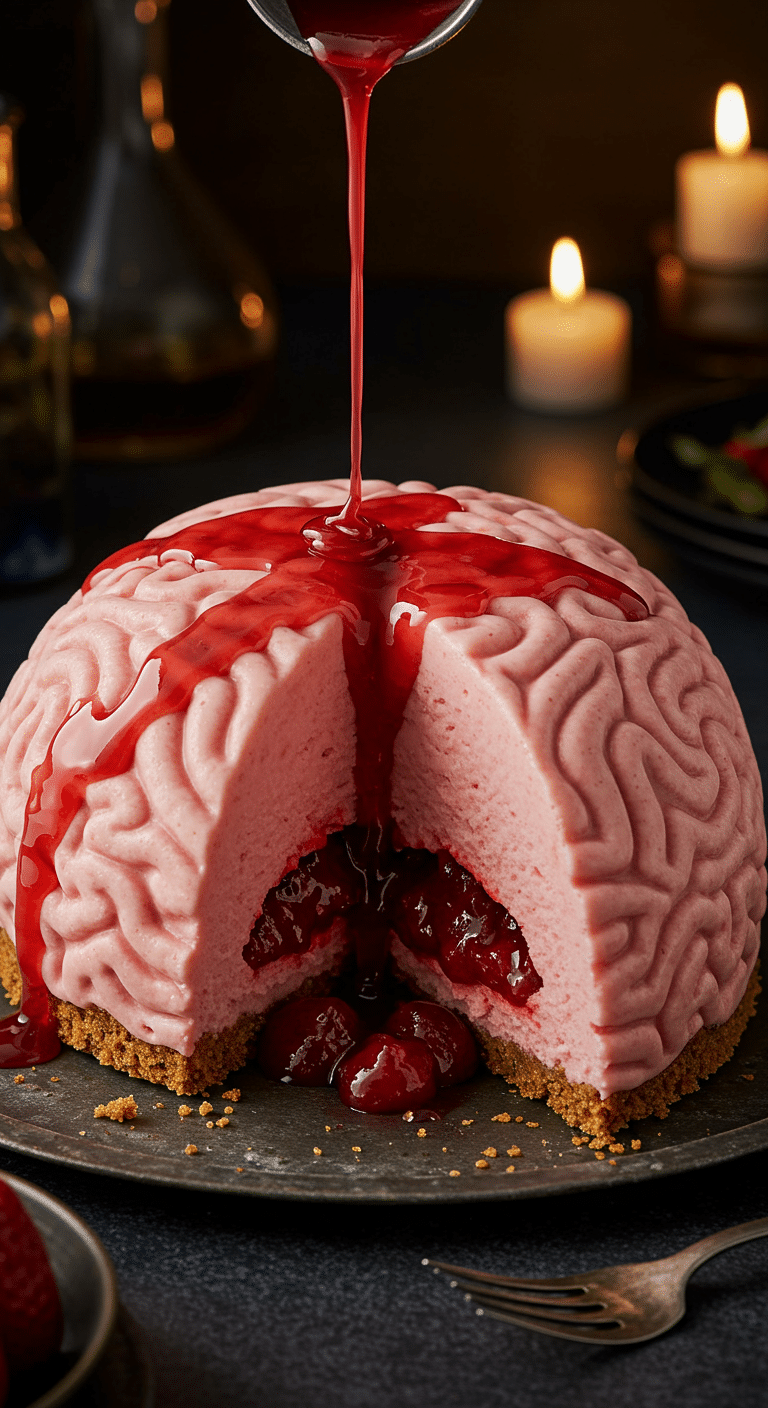
What makes this Cheesecake Brain so spectacularly fun is its brilliant, sculptural design and its incredible combination of classic, crowd-pleasing flavors. This recipe is a masterpiece of festive creativity. The “brain” itself is a rich, tangy, and creamy from-scratch no-bake cheesecake, which gets its beautiful, spooky pink hue from a touch of food coloring. The real magic, however, is what’s hidden inside. A hollow shell of the cheesecake is filled with a delicious, homemade strawberry compote, creating a gory, surprise “brain matter” center. The entire creation is formed using a brain-shaped gelatin mold, sits atop a classic, buttery graham cracker crust, and is finished with a drizzle of a “bloody” strawberry syrup.
| Metric | Time / Level |
| Total Time | 5 hours (includes chilling) |
| Active Prep Time | 45 minutes |
| Difficulty Level | Intermediate |
| Servings | 10-12 slices |
The Mad Scientist’s Laboratory: The Essential Ingredients & Tools
This iconic party cake uses a handful of high-quality ingredients and one key piece of equipment to create its signature spooky look.
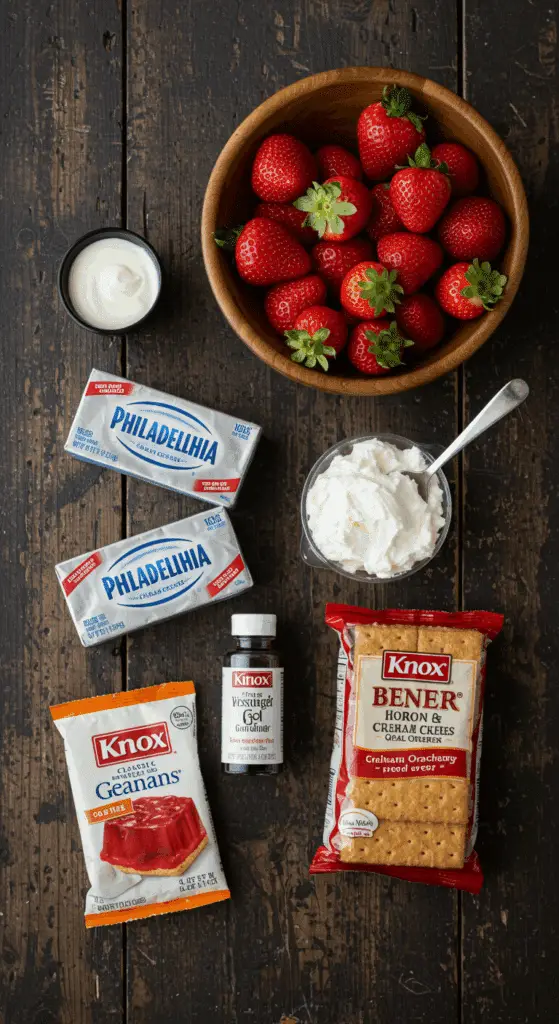
- The No-Bake Cheesecake “Brain”:
- The Creamy Base: A classic and delicious combination of room temperature cream cheese and heavy cream creates the perfect, rich and tangy cheesecake base.
- Gelatin (The No-Bake Secret!): The magic that allows this creamy, no-bake filling to set up perfectly firm for a beautiful, sculptural shape is a simple packet of unflavored powdered gelatin.
- The Gory Strawberry Filling & “Blood” Syrup: A simple but delicious, from-scratch strawberry compote and syrup is made from fresh strawberries, sugar, and lemon juice. The cooked, whole berries become the “guts,” while the reduced syrup is the perfect, “bloody” topping.
- The Key Equipment: A flexible, plastic, brain-shaped gelatin mold is the essential tool for this recipe. You can easily find these online or in the seasonal section of most major craft stores, especially around Halloween.
The No-Bake Masterclass: The Secret to a Perfect, Molded Cheesecake
The number one, non-negotiable secret to a successful no-bake cheesecake that holds its intricate shape is the combination of gelatin and a long chilling time.
- “Bloom” the Gelatin: You must “bloom” your powdered gelatin before you use it. This simply means sprinkling it over a small amount of cold water and letting it sit for about 5 minutes. This is the key that hydrates the gelatin granules and ensures they will dissolve smoothly and evenly into your filling without any lumps.
- Create a Shell: The brilliant technique of creating a frozen shell of the cheesecake batter inside your mold first is the secret that will allow you to create the hollow center for your surprise filling.
- The Long Chill: Once assembled, the cheesecake must chill for at least 4 hours. This crucial, patient step is the key that allows the gelatin to fully set and firm up the entire dessert, which is the magic that will allow your brain to hold its intricate, beautiful shape when you unmold it. Do not skip this step!

Step-by-Step to the Best No-Bake Cheesecake Brain
This fun and festive project is a joy to prepare.
Part 1: Make the Crust and Strawberry “Guts”
Step 1: In a food processor, pulse your 1 sleeve of graham crackers with the 1/3 cup of brown sugar, the 1/2 teaspoon of cinnamon, and a pinch of salt until they form fine crumbs. Drizzle in the 1 stick of melted butter and pulse until the mixture looks like wet sand.
Step 2: To make the strawberry filling, combine your 1 pound of halved strawberries, 3/4 cup of granulated sugar, the juice of 1/2 a lemon, and 1/4 cup of water in a medium saucepan. Bring to a simmer and cook until the berries are very soft.
Step 3: Strain the mixture through a fine-mesh sieve. Transfer the cooked berries to a small bowl and chill them. Return the syrup to the saucepan and continue to cook for about 10 minutes, until it has thickened. Chill the syrup until you are ready to use it.
Part 2: Create the Creamy Cheesecake “Brain Matter”
Step 1: In a small bowl, sprinkle your 2 tablespoons of unflavored gelatin over 1/3 cup of warm water and let it bloom for 5 minutes. Step 2: In a food processor, pulse your 1 pound of room temperature cream cheese until it is completely smooth. Add the 3/4 cup of granulated sugar, the 1/2 teaspoon of vanilla extract, a pinch of salt, the juice of 1/2 a lemon, and your softened gelatin. Pulse until the mixture is completely smooth. Step 3: With the food processor running, add the 2 cups of heavy cream and enough red food coloring to make the batter a spooky, light pink. Process until everything is combined.
Part 3: Assemble Your Gory Masterpiece
Step 1: Generously coat your brain-shaped gelatin mold with nonstick cooking spray. Step 2: Pour about half of your cheesecake batter into the mold. Swirl the batter to cover all the sides of the mold and then freeze for 5 minutes. Use the back of a spoon to spread the thickened batter up the sides to create a 1/2-inch-thick coating around the entire mold. Freeze this shell for another 10 minutes to set it. Step 3: Add your chilled, cooked strawberries to the center of the mold. Drizzle about 1 tablespoon of your chilled strawberry syrup over the strawberries. Step 4: Evenly spread your remaining cheesecake batter over the berries, pressing the batter into the mold to fill any gaps. Step 5: Top with your prepared graham cracker crumbs, pressing them down to create a firm crust. Step 6 (The Most Important Step!): Place the cheesecake in the freezer until the sides are very firm, for about 2 hours. Then, transfer it to the refrigerator and let it chill for at least 2 more hours, or up to overnight.
Part 4: The Gory Reveal!
To unmold the cheesecake, carefully place the mold briefly into a bowl of hot water. Then, run a small offset spatula around the edge of the mold to help release it. Invert the cheesecake onto a plate. You may need to poke a few small holes in the mold with a paring knife to help release the suction.
For the final, gory touch, pour your remaining, chilled strawberry syrup “blood” all over the top of the brain.

No-Bake Strawberry Cheesecake Brain (A Gory Halloween Showstopper!)
A spooky and creative ‘No-Bake Strawberry Cheesecake Brain,’ perfect as a showstopper for a Halloween party. This dessert features a pink-tinted, no-bake cheesecake filling made with cream cheese and heavy cream, which is set with gelatin to hold its intricate shape. A surprise center is made from a simple, cooked strawberry compote. The dessert is formed in a special brain-shaped gelatin mold, with a press-in graham cracker crust serving as the base. The finished cheesecake is carefully unmolded and served with a drizzling of the remaining strawberry syrup for a gory ‘bloody’ effect.
Ingredients
- For the Graham Cracker Crust:
- 1 sleeve graham crackers (9 whole crackers)
- 1/3 cup packed light brown sugar
- 1/2 teaspoon ground cinnamon
- Pinch of fine salt
- 1 stick (8 tablespoons) unsalted butter, melted
- For the Cheesecake:
- 2 tablespoons plus 1 1/2 teaspoons unflavored powdered gelatin
- 1 pound (two 8-ounce packages) cream cheese, at room temperature
- 3/4 cup granulated sugar
- 1/2 teaspoon pure vanilla extract
- Pinch of fine salt
- Juice of 1/2 lemon
- 2 cups heavy cream
- Bright red gel food coloring
- For the Strawberry Syrup & Filling:
- 1 pound strawberries, hulled and halved
- 3/4 cup granulated sugar
- Juice of 1/2 lemon
- Nonstick cooking spray, for the mold
Instructions
- Make the Crust & Syrup: In a food processor, pulse the graham crackers, brown sugar, cinnamon, and salt into crumbs. Drizzle in the melted butter and pulse until it resembles wet sand. For the syrup, simmer the strawberries, sugar, lemon juice, and 1/4 cup water in a saucepan until the berries are very soft. Strain the syrup, returning it to the pan to cook for about 10 more minutes until thickened. Chill both the cooked berries and the syrup.
- Make the Cheesecake Filling: In a small bowl, whisk the gelatin into 1/3 cup warm water and let it soften for 5 minutes. In a food processor, pulse the room-temperature cream cheese until smooth. Add the granulated sugar, vanilla, salt, lemon juice, and softened gelatin. Pulse until smooth. With the processor running, add the heavy cream and a few drops of red food coloring to make a light pink batter.
- Assemble the Brain: Generously spray a 7-cup brain-shaped gelatin mold with nonstick spray. Pour half of the cheesecake batter into the mold, spreading it up the sides to create a 1/2-inch thick coating. Freeze for 10 minutes to set.
- Add the chilled, cooked strawberries to the center of the mold and drizzle with 1 tablespoon of the chilled strawberry syrup.
- Evenly spread the remaining cheesecake batter over the berries to fill the mold.
- Top with the graham cracker crumbs, pressing down to create a firm crust.
- Freeze for 2 hours, until the sides are very firm. Then, transfer to the refrigerator and chill for at least 2 more hours.
- Unmold and Serve: To unmold, briefly dip the mold in hot water. Run a small spatula around the edge to loosen. Invert onto a serving plate. Poke small holes in the mold to help release the cheesecake. Carefully pull off the mold.
- Top the ‘brain’ with the remaining strawberry syrup and serve.
Notes
- Special Equipment: The recipe requires a brain-shaped gelatin mold to achieve the signature look.
- This is a no-bake cheesecake that uses gelatin to set, which is crucial for it to hold its intricate shape when unmolded.
- The recipe involves multiple chilling and freezing steps, so it’s a great make-ahead dessert for a party.
Storage and Make-Ahead Tips
This is the ultimate make-ahead party centerpiece!
- Make-Ahead: This dessert must be made ahead, as it requires several hours to chill and set. It is the perfect dessert to prepare the day before a party or a holiday gathering.
- Storage: Store any leftover cheesecake, well-covered, in the refrigerator for up to 5 days.
For more recipe follow my pinterest account
Frequently Asked Questions (FAQs)
Q1: What is the absolute, number one secret to a no-bake cheesecake that holds its intricate, molded shape?
The secret is gelatin and a long, two-stage chilling process. The gelatin is the essential stabilizer that will give your creamy filling a firm, sliceable set. The initial 2 hours in the freezer are crucial for firming up the outer shell quickly, while the final 2 hours in the refrigerator allow the entire cheesecake to chill and set evenly without becoming an icy block.
Q2: Can I make this Halloween cheesecake ahead of time for a party?
Yes, absolutely! This is an ideal make-ahead dessert. You can prepare it completely a day or two in advance and keep it, well-covered, in the refrigerator.
Q3: Can I make this with a different kind of crust?
Of course! This no-bake cheesecake would also be fantastic with a simple, no-bake crust made from crushed chocolate sandwich cookies (like Oreos®).
Q4: Do I have to use a food processor for the cheesecake filling?
While a food processor is fantastic for getting a super-smooth result, you can absolutely make the filling in a large bowl with a good electric hand mixer. Just be sure to beat the cream cheese first until it is completely smooth and free of lumps before you add your other ingredients.
Q5: How do I unmold my cheesecake without it breaking?
The two most important secrets are to make sure your cheesecake is very, very cold and firm, and to use the hot water trick. By dipping the outside of the cold mold in hot water for just a few seconds, you are gently melting the very outer layer of the cheesecake, which is the key that will allow it to release from the mold cleanly and easily.

