Are you searching for the ultimate, show-stopping, “angelic” dessert for your holiday table? A magnificent, nostalgic pie so stunningly beautiful, so impossibly light-as-air, and so packed with a dreamy, creamy coconut flavor, it will be the star of your Christmas feast? This incredible, from-scratch “White Christmas Pie” is that perfect recipe. We’re talking a crisp, buttery pie crust, filled with a magnificent, cloud-like, no-bake coconut chiffon filling that is as light as freshly fallen snow.
This isn’t just another pie recipe; it’s a guide to mastering a legendary, old-fashioned classic. While it looks like a masterpiece from a fine bakery, we’ll show you the simple but brilliant, “old-world” secrets to its flawless, ‘chiffon’ texture and a perfect, sliceable set. This is a satisfying, soulful, and deeply impressive dessert that is perfect for making ahead and is destined to become your new family tradition.
Table of Contents
Table of Contents
Recipe Overview: The Ultimate “Light-as-Air” Holiday Dessert
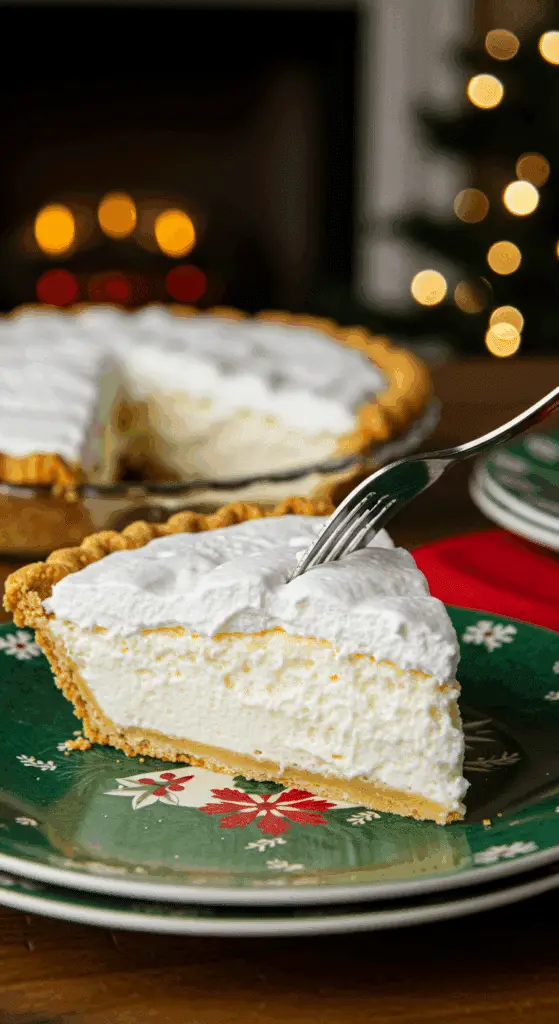
What makes this “White Christmas Pie” so spectacularly delicious is its incredible, cloud-like texture and its wonderful, delicate flavor. This recipe is a masterpiece of classic, old-fashioned baking. The “magic” is in the filling, a classic chiffon that is lightened with two different types of aeration. The flavor foundation is a simple, from-scratch vanilla-coconut custard, which is set with gelatin. The real, show-stopping magic comes from the “double-fold” technique: this custard base is first lightened with a cloud of rich, freshly whipped cream, and then made even lighter with a cloud of a sweet, stiffly-beaten egg white meringue. This is the secret to the pie’s impossibly light, airy, and mousse-like texture.
| Metric | Time / Level |
| Total Time | 3 hours 30 minutes (includes 2+ hours chilling) |
| Active Prep Time | 45 minutes |
| Difficulty Level | Intermediate |
| Servings | 8-10 slices |
The Baker’s Pantry: The Essential Ingredients
This iconic party cake uses a handful of high-quality ingredients and key techniques to create its signature festive look and delicious flavor.
- The Crust (The Shortcut Superstar!):
- Pre-Baked Pie Crust: This is the key to an incredibly easy and impressive “no-bake” (mostly!) dessert! Using your favorite store-bought or homemade pre-baked 9-inch pie crust provides the perfect, crisp, and buttery base.
- The “Chiffon” Filling (The Secret to the “Cloud”!):
- The Custard Base: The flavor of the pie comes from a simple, stovetop pudding made from milk, sugar, flour, and vanilla, and studded with flaked coconut.
- Gelatin: The brilliant, old-school secret! A packet of unflavored gelatin is the key that allows this light, airy, no-bake filling to set up perfectly firm for beautiful, clean slices.
- The “Double-Fold”: This is the non-negotiable secret to the “chiffon” texture! You will fold in stiffly beaten whipped cream (for richness and air) and stiffly beaten meringue (egg whites + sugar, for an even lighter, “snowy” texture).
The Baker’s Masterclass: The Secrets to a Perfect Chiffon Pie
This recipe uses a few simple but brilliant professional techniques that guarantee a flawless, impressive result.
- The “Double-Fold” is KEY!: The number one, non-negotiable secret to the incredible, light-as-air texture is to gently fold in your two aerators. You must use a large rubber spatula to gently “fold” the whipped cream, and then the meringue, into your custard base. Do not stir or whisk! This is the crucial step that keeps all the air you’ve beaten in, which is the key to a “cloud-like” texture.
- The “Partially Set” Custard: The secret to a filling that doesn’t just “break” and separate is to let your hot, gelatin-infused custard cool until it is “partially set” (like a loose Jell-O). This is the perfect, “ribbon-like” consistency for you to beat smooth and then fold in your lighter, airy components.
- The “Long Chill” is NON-NEGOTIABLE!: This is a true, no-bake, gelatin-set pie. It must chill in the refrigerator for at least 2 hours, or preferably overnight. This crucial, patient step is the key that allows the gelatin to fully set and firm up the entire dessert. Do not skip this step!

Step-by-Step to the Best “White Christmas Pie”
This elegant, festive dessert is a joy to prepare.
Part 1: The Art of the Creamy Coconut Custard Base
Step 1: First, in a small bowl, sprinkle your 1 packet of unflavored gelatin over the 1/4 cup of cold water and set it aside to “bloom” and soften.
Step 2: In a medium saucepan, combine 1/2 cup of the white sugar, the 4 tablespoons of flour, and the 1/2 teaspoon of salt. Gradually stir in your 1 1/2 cups of milk.
Step 3: Cook this mixture over a low heat, stirring constantly, until it boils and has thickened. Let it boil for 1 minute, then remove it from the heat and transfer it to a large bowl.
Step 4: Stir your softened, bloomed gelatin into the hot custard until it has completely dissolved. Let this mixture cool until it is partially set.
Step 5: Once it is partially set, beat the mixture with a rotary mixer until it is smooth. Blend in the 3/4 teaspoon of vanilla extract and the 1 cup of flaked coconut.
Part 2: The “Double-Fold” for the Cloud-Like Texture
Step 1: In a medium bowl, whip your 1/2 cup of heavy whipping cream until it forms stiff peaks.Step 2 (The First Fold!): Gently fold your stiffly beaten whipped cream into your cooled coconut-custard mixture.Step 3: In a separate, very clean bowl, beat your 3 egg whites until they are frothy. Add the 1/4 teaspoon of cream of tartar and the remaining 1/2 cup of white sugar. Continue beating until the egg whites form stiff, glossy peaks (a meringue).Step 4 (The Second Fold!): Gently fold this meringue into your coconut-cream mixture.
Part 3: The Festive Assembly and Final Chill
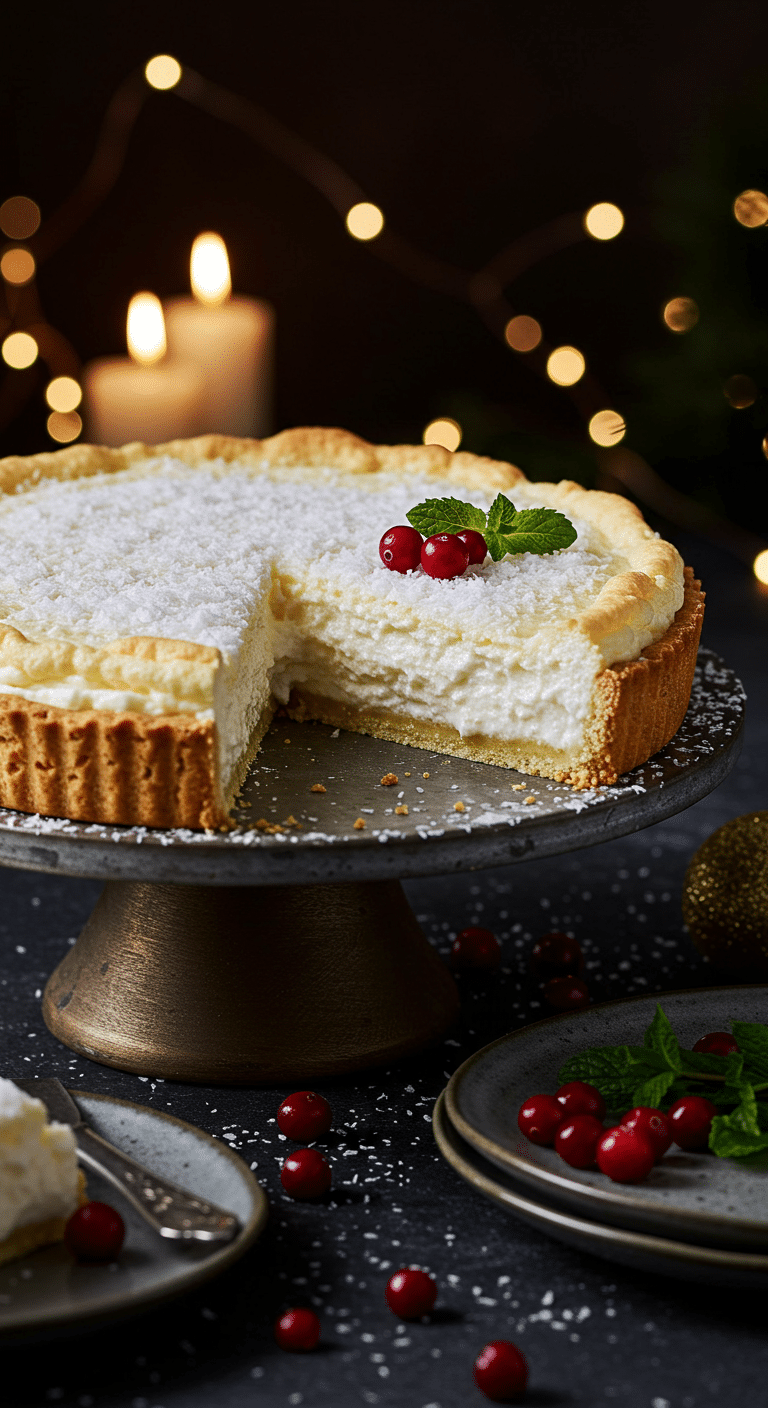
Step 1 (The Fun Part!): Pile your beautiful, light, and airy chiffon filling into your 9-inch, pre-baked pie shell.Step 2: Sprinkle the top of the pie with your remaining 2 tablespoons of flaked coconut.Step 3: Chill the pie for at least 2 hours, or overnight, until it is completely firm and set.

“White Christmas Pie” (A No-Bake Holiday Dream!)
A no-bake recipe for a ‘White Christmas Pie.’ This classic holiday dessert features a pre-baked 9-inch pie crust filled with a light, fluffy, and voluminous coconut cream filling. The filling is made by creating a cooked custard base (milk, sugar, flour), which is set with gelatin. This base is then lightened with both folded-in whipped cream and a stiffly beaten egg white meringue. The pie is topped with more flaked coconut and must be chilled for at least 2 hours to set completely.
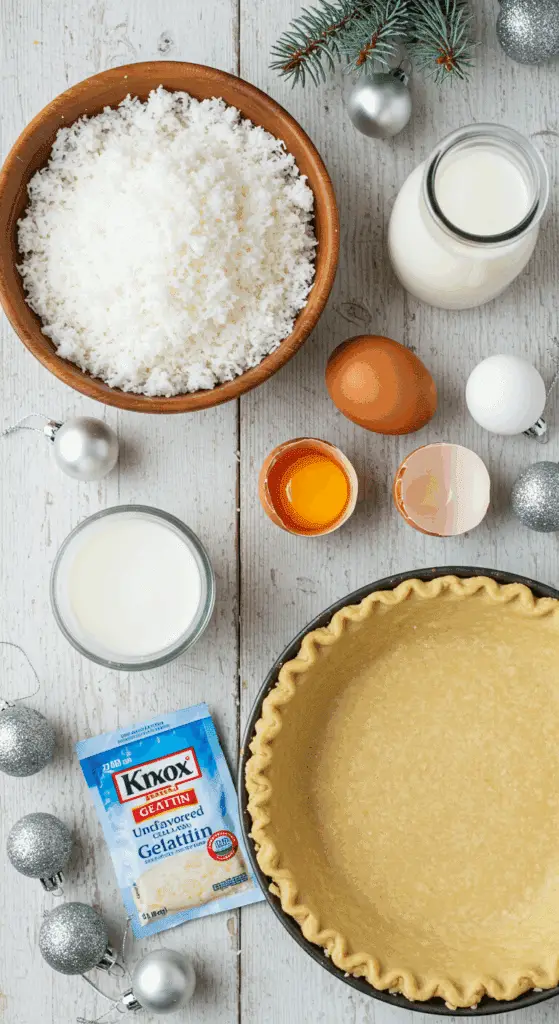
Ingredients
- 1 (.25 ounce) package unflavored gelatin
- ¼ cup cold water
- 1 cup white sugar, divided
- 4 tablespoons all-purpose flour
- ½ teaspoon salt
- 1 ½ cups milk
- ¾ teaspoon vanilla extract
- 1 cup flaked coconut
- ½ cup heavy whipping cream
- 3 egg whites
- ¼ teaspoon cream of tartar
- 1 (9 inch) pie crust, baked
- 2 tablespoons flaked coconut, for topping
Instructions
- In a small bowl, sprinkle the gelatin over the cold water and set it aside to soften.
- In a medium saucepan, combine 1/2 cup of the sugar, the flour, and the salt. Gradually stir in the milk to create a smooth mixture.
- Cook over low heat, stirring constantly, until the mixture boils and thickens. Boil for 1 minute, then remove from the heat.
- Transfer the mixture to a large bowl. Stir in the softened gelatin until it is completely dissolved.
- Let the mixture cool until it is partially set. Once partially set, beat it with a rotary or electric mixer until smooth.
- Blend in the vanilla extract and 1 cup of the flaked coconut.
- In a separate bowl, whip the heavy cream until stiff peaks form. Gently fold the whipped cream into the coconut mixture.
- In a clean, dry bowl, beat the 3 egg whites with an electric mixer until frothy. Add the cream of tartar and the remaining 1/2 cup of sugar. Continue beating until stiff peaks form.
- Gently fold the beaten egg white mixture (meringue) into the coconut-cream mixture.
- Pile the final filling into the pre-baked 9-inch pie shell.
- Sprinkle the top with the remaining 2 tablespoons of flaked coconut.
- Chill the pie for at least 2 hours, or overnight, to allow it to set completely before serving.
Notes
- This is a classic no-bake (or chiffon-style) pie that must be chilled for several hours to set properly.
- The recipe uses raw, uncooked egg whites in the filling. For modern food safety, it is recommended to use pasteurized egg whites.
- The filling is lightened by two separate components: whipped cream and a beaten egg white meringue.
- The 9-inch pie crust must be pre-baked and completely cooled before adding the filling.
What to Serve With Your “White Christmas Pie”
This beautiful and nostalgic pie is a fantastic, all-in-one show-stopper that is perfect on its own!
- The Perfect Garnish: For a beautiful, festive pop of color, you can garnish the top of the pie or your individual slices with a few fresh, sugared cranberries or some bright red pomegranate seeds.
For more recipe follow my pinterest account
Storage and Make-Ahead Tips
This is the ultimate make-ahead holiday dessert!
- Make-Ahead: This dessert must be made ahead, as it requires a long chilling time. You can prepare and fully assemble the entire pie up to 2 days in advance.
- Storage: Store the finished pie, loosely covered, in the refrigerator for up to 4 days.
Frequently Asked questions (FAQs)
Q1: Why did my pie not set up?
The two most common culprits are not letting the pie chill for long enough or not dissolving your gelatin properly. It is crucial that you stir your bloomed gelatin into your custard while it is still very hot, and that you let the finished pie chill for at least 2 hours (though overnight is even better!).
Q2: Is this pie safe to eat with the uncooked egg whites?
This is a classic, old-fashioned chiffon pie recipe, which uses uncooked egg whites. If this is a concern for you, you can absolutely use pasteurized egg whites (which are available in a carton in the refrigerated section) for a 100% safe result.
Q3: Can I make this with a different kind of crust?
Yes, absolutely! This beautiful, creamy filling would be fantastic with a classic, no-bake graham cracker or a shortbread crust. A chocolate cookie crumb crust would also be a delicious, striking contrast!
Q4: Can I toast my coconut?
Of course! For an even deeper, nuttier flavor, you can toast your flaked coconut (for both the filling and the topping) in a 350°F oven for about 5-8 minutes, until it is a light golden brown, before you use it.
Q5: My filling is lumpy. What happened?
Lumpy filling can happen for two reasons: your initial stovetop custard was not whisked well as it cooked, or you let your gelatin-custard mixture set up too firm before you beat it smooth. Be sure to catch it when it’s “partially set,” like a loose Jell-O, which is the perfect consistency to beat it smooth before you fold in your cream and meringue.

