Are you searching for that perfect, nostalgic holiday cookie? The kind of soulful, “from-scratch” treat that tastes just like the ones grandma used to make—impossibly tender, rich with butter, and perfect for cutting into festive shapes? This incredible, “Grandma’s” Old-Fashioned Tea Cake recipe is that perfect, timeless tradition. We’re talking a classic, buttery sugar cookie with a crisp, golden edge and a wonderfully soft, “short” texture that melts in your mouth.
This isn’t just another cookie recipe; it’s a guide to mastering a legendary, multi-generational secret. Forget the store-bought dough and the cookies that spread into sad, flat puddles. We’ll show you the simple but crucial “old-world” secrets to a flawless, foolproof, and easy-to-roll cookie that is the perfect blank canvas for your holiday baking traditions.
Recipe Overview: The Ultimate “Blank Canvas” Holiday Cookie
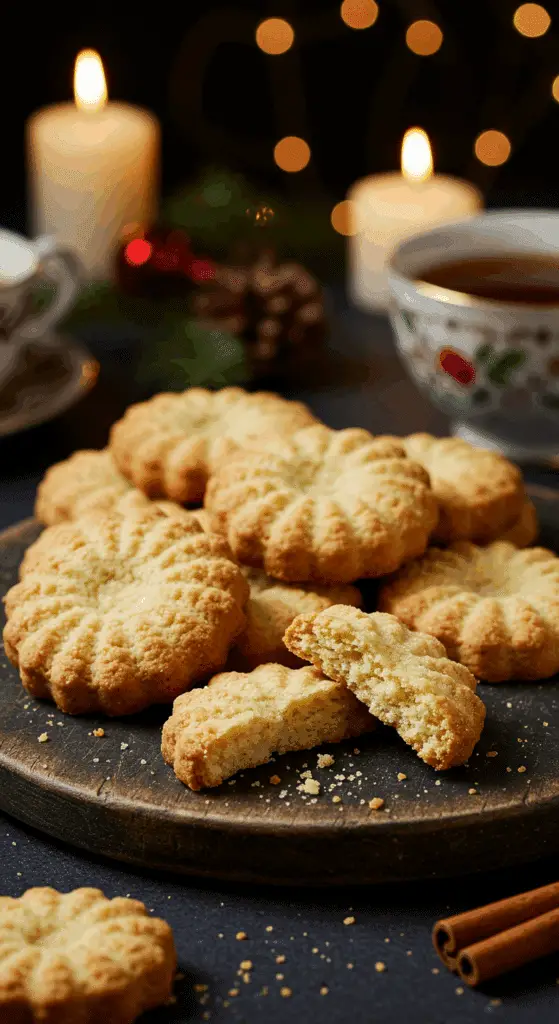
What makes this “Grandma’s” tea cake so spectacularly delicious is its incredible, rich flavor and its wonderfully tender, yet sturdy, texture. This recipe is a masterpiece of classic, old-fashioned baking. The star of the show is the dough itself, a rich and fragrant buttery, creamed-sugar base. Unlike a “puffy” sugar cookie, this dough is more of a classic, tender “short” cookie, with just a hint of leavening and a warm, aromatic kick from ground nutmeg. The result is the perfect, versatile cut-out cookie, sturdy enough to decorate but tender enough to melt in your mouth.
| Metric | Time / Level |
| Total Time | 2 hours (includes chilling) |
| Active Prep Time | 30 minutes |
| Difficulty Level | Easy |
| Servings | About 4-5 dozen cookies |
The Baker’s Pantry: The Essential Ingredients
This iconic dish uses a handful of high-quality, simple ingredients to create its signature rich and comforting flavor.
- The Cookie Dough (The “Melt-in-your-Mouth” Secret!):
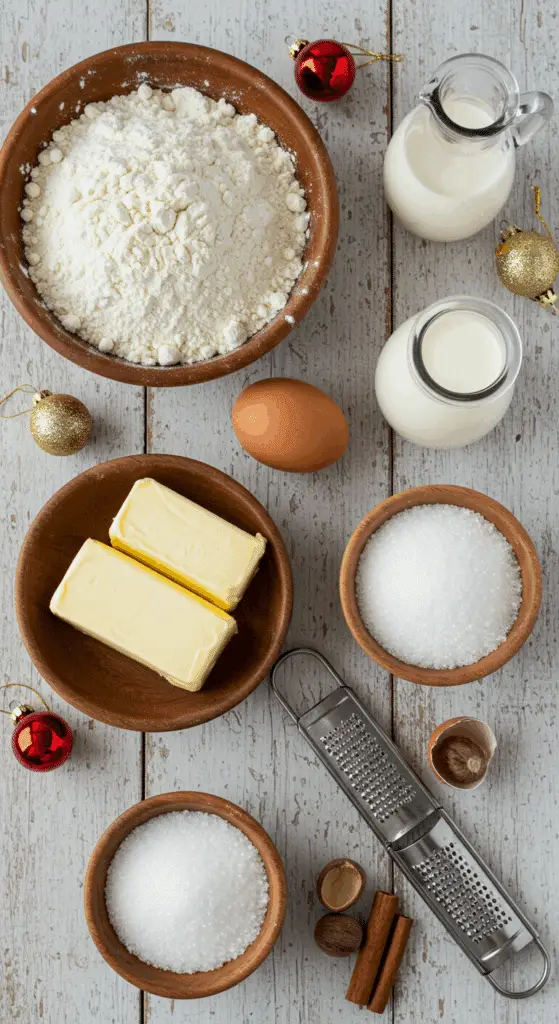
- Softened Butter: This is the heart and soul of the cookie! It is absolutely essential to use softened, room temperature butter. This is the non-negotiable secret to a batter that can hold air and create a light, tender crumb.
- The “Old-Fashioned” Aromatics: A hint of warm, fragrant ground nutmeg is the classic “Grandma’s secret” that gives these cookies a wonderful, cozy, and distinctly old-world, holiday flavor that sets them apart from a plain vanilla cookie.1
- The “Secret” Binders:
- Eggs & Heavy Cream: This is the key to a dough that is not just a simple, crumbly shortbread. The eggs add richness and structure, while the heavy cream provides a wonderful, rich moisture that makes the dough soft, pliable, and incredibly easy to roll out without cracking.
The Baker’s Masterclass: The Secrets to a Perfect Cut-Out Cookie
This recipe is all about a few simple but brilliant techniques that guarantee a flawless, impressive result.
- “Creaming” is Your Leavening: The number one, non-negotiable secret to a perfect, light, and tender cookie is the creaming method. You must beat your room temperature butter and sugar together on a medium-high speed until the mixture is very light, pale, and fluffy. This is the crucial step that incorporates the air needed for a beautiful texture.
- The 30-Minute Chill is NON-NEGOTIABLE!: This is the single most important, professional secret to a cut-out cookie that holds its shape. For any butter-based cut-out cookie, you must chill the dough. This crucial, patient step is the key that solidifies the fat, which is the magic that will prevent your beautiful, sharp-edged cookie cut-outs from spreading into sad puddles in the oven.
- The “Low and Slow” Bake: The secret to a cookie that is perfectly crisp on the edges but still tender and pale in the center is the low, 325°F oven. This is a classic, old-fashioned “gentle” baking temperature. It’s the key that allows the cookie to bake through and set its shape without the butter and the edges browning too quickly.
- Don’t Overmix!: The secret to a tender, not tough, cookie is to not overwork the dough. After you have created your butter-and-sugar base, you will sift in your flour mixture and mix on a low speed just until the dough comes together. The recipe’s “knead for a few turns” is just to form a smooth ball, not to develop gluten.

Step-by-Step to the Best “Grandma’s” Tea Cakes
This elegant, festive dessert is a joy to prepare.
Part 1: The Art of the Creamy, “Old-Fashioned” Dough
Step 1: In a large bowl with an electric mixer, beat your 1 cup of white sugar and 1 cup of softened butter together on a medium speed until the mixture is light and fluffy.2
Step 2: Add your 2 large eggs, one at a time, making sure to beat well after each addition. Beat in your 1 teaspoon of vanilla extract.
Step 3: In a separate, large bowl, combine your 3 cups of all-purpose flour, 1/2 teaspoon of baking soda, 1/2 teaspoon of salt, and 1/4 teaspoon of ground nutmeg.
Step 4: Gently stir your dry ingredients into your creamed butter mixture.
Step 5: Turn the dough out onto a floured board and knead it for a “few turns,” just until it is smooth.
Step 6 (The Most Important Step!): Cover the dough and refrigerate it until it is firm, for at least 30 minutes.
Part 2: The “Roll-and-Cut” to Perfection
Step 1: Once the dough is chilled, preheat your oven to a gentle 325°F ($165^{\circ}C$).
Step 2: On a lightly floured surface, roll your dough out to a 1/4-inch thickness.
Step 3 (The Fun Part!): Cut the dough into your desired shapes with your favorite cookie cutters. Place the cookies about 1 1/2 inches apart on an ungreased cookie sheet.
Step 4: Bake for 8 to 10 minutes. You will know they are perfectly done when the edges are just beginning to turn a beautiful, light golden brown.
Let the cookies cool on the pan for 2 minutes (they will be soft!) before you transfer them to a wire rack to cool completely.

Old-Fashioned Tea Cakes (A Classic Cut-Out Cookie!)
A classic, old-fashioned recipe for ‘Grandma’s Old Fashioned Tea Cakes.’ This simple, buttery cut-out cookie dough is flavored with vanilla and a hint of nutmeg. The dough is chilled, rolled out 1/4-inch thick, cut into desired shapes, and baked at a low temperature until the edges are just golden, resulting in a tender, classic cookie.
Ingredients
- 1 ¾ cups white sugar
- 1 cup butter, softened
- 2 large eggs
- 1 teaspoon vanilla extract
- 3 cups all-purpose flour
- ½ teaspoon baking soda
- ½ teaspoon salt
- ¼ teaspoon ground nutmeg
Instructions
- In a large bowl, beat the white sugar and softened butter together with an electric mixer until light and fluffy.
- Add the eggs one at a time, beating well after each addition. Beat in the vanilla extract.
- In a separate bowl, combine the flour, baking soda, salt, and nutmeg.
- Stir the dry ingredients into the creamed mixture until a soft dough forms.
- Knead the dough for a few turns on a floured board until smooth.
- Cover the dough and refrigerate until firm, about 30 minutes.
- Preheat the oven to 325°F (165°C). Prepare ungreased cookie sheets.
- On a lightly floured surface, roll the dough out to 1/4 inch in thickness.
- Cut the dough into desired shapes with cookie cutters.
- Place the cookies 1 1/2 inches apart onto the ungreased cookie sheets.
- Bake in the preheated oven for 8 to 10 minutes, until the edges are golden.
- Let the cookies cool on the cookie sheets briefly (about 2 minutes) before transferring them to a wire rack to cool completely.
Notes
- This is a classic ‘tea cake,’ which is essentially a simple, old-fashioned cut-out sugar cookie.
- Chilling the dough for 30 minutes is a recommended step to make the soft dough easier to roll out.
- The cookies are baked at a relatively low temperature (325°F) until just the edges are golden, which keeps them tender.
What to Serve With Your Tea Cakes
These beautiful and nostalgic cookies are a fantastic and essential part of any holiday celebration.
- The Perfect Blank Canvas: These cookies are delicious as-is, but they are also the perfect, sturdy, and flavorful base for decorating with a classic royal icing or a simple buttercream frosting.
- A Cozy Treat: They are the perfect, delicate bite to enjoy with a cup of hot coffee, a cup of tea, or a rich, homemade hot chocolate.
For more recipe follow my pinterest account
Storage and Make-Ahead Tips
These are the ultimate make-ahead holiday cookie!
- Make-Ahead: You can prepare the unbaked dough up to 3 days in advance and store it, well-wrapped, in the refrigerator.3
- Storage: Store the finished, baked cookies in an airtight container at room temperature, with sheets of wax paper between the layers, for up to 2 weeks.
- Freezing: This dough freezes beautifully! You can freeze the unbaked dough disk (for up to 3 months), or the unbaked, cut-out cookies.
Frequently Asked questions (FAQs)
Q1: Why did my cookies spread out and go flat?
The most common culprits are butter that was too soft (or melted) or not chilling your dough. The 30-minute chill is the non-negotiable secret that will solidify the fats in the dough and guarantee your cookies hold their beautiful, sharp edges.
Q2: My cookies are tough, not tender. What happened?
You overmixed your dough! After you add the flour, you must mix only until the dough comes together. The “few turns” of kneading is just to form a ball, not to work the dough.
Q3: Can I use this dough for a cookie press?
This dough is specifically designed for rolling and cutting. It may be a bit too stiff for a cookie press.
Q4: Can I use a different kind of flavoring?
Yes! This is a wonderful base. For a brighter, citrusy flavor, you can add about 1 to 2 teaspoons of freshly grated lemon or orange zest to the butter and sugar when you are creaming them. You could also substitute the vanilla with 1/2 teaspoon of almond extract.
Q5: Do I have to use nutmeg?
The nutmeg is the “Grandma’s secret” to that classic, old-fashioned, “tea cake” flavor! If you are not a fan, you can simply omit it for a beautiful, classic, vanilla-butter cookie.

