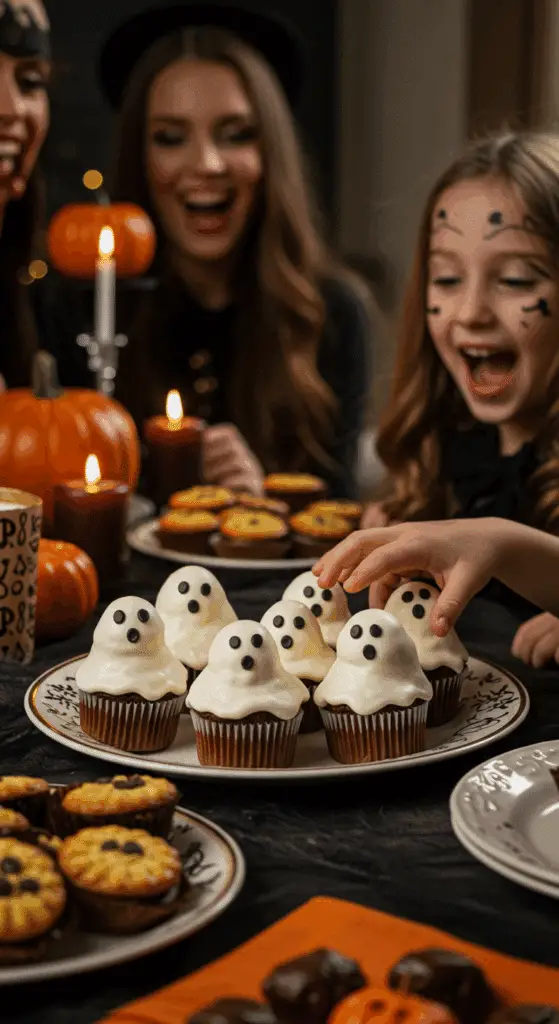
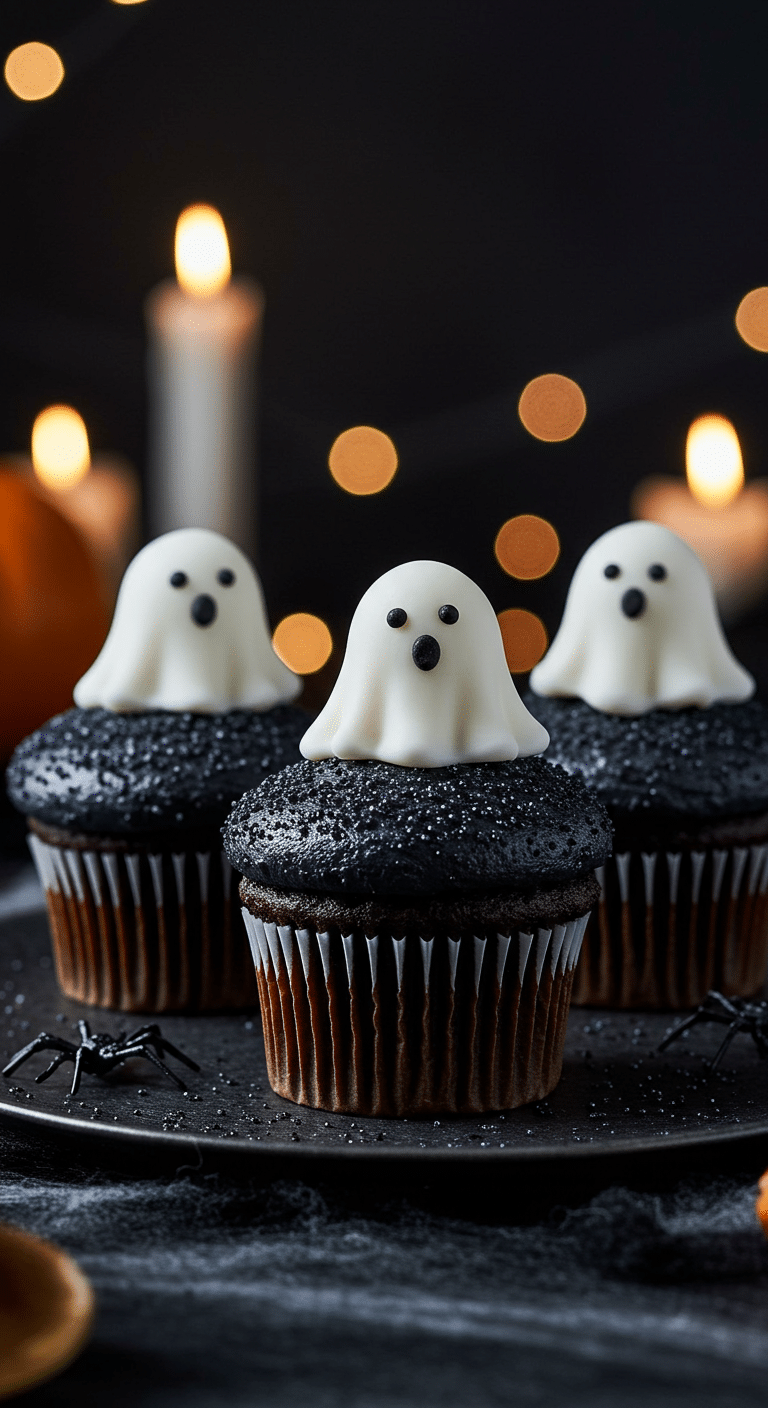
Ready to bake up the most spectacularly spooky and unbelievably adorable treat for your Halloween party? A dessert that is so fun to make, so impressive to look at, and so incredibly delicious, it will be the ghostess with the mostest at your celebration? These incredible, from-scratch Black Cocoa Ghost Cupcakes are the ultimate festive bake! We’re talking about a rich, moist, and intensely dark “midnight” chocolate cupcake, topped with the cutest and most ghoulishly delightful 3D frosting ghost you’ve ever seen.
This isn’t just a recipe; it’s a guide to your new favorite Halloween project. We’ll show you the simple secrets to a deep, dark chocolate cake and the brilliant, easy technique for creating a smooth, free-standing frosting ghost that seems to magically float on top of the cupcake. This is a show-stopping dessert that will have all your guests shrieking with delight!
Table of Contents
Table of Contents
Recipe Overview: The Ultimate Spooky & Adorable Halloween Cupcake
What makes these Ghost Cupcakes so spectacularly delicious and fun is their brilliant combination of a sophisticated, deep chocolate flavor with a super-cute, creative, and spooky decoration. The cupcake itself is a masterpiece of chocolate. It uses black cocoa powder, the secret to its “black magic,” near-black color and its intense, smooth chocolate flavor. The cupcake is then topped with a sparkly, black sanding sugar “night sky” and a classic, sweet vanilla buttercream frosting. The true magic, however, is in the technique for creating the 3D frosting ghost, a simple but brilliant “pipe, flip, press, and chill” method that creates a stunning, smooth, and free-standing ghost.
| Metric | Time / Level |
| Total Time | 2 hours 30 minutes (includes cooling & chilling) |
| Active Prep Time | 45 minutes |
| Difficulty Level | Intermediate |
| Servings | 12 cupcakes |
The “Ghostly Laboratory”: Essential Ingredients & Tools
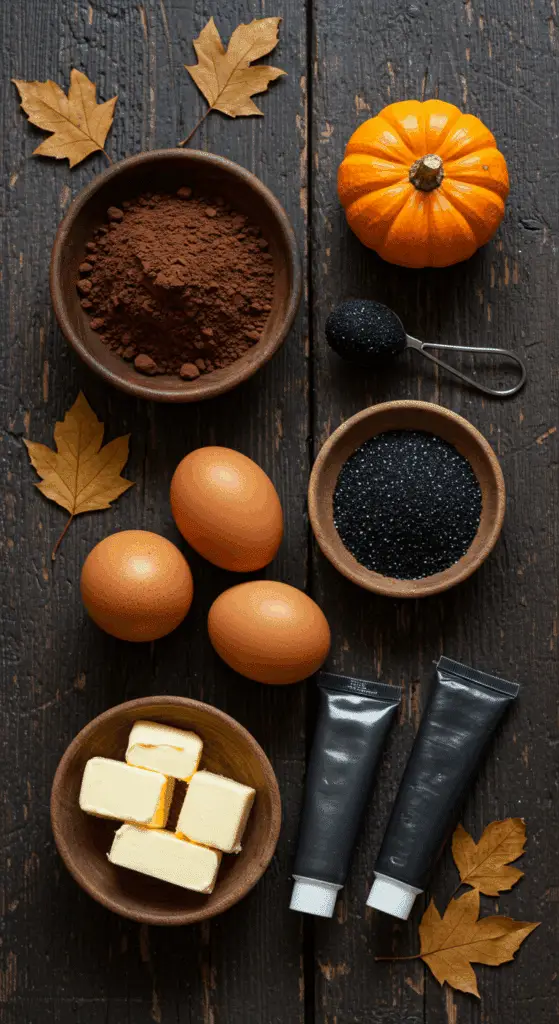
This iconic party treat uses a handful of high-quality ingredients and a few simple tools to create its signature spooky look.
- The “Midnight” Black Cocoa Cupcakes:
- Black Cocoa Powder: This is the key to the cupcake’s spooky, dark color and its deep, smooth flavor. Black cocoa powder is a type of “ultra-Dutched” cocoa, which means it has been treated to neutralize its acidity. This is the secret that gives it a stunning, near-black color (just like an Oreo® cookie!) and a very smooth, non-bitter, and intensely chocolatey taste.
- Blooming the Chocolate: This is a brilliant professional trick! Whisking the semisweet chocolate and the instant coffee with boiling water before you add them to the batter is a crucial step that dissolves them completely and “blooms” or deepens their rich, complex flavor.
- The Ghostly Frosting & Decorations:
- American Buttercream: A classic, simple, and delicious frosting made from room temperature butter, confectioners’ sugar, and milk. This is the perfect, sturdy frosting for piping our ghosts.
- Black Sanding Sugar: This gives our cupcakes a beautiful, sparkly, and dark “night sky” base for our ghosts to float on.
- Black Gel Icing: A tube of black gel icing is the perfect, easy-to-use tool for drawing on the ghosts’ cute and spooky faces.

Step-by-Step to the Best Ghost Cupcakes
This fun and festive project is incredibly simple to prepare.
Part 1: The “Midnight” Black Cocoa Cupcakes
Step 1: First, preheat your oven to 350°F (175°C). Line a 12-cup muffin tin with cupcake liners. For the best, non-stick result, you can also spray the liners and the top of the pan with a nonstick cooking spray.
Step 2: In a medium bowl, whisk together the 1 cup of all-purpose flour, the 1/2 cup of unsweetened black cocoa powder, the 1/2 teaspoon of salt, the 1/4 teaspoon of baking soda, and the 1/4 teaspoon of baking powder.
Step 3: In a separate medium bowl, combine the 2 ounces of chopped semisweet chocolate and the 1 tablespoon of instant coffee granules. Pour the 3/4 cup of boiling water over the top and let the mixture sit for 5 minutes. Then, whisk until it is completely smooth. Add the 1/3 cup of sour cream, the 1/4 cup of vegetable oil, and the 1 teaspoon of pure vanilla extract and whisk until the mixture is smooth.
Step 4: In the bowl of a stand mixer fitted with the paddle attachment, beat the 2 large eggs and the 1 1/4 cups of granulated sugar on a medium-high speed for 4 to 5 minutes, until the mixture is light and fluffy.
Step 5: Reduce the mixer speed to low and beat in the flour mixture in three additions, alternating with the sour cream mixture in two additions, beginning and ending with the flour mixture. Beat until the batter is just incorporated; it should look like a rich, dark hot fudge.
Step 6: Divide the batter evenly among your cupcake liners. Bake for 22 to 25 minutes, until a toothpick inserted into the centers comes out clean. Let the cupcakes cool for 10 minutes in the pan, then transfer them to a wire rack to cool completely.
Part 2: The Vanilla Buttercream Frosting & Decoration
Step 1: While the cupcakes are cooling, prepare your frosting. In the bowl of a stand mixer fitted with the paddle attachment, combine the 1 stick of room temperature butter, the 4 cups of confectioners’ sugar, and the 1/4 teaspoon of kosher salt on a low speed. Step 2: Gradually add the 1/4 cup of whole milk and the 1 teaspoon of pure vanilla extract and beat until the frosting is light and smooth. Step 3: Transfer about 3/4 cup of the finished frosting to a piping bag. Step 4: Line a baking sheet with parchment paper. Pour your black sanding sugar onto a plate. Step 5: Spread the frosting that is remaining in the bowl evenly over the tops of your completely cooled cupcakes. Step 6: Flip one cupcake upside down and gently press it into the sanding sugar so that the frosting is completely covered. Repeat with all the cupcakes.
Part 3: The Art of the 3D Frosting Ghost
Step 1: Working with one cupcake at a time, use your piping bag to pipe a tall, lima bean-shaped dollop of the white frosting into the center of the cupcake. Step 2 (The Magic Trick!): Flip the cupcake upside down and place it onto your prepared, parchment-lined baking sheet. Gently press down to slightly flatten the frosting dollop. The frosting will spread a little into a classic, flowing “ghost” shape. Step 3: Repeat this process with all your remaining cupcakes and then refrigerate them, upside down, until the frosting ghosts are completely firm and hardened. This will take about 30 minutes to 1 hour. Step 4: Carefully peel the cupcakes off the parchment paper and turn them right-side up. Step 5: Use your tube of black gel icing to pipe two small eyes and a mouth onto each of your beautiful, 3D ghosts.

Adorable Ghost Cupcakes (with Black Cocoa!)
A festive recipe for ‘Black Cocoa Ghost Cupcakes,’ a perfect treat for Halloween. The base is a rich and intensely dark chocolate cupcake made with black cocoa powder and bloomed with coffee for a deep flavor. The cupcakes are topped with a simple vanilla buttercream frosting. A unique decorating technique is used to create the ghost shape: a base layer of frosting is covered in black sanding sugar, then a dollop of white frosting is piped on top and flattened to create a ghost shape, which is then finished with a piped-on face.
Ingredients
- For the Cupcakes:
- Nonstick cooking spray
- 1 cup all-purpose flour
- 1/2 cup unsweetened black cocoa powder
- 1/2 teaspoon salt
- 1/4 teaspoon baking soda
- 1/4 teaspoon baking powder
- 2 ounces semisweet chocolate, chopped
- 1 tablespoon instant coffee granules
- 3/4 cup boiling water
- 1/3 cup sour cream
- 1/4 cup vegetable oil
- 1 teaspoon pure vanilla extract
- 2 large eggs
- 1 1/4 cups granulated sugar
- For the Frosting & Decoration:
- 1 stick (8 tablespoons) unsalted butter, at room temperature
- 4 cups confectioners’ sugar
- 1/4 teaspoon kosher salt
- 1/4 cup whole milk
- 1 teaspoon pure vanilla extract
- Black sanding sugar
- Black gel icing
Instructions
- Make the Cupcakes: Preheat the oven to 350°F. Line a 12-cup muffin tin with liners and spray them.
- In a medium bowl, whisk the flour, cocoa powder, salt, baking soda, and baking powder.
- In another bowl, combine the chopped chocolate and instant coffee. Pour the boiling water over top, let sit for 5 minutes, then whisk until smooth. Whisk in the sour cream, oil, and vanilla.
- In a stand mixer, beat the eggs and sugar on medium-high speed for 4 to 5 minutes, until light and fluffy.
- On low speed, beat in the flour mixture in three additions, alternating with the sour cream mixture in two additions, beginning and ending with the flour.
- Divide the batter among the cupcake liners. Bake for 22 to 25 minutes. Let the cupcakes cool completely on a wire rack.
- Make the Frosting and Decorate: In a stand mixer, beat the butter, confectioners’ sugar, and salt on low speed. Add the milk and beat until smooth. Transfer 3/4 cup of the frosting to a piping bag.
- Spread the remaining frosting from the bowl over the tops of the cooled cupcakes. Pour the black sanding sugar onto a plate and dip the frosted cupcakes upside down into the sugar to coat them completely.
- Working one at a time, pipe a lima bean-shaped dollop of frosting from the piping bag into the center of each cupcake. Flip the cupcake upside down onto a parchment-lined pan and gently press to flatten the dollop into a ghost shape.
- Repeat with the remaining cupcakes, then refrigerate them upside down for 30 minutes to 1 hour, until the frosting is hardened.
- Carefully peel the cupcakes off the parchment. Use the black gel icing to pipe eyes and a mouth onto each ghost.
Notes
- ‘Blooming’ the cocoa powder and coffee in hot water is a key step that intensifies the deep chocolate flavor of the cupcakes.
- The unique decorating technique of pressing the piped frosting upside down is what creates the smooth, flat ghost shape.
- Chilling the decorated cupcakes is crucial for the ghost frosting to harden and set.
Storage and Make-Ahead Tips
- Make-Ahead: For a super-fast and impressive party dessert, you can get a head start by preparing all your components in advance. The cupcakes can be baked and stored, unfrosted, in an airtight container at room temperature for up to 2 days. The frosting can also be made and stored in an airtight container in the refrigerator for up to a week.
- Storage: Store the finished, decorated cupcakes in an airtight container in the refrigerator for up to 3 days.
For more recipe follow my pinterest account
Creative Recipe Variations (“Make it Your Own Potion!”)
- Make it a “Bloody” Ghost Cupcake: For a gruesome and delicious surprise, you can use a small cupcake corer or an apple corer to remove the center of your baked cupcakes. Fill the hole with a spooky, “bloody” raspberry or cherry jam before you frost them.
- Use a Different Spooky Color: If you can’t find black sanding sugar, you can create a different but equally spooky look by using purple or orange sanding sugar for the base.
- Make some “Mummy” Cupcakes: For another fun and easy decoration, you can frost your cupcakes with the chocolate frosting from the “Black Magic Cake” recipe, and then use your white buttercream in a piping bag with a flat, basket-weave tip to pipe on some spooky “mummy bandages.”
Enjoy Your Ultimate Spooky & Adorable Halloween Cupcake!
You’ve just created a truly special treat that is a perfect harmony of fun, classic ingredients and delicious, satisfying flavors. These classic “Ghost Cupcakes” are a testament to the power of a simple, creative idea to become an instant party favorite and a treasured holiday tradition. It’s a rewarding and deeply satisfying recipe that is sure to make your Halloween party a memorable one.
We hope you enjoy every last, perfect, and delicious bite!
If you enjoyed making this recipe, please leave a comment below or share it with a friend who loves an easy and impressive meal!
Frequently Asked Questions (FAQs)
Q1: What is the absolute, number one secret to creating the perfect, smooth, 3D frosting ghost?
The secret is the brilliant “pipe, flip, press, and chill” method! By piping a dollop of frosting and then flipping the cupcake upside down onto a piece of parchment paper, you are using the weight of the cupcake to create a perfectly smooth, flat bottom for your ghost. Then, chilling the cupcakes until the frosting ghost is completely firm is the non-negotiable step that allows you to easily peel it off the parchment without a single smudge.
Q2: What is black cocoa powder, and is there a good substitute if I can’t find it?
Black cocoa powder is a type of “ultra-Dutched” cocoa that has been treated with an alkali to give it a stunning, near-black color and a very smooth, non-bitter flavor (it’s the secret to an Oreo® cookie’s color!). If you cannot find it, you can substitute it with a high-quality, regular Dutch-process cocoa powder. Your cupcakes will be a deep reddish-brown instead of black, but still absolutely delicious.
Q3: Can I make these Halloween cupcakes ahead of time for a party?
Yes, this is a perfect make-ahead party dessert! You can bake the cupcakes and prepare the frosting up to 2 days in advance. It is best to assemble and decorate the cupcakes on the day of your party for the freshest and most impressive result.
Q4: What is the best way to fill a piping bag without making a mess?
A great and simple trick is to place your piping bag, with the tip already in it, into a tall drinking glass. You can then fold the top edges of the bag down and over the rim of the glass. This will hold the bag open for you, leaving both of your hands free to easily scoop the frosting into the bag.
Q5: Can I make this recipe without a stand mixer?
Of course! You can easily make both the cake batter and the frosting in a large bowl with a good electric hand mixer.

