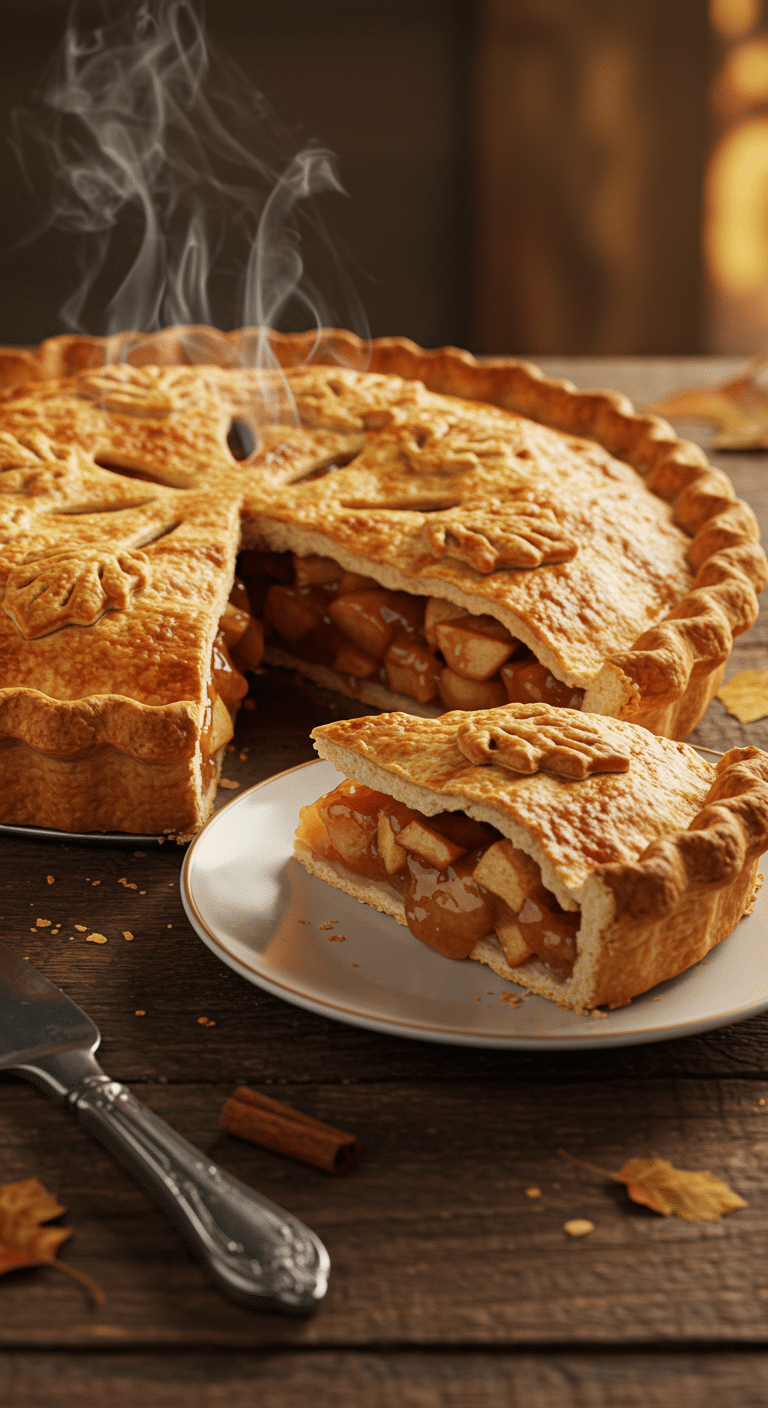
Is there any dessert more iconic, more comforting, or more quintessentially American than a perfect, homemade Apple Pie, fresh from the oven? Imagine a golden, flaky, all-butter crust that shatters at the touch of your fork, giving way to a thick, jammy, and perfectly spiced apple filling that holds its shape beautifully in a perfect slice. This isn’t just any recipe; this is your ultimate guide to mastering that perfect, bakery-worthy classic from scratch.
This is the recipe that solves all the common pitfalls of homemade apple pie. We’ll show you the simple, professional secrets to an incredibly flaky pie crust, and the game-changing technique for creating a thick, intensely flavorful apple filling that will never, ever make your bottom crust soggy. Get ready to bake the best apple pie of your life.
Table of Contents
Table of Contents
Recipe Overview: The Ultimate Guide to a Perfect Pie
What makes this Apple Pie recipe truly “perfect” is its foolproof, technique-driven approach to the filling. Instead of gambling with raw apples, we pre-cook them on the stovetop to release their juices. Then, in a brilliant move, we drain that liquid, reduce it down into a rich, caramelized syrup, and toss it back with the apples. This ingenious method guarantees a thick, jammy filling with concentrated flavor and eliminates the dreaded gap between the filling and the top crust. It’s the secret to a perfect slice, every single time.
| Metric | Time / Level |
| Total Time | 4 hours (includes chilling and cooling) |
| Active Prep Time | 45 minutes |
| Difficulty Level | Intermediate |
| Servings | 8-10 slices |
The Essential Ingredients for a Classic Apple Pie
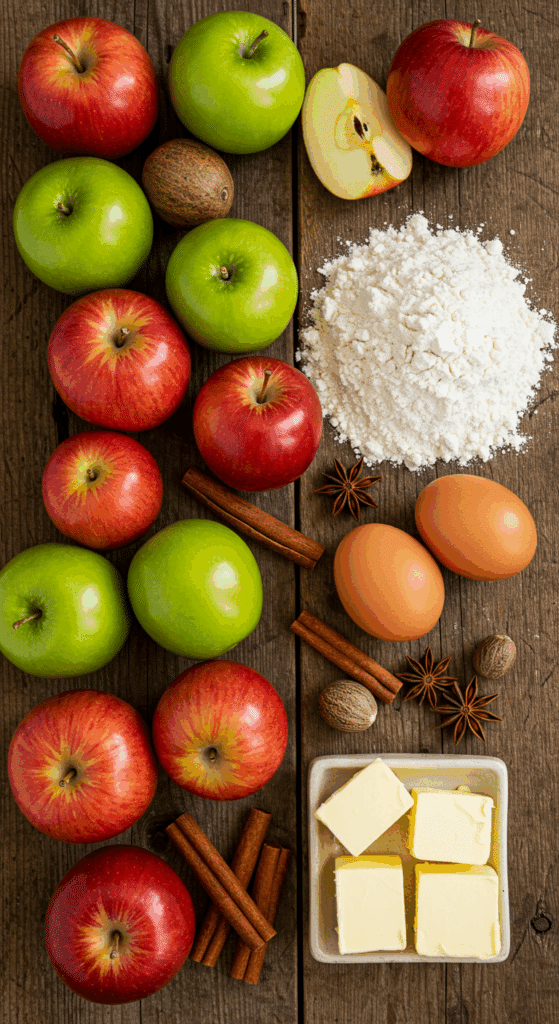
This recipe uses simple, classic ingredients where quality makes all the difference.
- The All-Butter Pie Dough: The foundation of our pie is a rich, flaky, and incredibly flavorful pâte brisée.
- Cold Unsalted Butter: The absolute key to a flaky crust. It is crucial that your butter is very cold and cut into small pieces. These cold pieces of butter will create steam as the pie bakes, which is what creates all those beautiful, flaky layers.
- An Egg: An egg (and a little cold water) is used to bind the dough. The extra fat from the egg yolk makes the crust richer, more tender, and easier to handle.
- The Apple Filling: This is the sweet and spiced heart of our dessert.
- Baking Apples: For the best pie with a complex flavor and a texture that is tender but not mushy, it’s best to use a mix of different baking apples. The recipe suggests great options like Golden Delicious, Cortland, or Mutsu. A combination of a firm-sweet apple (like a Honeycrisp or Golden Delicious) and a firm-tart apple (like a Granny Smith or Braeburn) is a fantastic choice.
- Lemon Juice: A squeeze of fresh lemon juice not only adds a bright, tart flavor that balances the sweetness but also prevents the apples from browning as you peel and slice them.
- Warm Spices (Cinnamon & Nutmeg): A classic and comforting blend of warm spices that is the perfect complement to the sweet, baked apples.

Step-by-Step to the Best Apple Pie of Your Life
This recipe is a rewarding baking project. Follow these detailed steps for a perfect, show-stopping result.
Part 1: The Perfect All-Butter Pie Dough
This recipe provides two simple methods for the dough.
- By Hand:
- In a large bowl, whisk together the 2 1/2 cups of all-purpose flour, the 4 teaspoons of sugar, and the 1/4 teaspoon of salt.
- Add the 14 tablespoons of cold, diced butter. Using your fingertips or a pastry blender, quickly work the butter into the flour until the mixture resembles coarse cornmeal with some small, pea-sized bits of butter remaining.
- Add the egg and cold water mixture and use a fork to stir the dough together until it just begins to form a shaggy mass. Do not overmix.
- By Food Processor:
- In the bowl of a food processor fitted with the metal blade, pulse the flour, sugar, and salt to combine.
- Add the cold, diced butter and pulse about 10 times, until the mixture resembles coarse cornmeal with some pea-sized bits of butter remaining.
- Add the egg and water mixture and pulse just 1 to 2 more times. Do not let the dough form into a ball in the machine.
For both methods: Turn the crumbly dough out onto a clean surface and bring it together by hand. Divide the dough in half, form each half into a flattened disc, and wrap each disc tightly in plastic wrap. Refrigerate the dough until it is thoroughly chilled, for at least 1 hour.
Part 2: The No-Soggy-Bottom Apple Filling
Step 1: In a large bowl, add the 2 tablespoons of freshly squeezed lemon juice. Peel, core, and slice your apples into 1/4-inch thick wedges. As you slice them, toss them in the bowl with the lemon juice to prevent them from browning. Add the 2/3 cup of sugar and toss to combine evenly.
Step 2: In a large skillet, melt the 1/4 cup of unsalted butter over medium-high heat. Add the apples and cook, stirring, for about 2 minutes, until the sugar has dissolved and the mixture begins to simmer.
Step 3: Cover the skillet, reduce the heat to medium-low, and let the apples cook for about 7 minutes, until they have softened slightly and have released most of their juices.
Step 4: Strain the apples in a colander set over a medium bowl, catching all of that delicious apple juice. Shake the colander a bit to get as much liquid as possible.
Step 5: Return the juices to the skillet. Simmer the juices over medium heat for about 10 minutes, until the liquid has reduced and thickened into a beautiful, lightly caramelized syrup.
Step 6: In a medium bowl, toss the slightly cooled, pre-cooked apples with the reduced juice, the 1/4 teaspoon of ground cinnamon, and the generous pinch of ground nutmeg. Set this filling aside to cool completely.
Part 3: Assembling and Baking Your Masterpiece
Step 1: Place a rack in the lower third of your oven and preheat the oven to 375°F (190°C).
Step 2: On a lightly floured surface, roll out one of the chilled discs of dough into a circle that is about 11 to 12 inches wide. Carefully line the bottom of a 9-inch pie pan with the dough. Trim the dough so that it hangs over the edge of the pan by about 1/2 inch.
Step 3: Put the completely cooled apple filling in the pan and mound it slightly in the center.
Step 4: Roll out the second disc of dough to a similar size. Brush the top edges of the bottom dough with the beaten egg. Place the second disc of dough over the top of the pie.
Step 5: Fold the top layer of dough under the edge of the bottom layer and press the edges together firmly to form a seal. Flute the edge of the pie decoratively with your fingers or a fork.
Step 6: Brush the entire surface of the top dough with the beaten egg and then sprinkle it generously with some extra sugar. Use a small, sharp knife to pierce the top of the dough in several places to allow steam to escape while the pie is baking.
Step 7: Refrigerate the assembled pie for at least 15 minutes to chill the pastry one last time.
Step 8: Place the chilled pie on a baking sheet and bake in the preheated oven for about 50 minutes, or until the crust is a deep golden brown and the filling is bubbly.
Step 9 (The Most Important Step!): Let the pie cool completely on a wire rack before you slice and serve it. This will take at least 3-4 hours. This crucial resting period allows the hot, jammy filling to cool down and set up properly, which is the secret to a perfect, clean slice.

The Best Perfect & Classic Apple Pie Recipe (From Scratch)
A from-scratch recipe for a classic double-crust apple pie. The recipe includes instructions for making a rich, buttery pastry dough either by hand or in a food processor. A key feature is the filling method, where sliced baking apples are pre-cooked on the stovetop to release their juices. These juices are then strained off and reduced into a thick, lightly caramelized syrup before being tossed back with the apples and spices. This technique creates a deeply flavorful filling and helps prevent a soggy bottom crust. The pie is finished with a full top crust and baked until golden.
- Prep Time: 45 minutes
- Cook Time: 1 hour 10 minutes
- Total Time: 5 hours (includes chilling and cooling time)
- Yield: 8 servings
- Category: Dessert
- Method: Baking
- Cuisine: American
- Diet: Vegetarian
Ingredients
- For the Dough:
- 2 1/2 cups all-purpose flour
- 4 teaspoons sugar
- 1/4 teaspoon fine salt
- 14 tablespoons cold butter, diced
- 1 large egg, lightly beaten with 2 tablespoons cold water
- For the Filling:
- 2 tablespoons freshly squeezed lemon juice
- 3 pounds baking apples (like Golden Delicious, Cortland, or Mutsu)
- 2/3 cup sugar, plus more for sprinkling
- 1/4 cup unsalted butter
- 1/4 teaspoon ground cinnamon
- Generous pinch of ground nutmeg
- 1 large egg, lightly beaten (for egg wash)
Instructions
- Make the Dough: In a medium bowl (or a food processor), combine the flour, sugar, and salt. Work in the cold, diced butter with your fingers or by pulsing until the mixture resembles coarse cornmeal with some bean-sized bits of butter remaining. Add the egg-water mixture and bring the dough together by hand until it just forms.
- Divide the dough in half, form each half into a disk, wrap in plastic wrap, and refrigerate for at least 1 hour.
- Make the Filling: Peel, core, and slice the apples. Toss them in a medium bowl with the lemon juice and 2/3 cup of sugar.
- In a large skillet, melt the butter over medium-high heat. Add the apple mixture and cook for about 2 minutes until it simmers. Cover, reduce the heat, and cook for about 7 minutes until the apples soften.
- Strain the apples in a colander set over a bowl, catching all the juices. Return the juices to the skillet and simmer over medium heat for about 10 minutes, until thickened and lightly caramelized.
- In a bowl, toss the cooked apples with the reduced juice and the spices. Let the filling cool completely.
- Assemble and Bake: Preheat the oven to 375°F with a rack in the lower third.
- On a lightly floured surface, roll one half of the chilled dough into an 11 to 12-inch disc. Line a 9-inch pie pan with the dough, trimming it to leave a 1/2-inch overhang.
- Fill the pan with the cooled apple filling, mounding it slightly in the center. Brush the top edge of the dough with the beaten egg wash.
- Roll out the second disc of dough. Place it over the top of the pie. Fold the top layer under the bottom layer and press to seal, then flute the edge as desired.
- Brush the top crust with the egg wash and sprinkle with sugar. Cut several vents in the top to allow steam to escape. Refrigerate the assembled pie for at least 15 minutes.
- Place the pie on a baking sheet and bake for about 50 minutes, until the crust is golden and the filling is bubbly.
- Cool on a wire rack completely before serving.
Notes
- This recipe includes two methods for making the pie dough: by hand or with a food processor.
- The technique of pre-cooking the apples and reducing their juices is crucial for creating a thick, flavorful filling and preventing a soggy bottom crust.
- Chilling the dough at multiple stages (after mixing, after rolling, and after assembly) helps to create a flaky crust.
- Baking the pie on a baking sheet will catch any potential drips from the bubbling filling.
Storage and Make-Ahead Tips
A homemade apple pie is a fantastic dessert to make ahead for a holiday or special occasion.
- Make-Ahead: The pie dough can be made up to 3 days in advance and stored, well-wrapped, in the refrigerator, or frozen for up to 3 months. The apple pie filling can also be made completely up to 2 days in advance and stored in an airtight container in the refrigerator.
- Storage: Store the finished, cooled pie, covered loosely, at room temperature for up to 2 days. For longer storage, you can keep it in the refrigerator for up to 4 days.
- Reheating: You can enjoy the pie at room temperature, or you can gently reheat individual slices in the microwave or a low oven until just warm.
For more recipe follow my Pinterest account
Creative Recipe Variations
This classic apple pie is a perfect base for your own delicious and creative twists.
- Classic Lattice Top: For a beautiful, traditional presentation, you can cut the second disc of dough into strips and weave a lattice top over the filling instead of using a solid top crust.
- Add a Caramel Drizzle: For a decadent Caramel Apple Pie, you can drizzle about 1/4 cup of your favorite salted caramel sauce over the top of the apple filling before you add the top crust.
- Classic Cheddar Cheese Crust: For a beloved New England-style twist, you can either grate 1/2 to 3/4 of a cup of sharp cheddar cheese and work it into the pie dough along with the butter, or you can serve each slice of the warm pie with a thin slice of sharp cheddar on top. The combination of the salty cheese and the sweet apple is incredible!
Enjoy a True American Classic!
You’ve just created a truly special, from-scratch dessert that is the very definition of American comfort food. This perfect apple pie, with its incredibly flaky all-butter crust and its thick, jammy, and intensely flavorful filling, is a rewarding baking project that is guaranteed to be a massive hit. It’s the kind of timeless dessert that creates lasting memories.
We hope you enjoy every last, perfect, flaky, and delicious bite!
If you enjoyed making this recipe, please leave a comment below or share it with a friend who loves to bake!
Frequently Asked Questions (FAQs)
Q1: What are the absolute best apples to use for an apple pie?
The secret to the best apple pie filling is to use a combination of apples. You want a mix of a firm-tart apple that will hold its shape (like Granny Smith, Braeburn, or Pink Lady) and a firm-sweet apple that will soften a bit more and create a nice sauce (like Golden Delicious, Honeycrisp, or Jonagold). Using a mix provides a much more complex and interesting flavor and texture.
Q2: What is the real secret to a flaky pie crust?
The secret is cold fat. It is absolutely crucial that your butter and your water are very cold. The goal is to keep small, pea-sized pieces of solid butter intact throughout the dough. When the pie bakes, these pieces of butter will melt and create steam, which is what creates the separate, flaky layers in the crust.
Q3: How does this recipe guarantee that my apple pie won’t have a soggy bottom crust?
The brilliant technique of pre-cooking the apples and reducing their juices is the key. By cooking the apples on the stovetop first, you are releasing a significant amount of their water before the filling ever goes into the pie crust. By then reducing that juice down to a thick syrup, you are concentrating the flavor and removing even more water. This results in a thick, jammy filling that won’t make your bottom crust soggy.
Q4: How do I know for sure when my apple pie is fully baked?
There are two key visual cues for a perfectly baked fruit pie. First, the crust should be a deep, rich golden brown all over, not pale. Second, and most importantly, the filling should be thick and bubbling vigorously up through the vents in your top crust. Seeing that thick, bubbly filling is the sign that the pie is cooked through and the filling will set up perfectly as it cools.
Q5: Why do I have to let the pie cool completely before I slice it?
This is the most important rule of fruit pie baking, but also the hardest to follow! The filling is like molten lava when it comes out of the oven. It needs several hours in the cooler, room-temperature air for the thickeners and the natural pectins to fully set up and create a firm, sliceable, jammy filling. If you cut into a warm pie, all that delicious filling will come pouring out in a runny mess. Patience is the key to a perfect slice!

