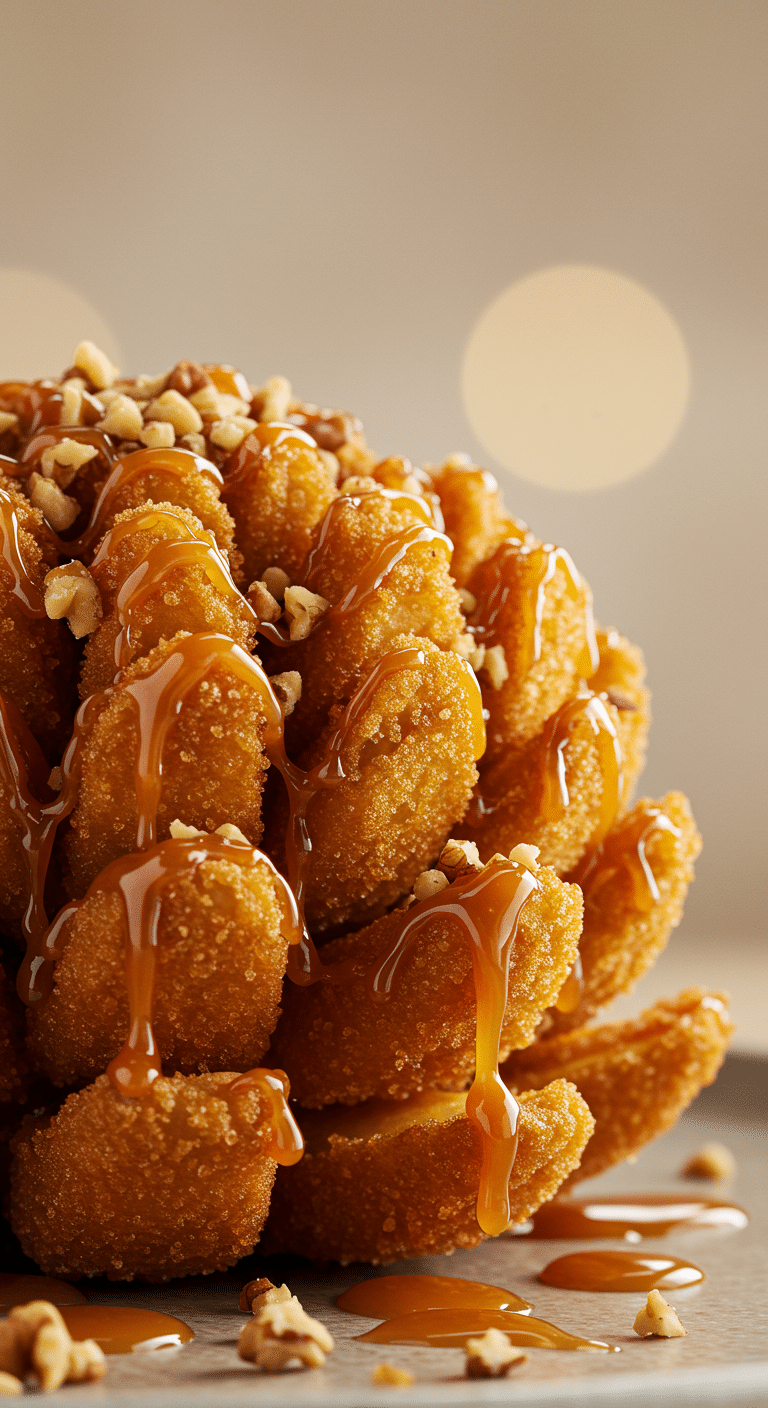
Are you ready to create the most fun, most impressive, and most outrageously delicious fall dessert you’ve ever seen? A treat that looks like it came straight from a gourmet food truck at a fall festival? This incredible, from-scratch Bloomin’ Apple is a sweet and spectacular twist on the famous blooming onion, and it’s a guaranteed showstopper that is surprisingly easy to make at home.
This isn’t just a recipe; it’s your ultimate guide to mastering a truly fun and unique dessert. We’ll show you the simple secret to a light, airy, and super-crispy batter, and the clever cutting technique that allows a whole apple to “bloom” like a flower in the fryer. Stuffed with a gooey, molten marshmallow center and served with a rich salted caramel sauce, this is the kind of fun, interactive dessert that creates delicious memories.
Table of Contents
Table of Contents
Recipe Overview: The Ultimate Fun Fair Food, Made at Home
What makes this Bloomin’ Apple so spectacular is its incredible, flower-like presentation and its amazing harmony of flavors and textures. The genius of the recipe lies in a few simple secrets: a light and crispy batter made with hard cider, and a special cutting technique that allows the apple to open up while staying intact. When deep-fried, the apple petals become perfectly tender and sweet, the batter becomes shatteringly crisp, and the marshmallow center melts into a gooey surprise. It’s the ultimate fun, from-scratch fall treat.
| Metric | Time / Level |
| Total Time | 45 minutes |
| Active Prep Time | 20 minutes |
| Difficulty Level | Intermediate |
| Servings | 6 |
The Essential Ingredients for This Showstopper
This recipe uses a handful of simple pantry staples and a few smart choices to create a spectacular result.
- The Apples: The type of apple you use is the single most important decision for this recipe! You must use a very firm, crisp, and tart apple that will hold its shape during the cutting and frying process and not turn into a mushy mess.
- Best Variety: Granny Smith apples are the absolute number one choice for a reason! Their firm texture is incredibly sturdy, and their bright, tart flavor is the perfect, delicious contrast to the sweet batter and the rich caramel sauce.
- The Light & Crispy Batter:
- Hard Cider: This is the game-changing secret ingredient! The carbonation and the yeast in a bottle of hard cider create an incredibly light, airy, and super-crispy fried coating, much like a classic beer batter.
- The Gooey Marshmallow Center: A handful of mini marshmallows are stuffed into the cored center of each apple half. As the apple fries, they melt into a wonderfully sweet and gooey surprise in the middle.
- The Salted Caramel Sauce: We take a simple, store-bought prepared caramel sauce and elevate it with a good pinch of kosher salt. This simple trick creates a much more complex, balanced, and addictive salted caramel that perfectly complements the sweet and tart apple.

Step-by-Step to the Perfect Bloomin’ Apple
Follow these detailed steps for a perfect, crispy, and beautifully “bloomed” result every time.
Part 1: The Light & Crispy Hard Cider Batter
In a large bowl, whisk together the 1 1/2 cups of all-purpose flour and the 1 teaspoon of ground cinnamon.
Pour in the 12-ounce bottle of hard cider and continue to whisk until no lumps remain and the batter is completely smooth. Set the batter aside to rest for about 15 minutes. This simple resting step allows the flour to fully hydrate, which results in a more tender final fritter.
While the batter is resting, in a small bowl, stir together the 2 tablespoons of sugar and the remaining 1/2 teaspoon of cinnamon. Set this cinnamon-sugar aside.
Part 2: The Secret to the “Bloom” – A Cutting Guide
This is the most important and fun part of the recipe! Take your time and follow these steps carefully.
Step 1: Slice your 3 Granny Smith apples in half crosswise (through the “equator,” not through the stem).
Step 2: Use a melon baller or a small, sturdy spoon to scoop out the core and the seeds from the center of each apple half. Be very careful not to go all the way through the bottom of the apple.
Step 3: Now, to help the apple bloom, you will make three concentric circle cuts. Using a set of round biscuit or cookie cutters (about 1 1/2-inch, 2-inch, and 2 1/2-inch), start with the smallest cutter and press it down into the apple flesh around the cored center. Do not press all the way through the skin. Repeat this with the next two larger cutters, creating three rings.
Step 4: Flip an apple half over so it is skin-side up. Visualize a small circle (about the size of a quarter) in the very center, where the stem was. Using a sharp paring knife, cut slits through the apple from the outside edge toward that center circle, about 1/2-inch apart, all the way around the apple. Do not cut through the center circle.
Step 5: Repeat this cutting process with the remaining apple halves.
Part 3: Assemble and Fry to Golden Perfection
Step 1: In a large, heavy-bottomed pot or Dutch oven, fill the pot about halfway with a neutral, high-heat frying oil. Attach a deep-fry thermometer to the side of the pot and heat the oil to 350°F (175°C).
Step 2: While the oil is heating, gently use your hands to pull apart the outer layers or “petals” of your cut apples. This will help them to bloom and will allow the batter to get into all the cuts.
Step 3: Sprinkle each apple half with about 1 teaspoon of your prepared cinnamon-sugar mixture. Stuff the cored centers of each apple half with 4 mini marshmallows.
Step 4: Place 2 of the apple halves at a time into the bowl with the batter. Use a large, slotted spoon to turn them and make sure they are completely and evenly coated.
Step 5: Carefully lower each battered apple, cut-side down, into the hot oil. Fry for about 3 minutes, until the bottom is crispy and a deep golden brown.
Step 6: Using your slotted spoon, carefully flip the apples over and continue to fry for another 2 to 3 minutes, until the apples are tender all the way through and the tops are also golden brown and crispy.
Step 7: Use your slotted spoon to transfer the hot, fried Bloomin’ Apples to a wire rack or a paper towel-lined baking sheet to drain. Repeat this process with the remaining apples, making sure to bring your oil temperature back up to 350°F before you start each new batch.
Part 4: Garnish and Serve
While the apples are frying, stir the 1/2 cup of prepared caramel sauce and the 1/2 teaspoon of kosher salt together in a small bowl until they are well combined.
Serve the Bloomin’ Apples immediately while they are still warm and at their crispiest. Place each one in a bowl, dollop it with a generous amount of fresh whipped cream, and drizzle it with the prepared salted caramel sauce. Serve any remaining sauce on the side for dipping.

The Ultimate Crispy Bloomin’ Apple Recipe (Easy!)
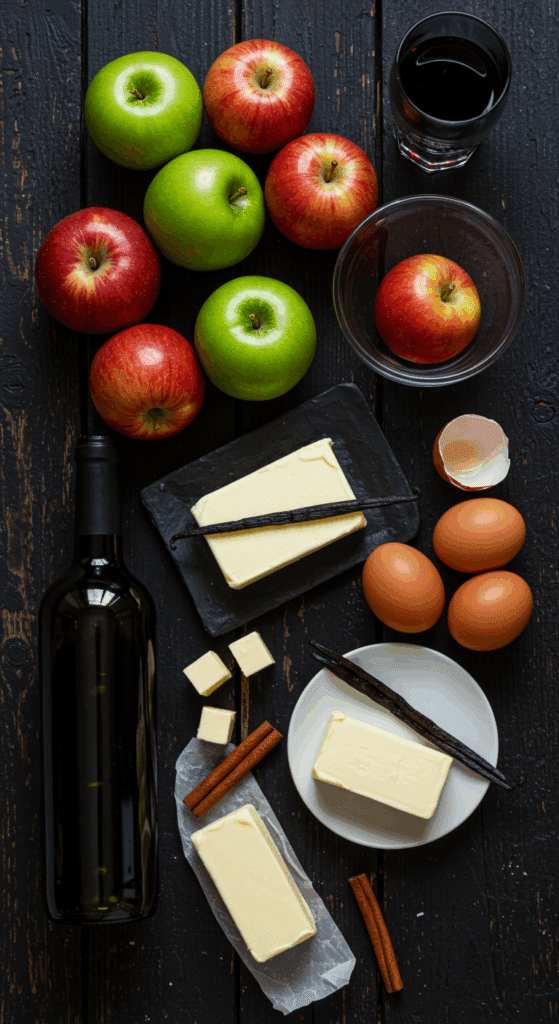
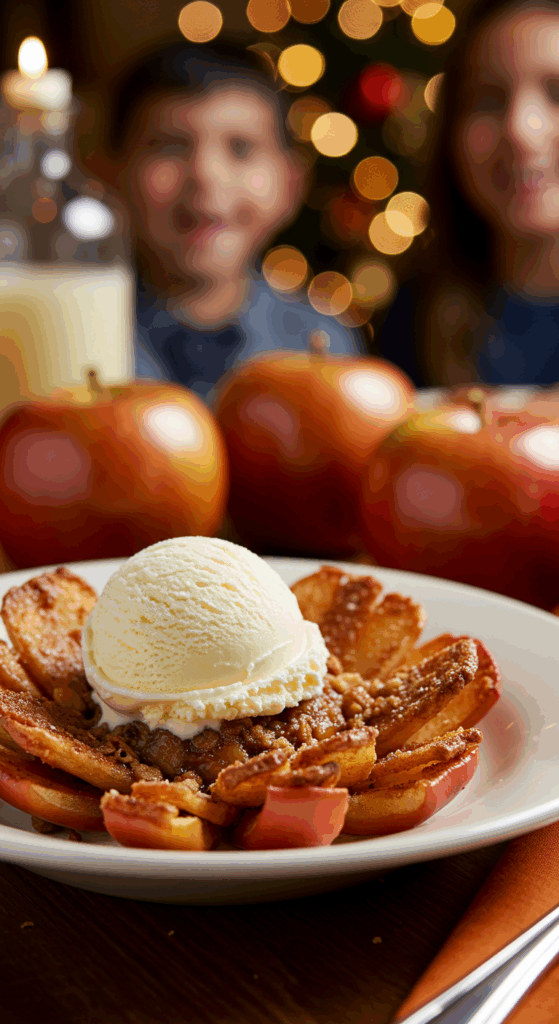
An elaborate from-scratch recipe for the ‘Ultimate Caramel Apple Pie’. This dessert features a homemade all-butter double pie crust. The unique filling consists of very thinly sliced apples layered with a rich, homemade caramel sauce that is infused with red wine and a fresh vanilla bean. The pie is assembled in a deep-dish pan, topped with a full crust, brushed with an egg white wash, and sprinkled with cinnamon sugar. It’s baked first under foil and then uncovered until the crust is deeply golden and the filling is bubbly.
- Prep Time: 55 minutes
- Cook Time: 50 minutes
- Total Time: 3 hours 45 minutes (includes chilling and cooling time)
- Yield: 8-10 servings
- Category: Dessert
- Method: Baking
- Cuisine: American
- Diet: Vegetarian
Ingredients
- For the Pie Crust:
- 3 cups all-purpose flour, plus more for dusting
- 1 teaspoon salt
- 1 1/2 sticks (12 tablespoons) cold unsalted butter, in chunks
- 1 egg yolk
- 3 tablespoons ice water, plus more if needed
- For the Caramel Apples:
- 1 cup sugar, plus 1/4 cup for the top
- 3 tablespoons water
- 1/4 cup heavy cream
- 1/2 cup red wine
- 1/2 vanilla bean, split and scraped
- 1 lemon, halved
- 8 apples (e.g., Granny Smith and Gala), peeled, cored, and thinly sliced
- 1 tablespoon all-purpose flour
- 1 cinnamon stick, freshly grated
- 1/4 cup unsalted butter, in pieces
- 1 egg white, beaten
Instructions
- Make the Pie Crust: In a large bowl, combine the flour and salt. Cut in the cold butter with a pastry blender until the mixture resembles coarse meal. In a small bowl, whisk the egg yolk and ice water. Add this to the flour mixture and mix until a dough forms. Form into a ball, wrap in plastic, and refrigerate for 1 hour.
- Make the Caramel Sauce: In a small pot over medium-low heat, cook 1 cup of sugar and 3 tablespoons of water without stirring for about 10 minutes, until the sugar has melted and caramelized. Carefully and slowly add the cream and red wine (it will bubble vigorously). Return the pot to the heat, add the vanilla bean, and simmer until the sauce is smooth and reduced by half. Let it cool.
- Prepare the Apples: Preheat the oven to 350°F. Peel, core, and thinly slice the apples, placing them in a bowl of water with the juice of half a lemon to prevent browning. Drain the apples and toss with 1 tablespoon of flour and freshly grated cinnamon.
- Assemble the Pie: Roll out half of the chilled dough and fit it into a 10-inch glass pie pan.
- Create layers in the pie shell, alternating between shingled apple slices and a drizzle of the cooled red wine caramel sauce, until the pie is slightly domed. Dot the top layer of apples with pieces of butter.
- Roll out the second half of the dough. Brush the rim of the bottom crust with beaten egg white. Place the top crust over the pie, trim, and crimp the edges to seal.
- Brush the top crust with the remaining egg white, sprinkle with a mixture of 1/4 cup sugar and more cinnamon, and cut slits in the top for steam to escape.
- Bake: Place the pie on a sheet tray. Tent with foil and bake for 25 minutes. Remove the foil and continue to bake for another 25 minutes, until golden and bubbly.
- Let the pie rest at room temperature for at least 1 hour before slicing.
Notes
- This pie requires several chilling and cooling steps, so it’s a great make-ahead project for a special occasion.
- Making the caramel sauce requires care, as the hot sugar will bubble up aggressively when the cream and wine are added.
- Slicing the apples very thinly, with a mandolin if possible, is key to creating a dense, meaty apple pie with no gaps.
- Baking the pie on a sheet pan is recommended to catch any potential drips from the bubbling caramel.
Storage and Make-Ahead Tips
A Bloomin’ Apple is a spectacular treat that is at its absolute best when it is served immediately, fresh and hot from the fryer.
- Make-Ahead: For a super-fast treat, you can prepare the hard cider batter, the cinnamon-sugar, and the salted caramel sauce up to a day in advance. Store the batter and the caramel sauce, covered, in the refrigerator. You may need to whisk another small splash of cider into the batter to loosen it up before you use it.
- Storage: If you do have leftovers, they can be stored in an airtight container in the refrigerator for up to 2 days.
- Reheating: The absolute best way to reheat a Bloomin’ Apple and bring back some of its original crispiness is in an air fryer or a hot 400°F oven. Place it on a baking sheet and reheat for just 3-5 minutes, until it is hot and has crisped up again.
For more recipe follow my Pinterest account
Creative Recipe Variations
- Make it a Non-Alcoholic Version: If you prefer to make this without the hard cider, you can simply substitute it in the batter with an equal amount of a non-alcoholic sparkling apple cider or a plain club soda. The carbonation is the key to the crispy texture.
- Add a Different Topping: If you’re not a fan of caramel, these Bloomin’ Apples would also be absolutely delicious simply dusted with powdered sugar, or served with a side of a rich chocolate dipping sauce.
- Use a Different Fall Fruit: This same fun blooming and frying technique can also be used with firm, crisp pears (like a Bosc or an Anjou pear) for a delicious Bloomin’ Pear dessert.
Enjoy The Ultimate Fun Fall Treat!
You’ve just created a truly special, show-stopping dessert that is the very definition of fun food. This incredible Bloomin’ Apple is a perfect harmony of a crispy, light batter, a tender, tart fruit center, and a rich, gooey filling. It’s a rewarding and deeply satisfying project that is guaranteed to be a massive hit at any party or family gathering.
We hope you enjoy every last, warm, and delicious bite!
If you enjoyed making this recipe, please leave a comment below or share it with a friend who is ready for a fun new fall treat!
Frequently Asked Questions (FAQs)
Q1: What is the absolute best apple to use for a Bloomin’ Apple?
For a recipe like this one, where the apple needs to be cut in an intricate way and then hold its shape during deep-frying, you must use a very firm, crisp, and sturdy apple. A Granny Smith is the number one choice for both its firm texture and its wonderful, tart flavor, which is a fantastic contrast to the sweet toppings.
Q2: How do I cut the apple so that it “blooms” but doesn’t fall apart?
The secret is the two-part cutting method described in the recipe. The concentric circle cuts on the inside help to separate the layers, while the crucial step of making the outside slits without cutting through the very center of the apple is what keeps the entire thing connected and allows you to fan it open like a flower without it falling into individual pieces.
Q3: Can I make these Bloomin’ Apples in an air fryer?
Because this is a very wet, liquid batter, it is not suitable for a standard air fryer, as the batter would simply drip through the basket. An air fryer is best for foods that are already solid or are coated in a drier, breadcrumb-style coating.
Q4: How do I keep my batter from falling off of the apple in the fryer?
The key is to make sure your apple slices are as dry as possible before they go into the batter. As the recipe directs, be sure to pat them dry with paper towels after you have sliced them. This will help the batter to adhere much better. Also, be sure to handle them gently with a slotted spoon in the hot oil.
Q5: What is the best way to deep-fry safely at home?
Always use a heavy-bottomed, deep pot (like a Dutch oven) and never fill it more than halfway with oil. Use a deep-fry thermometer to constantly monitor your oil temperature. Never leave your hot oil unattended. And when you are adding your food to the oil, be sure to lower it in gently and slowly to prevent any dangerous splashing.

