Introduction & Inspiration
Get ready for a wrap that’s bursting with flavor and loaded with cheesy, garlicky goodness! These Cheesy Garlic Chicken Wraps take simple cooked chicken and elevate it with a rich, creamy filling made from mozzarella, cream cheese, sour cream, fresh garlic, and Italian herbs. Rolled up snugly in a soft tortilla and then pan-fried or grilled until golden brown and slightly crispy, they are absolutely irresistible.
My inspiration for this recipe comes from loving those decadent cheesy garlic bread appetizers and wanting to turn those flavors into a satisfying handheld meal. Combining a creamy garlic cheese mixture with tender chicken and wrapping it all up seemed like the perfect way to create a convenient and incredibly flavorful treat.
These wraps are perfect for a quick weeknight dinner, a fun lunch, or even cut into smaller pieces for a party appetizer. They are easy to assemble and deliver big on comforting, savory flavor. It is a perfect recipe for cheese lovers.
Nostalgic Appeal / Comfort Factor
Cheesy chicken dishes and anything involving garlic butter flavors tap into deep wells of comfort food nostalgia for many. Think cheesy casseroles, garlic bread, or creamy pasta dishes. Wraps and burritos offer their own modern comfort factor – convenient, customizable, handheld meals.
This recipe combines the satisfying richness of a cheesy garlic filling with the familiar comfort of tender chicken, all wrapped up in an easy-to-eat format. Pan-frying the wrap at the end adds a delightful crispy texture that enhances the comfort and satisfaction.
It’s a fun, indulgent-tasting meal or snack that feels both comforting and satisfyingly complete. A perfect comfort food recipe.
Homemade Focus (Easy Filling & Assembly)
While this recipe cleverly uses pre-cooked chicken (like leftover or rotisserie chicken) as a fantastic shortcut, the homemade focus shines in the creation of the flavorful cheesy garlic filling and the assembly/cooking process. You’re sautéing fresh garlic in butter, mixing up a creamy blend of cheeses, sour cream, and seasonings from scratch, and then carefully wrapping and crisping the tortillas yourself.
Making the filling fresh allows you to control the garlic intensity and seasoning balance. The final step of pan-frying or grilling the assembled wrap is a key homemade technique that creates that desirable crispy exterior and melds the cheesy filling together.
It’s about taking convenient components and combining them with simple homemade steps to create a delicious, satisfying meal that tastes far better than just throwing ingredients into a plain wrap. The homemade filling is delicious.
Flavor Goal
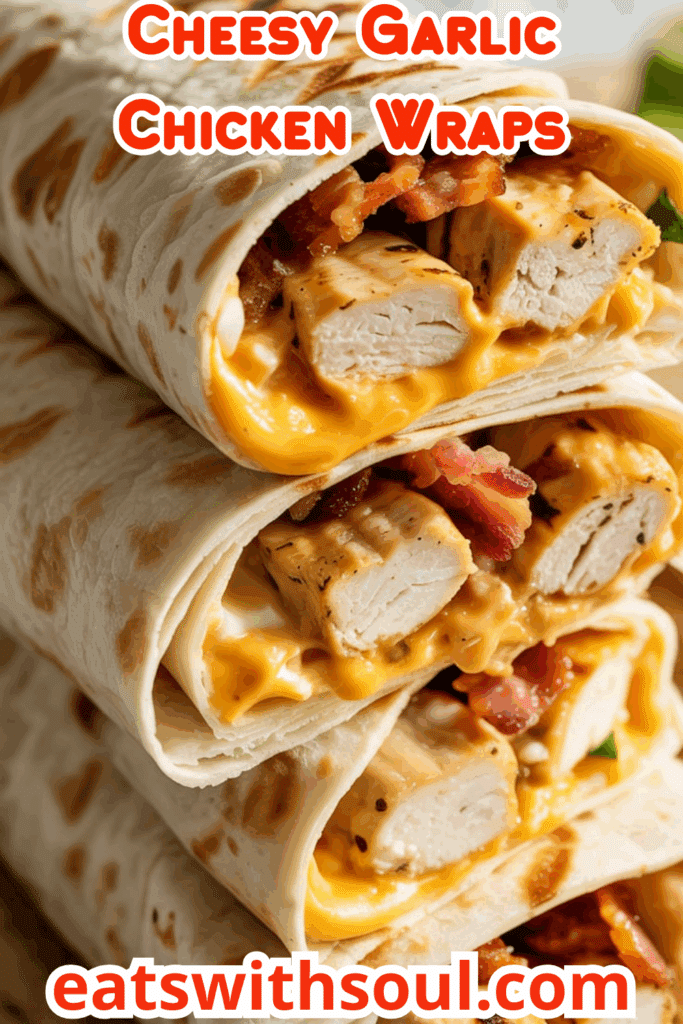
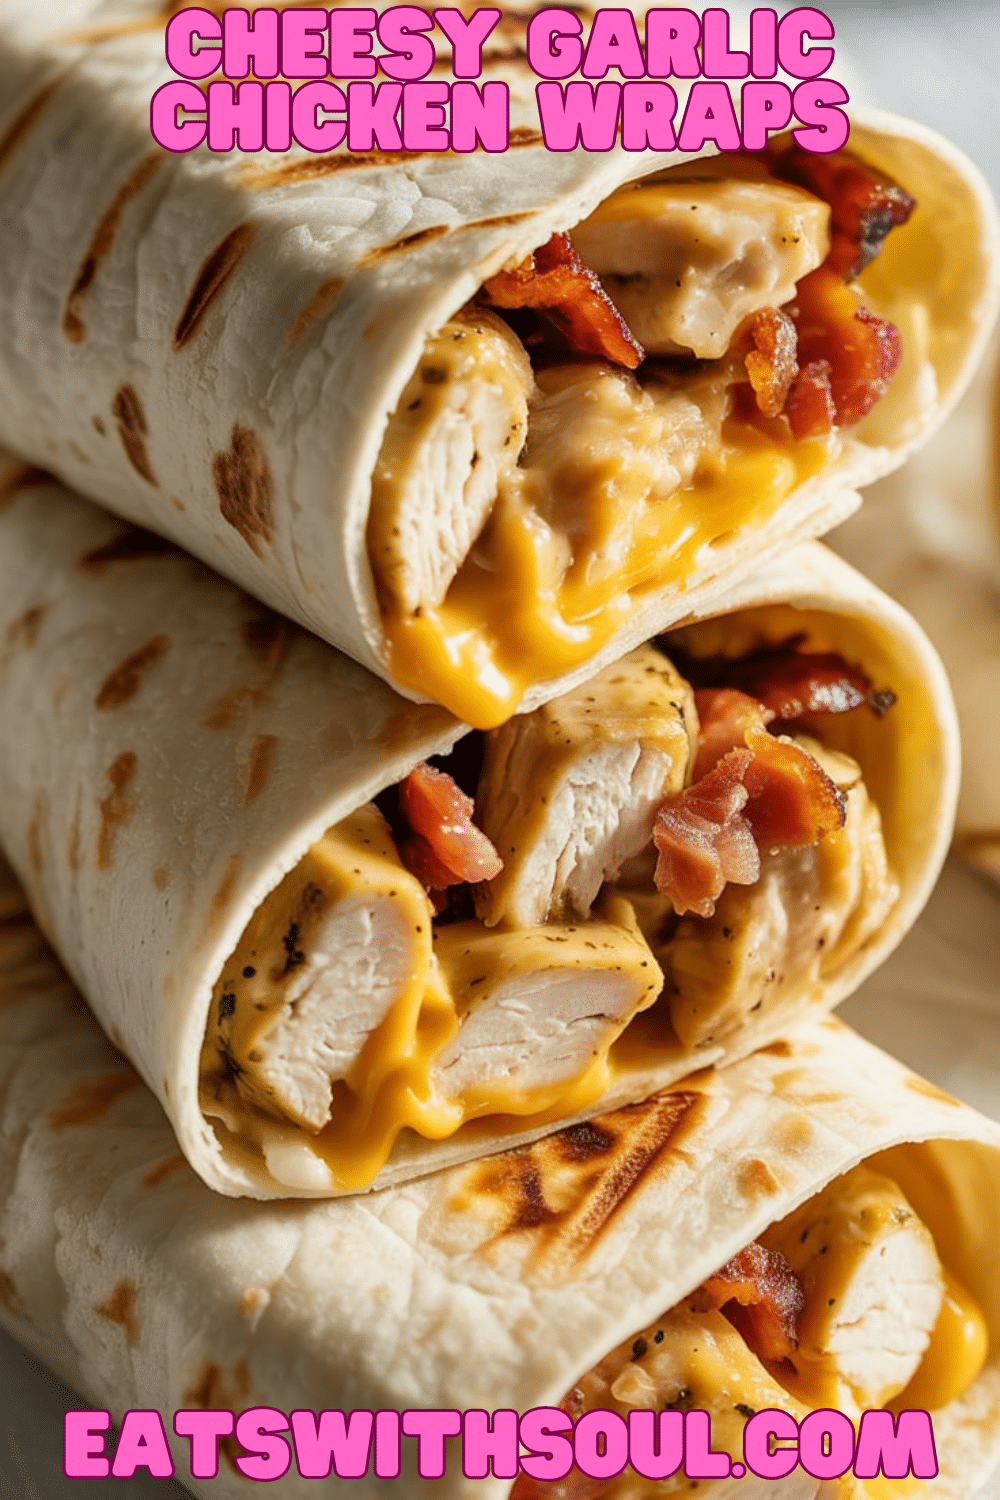
The primary flavor goal is a warm, savory wrap bursting with garlic, melted cheese, and tender chicken flavors, encased in a slightly crispy tortilla. The filling should be creamy and rich from the cream cheese, sour cream, and mozzarella, with prominent garlic and Italian herb notes.
The cooked chicken provides the savory protein base. The pan-fried tortilla exterior should offer a pleasant golden-brown crispness that contrasts with the soft, gooey, cheesy filling inside.
The overall experience should be cheesy, garlicky, savory, comforting, and texturally satisfying with the crispy wrap and creamy interior. A perfect balance between flavour and texture.
Ingredient Insights
- Cooked Chicken (Shredded or Diced): Leftover roasted chicken, rotisserie chicken, or quickly sautéed diced chicken breast works perfectly. About 2 cups needed.
- Cheese Filling:
- Mozzarella or Cheddar Cheese (Shredded): Provides the primary gooey melt. Divided use – some mixed in, some sprinkled before rolling. Mozzarella is milder, cheddar sharper.
- Cream Cheese (Softened): Creates the essential creamy, tangy base for the filling. Must be well softened for smooth mixing.
- Butter: Used to sauté the fresh garlic, forming a flavor base.
- Garlic (Minced): Fresh minced garlic provides the core flavor punch.
- Sour Cream: Adds extra creaminess and tang to the filling. Plain Greek yogurt could substitute.
- Seasonings (Garlic Powder, Italian Seasoning, Salt, Pepper): Enhance the savory and herbaceous notes of the filling.
- Wraps:
- Large Flour Tortillas: Standard “burrito size” (around 10-inch) works best to hold the filling and allow for proper folding/rolling.
- Garnish:
- Fresh Parsley (Chopped): Adds a pop of fresh green color and flavor at the end.
Essential Equipment
- Large Skillet or Grill Pan: For sautéing garlic initially and for pan-frying/crisping the assembled wraps.
- Large Bowl: For mixing the chicken and cheese filling.
- Spatula or Spoon: For mixing filling and potentially pressing wraps in skillet.
- Knife & Cutting Board: For prepping chicken (if needed), mincing garlic, chopping parsley.
- Measuring Cups & Spoons:
- Grater (Optional): If grating cheese from a block.
Ingredients
(Based on 1x column)
Cheese Filling & Chicken:
- ▢ 2 tbsp butter
- ▢ 3 cloves garlic, minced
- ▢ 2 cups cooked chicken, shredded or diced
- ▢ 1 tsp garlic powder
- ▢ 1 tsp Italian seasoning
- ▢ Salt and pepper to taste
- ▢ 1 1/2 cups mozzarella or cheddar cheese, shredded, divided (reserve ~1/2 cup for inside wraps)
- ▢ 1/4 cup cream cheese, softened
- ▢ 1/4 cup sour cream
Wraps:
- ▢ 4 large tortillas (10-inch size recommended)
Garnish:
- ▢ Fresh parsley, chopped

Step-by-Step Instructions
1. Sauté Garlic:
- Melt the butter in a large skillet over medium heat.
- Add the minced fresh garlic and sauté for 1-2 minutes until fragrant. Be careful not to let it brown or burn, as burnt garlic tastes bitter. Remove skillet from heat briefly if needed.
2. Heat Chicken & Seasonings:
- Add the cooked shredded or diced chicken to the skillet with the garlic butter.
- Sprinkle with the garlic powder, Italian seasoning, salt, and pepper. Stir well and heat through for about 1-2 minutes, coating the chicken in the flavors. Remove chicken mixture from skillet and set aside briefly (can place in the filling bowl).
3. Make Cheese Filling Base:
- In a large mixing bowl, combine the softened cream cheese and sour cream. Stir or beat until smooth.
- Stir in about 1 cup of the shredded mozzarella or cheddar cheese (reserving the remaining 1/2 cup for inside the wraps).
4. Combine Filling:
- Add the warm garlic-seasoned chicken mixture to the cheese mixture in the bowl.
- Stir everything together until the chicken is evenly coated and combined with the creamy cheese filling.
5. Assemble the Wraps:
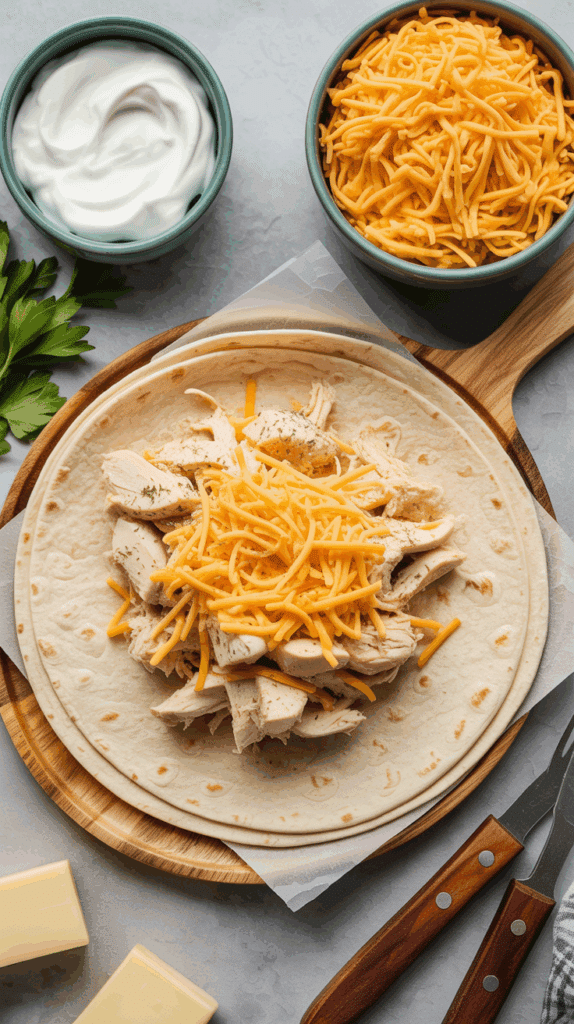
- Lay one large tortilla flat on a clean surface.
- Spoon about one-quarter of the chicken and cheese mixture onto the center of the tortilla, spreading it slightly but leaving a border around the edges.
- Sprinkle about 2 tablespoons (or 1/8 cup) of the reserved shredded mozzarella/cheddar cheese over the filling on the tortilla.
- Fold the wrap burrito-style: Fold in the opposite sides (left and right) snugly over the filling. Then, tightly roll the tortilla up from the bottom edge towards the top edge to form a secure wrap. Place seam-side down.
- Repeat for the remaining tortillas and filling.
6. Cook the Wraps:
- Wipe out the skillet used earlier if needed, or use a clean skillet or grill pan. Place it over medium heat (add a tiny bit of oil or butter if desired, but often not necessary if wraps are sealed well).
- Carefully place 1 or 2 wraps (depending on pan size), seam-side down, into the warm skillet.
- Cook for 2-3 minutes per side, until the tortilla is golden brown, slightly crispy, and the cheese inside is melted and gooey. Flip carefully with a spatula. Adjust heat as needed to prevent burning.
- Repeat with remaining wraps.
7. Garnish and Serve:
- Remove the cooked wraps from the skillet.
- Garnish generously with fresh chopped parsley.
- Serve the Cheesy Garlic Chicken Wraps immediately while hot and crispy.

Troubleshooting
- Wrap Falling Apart/Leaking: Rolled too loosely, overstuffed, or tortilla split. Ensure a tight roll and don’t overfill. Warm tortillas slightly if they seem stiff before rolling. Seal ends well.
- Tortilla Burning: Skillet heat too high. Cook over medium or medium-low heat to allow cheese to melt before exterior burns.
- Tortilla Soggy (Instead of Crispy): Skillet heat too low, or too much moisture in filling. Cook over medium heat. Ensure chicken/filling isn’t excessively wet.
- Filling Too Dry: Needed more cream cheese/sour cream, or chicken was very dry initially. Add a splash more sour cream if needed.
- Filling Too Runny: Cream cheese too soft/warm, or used low-fat versions which can be more watery. Use full-fat, slightly cool (but softened) cream cheese.
Tips and Variations
- Soften Cream Cheese: Ensure cream cheese is properly softened for a smooth, lump-free filling.
- Seal Wraps Well: Folding sides in first then rolling tightly helps keep everything contained.
- Medium Heat for Crisping: Don’t rush the final cooking step. Medium heat allows the tortilla to crisp nicely while the cheese melts.
- Chicken Options: Great way to use leftover rotisserie chicken!
- Cheese Variations: Use Provolone, Monterey Jack, Pepper Jack (for spice!), or an Italian blend instead of mozzarella/cheddar.
- Add Veggies: Mix in some finely chopped sautéed spinach, mushrooms, or bell peppers (ensure cooked and moisture removed) into the filling.
- Spice it Up: Add a pinch of red pepper flakes or a dash of hot sauce to the filling mixture.
- Baking/Air Frying Option: Instead of pan-frying, brush wraps lightly with melted butter or oil spray and bake at 400°F (200°C) for 10-15 mins, flipping once, until golden OR air fry at ~375°F (190°C) for 6-10 mins, flipping once. Texture will be slightly different than pan-fried.
Serving and Pairing Suggestions
- Serve Hot: Essential for the crispy tortilla and melty cheese experience!
- With Dipping Sauce: Delicious with marinara sauce, ranch dressing, or even salsa or queso dip.
- Lunch or Dinner: Makes a quick and satisfying meal.
- Appetizer: Cut wraps into smaller pinwheels or halves for a party appetizer.
- Simple Side: Serve with a side salad, fruit, or chips.
Nutritional Information
(Note: Estimated, per wrap, assuming 4 wraps made. Variable based on tortilla size/brand, chicken type, cheese amount.)
- Calories: 450-600+
- Fat: 25-40g+
- Saturated Fat: 12-20g+
- Cholesterol: 90-130mg+
- Sodium: 800-1200mg+ (depends on seasonings, cheese, chicken)
- Total Carbohydrates: 30-40g+ (mostly from tortilla)
- Dietary Fiber: 2-4g+
- Sugars: 2-5g+
- Protein: 25-35g+
Cheesy Garlic Chicken Wraps (Quick & Crispy!)
Make these delicious Cheesy Garlic Chicken Wraps! An easy recipe featuring cooked chicken in a creamy garlic cheese filling, rolled in tortillas and pan-fried until golden and crispy.
Ingredients
(Based on 1x column)
Cheese Filling & Chicken:
- ▢ 2 tbsp butter
- ▢ 3 cloves garlic, minced
- ▢ 2 cups cooked chicken, shredded or diced
- ▢ 1 tsp garlic powder
- ▢ 1 tsp Italian seasoning
- ▢ Salt and pepper to taste
- ▢ 1 1/2 cups mozzarella or cheddar cheese, shredded, divided (reserve ~1/2 cup for inside wraps)
- ▢ 1/4 cup cream cheese, softened
- ▢ 1/4 cup sour cream
Wraps:
- ▢ 4 large tortillas (10-inch size recommended)
Garnish:
- ▢ Fresh parsley, chopped
Instructions
1. Sauté Garlic:
- Melt the butter in a large skillet over medium heat.
- Add the minced fresh garlic and sauté for 1-2 minutes until fragrant. Be careful not to let it brown or burn, as burnt garlic tastes bitter. Remove skillet from heat briefly if needed.
2. Heat Chicken & Seasonings:
- Add the cooked shredded or diced chicken to the skillet with the garlic butter.
- Sprinkle with the garlic powder, Italian seasoning, salt, and pepper. Stir well and heat through for about 1-2 minutes, coating the chicken in the flavors. Remove chicken mixture from skillet and set aside briefly (can place in the filling bowl).
3. Make Cheese Filling Base:
- In a large mixing bowl, combine the softened cream cheese and sour cream. Stir or beat until smooth.
- Stir in about 1 cup of the shredded mozzarella or cheddar cheese (reserving the remaining 1/2 cup for inside the wraps).
4. Combine Filling:
- Add the warm garlic-seasoned chicken mixture to the cheese mixture in the bowl.
- Stir everything together until the chicken is evenly coated and combined with the creamy cheese filling.
5. Assemble the Wraps:
- Lay one large tortilla flat on a clean surface.
- Spoon about one-quarter of the chicken and cheese mixture onto the center of the tortilla, spreading it slightly but leaving a border around the edges.
- Sprinkle about 2 tablespoons (or 1/8 cup) of the reserved shredded mozzarella/cheddar cheese over the filling on the tortilla.
- Fold the wrap burrito-style: Fold in the opposite sides (left and right) snugly over the filling. Then, tightly roll the tortilla up from the bottom edge towards the top edge to form a secure wrap. Place seam-side down.
- Repeat for the remaining tortillas and filling.
6. Cook the Wraps:
- Wipe out the skillet used earlier if needed, or use a clean skillet or grill pan. Place it over medium heat (add a tiny bit of oil or butter if desired, but often not necessary if wraps are sealed well).
- Carefully place 1 or 2 wraps (depending on pan size), seam-side down, into the warm skillet.
- Cook for 2-3 minutes per side, until the tortilla is golden brown, slightly crispy, and the cheese inside is melted and gooey. Flip carefully with a spatula. Adjust heat as needed to prevent burning.
- Repeat with remaining wraps.
7. Garnish and Serve:
- Remove the cooked wraps from the skillet.
- Garnish generously with fresh chopped parsley.
- Serve the Cheesy Garlic Chicken Wraps immediately while hot and crispy.
Recipe Summary and Q&A
Summary: These Cheesy Garlic Chicken Wraps feature cooked chicken mixed with a creamy filling of mozzarella, cream cheese, sour cream, sautéed garlic, and seasonings. The mixture is wrapped in large flour tortillas, sprinkled with more cheese inside, rolled tightly, and then pan-fried or grilled until golden brown and crispy on the outside and gooey on the inside. They are garnished with fresh parsley and served warm.
Q&A:
- Q: What kind of cooked chicken is best?
- A: Any cooked chicken works! Rotisserie chicken (shredded), leftover grilled or baked chicken (diced or shredded), or even quickly sautéed diced chicken breast are all great options.
- Q: Can I make these ahead of time?
- A: They are significantly best served fresh right after cooking to maintain the crispy exterior. You can assemble the wraps ahead, store them refrigerated (tightly wrapped), and then pan-fry just before serving. Reheating already cooked wraps works best in an oven or air fryer to re-crisp, but they won’t be quite as good as fresh.
- Q: My tortillas keep tearing when I roll them.
- A: Make sure you are using large, soft flour tortillas (burrito size). Warm them gently in a skillet or microwave for 15-30 seconds before filling and rolling – this makes them much more pliable and less likely to tear. Also, be careful not to overstuff them.
- Q: Can I bake these instead of pan-frying?
- A: Yes! See the Tips section. Brush lightly with oil or melted butter and bake at 400°F (200°C) for 10-15 minutes, flipping once, until golden. The texture will be slightly less “fried” but still delicious. Air frying also works well.

