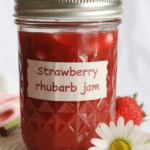
Classic Homemade Strawberry Rhubarb Jam (Perfect for Canning!)
Preserve the taste of the season with this Classic Homemade Strawberry Rhubarb Jam! An easy, detailed recipe perfect for water bath canning, creating a delicious sweet-tart jam with a hint of vanilla.
Ingredients
(Based on 1x column)
- ▢ 2 pounds fresh rhubarb, trimmed and cut into ½-inch pieces
- ▢ 1 pound fresh strawberries, stems removed and cut into ¼-inch pieces
- ▢ 2 ½ cups granulated sugar
- ▢ 3 tablespoons bottled lemon juice
- ▢ ¼ teaspoon fine salt
- ▢ 1 vanilla bean pod
Equipment for Canning:
- Water Bath Canner with rack
- Half-pint jars with new lids and bands
- Jar lifter, canning funnel
Instructions
1. Macerate the Fruit (Overnight):
- In a large glass bowl, combine the chopped rhubarb, chopped strawberries, and granulated sugar.
- Stir thoroughly until the fruit is completely coated in sugar.
- Cover the bowl tightly with plastic wrap and place it in the refrigerator for at least 12 hours, or up to 24 hours. This process, called maceration, will cause the fruit to release its natural juices and dissolve the sugar, creating a rich syrup.
2. Prepare for Canning:
- When you’re ready to make the jam, prepare your canning setup. Place a small plate in the freezer – this will be used later to test the jam’s set.
- Wash your jars, lids, and bands in hot, soapy water. Rinse well.
- Place the jars on the rack inside your water bath canner. Fill the canner with water until the jars are covered. Bring the water to a simmer (not a full boil yet) to keep the jars hot. Place the lids in a small saucepan with water and keep them warm over low heat (do not boil lids).
- Prepare your vanilla bean: Split the pod lengthwise with the tip of a paring knife. Use the back of the knife to scrape out the tiny black seeds from both halves.
3. Cook the Jam:
- Remove the macerated fruit mixture from the refrigerator. Transfer it to a large, wide, heavy-bottomed pot or Dutch oven.
- Add the scraped vanilla bean seeds, the bottled lemon juice, and the fine salt to the pot. You can also toss the scraped vanilla pod into the pot for extra flavor infusion during cooking (remember to remove it later!).
- Place the pot over medium-high heat and bring the mixture to a full, rolling boil, stirring occasionally.
- Once boiling, the mixture will begin to foam. Continue to cook, stirring every few minutes to prevent sticking and scorching. Watch the heat and adjust as needed to maintain a strong but controlled simmer/boil. The jam will cook down and thicken as liquid evaporates. This will take around 20-30 minutes.
4. Test for Set (The Cold Plate Test):
- Around the 22-25 minute mark, as the jam visibly thickens and the bubbles become larger and slower, begin testing for its setting point. The recipe notes the jam will “sheet” off a spoon rather than drip in individual droplets when it’s getting close.
- The Cold Plate Test: Remove the small plate from the freezer. Turn off the heat under the jam pot. Spoon a small amount of the hot jam onto the cold plate. Place the plate back in the freezer for 1-2 minutes.
- Remove the plate and push the edge of the jam puddle with your finger. If the surface wrinkles and the jam doesn’t immediately flood back into the open space, it has reached its setting point. If it’s still very runny, return the pot to a boil and cook for another 2-3 minutes, then test again.
5. Fill and Seal Jars:
- Once the jam has reached its setting point, remove and discard the vanilla bean pod if you added it.
- Working one jar at a time, carefully remove a hot jar from your water bath canner, pouring the water back into the canner. Place the hot, empty jar on a kitchen towel next to your jam pot.
- Using a ladle and a canning funnel, carefully fill the hot jar with the hot jam, leaving ¼ inch of headspace (the space between the top of the jam and the rim of the jar).
- Wipe the rim of the jar clean with a damp paper towel to ensure a good seal. Center a warm, new lid on the jar. Screw on the band until it is “fingertip tight” – snug, but not overly tight.
- Using a jar lifter, carefully place the filled jar back onto the rack in the water bath canner. Repeat this process with the remaining jars.
6. Process in Water Bath:
- Ensure all jars are covered by at least 1-2 inches of water in the canner. Add more hot water if needed.
- Place the lid on the canner and bring the water to a full, rolling boil.
- Once the water is at a rolling boil, start your timer. Process the jars for 10 minutes.
- After 10 minutes, turn off the heat, remove the canner lid, and let the jars stand in the hot water for another 5 minutes. This helps prevent thermal shock.
7. Cool and Store:
- Using a jar lifter, carefully remove the jars from the canner and place them upright on a kitchen towel on the counter, leaving space between them.
- Let the jars cool completely, undisturbed, for 12-24 hours. You may hear satisfying “ping” sounds as the lids seal.
- After 24 hours, check the seals by pressing on the center of each lid. If it doesn’t move or “ping” back, the jar is sealed. (Any unsealed jars should be refrigerated and used first).
- Remove the bands, wipe the jars clean, label them with the contents and date, and store your homemade Strawberry Rhubarb Jam in a cool, dark place for up to 1 year.
