Are you ready to make the juiciest, crispiest, most flavorful, and fastest-cooking Thanksgiving turkey of your life? If you’ve ever been curious about the legendary, show-stopping method of deep-frying a whole turkey, you have come to the right place. This is your ultimate, step-by-step guide to doing it safely and perfectly.
This isn’t just a recipe; it’s a complete masterclass in the art of deep-frying a turkey. We’ll show you how a simple, flavorful wet brine is the first secret to a succulent, seasoned bird. Then, we’ll walk you through the entire process, with a heavy emphasis on the crucial safety steps, to ensure your turkey emerges from the hot oil with shatteringly crisp, golden-mahogany skin and unbelievably moist meat. Get ready to create a Thanksgiving centerpiece that your family will talk about for years to come.
Table of Contents
Table of Contents
Recipe Overview: The Ultimate Thanksgiving Showstopper
What makes a Deep-Fried Turkey so spectacular is the incredible result that the method produces. The hot oil cooks the turkey much faster than an oven and seals the outside, locking in the natural juices for an incomparably moist result. This recipe starts with a simple brown sugar and salt brine to season the meat to the bone and ensure it stays succulent. The high-heat frying method results in the crispiest skin imaginable. Best of all, it frees up your oven for all the important side dishes!
| Metric | Time / Level |
| Total Time | 18 hours (includes overnight brining) |
| Active Prep Time | 45 minutes |
| Difficulty Level | Advanced (Requires special equipment and strict safety precautions) |
| Servings | 12-14 |
CRUCIAL SAFETY INSTRUCTIONS: Read This Before You Begin
Deep-frying a whole turkey is a serious undertaking that can be dangerous if not done with the utmost care and respect for the process. FIRE AND SERIOUS INJURY CAN RESULT FROM IMPROPER USE.
- FRY OUTDOORS ONLY: Never, ever attempt to fry a turkey indoors, in a garage, or on a wooden deck. It must be done on a flat, level, non-combustible surface (like concrete or dirt) at least 10-15 feet away from any buildings, trees, or flammable materials.
- COMPLETELY THAWED TURKEY: Your turkey must be 100% thawed before it enters the oil. Any ice or water will cause the hot oil to bubble violently and potentially overflow, which can cause a massive fire.
- COMPLETELY DRY TURKEY: After brining and rinsing, your turkey must be patted bone dry, inside and out. Again, water and hot oil are a dangerous combination.
- NEVER OVERFILL THE POT: You must perform the “water displacement test” (instructions below) to determine the exact amount of oil you need. An overfilled pot is the number one cause of dangerous boil-overs.
- MONITOR THE TEMPERATURE: Use a deep-fry thermometer to constantly monitor the oil temperature. If the oil gets too hot, it can ignite. If you see the oil smoking, immediately turn off the burner.
- NEVER LEAVE THE FRYER UNATTENDED: Stay by your fryer for the entire cooking process.
- HAVE A FIRE EXTINGUISHER READY: Keep a multi-purpose, grease-rated (Class B) fire extinguisher nearby at all times. NEVER use water to extinguish a grease fire.
- USE PROTECTIVE GEAR: Wear heavy-duty, heat-resistant gloves and long sleeves.
- TURN OFF THE BURNER: Always turn the propane burner completely off before you slowly lower the turkey into the pot and before you remove it.
The Essential Ingredients
This recipe uses a simple but powerful brine to create a truly memorable flavor.
- A Whole Turkey: This recipe is designed for a 13- to 14-pound turkey. It is absolutely essential that your turkey is completely thawed before you begin.
- The Wet Brine: This is the secret to a juicy, seasoned bird.
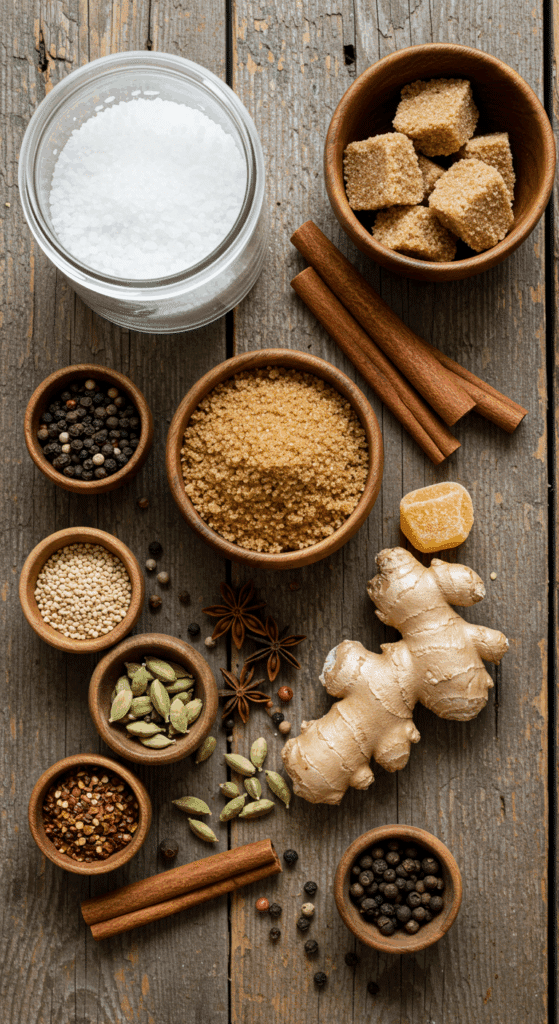
- Kosher Salt & Dark Brown Sugar: This is the savory and sweet foundation. The salt seasons the meat and helps it retain moisture, while the brown sugar adds a deep, molasses-like sweetness and helps the skin to achieve a beautiful, deep mahogany color during frying.
- The Aromatics: Whole black peppercorns, allspice berries, and chopped candied ginger add a unique, warm, and festive spice note to the brine.
- Peanut Oil for Frying: Peanut oil is the traditional and best choice for deep-frying a turkey. It has a high smoke point (so it won’t burn) and a very clean, neutral flavor. You will need approximately 4 to 4 1/2 gallons, but you must confirm the exact amount with the water displacement test.

Step-by-Step to the Juiciest, Crispiest Turkey
Step 1: The Water Displacement Test (Do This First!)
This crucial step tells you exactly how much oil you need and prevents a dangerous overflow.
- Place your raw, thawed turkey into your empty fryer pot.
- Pour in enough cold water to cover the turkey by about one inch.
- Remove the turkey and let all the water drip back into the pot.
- Use a ruler or a marker to mark the water line on the outside of the pot. This is your MAX FILL LINE. Pour out the water and dry the pot completely.
Step 2: Create the Brine and Brine the Turkey
Step 1: In a large stockpot, bring 3 quarts of the hot water to a boil. In a very large, clean, 5-gallon food-grade bucket or a cooler, place the 1 pound of kosher salt and the 1 pound of dark brown sugar.
Step 2: Carefully pour the boiling water over the salt and sugar. Stir until they are completely dissolved. Add the peppercorns, allspice, and candied ginger and stir.
Step 3: Add the 5 pounds of ice and stir until the mixture is completely ice-cold.
Step 4: Carefully submerge your thawed turkey, breast-side down, into the ice-cold brine. Ensure the cavity fills with liquid. The turkey should be fully covered.
Step 5: Cover the cooler or bucket and let the bird brine in a cool, safe place (below 40°F) for 8 to 16 hours. Turn the bird once halfway through.
Step 3: Prep the Turkey for Frying
Step 1: Remove the bird from the brine. Discard the brine. Rinse the turkey thoroughly, inside and out, with cold running water to remove the excess salt from the surface.
Step 2 (The Most Important Step!): Pat the turkey completely and thoroughly dry with paper towels. A very dry surface is the non-negotiable secret to a crispy skin and, more importantly, to frying safely. Let the turkey sit at room temperature for at least 30 minutes prior to cooking to continue to air dry.
Step 4: The Frying Process
Step 1: Pour your peanut oil into the clean, dry pot, up to the max fill line you marked earlier. Set up your propane burner on a stable, level surface outdoors, far from any buildings.
Step 2: Heat the oil over high heat to 250°F (120°C).
Step 3: Attach the turkey to the poultry lifter that came with your fryer. TURN THE BURNER OFF.
Step 4: Wearing protective gloves, very, very slowly lower the turkey into the oil. This should take at least a full minute.
Step 5: Once the turkey is fully submerged, you can turn the burner back on. Bring the temperature of the oil up to 350°F (175°C). Once it has reached 350°F, you will need to adjust the heat to maintain this temperature for the duration of the cook.
Step 6: Fry the turkey for about 3 to 4 minutes per pound. A 14-pound turkey will take approximately 42 to 56 minutes.
Step 7: After about 35 minutes, you can begin to check the internal temperature. The turkey is perfectly and safely cooked when an instant-read thermometer inserted into the thickest part of the breast reads 151°F (66°C).
Step 8: TURN THE BURNER OFF. Carefully and slowly remove the turkey from the oil and let it drain for a moment.
Step 5: The Crucial Rest
Transfer the hot, crispy turkey to a clean baking sheet with a wire rack. Tent it loosely with foil and let it rest for a minimum of 30 minutes before carving. During this time, carry-over cooking will cause the internal temperature to rise to a perfect, safe 161°F, and the juices will redistribute throughout the meat, ensuring a moist and succulent result.

The Juiciest, Crispiest Deep-Fried Turkey (A Step-by-Step Safety Guide!)
A comprehensive recipe for a classic deep-fried turkey, starting with a flavorful wet brine to ensure a juicy result. A whole turkey is brined for 8 to 16 hours in a simple mixture of water, kosher salt, and brown sugar. After brining, the turkey is thoroughly dried and then carefully deep-fried in a large pot of peanut oil using an outdoor propane burner. The turkey is cooked to a specific internal temperature and then rested for 30 minutes before carving to produce a moist bird with incredibly crispy skin.
- Prep Time: 30 minutes
- Cook Time: 45 minutes
- Total Time: 13 hours 35 minutes (includes 12-hour brining time)
- Yield: 12-14 servings
- Category: Main Course
- Method: Brining, Deep-Frying
- Cuisine: American
- Diet: Gluten Free
Ingredients
- 6 quarts hot water
- 1 pound kosher salt
- 1 pound dark brown sugar
- 5 pounds ice
- 1 (13 to 14-pound) turkey, with giblets removed
- Approximately 4 to 4 1/2 gallons peanut oil
Instructions
- Make the Brine: In a 5-gallon upright drink cooler or other large container, combine the hot water, kosher salt, and brown sugar. Stir until the salt and sugar dissolve completely.
- Add the ice and stir until the mixture is cool.
- Brine the Turkey: Gently lower the thawed turkey, breast-side down, into the brine. Ensure the bird is fully immersed, weighing it down if necessary. Cover and let the turkey sit in a cool place or refrigerate for 8 to 16 hours.
- Prepare for Frying: Remove the turkey from the brine, rinse it inside and out with cold water, and discard the brine.
- Pat the turkey completely dry with paper towels, both inside and out. Allow it to sit at room temperature for at least 30 minutes before cooking.
- Fry the Turkey: Set up an outdoor propane burner on a sturdy, level surface away from any structures. Place the peanut oil into a 28 to 30-quart pot and heat it to 250°F.
- Once the oil reaches 250°F, very slowly and carefully lower the turkey into the hot oil. The oil temperature will drop.
- Increase the heat to bring the oil temperature up to 350°F. Once it reaches 350°F, lower the heat to maintain this temperature.
- Cook for about 35-45 minutes. Begin checking the internal temperature after 35 minutes with a probe thermometer.
- Once the thickest part of the breast reaches 151°F, gently remove the turkey from the oil.
- Rest and Carve: Let the turkey rest on a cutting board for a minimum of 30 minutes before carving. The internal temperature will continue to rise to a safe 161°F during this time. Carve and serve.
Notes
- Safety First: Deep-frying a turkey should only be done outdoors on a stable surface, far away from any buildings or flammable materials. Never leave the fryer unattended.
- Patting the turkey completely dry before frying is a crucial safety step to prevent the hot oil from splattering dangerously.
- Using a probe thermometer is the most reliable way to ensure the turkey is cooked to the correct temperature without being overcooked or undercooked.
- The 30-minute rest period is essential for the juices to redistribute, resulting in a moist and tender turkey.
- The article references a ‘Cook’s Note’ for the oil that was not provided in the text.
Storage and Make-Ahead Tips
- Make-Ahead: The entire brining process is a fantastic make-ahead step that you do the day before.
- Storage: Store any leftover carved turkey meat in an airtight container in the refrigerator for up to 4 days.
For more recipe follow my Pinterest account
Creative Recipe Variations
- Cajun-Style Fried Turkey: Instead of brining, you can use your favorite Cajun-style injectable butter marinade. This will also result in a very juicy and spicy bird.
- Add a Dry Rub: For an extra layer of flavor and an even crispier crust, you can apply your favorite BBQ dry rub all over the skin of the turkey after you have rinsed and dried it from the brine.
- Classic Herb Brine: If you prefer a more classic, savory flavor, you can use a brine made with salt, water, and a large bunch of fresh herbs like sage, rosemary, and thyme, along with a halved head of garlic and some black peppercorns.
Enjoy Your Legendary Fried Turkey!
You’ve just created a truly special, show-stopping centerpiece that is guaranteed to be the juiciest, most flavorful turkey you’ve ever eaten. This Deep-Fried Turkey is a rewarding project that, when done safely, produces a spectacular result that will be the talk of your holiday feast.
We hope you and your loved ones enjoy every last, perfect, crispy, and juicy bite!
If you enjoyed making this recipe, please leave a comment below or share it with a friend who is ready to tackle a deep-fried turkey!
Frequently Asked Questions (FAQs)
Q1: Is deep-frying a turkey really that dangerous?
It can be if you do not follow the safety rules strictly. The primary dangers are oil spills and grease fires. These are almost always caused by overfilling the pot with oil or by adding a wet or frozen turkey to the hot oil. By following all the safety precautions outlined in this guide—especially the water displacement test and ensuring a completely thawed and dry bird—you can eliminate these risks and have a safe and successful experience.
Q2: How much oil do I really need?
The exact amount will depend on the size of your pot and your turkey. The only way to know for sure is to perform the water displacement test described in Step 1 of the instructions before you begin. This is the only way to guarantee you will not overfill your pot.
Q3: Why does the recipe say to heat the oil to 250°F first, and then to 350°F?
This is a key technique for safety and temperature management. Heating the oil to an initial, lower temperature of 250°F allows you to lower the cold turkey into the oil more gently. The large, cold bird will cause the oil temperature to drop significantly. You then bring the temperature back up to the target frying temperature of 350°F to cook the bird.
Q4: How long does it take to fry a turkey?
Deep-frying is much faster than roasting! A good rule of thumb is about 3 to 4 minutes per pound. So, a 14-pound turkey will take approximately 42 to 56 minutes. However, the only way to know for sure when it is done is to use a meat thermometer.
Q5: What do I do with all that used peanut oil when I’m finished?
First, let the oil cool completely in the pot, which can take several hours. Never try to move or dispose of hot oil. Once it is completely cool, you can strain it through a cheesecloth or coffee filter into its original container. Peanut oil can be reused 2-3 times. If you are discarding it, pour it into a sealable container and dispose of it in your household trash, not down the drain.

