Introduction & Inspiration
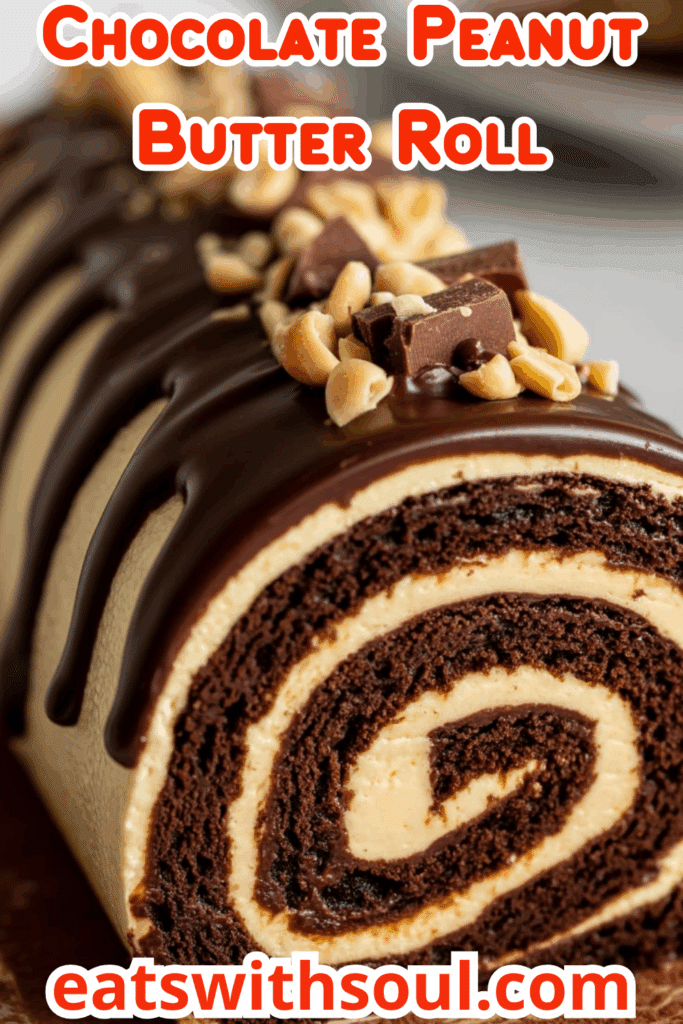
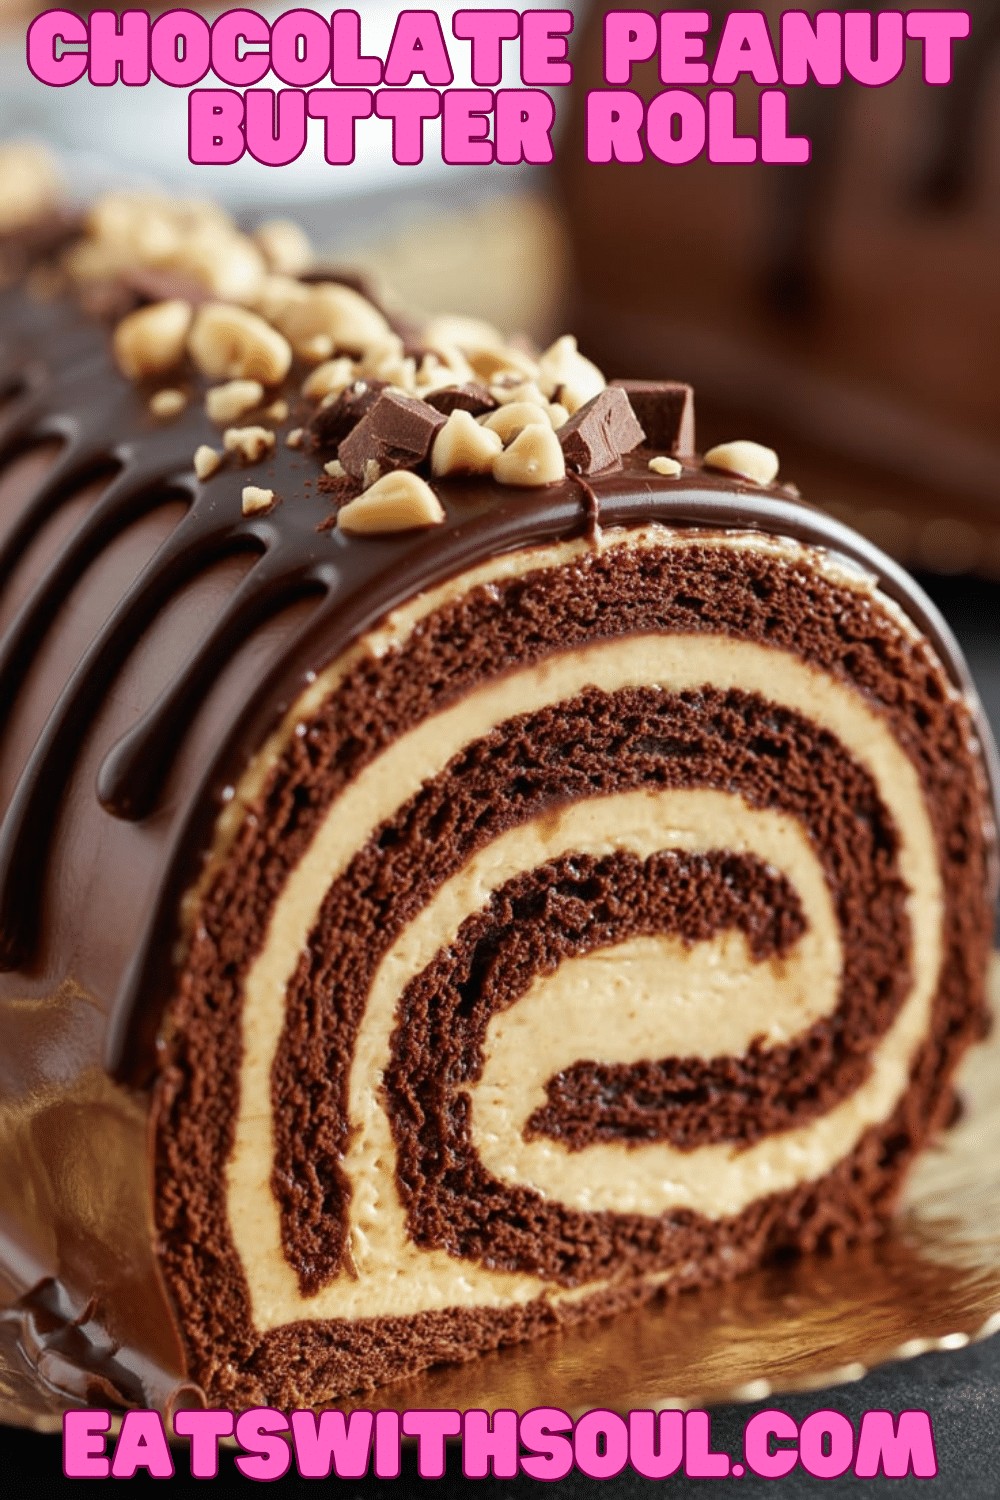
Calling all chocolate and peanut butter fanatics! This Chocolate Peanut Butter Roll Cake is the dessert you’ve been dreaming of. Imagine a light, flexible chocolate sponge cake, carefully rolled up around a luscious, fluffy filling made from peanut butter, whipped cream, and studded with little treasures of chopped mini peanut butter cups. Finished with a simple dusting of powdered sugar, it’s an elegant presentation of an absolutely irresistible flavor combination.
My inspiration for this recipe comes from loving the classic look of a jelly roll or Swiss roll cake and wanting to infuse it with the ultimate comfort pairing: chocolate and peanut butter. The light sponge cake is the perfect vehicle for the rich, creamy filling, creating a delightful balance in every swirled slice.
This roll cake is perfect for parties, potlucks, holiday dessert tables, or anytime you want a showstopper dessert that tastes as amazing as it looks. While rolling a cake might seem intimidating, this recipe breaks it down into simple steps! It is a perfect recipe for peanut butter lovers.
Nostalgic Appeal / Comfort Factor
Chocolate cake and peanut butter are powerhouse comfort flavors, deeply rooted in nostalgic treats like Reese’s cups, favorite cookies, and classic birthday cakes. Rolled cakes, sometimes called jelly rolls or Swiss rolls, have their own nostalgic charm, often associated with holidays, special occasions, or vintage bakery displays. They feel a bit fancy and special.
This recipe beautifully combines the comforting, beloved flavors of chocolate and peanut butter with the slightly retro elegance of a rolled cake. The surprise crunch of peanut butter cups inside the creamy filling adds another layer of fun and familiar indulgence.
It’s a dessert that feels both impressively special and deeply comforting, guaranteed to delight anyone who loves the classic chocolate-peanut butter pairing. A perfect dessert to share.
Homemade Focus
This Chocolate Peanut Butter Roll Cake is a wonderful project that showcases homemade baking techniques from start to finish. You’ll be creating a delicate chocolate sponge cake batter, relying on properly whipped eggs for its structure and lightness. The key homemade technique here is carefully rolling the warm cake in a towel to set its shape. The creamy peanut butter filling is also made from scratch by whipping fresh cream and combining it with peanut butter and sugar.
Making both the sponge and the filling yourself allows for control over the texture and flavor balance. Achieving a light, crack-free sponge roll and a perfectly fluffy peanut butter cream are the rewarding results of these homemade steps.
It celebrates classic baking techniques applied to create a visually appealing and incredibly delicious dessert. The homemade taste is incredible.
Flavor Goal
The primary flavor goal is an intense yet balanced combination of rich chocolate cake and sweet, slightly salty peanut butter filling, studded with mini peanut butter cups. The chocolate sponge cake should be light in texture but deliver a good cocoa flavor.
The filling should be creamy, fluffy, and unmistakably peanut buttery, sweetened nicely by the powdered sugar. The mini peanut butter cups folded in should provide bursts of extra chocolate and peanut butter flavor and a slight textural chewiness. The powdered sugar dusting adds a simple sweet finish.
The overall experience should be a delightful swirl of light chocolate cake and creamy, intense peanut butter filling with candy surprises, offering a perfect marriage of these classic flavors. A perfect balance between flavour and texture.
Ingredient Insights
For the Chocolate Cake:
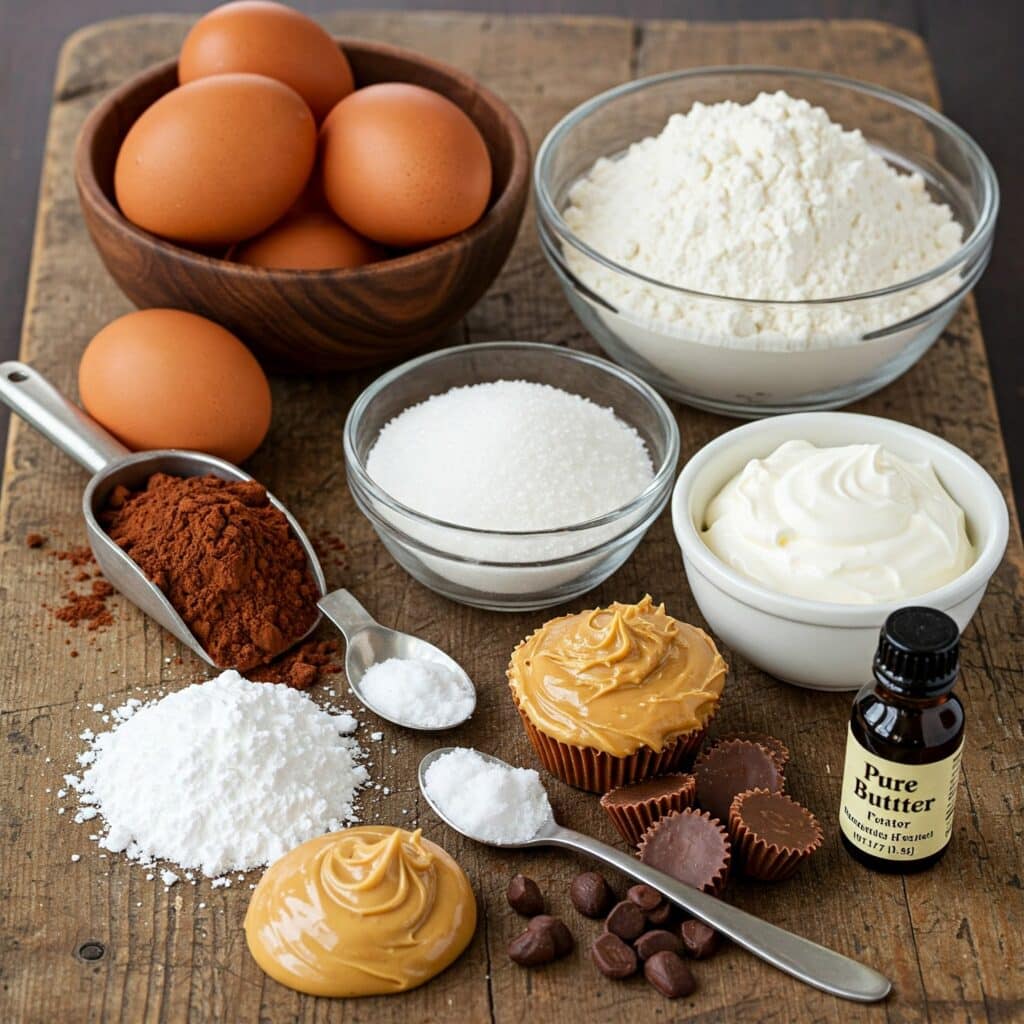
- Large Eggs: The backbone of the sponge cake. Whipping them extensively with sugar incorporates air, providing the primary leavening and light texture. Room temperature eggs whip to better volume.
- Granulated Sugar: Sweetens the cake and helps stabilize the whipped eggs.
- All-Purpose Flour: Provides structure. Sifting it with other dry ingredients ensures lightness and prevents lumps.
- Unsweetened Cocoa Powder: Provides the chocolate flavor. Sifting is crucial.
- Baking Powder: Adds a little extra lift insurance to the sponge.
- Salt: Balances sweetness and enhances chocolate flavor.
- Powdered Sugar (for rolling): Dusted onto a clean kitchen towel, it prevents the warm cake from sticking when rolled up to cool.
For the Filling:
- Heavy Cream: Whipped to soft peaks, it provides the light, airy base for the filling. Must be cold to whip properly.
- Powdered Sugar: Sweetens the filling and helps stabilize the whipped cream slightly. Sifted is best.
- Smooth Peanut Butter: Provides the dominant flavor. Standard commercial creamy peanut butter (like Jif, Skippy, or the Reese’s brand mentioned) works best for a smooth, stable filling.
- Chopped Mini Peanut Butter Cups: Add texture and bursts of candy flavor. Chopped regular cups or even peanut butter chips could substitute.
- Vanilla Extract: Enhances the peanut butter and overall flavor. (Note: Added vanilla to ingredient list as it’s mentioned in Step 7 instructions)
Essential Equipment
- 9×13 Inch Baking Pan: Standard rectangular baking pan. Note: Traditional jelly roll pans are often 10×15 inches, resulting in a thinner cake that rolls easier. A 9×13 pan will yield a thicker sponge, potentially more prone to cracking but still workable. Line with parchment paper.
- Parchment Paper: Essential for lining the pan and preventing the cake from sticking.
- Electric Mixer (Handheld or Stand Mixer): Essential for whipping the eggs sufficiently for the cake (5 minutes!) and for whipping the cream for the filling.
- Large Mixing Bowls (2): One for egg mixture, one for filling.
- Sifter: For dry cake ingredients and powdered sugar for filling.
- Rubber Spatula: Crucial for gently folding dry ingredients into egg mixture and for spreading filling.
- Clean Kitchen Towel (Lint-Free): Used for rolling the warm cake. Tea towels work well.
- Wire Cooling Rack: For cooling the rolled cake.
- Sharp Serrated Knife: For slicing the finished roll neatly.
Ingredients
(Based on 1x column)
Chocolate Cake:
- ▢ 4 large eggs, room temperature
- ▢ 1/2 cup granulated sugar
- ▢ 1 cup all-purpose flour, sifted
- ▢ 1/2 cup unsweetened cocoa powder, sifted
- ▢ 1/2 teaspoon baking powder
- ▢ 1/4 teaspoon salt
- ▢ 1/4 cup powdered sugar (for dusting towel)
- ▢ (Implied but missing: 1 tsp Vanilla Extract for cake – often included in sponge)
Peanut Butter Filling:
- ▢ 1 cup heavy cream, cold
- ▢ 1 cup powdered sugar, sifted
- ▢ 1/2 cup smooth peanut butter (standard commercial type recommended)
- ▢ 1/4 cup chopped mini peanut butter cups (or more, to taste)
- ▢ 1 tsp vanilla extract (Added based on Step 7)
Garnish:
- ▢ Extra powdered sugar for dusting

Step-by-Step Instructions
1. Prepare Oven and Pan:
- Preheat your oven to 350°F (175°C).
- Line a 9×13-inch baking pan completely with parchment paper, allowing a slight overhang on the longer sides for easy lifting later. Grease the parchment paper lightly or spray with non-stick spray. Set aside.
2. Whip Eggs and Sugar:
- Separate eggs if preferred for maximum volume (whipping whites then folding in yolks later), or proceed as recipe implies: In a large bowl using an electric mixer (stand mixer with whisk attachment is ideal), beat the 4 large room temperature eggs together with the 1/2 cup granulated sugar on high speed.
- Continue beating for a full 5 minutes, until the mixture is very thick, pale lemon-colored, airy, and ribbon-like (when you lift the beaters, the batter falls back in a thick ribbon that sits on the surface briefly). (Adding 1 tsp vanilla extract here is common for sponge cakes).
3. Combine Dry Ingredients and Fold:
- In a separate medium bowl, sift together the all-purpose flour, unsweetened cocoa powder, baking powder, and salt. Whisk briefly to combine.
- Gently sift or sprinkle about half of the dry ingredients over the whipped egg mixture. Using a large rubber spatula, carefully fold the dry ingredients in until just barely combined (cut down the middle, scrape across bottom, fold over). Do not stir or beat!
- Sift or sprinkle the remaining dry ingredients over the batter and continue folding gently only until no large streaks of flour/cocoa remain. Be careful not to deflate the airy egg mixture.
4. Bake the Sponge Cake:
- Pour the batter into the prepared parchment-lined 9×13 inch pan.
- Gently spread the batter into an even layer using an offset spatula or the back of a spoon, being careful not to knock out the air.
- Bake for 12-15 minutes. The cake is done when the surface springs back lightly when gently touched. Do not overbake, as this will make it prone to cracking when rolled.
5. Roll the Warm Cake:
- While the cake is baking, prepare your rolling surface. Lay a clean, lint-free kitchen towel flat on your counter and dust it generously and evenly with the 1/4 cup of powdered sugar.
- As soon as the cake comes out of the oven, immediately invert the hot cake pan onto the prepared sugar-dusted towel.
- Carefully peel off the parchment paper from the bottom of the cake.
- Starting from one of the short sides of the cake, carefully and snugly roll the warm cake up with the towel inside the roll.
- Place the rolled-up cake (still in the towel) seam-side down on a wire cooling rack. Let it cool completely in this rolled position, at least 1 hour.
6. Make the Peanut Butter Filling:
- While the cake cools, make the filling. In a large, chilled bowl, whip the cold heavy cream with an electric mixer until soft peaks form.
- Add the sifted powdered sugar and the 1 tsp vanilla extract. Continue whipping until stiff peaks form.
- Add the smooth peanut butter and mix on low speed (or fold gently with a spatula) just until combined and smooth. Be careful not to overwhip at this stage.
7. Assemble the Roll Cake:
- Once the cake roll is completely cool, gently and carefully unroll it flat onto the towel.
- Spread the prepared peanut butter filling evenly over the surface of the unrolled cake, leaving about a 1/2-inch border along the edges.
- Sprinkle the chopped mini peanut butter cups evenly over the filling.
- Carefully re-roll the cake without the towel this time, starting from the same short side you started rolling from initially. Roll snugly but gently.
8. Garnish and Serve:
- Place the finished Chocolate Peanut Butter Roll Cake seam-side down on a serving platter.
- Dust the top generously with additional powdered sugar.
- Slice into rounds using a sharp serrated knife. Serve immediately or chill briefly before serving.

Troubleshooting
- Cake Cracked When Rolling/Unrolling: Overbaked cake (too dry), cooled too long before initial roll, rolled too tightly, or unrolled/rerolled too forcefully. Roll immediately while hot! Cool completely while rolled. Be gentle. Minor cracks are okay and often hidden by filling/dusting. A 9×13 pan results in a thicker cake than a 10×15 jelly roll pan, making it slightly more prone to cracking.
- Cake Sticking to Towel: Towel wasn’t dusted generously enough with powdered sugar. Ensure even, thick coating.
- Filling Too Soft/Oozing: Heavy cream wasn’t whipped to stiff peaks, or filling wasn’t chilled (though recipe doesn’t call for chilling filling, only finished cake). Ensure stiff peaks. Using standard processed peanut butter helps stability.
- Cake Tough: Overmixed batter after adding flour, deflating the eggs. Fold dry ingredients gently.
Tips and Variations
- Whip Eggs Well: The 5-minute whipping time is crucial for the cake’s volume and texture.
- Gentle Folding: Essential to keep the cake light and airy. Do not stir or beat vigorously when adding dry ingredients.
- Roll While Hot: Roll the cake immediately after removing from the oven while it’s pliable.
- Cool Completely Rolled: Allow the cake to cool fully in its rolled shape within the towel before unrolling and filling.
- Peanut Butter: Standard commercial creamy peanut butter provides the best texture for the filling.
- Candy: Swap mini cups for chopped full-size Reese’s cups or peanut butter M&M’s.
- Add Chocolate Drizzle/Ganache: Instead of powdered sugar, drizzle the finished roll with melted chocolate or a thin chocolate ganache.
- Different Extracts: Use vanilla instead of/in addition to almond in the filling.
Serving and Pairing Suggestions
- Serve Slightly Chilled or Room Temperature: Slices hold better when cool.
- Slice with Serrated Knife: Use a gentle sawing motion for clean slices.
- Dessert Platter: Looks impressive sliced on a platter.
- With Milk or Coffee: Perfect accompaniments.
- Parties & Potlucks: A crowd-pleasing flavor combination.
Nutritional Information
(Note: Estimated, per slice, assuming 10-12 slices. Rich dessert.)
- Calories: 350-450+
- Fat: 18-28g+
- Saturated Fat: 8-14g+
- Cholesterol: 100-140mg+ (High due to eggs)
- Sodium: 150-250mg+
- Total Carbohydrates: 40-55g+
- Dietary Fiber: 2-4g+
- Sugars: 25-40g+
- Protein: 6-9g+
Decadent Chocolate Peanut Butter Roll Cake
Bake an impressive Chocolate Peanut Butter Roll Cake! Features a light chocolate sponge cake rolled up with a creamy peanut butter whipped cream filling studded with mini peanut butter cups.
Ingredients
Chocolate Cake:
- ▢ 4 large eggs, room temperature
- ▢ 1/2 cup granulated sugar
- ▢ 1 cup all-purpose flour, sifted
- ▢ 1/2 cup unsweetened cocoa powder, sifted
- ▢ 1/2 teaspoon baking powder
- ▢ 1/4 teaspoon salt
- ▢ 1/4 cup powdered sugar (for dusting towel)
- ▢ (Implied but missing: 1 tsp Vanilla Extract for cake – often included in sponge)
Peanut Butter Filling:
- ▢ 1 cup heavy cream, cold
- ▢ 1 cup powdered sugar, sifted
- ▢ 1/2 cup smooth peanut butter (standard commercial type recommended)
- ▢ 1/4 cup chopped mini peanut butter cups (or more, to taste)
- ▢ 1 tsp vanilla extract (Added based on Step 7)
Garnish:
- ▢ Extra powdered sugar for dusting
Instructions
1. Prepare Oven and Pan:
- Preheat your oven to 350°F (175°C).
- Line a 9×13-inch baking pan completely with parchment paper, allowing a slight overhang on the longer sides for easy lifting later. Grease the parchment paper lightly or spray with non-stick spray. Set aside.
2. Whip Eggs and Sugar:
- Separate eggs if preferred for maximum volume (whipping whites then folding in yolks later), or proceed as recipe implies: In a large bowl using an electric mixer (stand mixer with whisk attachment is ideal), beat the 4 large room temperature eggs together with the 1/2 cup granulated sugar on high speed.
- Continue beating for a full 5 minutes, until the mixture is very thick, pale lemon-colored, airy, and ribbon-like (when you lift the beaters, the batter falls back in a thick ribbon that sits on the surface briefly). (Adding 1 tsp vanilla extract here is common for sponge cakes).
3. Combine Dry Ingredients and Fold:
- In a separate medium bowl, sift together the all-purpose flour, unsweetened cocoa powder, baking powder, and salt. Whisk briefly to combine.
- Gently sift or sprinkle about half of the dry ingredients over the whipped egg mixture. Using a large rubber spatula, carefully fold the dry ingredients in until just barely combined (cut down the middle, scrape across bottom, fold over). Do not stir or beat!
- Sift or sprinkle the remaining dry ingredients over the batter and continue folding gently only until no large streaks of flour/cocoa remain. Be careful not to deflate the airy egg mixture.
4. Bake the Sponge Cake:
- Pour the batter into the prepared parchment-lined 9×13 inch pan.
- Gently spread the batter into an even layer using an offset spatula or the back of a spoon, being careful not to knock out the air.
- Bake for 12-15 minutes. The cake is done when the surface springs back lightly when gently touched. Do not overbake, as this will make it prone to cracking when rolled.
5. Roll the Warm Cake:
- While the cake is baking, prepare your rolling surface. Lay a clean, lint-free kitchen towel flat on your counter and dust it generously and evenly with the 1/4 cup of powdered sugar.
- As soon as the cake comes out of the oven, immediately invert the hot cake pan onto the prepared sugar-dusted towel.
- Carefully peel off the parchment paper from the bottom of the cake.
- Starting from one of the short sides of the cake, carefully and snugly roll the warm cake up with the towel inside the roll.
- Place the rolled-up cake (still in the towel) seam-side down on a wire cooling rack. Let it cool completely in this rolled position, at least 1 hour.
6. Make the Peanut Butter Filling:
- While the cake cools, make the filling. In a large, chilled bowl, whip the cold heavy cream with an electric mixer until soft peaks form.
- Add the sifted powdered sugar and the 1 tsp vanilla extract. Continue whipping until stiff peaks form.
- Add the smooth peanut butter and mix on low speed (or fold gently with a spatula) just until combined and smooth. Be careful not to overwhip at this stage.
7. Assemble the Roll Cake:
- Once the cake roll is completely cool, gently and carefully unroll it flat onto the towel.
- Spread the prepared peanut butter filling evenly over the surface of the unrolled cake, leaving about a 1/2-inch border along the edges.
- Sprinkle the chopped mini peanut butter cups evenly over the filling.
- Carefully re-roll the cake without the towel this time, starting from the same short side you started rolling from initially. Roll snugly but gently.
8. Garnish and Serve:
- Place the finished Chocolate Peanut Butter Roll Cake seam-side down on a serving platter.
- Dust the top generously with additional powdered sugar.
- Slice into rounds using a sharp serrated knife. Serve immediately or chill briefly before serving.
Recipe Summary and Q&A
Summary: This Chocolate Peanut Butter Roll Cake features a light chocolate sponge cake baked in a 9×13 pan, rolled up warm in a powdered sugar-dusted towel, and cooled. Once cool, it’s unrolled, filled with a homemade peanut butter whipped cream containing chopped mini peanut butter cups, then carefully re-rolled. The finished cake is dusted with powdered sugar before slicing and serving.
Q&A:
- Q: My cake always cracks when I roll it! Help!
- A: Ensure you’re not overbaking the cake (it should just spring back). Roll it immediately while it’s hot using the towel method. Dust the towel generously with powdered sugar. Roll snugly but gently. Unroll and re-roll gently after cooling. Using a 10×15 inch jelly roll pan creates a thinner, more flexible cake less prone to cracking than the thicker cake from a 9×13 pan.
- Q: Can I use natural peanut butter in the filling?
- A: Standard processed creamy peanut butter is recommended for the smoothest, most stable filling. Natural peanut butter can sometimes be gritty or separate, potentially making the filling oily or less fluffy. If using natural, ensure it’s extremely well stirred.
- Q: Can I make this ahead of time?
- A: Yes. Once filled and rolled, the cake can be wrapped tightly in plastic wrap and refrigerated for up to 2-3 days. Dust with powdered sugar just before serving. It can also be frozen (well-wrapped) for longer storage; thaw in the refrigerator.
- Q: What if I don’t have mini peanut butter cups?
- A: You can chop up regular Reese’s cups, use peanut butter chips, or even mini chocolate chips instead.

