Introduction & Inspiration
If you love the classic flavors of Boston Cream Pie – that wonderful combination of tender yellow cake, creamy vanilla custard, and rich chocolate glaze – but crave an incredibly easy way to enjoy it, then this Boston Cream Poke Cake is for you! We’re taking a simple yellow cake mix, baking it up, poking holes all over, and then pouring luscious vanilla pudding right over the top, letting it soak into those holes. Finished with a smooth layer of chocolate frosting, it’s a brilliant and effortless way to capture that beloved flavor profile.
My inspiration for this recipe comes from the pure genius and fun of poke cakes, combined with the timeless appeal of Boston Cream Pie (or doughnuts!). I wanted the easiest possible method to get that yummy yellow cake + vanilla cream + chocolate topping combination without multiple complex steps like making custard or ganache. This poke cake version absolutely nails it!
This cake is perfect for potlucks, birthdays, family gatherings, or anytime you need a simple, crowd-pleasing dessert that tastes amazing with minimal effort. It’s sweet, creamy, chocolatey, and so easy to make! It is a perfect recipe for beginners.
Nostalgic Appeal / Comfort Factor
Boston Cream Pie is a true American classic dessert, holding nostalgic value for many and often associated with bakeries, special occasions, or satisfying diner treats. Poke cakes themselves are a fun, retro comfort food staple, known for their moist texture and easy preparation, often appearing at potlucks and casual parties.
This recipe brilliantly merges the nostalgic flavor profile of Boston Cream Pie with the comforting ease and fun of a poke cake. The familiar taste of yellow cake, vanilla pudding (mimicking the custard), and chocolate frosting is incredibly satisfying and universally loved.
It’s a playful, delicious mashup that delivers comforting, classic flavors in an incredibly simple format. A perfect comfort food dessert.
Homemade Focus (Ultra-Easy Assembly with Mixes)
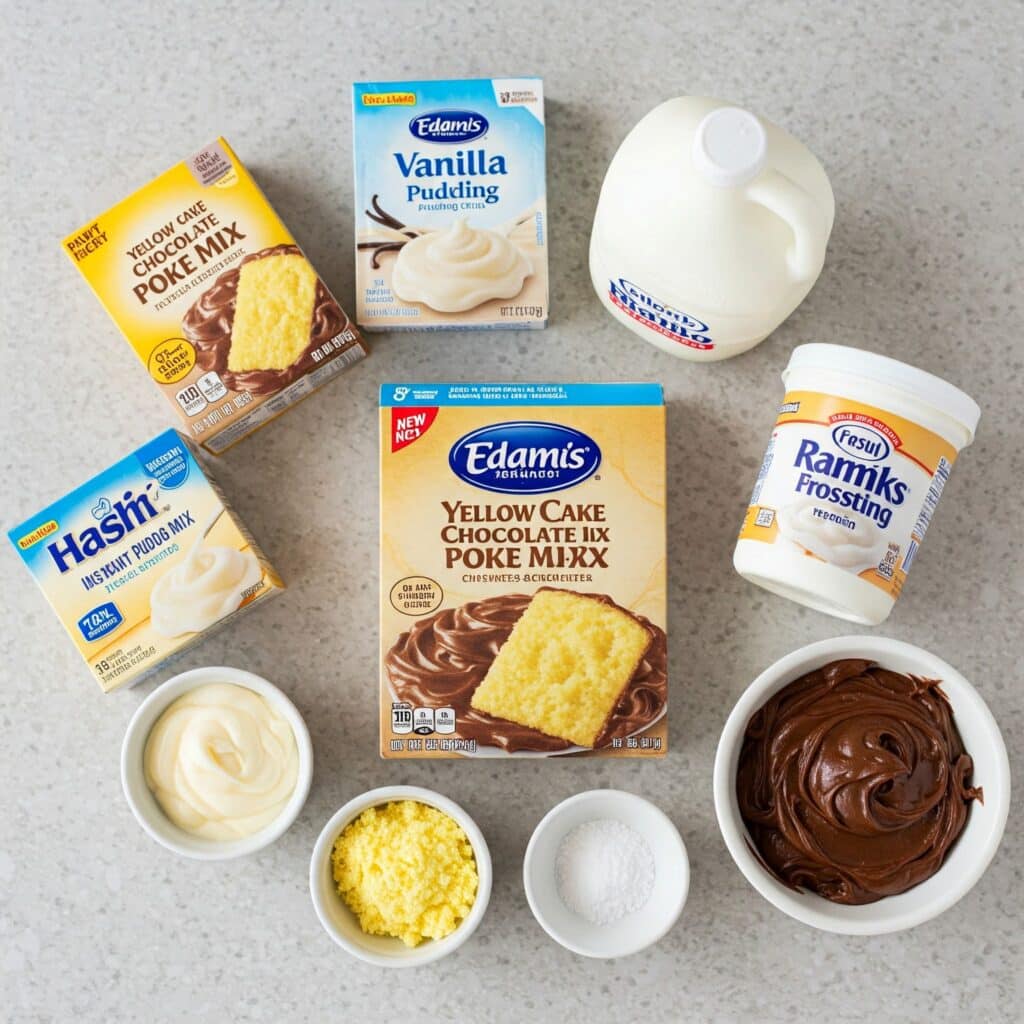
Let’s embrace the beauty of smart shortcuts! This recipe relies heavily on convenient store-bought ingredients: yellow cake mix, instant vanilla pudding mix, and prepared chocolate frosting. The “homemade” aspect here lies entirely in the simple assembly process – preparing the cake and pudding according to package directions, poking the holes, layering the components, and letting it chill.
While you could make each component from scratch for a more involved version, the entire point and charm of this specific recipe is its incredible ease and speed, achieved through these convenient shortcuts. It makes a delicious, themed dessert accessible to absolutely everyone, regardless of baking skill.
It celebrates how easily you can create a crowd-pleasing, flavorful dessert at home by cleverly combining ready-made ingredients. The perfect balance between easy and delicious.
Flavor Goal
The primary flavor goal is to replicate the three core flavors of Boston Cream Pie: moist yellow cake, creamy vanilla custard (represented by the pudding), and a rich chocolate topping (represented by the frosting).
The yellow cake base, made even moister by the absorbed pudding, should be tender and slightly sweet. The vanilla pudding, seeping into the cake and forming a layer on top, provides creamy vanilla flavor and richness. The chocolate frosting adds the final layer of smooth, sweet chocolatey goodness.
The overall experience should be a moist, creamy, sweet cake that tastes remarkably like a classic Boston Cream Pie, but with the unique texture of a poke cake. A perfect combination of flavour and texture.
Ingredient Insights
- Yellow Box Cake Mix: The convenient base. Prepare it according to the package directions (typically requires eggs, oil/butter, water). Lemon or white cake mix could also work for slight variations.
- Vanilla Instant Pudding Mix: Used to create the creamy “custard” layer. Ensure it’s INSTANT pudding, not cook & serve. Prepare according to package directions (usually requires cold milk). Using two boxes creates a generous pudding layer.
- Tub Chocolate Frosting: The quick and easy chocolate topping. Use a standard 16 oz tub of your favorite chocolate frosting (milk chocolate, fudge, dark chocolate). Warming it slightly makes it easily pourable/spreadable.
- Poke Tool (Straw or Wooden Spoon Handle): Needed to create the holes in the cooled cake for the pudding to seep into. Wider holes work well.
Essential Equipment
- 9×13 Inch Baking Pan: Standard size for baking the cake mix and assembling the poke cake. Needs to be greased.
- Large Bowl & Mixer (Optional): For preparing the cake mix per box directions.
- Medium Bowl & Whisk: For preparing the instant pudding mix per box directions.
- Straw or Handle of a Wooden Spoon: For poking holes in the cake.
- Spatula or Frosting Knife: For spreading the pudding and frosting layers.
- Microwave: For warming the chocolate frosting slightly.
- Measuring Cups & Spoons: (Mainly for ingredients needed for cake/pudding mixes).
Ingredients
(Based on 1x column)
- ▢ 1 box yellow cake mix (standard 15.25 oz size), plus ingredients listed on the box (e.g., eggs, oil, water)
- ▢ 2 boxes (3.4 oz each) vanilla instant pudding mix, plus ingredients listed on the box (usually cold milk)
- ▢ 1 tub (16 oz) chocolate frosting (store-bought)

Step-by-Step Instructions
1. Prepare and Bake the Cake:
- Preheat your oven according to the temperature specified on the yellow cake mix box.
- Grease and flour a 9×13 inch baking pan.
- Prepare the cake batter according to the package instructions, using the ingredients (eggs, oil/butter, water/milk) listed on the box.
- Pour the prepared batter into the greased 9×13 inch pan and spread evenly.
- Bake according to the package directions, or until a toothpick inserted into the center comes out clean.
2. Cool Cake and Poke Holes:
- Once baked, allow the cake to cool completely in the pan on a wire rack. This might take an hour or two. Don’t rush this step!
- When the cake is fully cool, use a sturdy straw or the round handle of a wooden spoon to poke holes evenly all over the top surface of the cake, about an inch or so apart. Poke down almost to the bottom of the cake.
3. Prepare Pudding and Apply Layer:
- Prepare both boxes of the vanilla instant pudding according to the package instructions (this usually involves whisking the dry mix with cold milk until it starts to thicken). Work quickly as instant pudding sets fast.
- Immediately pour the prepared (but still somewhat soft-set) pudding over the top of the poked cake.
- Use a spatula to gently spread the pudding evenly over the cake surface, pressing down slightly to encourage the pudding to seep into the holes.
4. Chill the Cake (Pudding Layer):
- Cover the pan with plastic wrap or a lid.
- Refrigerate the cake for at least 30 minutes (or longer, even overnight is fine) to allow the pudding to fully set and soak nicely into the cake layers.
5. Warm and Apply Chocolate Frosting:
- Remove the chilled cake from the refrigerator.
- Open the tub of chocolate frosting. Remove the foil seal if present. Place the tub (or scoop frosting into a microwave-safe bowl) in the microwave.
- Heat on high for about 30-60 seconds, stirring halfway, just until the frosting is smooth, slightly warmed, and easily spreadable/pourable. Be careful not to make it hot or liquidy.
- Pour the warmed chocolate frosting over the top of the set pudding layer.
- Quickly use an offset spatula or frosting knife to spread the chocolate frosting evenly over the entire surface.
6. Final Chill:
- Refrigerate the cake for at least another 30 minutes to allow the chocolate frosting layer to firm up slightly. Keep refrigerated until ready to serve.
7. Serve:
- Slice the chilled Boston Cream Poke Cake into squares.
- Serve cold and enjoy!

Troubleshooting
- Cake Dry: Overbaked the initial cake layer. Follow box directions carefully and check for doneness promptly. The pudding soak helps add moisture back.
- Pudding Too Thick/Set Before Spreading: Didn’t work quickly enough after mixing the instant pudding. Mix pudding just before pouring over cake. If it gets too thick, whisking in a tiny splash more cold milk might help, but don’t make it watery.
- Pudding Didn’t Go Into Holes: Holes weren’t large enough, or pudding was too thick when poured. Use a wider straw/handle. Ensure pudding is still pourable. Gently pressing helps.
- Frosting Too Hard/Not Spreadable: Overheated in microwave, or chilled too long after warming. Warm gently just until spreadable. If hardened on cake, let sit at room temp briefly before slicing.
- Frosting Too Runny: Microwaved too long/got too hot. Let it cool and thicken slightly at room temperature before pouring over the chilled cake.
Tips and Variations
- Cool Cake Completely: Essential before poking and adding pudding to prevent a gummy texture.
- Poking Holes: Use the round handle of a wooden spoon for nice, wide holes that hold plenty of pudding. Space them evenly.
- Instant Pudding is Key: Make sure you use instant pudding mix, not the cook & serve type, for this method.
- Cake Mix Flavor: White cake mix or butter yellow cake mix are good alternatives to standard yellow.
- Pudding Flavor: French vanilla or cheesecake instant pudding would also be delicious.
- Homemade Components: Elevate the cake by using your favorite homemade yellow cake recipe, homemade vanilla pastry cream (cooled completely!) instead of pudding, and/or a homemade chocolate ganache instead of canned frosting. Note that pastry cream is thicker than pudding and might not seep into holes as easily.
- Garnish: Add chocolate shavings, mini chocolate chips, or even a few maraschino cherries on top for extra flair.
Serving and Pairing Suggestions
- Serve Chilled: This cake is best served cold straight from the refrigerator.
- Potlucks & Parties: The 9×13 format and easy preparation make it ideal for gatherings.
- Cut into Squares: Easy serving directly from the pan.
- With Coffee or Milk: Classic pairings for cake.
Nutritional Information
(Note: Estimated, per serving, assuming 12-15 servings from a 9×13 pan. Highly variable based on specific cake mix, pudding mix, and frosting brands.)
- Calories: 350-500+
- Fat: 15-25g+
- Saturated Fat: 5-10g+
- Cholesterol: 40-60mg+ (depending on cake mix ingredients)
- Sodium: 350-500mg+ (Mixes/pudding can be high)
- Total Carbohydrates: 50-70g+
- Dietary Fiber: <1-2g
- Sugars: 35-50g+ (Very sweet dessert)
- Protein: 3-5g+
Easy Boston Cream Poke Cake
Make a delicious Boston Cream Poke Cake with incredible ease! This simple recipe uses yellow cake mix, vanilla pudding, and chocolate frosting for a fun twist on the classic dessert.
Ingredients
Based on 1x column)
- ▢ 1 box yellow cake mix (standard 15.25 oz size), plus ingredients listed on the box (e.g., eggs, oil, water)
- ▢ 2 boxes (3.4 oz each) vanilla instant pudding mix, plus ingredients listed on the box (usually cold milk)
- ▢ 1 tub (16 oz) chocolate frosting (store-bought)
Instructions
1. Prepare and Bake the Cake:
- Preheat your oven according to the temperature specified on the yellow cake mix box.
- Grease and flour a 9×13 inch baking pan.
- Prepare the cake batter according to the package instructions, using the ingredients (eggs, oil/butter, water/milk) listed on the box.
- Pour the prepared batter into the greased 9×13 inch pan and spread evenly.
- Bake according to the package directions, or until a toothpick inserted into the center comes out clean.
2. Cool Cake and Poke Holes:
- Once baked, allow the cake to cool completely in the pan on a wire rack. This might take an hour or two. Don’t rush this step!
- When the cake is fully cool, use a sturdy straw or the round handle of a wooden spoon to poke holes evenly all over the top surface of the cake, about an inch or so apart. Poke down almost to the bottom of the cake.
3. Prepare Pudding and Apply Layer:
- Prepare both boxes of the vanilla instant pudding according to the package instructions (this usually involves whisking the dry mix with cold milk until it starts to thicken). Work quickly as instant pudding sets fast.
- Immediately pour the prepared (but still somewhat soft-set) pudding over the top of the poked cake.
- Use a spatula to gently spread the pudding evenly over the cake surface, pressing down slightly to encourage the pudding to seep into the holes.
4. Chill the Cake (Pudding Layer):
- Cover the pan with plastic wrap or a lid.
- Refrigerate the cake for at least 30 minutes (or longer, even overnight is fine) to allow the pudding to fully set and soak nicely into the cake layers.
5. Warm and Apply Chocolate Frosting:
- Remove the chilled cake from the refrigerator.
- Open the tub of chocolate frosting. Remove the foil seal if present. Place the tub (or scoop frosting into a microwave-safe bowl) in the microwave.
- Heat on high for about 30-60 seconds, stirring halfway, just until the frosting is smooth, slightly warmed, and easily spreadable/pourable. Be careful not to make it hot or liquidy.
- Pour the warmed chocolate frosting over the top of the set pudding layer.
- Quickly use an offset spatula or frosting knife to spread the chocolate frosting evenly over the entire surface.
6. Final Chill:
- Refrigerate the cake for at least another 30 minutes to allow the chocolate frosting layer to firm up slightly. Keep refrigerated until ready to serve.
7. Serve:
- Slice the chilled Boston Cream Poke Cake into squares.
- Serve cold and enjoy
Recipe Summary and Q&A
Summary: This Easy Boston Cream Poke Cake starts with a baked and cooled 9×13 yellow cake mix. Holes are poked all over the cake, and prepared instant vanilla pudding is poured over, sinking into the holes and forming a layer on top. After chilling, warmed store-bought chocolate frosting is spread over the pudding layer. The cake is chilled again until the frosting is set before slicing and serving cold.
Q&A:
- Q: Do I have to use instant pudding? Can I use cook & serve?
- A: You must use instant pudding mix for this recipe method. Cook & serve pudding requires cooking on the stovetop and has a different texture; it wouldn’t work the same way poured over the cake.
- Q: Why poke holes in the cake?
- A: Poking holes allows the creamy vanilla pudding to seep down into the cake itself, infusing it with moisture and flavor, which is the signature technique of a “poke cake.”
- Q: Can I make this ahead of time?
- A: Yes! This cake is actually best made at least several hours ahead, or even the day before, to allow the pudding to fully soak in and the flavors to meld. Keep it covered and refrigerated.
- Q: How should I store leftovers?
- A: Store leftover cake tightly covered in the refrigerator for up to 3-4 days.

