Are you ready to bake a truly old-fashioned dessert, the kind that fills your whole house with the incredible aroma of sweet peaches and buttery pastry, and tastes like a cherished family memory? This incredible, from-scratch Old-Fashioned Peach Cobbler is a timeless masterpiece that is worth every single, satisfying moment in the kitchen.
This isn’t a quick, cake-mix shortcut; this is the real deal. We’ll show you how to make a wonderfully tender and flaky, shortening-based pastry crust from scratch. Then, we’ll create a rich, juicy, and perfectly spiced stovetop peach filling and encase it all under a beautiful, hand-woven lattice top. It’s a true celebration of summer’s most perfect fruit and the joy of traditional home baking.
Table of Contents
Table of Contents
Recipe Overview: A True Taste of Tradition
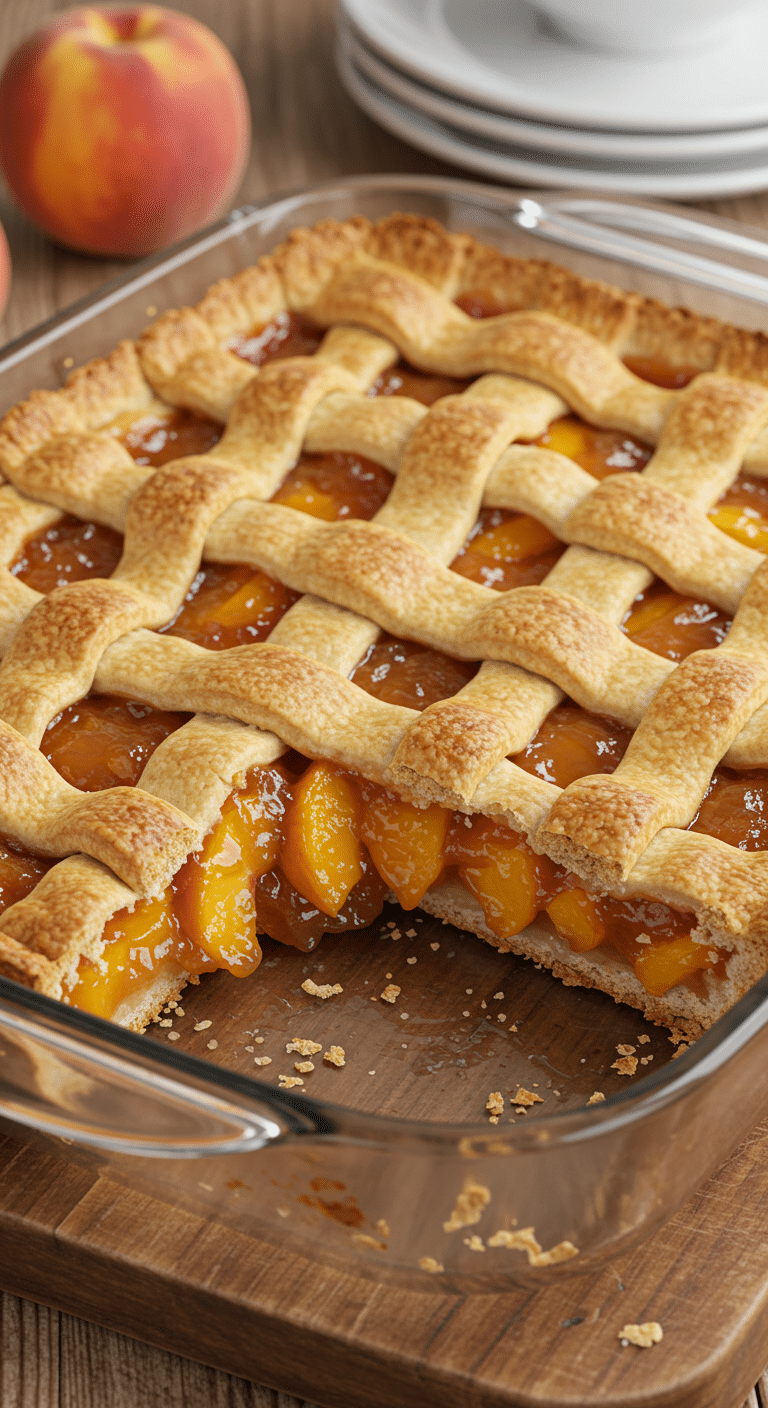
What makes this Old-Fashioned Peach Cobbler so special is its classic, pie-style construction. While many modern cobblers have a biscuit or batter topping, this traditional version features a full bottom crust and a beautiful lattice top, making it more like a rustic “pan pie.” The recipe uses two key techniques for a perfect result every time: par-baking the bottom crust to prevent sogginess, and cooking the filling first to create a thick, jammy consistency. It’s the ultimate summer dessert for a family gathering.
| Metric | Time / Level |
| Total Time | 2 hours 15 minutes (plus cooling) |
| Active Prep Time | 45 minutes |
| Difficulty Level | Intermediate |
| Servings | 12-18 |
The Essential Ingredients for a Classic Cobbler
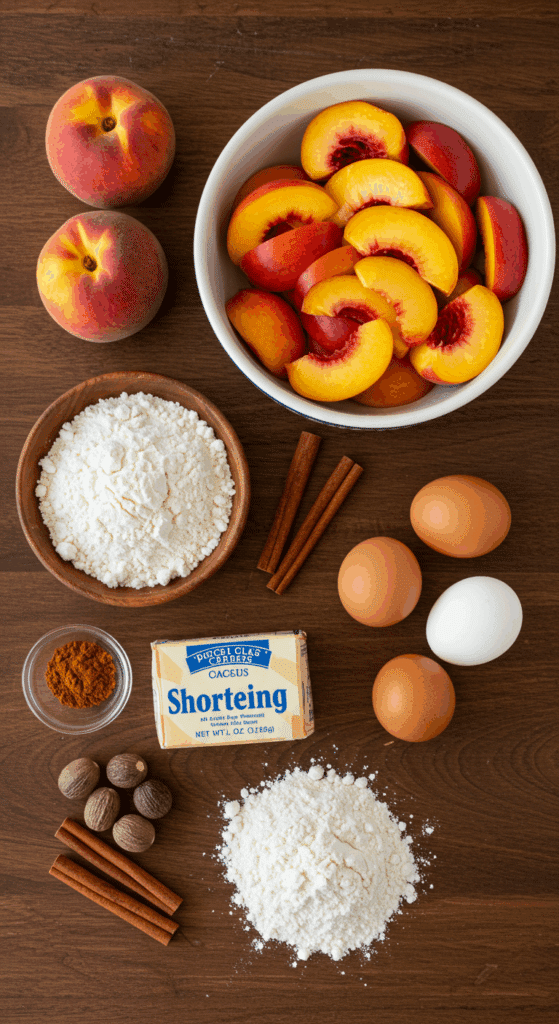
This recipe uses simple, classic ingredients to create a dessert with authentic, from-scratch flavor.
- The Old-Fashioned Pastry Crust: This is what gives the cobbler its wonderfully tender and flaky texture.
- Shortening: Using all shortening is a classic, old-fashioned technique that produces an incredibly tender and flaky crust with a delightful “melt-in-your-mouth” quality. Be sure it is very cold.
- Flour, Sugar, Salt, Egg, and Cold Water: These simple pantry staples come together to create a sturdy, workable, and delicious pastry.
- The Juicy Peach Filling: This is the sweet and spiced heart of our dessert.
- Fresh Freestone Peaches: For the absolute best flavor, you must use fresh, ripe, yet still firm freestone peaches. This will ensure they become tender and sweet during baking without turning into a watery mush.
- Orange & Lemon Juice: A generous amount of fresh citrus juice adds a wonderful, bright acidity that perfectly balances the sweetness of the peaches and sugar.
- Cornstarch: Our essential thickener. It transforms the beautiful fruit juices into a rich, thick, and jammy sauce that will slice cleanly once the cobbler has cooled.
- Warm Spices (Cinnamon & Nutmeg): A classic and comforting blend of warm spices that is the perfect complement to the sweet, baked peaches.

Pro Tutorial: The Easiest Way to Peel Peaches
For the best, smoothest filling, peeling your peaches is a must. The “blanching” method is the quickest and easiest way.
- Prep: Bring a large pot of water to a boil and prepare a large bowl of ice water.
- Score: Gently cut a shallow “X” on the bottom of each peach.
- Blanch: Carefully lower the peaches into the boiling water for just 30-60 seconds.
- Shock: Immediately use a slotted spoon to transfer the peaches to the ice water bath.
- Peel: Once cool, the skins will slip right off with your fingers!
Step-by-Step to the Perfect Peach Cobbler
This recipe is a rewarding baking project with a few distinct parts. Follow these steps for a perfect, nostalgic dessert.
Part 1: The Perfect, Flaky Shortening Crust
Step 1: In a large bowl, sift together the 2 1/2 cups of all-purpose flour, 3 tablespoons of the white sugar, and the 1 teaspoon of salt.
Step 2: Add the 1 cup of cold shortening to the bowl. Using a pastry blender or two knives, “cut” the shortening into the flour mixture until it resembles coarse crumbs with some small, pea-sized pieces remaining.
Step 3: In a small bowl, whisk together the large egg and the 1/4 cup of cold water. Sprinkle this mixture over the flour and shortening. Gently work the dough with your hands just until it comes together to form a ball. Do not overwork it.
Step 4: Divide the dough in half, press each half into a flattened disc, and wrap each disc tightly in plastic wrap. Chill the dough in the refrigerator for at least 30 minutes.
Part 2: Par-Baking the Bottom Crust
Step 1: Preheat your oven to 350°F (175°C).
Step 2: On a lightly floured surface, roll out one of the chilled dough discs to an 1/8-inch thickness, large enough to fit your 9×13-inch baking dish.
Step 3: Carefully place the dough in the baking dish, covering the bottom and pressing it about halfway up the sides.
Step 4: Bake the bottom crust in the preheated oven for about 20 minutes, until it is a light golden brown. This crucial step, known as par-baking, is a key defense against a soggy bottom. Set the dish aside.
Part 3: The Rich, Stovetop Peach Filling
Step 1: While the crust is baking, prepare the filling. In a large saucepan, mix together the 3 pounds of peeled and sliced fresh peaches, the 3/4 cup of orange juice, and the 1/4 cup of lemon juice. Add the 1/2 cup of butter and cook the mixture over medium-low heat until the butter is completely melted.
Step 2: In a separate medium bowl, stir together the 2 cups of white sugar, the 1 tablespoon of cornstarch, the 1 teaspoon of ground cinnamon, and the 1/2 teaspoon of ground nutmeg.
Step 3: Mix this sugar-and-spice mixture into the peach mixture in the saucepan until it is well combined. Bring the filling to a gentle simmer and cook for a few minutes until it begins to thicken.
Step 4: Pour the hot peach filling into the par-baked crust.
Part 4: Assembling the Lattice Top and Baking
Step 1: Roll out the remaining disc of dough to a 1/4-inch thickness. Using a pastry wheel or a sharp knife, cut the dough into 1/2-inch-wide strips.
Step 2: Carefully weave the strips over the top of the peach filling to create a beautiful lattice top. Trim the edges of the strips and tuck them under to seal.
Step 3: Sprinkle the remaining 1 tablespoon of sugar over the lattice crust, then drizzle with the 1 tablespoon of melted butter.
Step 4: Place the cobbler on a larger, rimmed baking sheet. Bake in the preheated oven for 35 to 40 minutes, until the lattice crust is a deep golden brown and the filling is thick and bubbling.
Step 5 (The Most Important Step!): You must let the cobbler cool completely on a wire rack before slicing and serving. This will take at least 2-3 hours. This allows the hot, jammy filling to set up properly so you can get clean slices.

The Best Old-Fashioned Peach Cobbler (From Scratch)
A classic, old-fashioned peach cobbler featuring a homemade double crust made with shortening for a flaky texture. The bottom crust is par-baked in a 9×13-inch dish to ensure it stays crisp. The filling is made on the stovetop with fresh, sliced peaches simmered with citrus juices, butter, sugar, and warm spices, and thickened with cornstarch. The cobbler is finished with a decorative lattice top crust and baked until the filling is bubbly and the pastry is golden brown.
- Prep Time: 40 minutes
- Cook Time: 1 hour
- Total Time: 2 hours 10 minutes (plus cooling time)
- Yield: 18 servings
- Category: Dessert
- Method: Baking
- Cuisine: American
- Diet: Vegetarian
Ingredients
- For the Crust:
- 2 ½ cups all-purpose flour
- 4 tablespoons white sugar, divided
- 1 teaspoon salt
- 1 cup shortening
- 1 large egg
- ¼ cup cold water
- 1 tablespoon butter, melted
- For the Filling:
- 3 pounds fresh peaches – peeled, pitted, and sliced
- ¾ cup orange juice
- ¼ cup lemon juice
- ½ cup butter
- 2 cups white sugar
- 1 tablespoon cornstarch
- 1 teaspoon ground cinnamon
- ½ teaspoon ground nutmeg
Instructions
- Make the Crust: In a medium bowl, sift together the flour, 3 tablespoons of sugar, and the salt. Using a pastry blender or two knives, cut in the shortening until the mixture resembles coarse crumbs.
- In a small bowl, whisk together the egg and cold water. Sprinkle this over the flour mixture and work with your hands to form the dough into a ball.
- Wrap the dough in plastic wrap and chill in the refrigerator for 30 minutes.
- Prepare the Bottom Crust: Preheat the oven to 350°F (175°C). Roll out half of the chilled dough to a 1/8-inch thickness.
- Place the dough in a 9×13-inch baking dish, covering the bottom and pressing it halfway up the sides. Bake in the preheated oven for about 20 minutes, until golden brown.
- Make the Filling: In a large saucepan, mix the sliced peaches with the orange juice and lemon juice. Add the ½ cup of butter and cook over medium-low heat until the butter is melted.
- In a separate bowl, stir together 2 cups of sugar, the cornstarch, cinnamon, and nutmeg. Mix this into the peach mixture until combined. Bring to a simmer and cook until thickened.
- Pour the hot peach filling into the baked bottom crust.
- Assemble and Bake: Roll the remaining dough to a 1/4-inch thickness and cut it into 1/2-inch-wide strips.
- Weave the strips into a lattice pattern over the peaches. Fold the ends of the strips under the bottom crust and crimp the edges to seal.
- Sprinkle the lattice top with the remaining 1 tablespoon of sugar and drizzle with the melted butter.
- Bake in the preheated oven for 35 to 40 minutes, until the top crust is golden brown and the filling is bubbly.
- Let the cobbler cool completely before slicing and serving to allow the filling to set.
Notes
- This recipe uses a traditional shortening-based pastry for a flaky crust.
- Par-baking the bottom crust before adding the filling is a key step to prevent it from becoming soggy.
- It is important to let the cobbler cool completely before slicing to ensure the filling has time to set properly.
Storage and Make-Ahead Tips
This Old-Fashioned Peach Cobbler is a wonderful dessert to have on hand.
- Make-Ahead: You can prepare the pie dough and keep it, well-wrapped, in the refrigerator for up to 2 days or in the freezer for up to 3 months. You can also prepare the entire fruit filling and store it in an airtight container in the refrigerator for up to 24 hours before assembling and baking.
- Storage: Store any leftover cobbler, covered loosely with a clean kitchen towel or foil, at room temperature for up to 2 days. For longer storage, you can keep it in the refrigerator for up to 5 days.
- Reheating: You can enjoy the cobbler at room temperature, or reheat individual slices in the microwave or a low oven until just warm.
For more recipe follow my Pinterest account
Creative Recipe Variations
This classic recipe is a perfect canvas for your own delicious twists.
- Classic All-Butter Crust: For a richer, more flavorful (though slightly less flaky) crust, you can substitute the 1 cup of shortening with 1 cup (2 sticks) of very cold, cubed unsalted butter.
- Add a Berry Burst: For a beautiful and delicious Peach-Blueberry Cobbler, you can gently fold in 1 to 1 1/2 cups of fresh or frozen blueberries into the peach filling mixture just before you pour it into the crust.
- Add a Nutty Almond Flavor: Almond and peach are a classic pairing. Add 1/2 teaspoon of almond extract to the peach filling along with the vanilla. You can also add 1/2 cup of sliced almonds to the filling for a lovely, nutty crunch.
Enjoy a True Taste of Nostalgia!
You’ve just created a truly special, from-scratch dessert that is the very essence of homemade comfort. This Old-Fashioned Peach Cobbler, with its tender flaky crust, rich jammy filling, and beautiful lattice top, is a rewarding baking project that is guaranteed to impress. It’s the kind of timeless dessert that creates lasting memories.
We hope you and your family love every last, perfect, flaky, and fruity bite!
If you enjoyed making this recipe, please leave a comment below or share it with a friend who loves to bake!
Frequently Asked Questions (FAQs)
Q1: Is this a cobbler or a pie? What’s the difference?
That’s a great question! While the name says “cobbler,” the construction of this dessert—with a bottom crust, a filling, and a top lattice crust—is technically that of a pie made in a rectangular pan. A traditional “cobbler” typically has a biscuit-style or a batter topping dropped over the fruit, creating a “cobbled” appearance. This recipe is a wonderful, rustic hybrid that gives you the best of both worlds!
Q2: Why is my bottom crust soggy?
This recipe has a built-in defense against a soggy bottom: par-baking the crust. By baking the bottom crust for about 20 minutes before you add the wet filling, you create a firm, sealed layer that is much more resistant to absorbing moisture. If your crust is still soggy, it may be that your filling was too thin; make sure to let it simmer and thicken on the stovetop as directed.
Q3: Can I use frozen peaches for this recipe?
Yes, you can, which makes this a great dessert to enjoy year-round. Use 3 pounds of frozen sliced peaches, and do not thaw them first. You can add them directly to the saucepan with the juices and butter. You may need to add a few extra minutes to the stovetop cooking time to allow them to thaw and release their juices.
Q4: Is making a lattice crust difficult?
It looks impressive, but it’s easier than you think! The key is to work with cold dough and to have a plan. The simple over-under weaving pattern described in the recipe is the classic technique. Just take your time, and don’t worry if it’s not absolutely perfect—the rustic look is part of its charm!
Q5: Why is it so important to let the cobbler cool completely before slicing?
This is the most important rule for any fruit pie or cobbler! The filling is incredibly hot and molten when it comes out of the oven. The thickeners (in this case, cornstarch) need several hours in the cooler, room-temperature air to fully set up and create a firm, sliceable, jammy filling. If you cut into a warm pie, all that delicious filling will come pouring out in a runny mess. Patience is the key to a perfect slice!

