Introduction & Inspiration
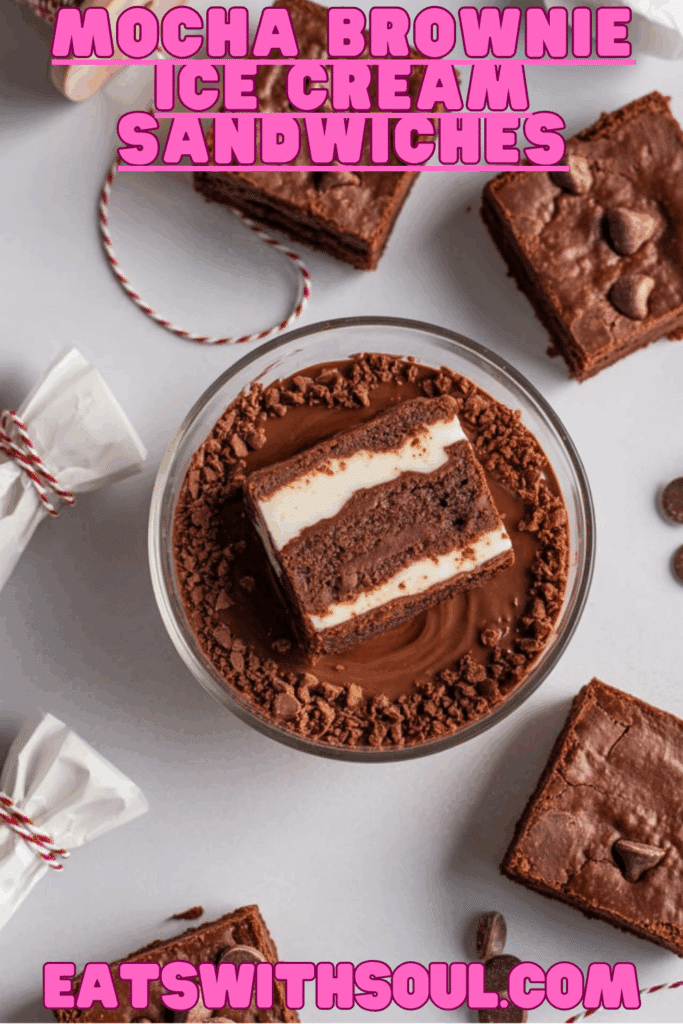
Prepare for the ultimate grown-up ice cream sandwich with this absolutely incredible recipe for Mocha Brownie Ice Cream Sandwiches! This is a truly decadent and sophisticated frozen treat that combines the deep, rich flavor of homemade chocolate brownies with bold, creamy coffee ice cream. Imagine two thin, chewy layers of intensely chocolatey brownie, embracing a thick slab of your favorite coffee ice cream, with the sides rolled in a delightful, crunchy coating of chopped chocolate-covered espresso beans. It’s a mocha lover’s dream come true!
My inspiration for this recipe comes from wanting to create a truly gourmet, restaurant-quality frozen dessert at home. This isn’t your childhood ice cream sandwich; it’s an elevated experience with complex flavors and wonderful textures. The method of creating one large brownie slab and then cutting it into individual sandwiches is a brilliant, efficient technique for perfect results.
This dessert project is fantastic for a special occasion, a dinner party finale, or anytime you want to treat yourself to a truly exceptional homemade confection. The combination of rich brownie, bold coffee ice cream, and the intense crunch of espresso beans is simply sublime. It is a perfect dessert recipe.
Nostalgic Appeal / Comfort Factor
This recipe brilliantly merges the nostalgic comfort of two beloved treats: the fudgy, home-baked goodness of brownies and the simple, joyful pleasure of an ice cream sandwich. While the mocha flavor profile lends a sophisticated, “adult” air, the core concept is pure comfort food. The familiar taste of chocolate and ice cream is universally comforting, while the addition of coffee flavor adds a layer of rich, satisfying warmth.
Making these at home is a rewarding process that taps into the comfort of baking and creating something special with your own hands. The result is an indulgent treat that feels both comfortingly familiar in its form and excitingly gourmet in its flavor. A perfect comfort food dessert with a sophisticated twist.
Homemade Focus
This recipe is a fantastic celebration of from-scratch baking and assembly, resulting in a truly premium dessert. You’ll be creating a rich, chewy, and perfectly thin chocolate brownie base entirely from scratch, using both unsweetened cocoa powder for depth and melted semi-sweet chocolate for that wonderful fudgy texture.
The homemade focus shines in the specific techniques employed: baking the brownie in a large sheet pan, using a foil sling for easy handling, and the clever method of assembling one giant ice cream sandwich before cutting it into individual portions. You’re also chopping the chocolate-covered espresso beans yourself to create the unique, crunchy coating. While the ice cream may be store-bought, the craft and assembly are all part of a satisfying homemade project.
It’s about taking a classic concept and elevating it with from-scratch components and thoughtful techniques to create a truly impressive gourmet treat. The homemade brownie is key.
Flavor Goal
The primary flavor goal is a sophisticated and balanced mocha experience, with deep chocolate and bold coffee flavors complemented by a variety of satisfying textures. The brownie layers should be rich, chewy, and intensely chocolatey, providing the perfect structure for the sandwich.
The coffee ice cream should be creamy and smooth, offering a bold, aromatic coffee flavor that merges with the brownie to create the “mocha” profile. The crucial finishing touch – the chopped chocolate-covered espresso bean coating – should provide a delightful, intense crunch and a final, slightly bitter burst of coffee and chocolate that perfectly cuts through the richness of the ice cream and brownie.
The overall experience should be a multi-layered, multi-textured frozen sandwich that is rich, indulgent, and a perfect harmony of deep chocolate and bold coffee flavors. A perfect balance between flavour and texture.
Ingredient Insights
For the Brownie Layers:
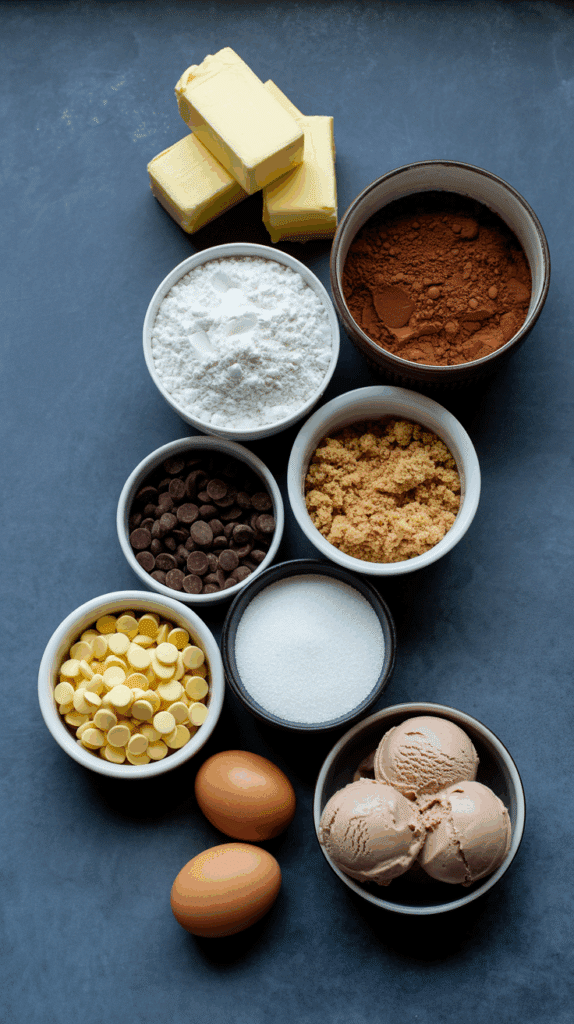
- Unsalted Butter & Semisweet or Bittersweet Chocolate: Melted together, they form the rich, fudgy foundation of the brownie.
- All-Purpose Flour & Unsweetened Cocoa Powder: The flour provides structure, while the cocoa powder adds deep, dark chocolate flavor.
- Sugar & Salt: Sugar adds sweetness and contributes to the chewy texture. Salt enhances the chocolate flavor.
- Large Eggs: Provide richness, binding, and leavening.
For the Ice Cream Filling & Coating:
- Coffee Ice Cream: The “mocha” component! Use a good quality, flavorful coffee ice cream. It needs to be softened slightly to become spreadable.
- Chocolate-Covered Espresso Beans (Chopped): The crunchy coating that adds intense coffee flavor and fantastic texture.
Special Equipment Note:
- 18×13-inch Rimmed Baking Sheet (Half Sheet Pan): This specific size is crucial for baking a brownie layer that is thin enough to work as a sandwich component.
Essential Equipment
- 18×13-inch Rimmed Baking Sheet (Half Sheet Pan): Essential for this recipe.
- Foil: For lining the baking sheet and creating a “sling” for easy removal.
- Medium Saucepan: For melting the butter and chocolate.
- Medium Bowl: For whisking dry ingredients.
- Large Bowl (or use saucepan): For mixing the brownie batter.
- Stand Mixer (or Hand Mixer, optional): The recipe can be done by hand with a whisk and spatula.
- Spatula (Offset is helpful): For spreading batter and ice cream.
- Cooling Rack:
- Large Cutting Board:
- Sharp, Long Knife: For trimming and cutting the frozen brownie sandwich.
- Parchment Paper: For wrapping individual sandwiches.
Ingredients
(Based on 1x column, makes 24 sandwiches)
Mocha Brownie:
- ▢ 2 sticks (16 tablespoons / 1 cup) unsalted butter, plus more for buttering the foil
- ▢ 1 ½ cups all-purpose flour
- ▢ ⅓ cup unsweetened cocoa powder
- ▢ ½ teaspoon fine salt
- ▢ 4 ounces semisweet or bittersweet chocolate, chopped
- ▢ 2 cups granulated sugar
- ▢ 4 large eggs, slightly beaten
Ice Cream Sandwich Assembly:
- ▢ ½ gallon (8 cups) coffee ice cream, softened
- ▢ 1 cup chocolate-covered espresso beans, chopped

Step-by-Step Instructions
Stage 1: Bake and Prepare the Brownie Layers
1. Prepare Oven and Pan:
- Preheat the oven to 350°F (175°C).
- Line an 18×13-inch rimmed baking sheet (a standard half sheet pan) with a large piece of foil, making sure to leave at least a 2-inch overhang on the two longer sides. This foil “sling” is crucial for lifting the brownie out later.
- Generously butter the foil.
2. Make the Brownie Batter:
- In a medium bowl, whisk together the all-purpose flour, unsweetened cocoa powder, and fine salt. Set aside.
- Melt the 2 sticks of butter and the chopped chocolate in a medium saucepan over medium-low heat, stirring frequently until smooth.
- Remove the saucepan from the heat and let the chocolate mixture cool slightly for a few minutes.
- Stir the granulated sugar into the slightly cooled chocolate mixture.
- Add the slightly beaten eggs and stir until well combined.
- Add the prepared flour mixture to the saucepan and stir with a spatula just until all the ingredients are combined. Do not overmix.
3. Bake and Chill the Brownie:
- Pour the brownie batter into the prepared foil-lined pan. Using an offset spatula or the back of a spoon, spread the batter into a thin, even layer that covers the entire surface of the pan.
- Bake for 20 to 25 minutes. The brownie is done when a toothpick inserted in the center comes out with just a few moist crumbs adhering to it (not wet batter).
- Let the brownie cool completely in the pan on a cooling rack.
- Once cool, place the entire pan in the freezer to firm up, for about 30 minutes.
Stage 2: Assemble the Giant Ice Cream Sandwich
1. Prepare the Brownie Slabs:
- Use the foil overhangs to carefully lift the entire chilled brownie slab out of the pan.
- Carefully flip the brownie over onto a large cutting board. Peel the foil away from the bottom and discard it.
- Line the now-empty baking sheet with a large piece of plastic wrap.
- Using a long, sharp knife, trim the rough edges off the brownie so it is an even rectangle. The recipe suggests trimming to 16-by-12 inches.
- Cut the trimmed brownie in half crosswise, resulting in two pieces that are approximately 12-by-8 inches each.
2. Assemble and Freeze:
- Lay one of the brownie pieces, top-side facing down, onto the prepared plastic wrap-lined baking sheet.
- Let your coffee ice cream soften at room temperature for a few minutes until it is just spreadable but not melty. Work quickly!
- Using a large ice cream scoop or a spatula, spread the softened coffee ice cream evenly across the brownie on the baking sheet, getting it close to all the edges. Use an offset or rubber spatula to help smooth out the sides and top of the ice cream layer.
- Place the other brownie piece on top of the ice cream and press down gently to create one large ice cream sandwich.
- Fold the overhanging plastic wrap around the assembled ice cream sandwich to help hold its shape and keep it tightly wrapped.
- Return the giant sandwich to the freezer to harden completely. This will take at least 6 hours, but overnight is ideal.
Stage 3: Cut and Coat the Sandwiches
1. Cut into Sandwiches:
- Remove the giant frozen brownie ice cream sandwich from the freezer and unwrap it. Place it on your cutting board.
- Using a large, sharp knife warmed under hot running water and wiped dry, carefully cut the large block into twenty-four individual ice cream sandwiches (e.g., cut into 6 rows by 4 rows).
2. Coat and Serve:
- Place the chopped chocolate-covered espresso beans in a shallow dish or on a plate.
- Working with one sandwich at a time, roll the exposed ice cream edges into the chopped espresso beans until the sides are well coated.
- Wrap each finished sandwich individually in parchment paper and enjoy immediately, or return to the freezer to store.
- These sandwiches will keep, well-wrapped, in the freezer for up to 1 week for best texture.

Troubleshooting
- Brownie is Dry or Crumbly: Overbaked. The brownie layer is thin, so it bakes quickly. Check for doneness at the lower end of the time range. A few moist crumbs on the toothpick is perfect.
- Ice Cream Melts Too Fast During Assembly: You must work quickly! Ensure the brownie slab is chilled/frozen before starting. Only take the ice cream out of the freezer right when you’re ready to spread it. If it gets too soft, pop the whole assembly back in the freezer for a few minutes before adding the top brownie layer.
- Difficulty Cutting the Frozen Sandwich Block: The block is frozen solid. The tip to use a large, sharp knife warmed under hot water is key. Run the knife under hot water, wipe it dry, make a cut, and repeat.
- Espresso Bean Coating Not Sticking: The ice cream edges may have become too hard or have a layer of frost on them. Let the cut sandwiches sit for just a minute for the edges to become slightly tacky before rolling in the chopped beans.
- Brownie Cracking: Can happen if handled roughly when lifting from the pan or if it’s very cold and brittle. Be gentle when using the foil sling and flipping.
Tips and Variations
- Foil Sling is Essential: Don’t skip creating a foil overhang; it’s the easiest way to remove the large, thin brownie from the pan without breaking it.
- Warm Knife for Cutting: This is the best trick for getting clean, neat slices of any frozen dessert, including this giant ice cream sandwich.
- Ice Cream Flavors: While coffee ice cream creates the “mocha” flavor, feel free to use your favorite! Mint chocolate chip, salted caramel, chocolate, or even strawberry would be delicious.
- Coating Variations: Instead of espresso beans, roll the edges in mini chocolate chips, rainbow or chocolate sprinkles, finely chopped nuts (like almonds or pecans), or crushed toffee bits.
- Add a Sauce Layer: Before spreading the ice cream, you could add a very thin layer of fudge sauce or caramel sauce on top of the bottom brownie layer. Freeze briefly before adding the ice cream.
- Make Ahead: This is a perfect make-ahead dessert. The individual, wrapped sandwiches can be stored in the freezer for up to a week.
Serving and Pairing Suggestions
- Serve Straight from the Freezer: The ultimate cool and satisfying dessert.
- Perfect for a Crowd: This recipe makes 24 sandwiches, so it’s fantastic for parties, barbecues, and family gatherings.
- Grown-Up Dessert: The intense coffee flavor makes this a sophisticated treat.
- With Coffee: The perfect pairing to enhance the mocha flavors! Serve with a hot cup of coffee or a cold brew.
Nutritional Information
(Note: Estimated, per one small ice cream sandwich, assuming 24 are made. This is an indulgent dessert.)
- Calories: 250-350
- Fat: 14-22g
- Saturated Fat: 8-14g
- Cholesterol: 40-60mg
- Sodium: 80-120mg
- Total Carbohydrates: 28-38g
- Dietary Fiber: 1-2g
- Sugars: 20-30g
- Protein: 3-5g
Gourmet Mocha Brownie Ice Cream Sandwiches
Create delicious Gourmet Mocha Brownie Ice Cream Sandwiches! This recipe features a homemade chocolate brownie layered with coffee ice cream and coated in crunchy chocolate-covered espresso beans.
Ingredients
(Based on 1x column, makes 24 sandwiches)
Mocha Brownie:
- ▢ 2 sticks (16 tablespoons / 1 cup) unsalted butter, plus more for buttering the foil
- ▢ 1 ½ cups all-purpose flour
- ▢ ⅓ cup unsweetened cocoa powder
- ▢ ½ teaspoon fine salt
- ▢ 4 ounces semisweet or bittersweet chocolate, chopped
- ▢ 2 cups granulated sugar
- ▢ 4 large eggs, slightly beaten
Ice Cream Sandwich Assembly:
- ▢ ½ gallon (8 cups) coffee ice cream, softened
- ▢ 1 cup chocolate-covered espresso beans, chopped
Instructions
Stage 1: Bake and Prepare the Brownie Layers
1. Prepare Oven and Pan:
- Preheat the oven to 350°F (175°C).
- Line an 18×13-inch rimmed baking sheet (a standard half sheet pan) with a large piece of foil, making sure to leave at least a 2-inch overhang on the two longer sides. This foil “sling” is crucial for lifting the brownie out later.
- Generously butter the foil.
2. Make the Brownie Batter:
- In a medium bowl, whisk together the all-purpose flour, unsweetened cocoa powder, and fine salt. Set aside.
- Melt the 2 sticks of butter and the chopped chocolate in a medium saucepan over medium-low heat, stirring frequently until smooth.
- Remove the saucepan from the heat and let the chocolate mixture cool slightly for a few minutes.
- Stir the granulated sugar into the slightly cooled chocolate mixture.
- Add the slightly beaten eggs and stir until well combined.
- Add the prepared flour mixture to the saucepan and stir with a spatula just until all the ingredients are combined. Do not overmix.
3. Bake and Chill the Brownie:
- Pour the brownie batter into the prepared foil-lined pan. Using an offset spatula or the back of a spoon, spread the batter into a thin, even layer that covers the entire surface of the pan.
- Bake for 20 to 25 minutes. The brownie is done when a toothpick inserted in the center comes out with just a few moist crumbs adhering to it (not wet batter).
- Let the brownie cool completely in the pan on a cooling rack.
- Once cool, place the entire pan in the freezer to firm up, for about 30 minutes.
Stage 2: Assemble the Giant Ice Cream Sandwich
1. Prepare the Brownie Slabs:
- Use the foil overhangs to carefully lift the entire chilled brownie slab out of the pan.
- Carefully flip the brownie over onto a large cutting board. Peel the foil away from the bottom and discard it.
- Line the now-empty baking sheet with a large piece of plastic wrap.
- Using a long, sharp knife, trim the rough edges off the brownie so it is an even rectangle. The recipe suggests trimming to 16-by-12 inches.
- Cut the trimmed brownie in half crosswise, resulting in two pieces that are approximately 12-by-8 inches each.
2. Assemble and Freeze:
- Lay one of the brownie pieces, top-side facing down, onto the prepared plastic wrap-lined baking sheet.
- Let your coffee ice cream soften at room temperature for a few minutes until it is just spreadable but not melty. Work quickly!
- Using a large ice cream scoop or a spatula, spread the softened coffee ice cream evenly across the brownie on the baking sheet, getting it close to all the edges. Use an offset or rubber spatula to help smooth out the sides and top of the ice cream layer.
- Place the other brownie piece on top of the ice cream and press down gently to create one large ice cream sandwich.
- Fold the overhanging plastic wrap around the assembled ice cream sandwich to help hold its shape and keep it tightly wrapped.
- Return the giant sandwich to the freezer to harden completely. This will take at least 6 hours, but overnight is ideal.
Stage 3: Cut and Coat the Sandwiches
1. Cut into Sandwiches:
- Remove the giant frozen brownie ice cream sandwich from the freezer and unwrap it. Place it on your cutting board.
- Using a large, sharp knife warmed under hot running water and wiped dry, carefully cut the large block into twenty-four individual ice cream sandwiches (e.g., cut into 6 rows by 4 rows).
2. Coat and Serve:
- Place the chopped chocolate-covered espresso beans in a shallow dish or on a plate.
- Working with one sandwich at a time, roll the exposed ice cream edges into the chopped espresso beans until the sides are well coated.
- Wrap each finished sandwich individually in parchment paper and enjoy immediately, or return to the freezer to store.
- These sandwiches will keep, well-wrapped, in the freezer for up to 1 week for best texture.
Recipe Summary and Q&A
Summary: These Mocha Brownie Ice Cream Sandwiches are made by first baking a thin, chewy chocolate brownie in a large 18×13-inch rimmed baking sheet lined with a foil sling. The baked brownie is cooled and then frozen briefly. It’s then removed from the pan, flipped, and cut in half crosswise. One brownie half is placed back in the pan (lined with plastic wrap), topped with a thick, even layer of softened coffee ice cream, and then sandwiched with the second brownie half. This giant ice cream sandwich is wrapped and frozen solid for at least 6 hours. Finally, it’s cut into 24 individual sandwiches, and the exposed ice cream edges of each sandwich are rolled in chopped chocolate-covered espresso beans.
Q&A:
- Q: Why do I need to use such a large (18×13-inch) baking sheet?
- A: This specific pan size (a standard “half sheet pan”) is crucial for baking the brownie batter into a very thin, even layer. This thinness is what makes it suitable to act as the “bread” for the ice cream sandwiches without being too thick or overwhelming. Using a smaller pan would result in a much thicker brownie that would be difficult to work with for this recipe.
- Q: Can I use a brownie mix instead of making the batter from scratch?
- A: You could try, but the results might vary. Boxed brownie mixes are often formulated to be very fudgy and might not bake into a sturdy enough layer to hold up as a sandwich. The from-scratch brownie in this recipe is designed to be both chewy and structurally sound. If you try a mix, look for a “chewy” or “cake-style” mix rather than an ultra-fudgy one, and spread it very thin.
- Q: What’s the best way to get clean cuts on the giant frozen sandwich?
- A: As the recipe suggests, using a long, sharp knife that has been warmed under hot running water is the key. Run the knife under hot water for a few seconds, wipe it completely dry with a towel, and then make one firm, straight cut. Repeat the warming and wiping process for each subsequent cut. This prevents the brownie from cracking and the ice cream from dragging.
- Q: Can I use different toppings for the edges?
- A: Absolutely! While the chocolate-covered espresso beans provide the “mocha” kick, you could easily roll the edges in mini chocolate chips, rainbow or chocolate sprinkles, finely chopped toasted nuts (like almonds or pecans), or crushed toffee bits for different flavors and textures.

