Introduction & Inspiration
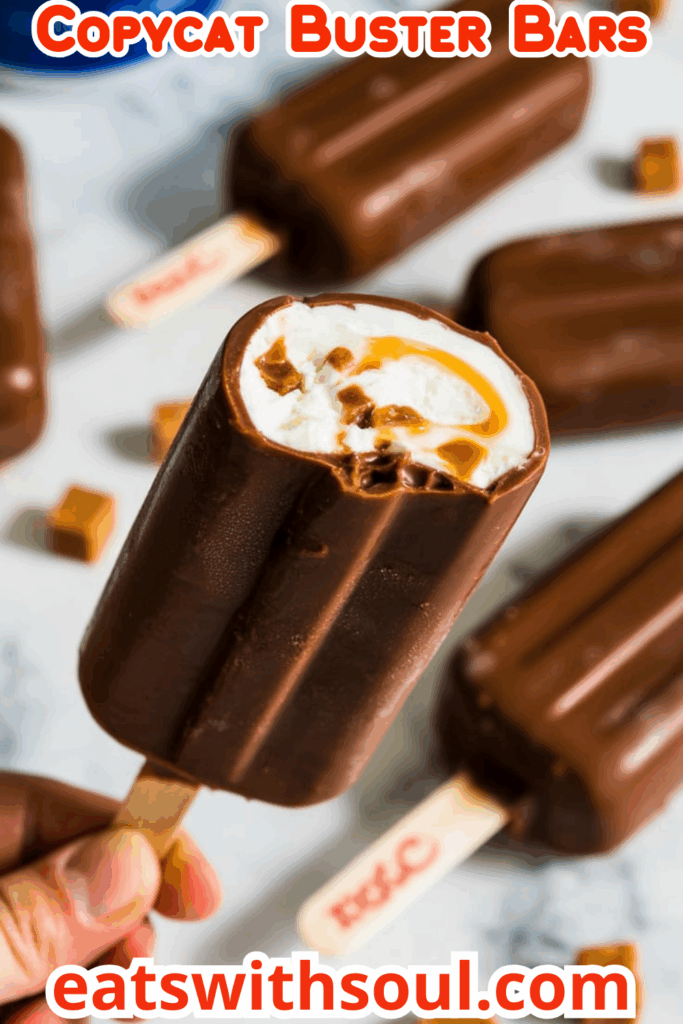
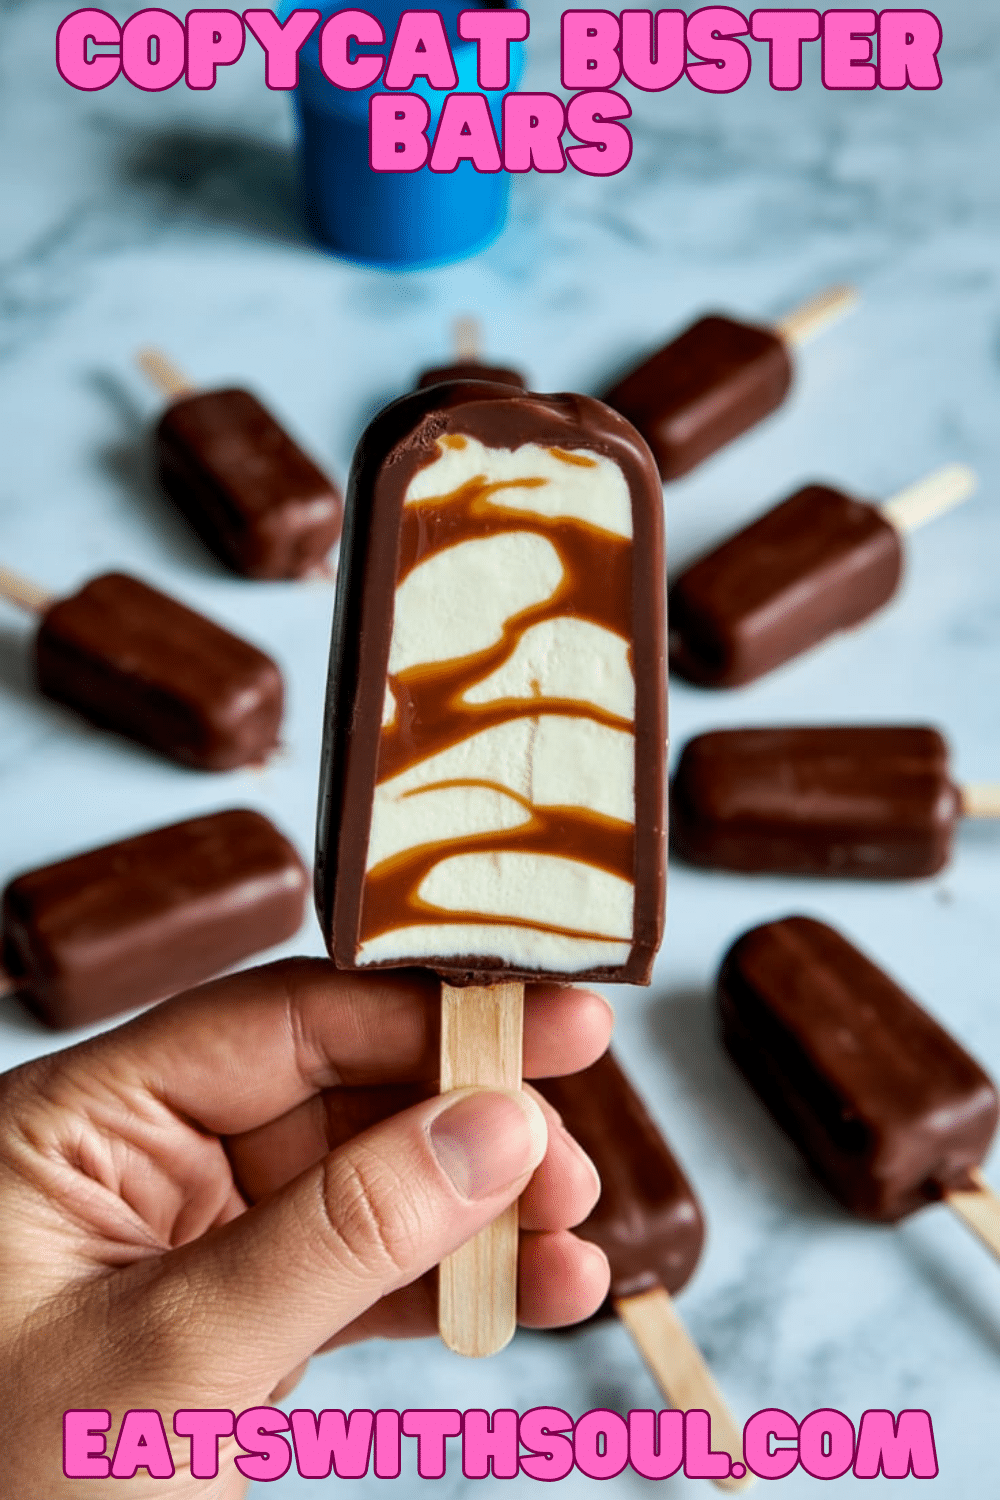
Get ready for a wave of pure ice cream nostalgia with these incredible Homemade Copycat Buster Bars! If you’re a fan of that iconic Dairy Queen treat, you’ll be absolutely thrilled at how easy it is to recreate the magic at home. Imagine layers of creamy vanilla bean ice cream, crunchy salted peanuts, and rich hot fudge sauce, all frozen onto a popsicle stick and then enrobed in that signature crackly chocolate Magic Shell coating. It’s pure, delightful indulgence!
My inspiration for this recipe comes directly from those cherished childhood memories of a trip to DQ and the pure joy of a Buster Bar. I wanted to capture that specific combination of textures and flavors – the cold ice cream, the salty nuts, the gooey fudge, and that fun chocolate shell – in a simple, homemade version.
These bars are perfect for summer treats, birthday parties, or anytime you want a fun, impressive, and utterly delicious frozen dessert. They require a bit of assembly and freezer time, but the process is simple and the results are so worth it! It is a perfect copycat recipe.
Nostalgic Appeal / Comfort Factor
The Dairy Queen Buster Bar is a true nostalgic icon for generations, synonymous with summer, ice cream treats, and simple, happy indulgences. The combination of vanilla ice cream, peanuts, fudge, and a chocolate shell is a classic for a reason – it’s deeply comforting and universally loved.
This homemade version taps directly into that powerful nostalgia. Each layer is designed to replicate the beloved original, from the salty crunch of the peanuts to the rich fudge and the satisfying crack of the chocolate shell. It’s a taste of childhood recreated in your own kitchen.
Making these at home is a fun way to relive those sweet memories and share them with a new generation. A perfect frozen treat.
Homemade Focus (Assembly Project)
Let’s be clear, this recipe is all about the fun and satisfaction of assembling a beloved treat using convenient, store-bought components. We’re using your favorite vanilla ice cream, jarred hot fudge sauce, salted peanuts, and bottled Magic Shell. The “homemade” magic here lies entirely in the careful layering and creative assembly process in cups to mimic the bar shape.
You’re creating the distinct layers, patiently freezing them, and then performing the exciting final dip in the Magic Shell. While the ingredients are largely ready-made, the act of constructing these bars yourself makes them feel special and allows for a little customization.
It celebrates the joy of recreating a favorite novelty treat at home, proving you don’t need to make everything from scratch to achieve a fun and delicious homemade result. The perfect balance for a fun project!
Flavor Goal
The primary flavor goal is to perfectly replicate the taste and textural experience of a classic Dairy Queen Buster Bar. This means creamy vanilla ice cream, distinct layers of salty, crunchy peanuts, and rich, sweet hot fudge sauce, all encased in a thin, crackly chocolate shell that shatters when you bite into it.
The vanilla ice cream should be smooth and cold. The peanuts provide essential saltiness and crunch to contrast the sweet ice cream and fudge. The hot fudge layer should be gooey and intensely chocolatey. The Magic Shell coating provides that signature crisp chocolate exterior.
The overall experience should be a delightful symphony of cold, creamy, crunchy, gooey, salty, sweet, and chocolatey – an exact homemade replica of the beloved treat. A perfect combination of flavour and texture.
Ingredient Insights
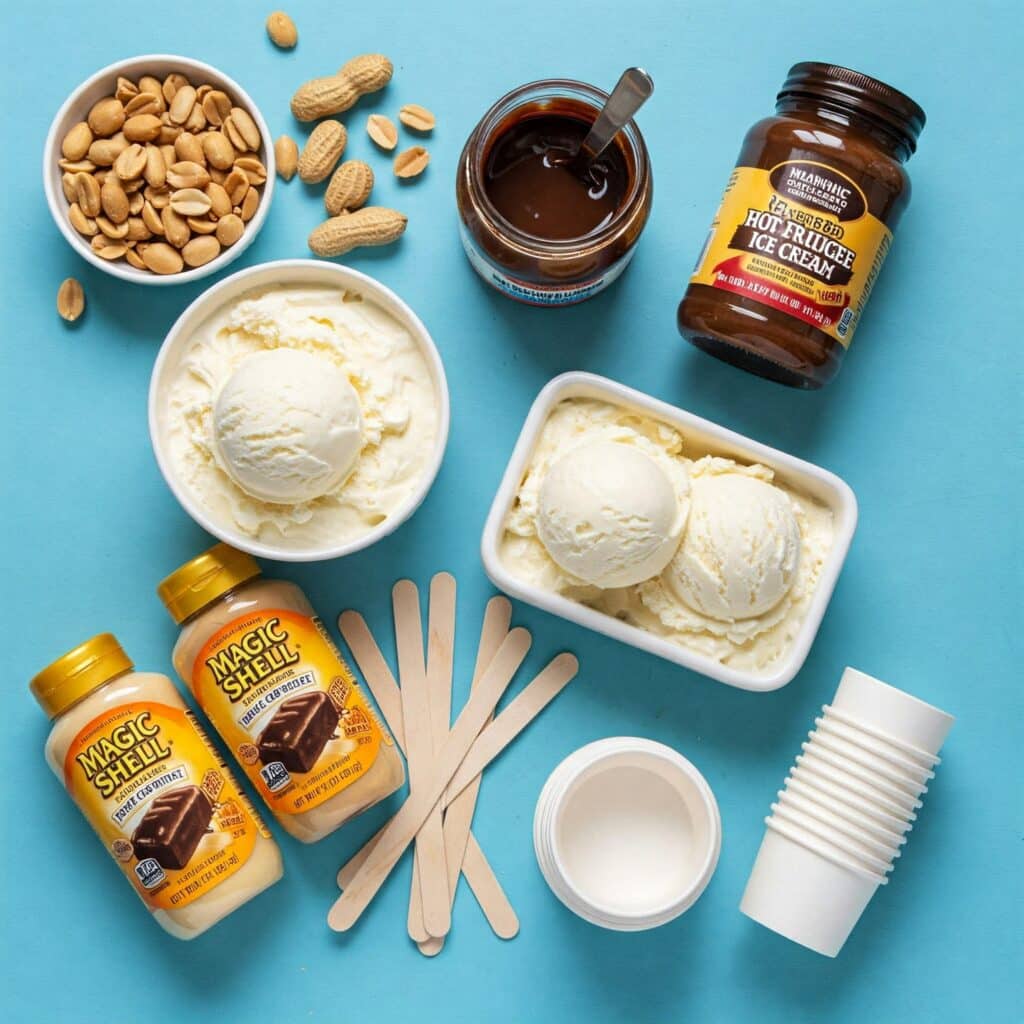
- Salted Peanuts: Provide the crucial salty crunch and nutty flavor. Regular salted cocktail peanuts work perfectly.
- Vanilla Bean Ice Cream (1.5 quart container): The creamy base. Using a good quality vanilla bean ice cream enhances the flavor. Allow it to soften just slightly for easier scooping and layering, but not melt.
- Hot Fudge Sauce (Jar, Smuckers suggested): Provides the rich, gooey chocolatey layers. Use a thick, good quality jarred hot fudge sauce.
- Popsicle Sticks: Essential for creating the “bar” format and for holding during dipping.
- Magic Shell Chocolate Coating (2 bottles, 7.25 oz each): The signature crackly chocolate shell. Shake these bottles VERY well before using as instructed in the recipe. This type of coating hardens instantly on contact with cold surfaces.
- Cups (for molds): Paper or plastic cups (e.g., 5-7 oz disposable cups) are used as molds for the bars.
- Wax Paper: For lining the sheet pan to place frozen bars on.
- Cool Water Bath: Used to help release the frozen bars from the cup molds. Crucially, not warm or hot water.
Essential Equipment
- Cups (Paper or Plastic, approx. 5-7 oz size): To use as molds for forming the bars. The number needed depends on how many bars you make (recipe implies enough for the ice cream, maybe 8-12 bars).
- Small Scoops or Spoons: For layering ice cream and peanuts.
- Piping Bag or Ziploc Bag (with corner snipped): For neatly piping the hot fudge layers.
- Popsicle Sticks:
- Quarter Sheet Pan (or other freezer-safe tray): Lined with wax paper, for freezing the cups/bars.
- Deep Bowl: For the cool water bath for unmolding.
- Medium-Deep Bowl (or Large Measuring Cup like 4-cup size): For pouring the Magic Shell into for dipping.
Ingredients
(Based on 1x column)
Layers & Assembly:
- ▢ ⅔ cup salted peanuts, roughly chopped or left whole, divided
- ▢ 1 (1.5 quart) container vanilla bean ice cream, slightly softened
- ▢ 1 jar hot fudge sauce (e.g., Smuckers, approx. 11-12 oz), warmed slightly if too thick for piping
- ▢ Popsicle sticks (1 per bar)
- ▢ Paper or plastic cups (approx. 5-7 oz size, quantity depends on bar size, ~8-12)
Chocolate Coating:
- ▢ 2 bottles (7.25 ounces each) Magic Shell chocolate coating

Step-by-Step Instructions
1. Prepare Cups and Ingredients (Mise en Place):
- Have all your ingredients ready and measured, as you’ll need to work somewhat quickly with the ice cream.
- Take the vanilla ice cream out of the freezer to soften just slightly (about 5-10 minutes at room temperature) so it’s scoopable but not melted.
- Line up your chosen cups (paper or plastic, around 5-7 oz size) on a quarter sheet pan or tray that will fit in your freezer. Line the pan with wax paper.
- If your hot fudge sauce is very thick, warm it very gently (microwave in short bursts or set jar in warm water) so it’s easily pipeable but not hot. Transfer some to a Ziploc bag with the corner snipped or a piping bag.
2. Assemble the Layers in Cups:
- Layer 1 (Peanuts): Place about 1 teaspoon of salted peanuts in the bottom of each cup.
- Layer 2 (Ice Cream): Add 1-2 small scoops of the slightly softened vanilla ice cream on top of the peanuts. Use the back of a spoon to press the ice cream down gently, creating a fairly even layer.
- Layer 3 (Hot Fudge): Pipe a layer or swirl of hot fudge sauce around the edge and/or over the ice cream layer.
- Layer 4 (Peanuts): Sprinkle another teaspoon of peanuts over the fudge layer.
- Layer 5 (Ice Cream): Add 1-2 more small scoops of ice cream over the peanuts. Flatten gently with the back of a spoon.
- Layer 6 (Hot Fudge): Pipe another round of hot fudge sauce over this ice cream layer.
- Layer 7 (Peanuts): Sprinkle a final teaspoon of peanuts on top of the fudge.
3. Insert Sticks and Initial Freeze:
- Carefully insert a popsicle stick into the center of each filled cup, pushing it down almost to the bottom.
- Place the sheet pan with the filled cups into the freezer. Freeze for at least 2 hours, or until the bars are completely hardened.
4. Unmold the Bars:
- Prepare a deep bowl with cool water (NOT warm or hot).
- Remove the cups from the freezer. Working one cup at a time, carefully dip the outside of the cup into the cool water for about 10 seconds. Be very careful not to let any water get inside the cup.
- Gently pull up on the popsicle stick to unmold the frozen Buster Bar. If it doesn’t release easily, dip briefly in the cool water again.
- Place the unmolded Buster Bar immediately back onto the wax paper-lined sheet pan in the freezer. Repeat the unmolding process with the remaining cups.
- Return the sheet pan with all unmolded bars to the freezer to harden completely again, for a minimum of 2 hours or up to overnight. They must be frozen solid before dipping.
5. Prepare Magic Shell and Dip Bars:
- Once the bars are frozen completely solid, prepare for dipping. Shake the bottles of Magic Shell very, very well according to package directions. This is crucial.
- Pour the Magic Shell from both bottles into a medium-deep bowl or a large (e.g., 4-cup) measuring cup that is deep enough to allow for dipping most of the bar.
- Working with one frozen Buster Bar at a time (keep the remaining bars in the freezer until ready to dip): Hold the bar by the popsicle stick and quickly dip it into the Magic Shell until fully coated.
- Allow any excess Magic Shell to drip back into the bowl for a few seconds. The shell will harden very quickly on contact with the frozen bar.
6. Final Set and Enjoy:
- Place the freshly coated bar back on the wax paper-lined freezer tray.
- Repeat the dipping process with the remaining frozen bars, working quickly.
- Allow the Magic Shell to fully harden on the bars (this takes only a minute or two at room temp, or place back in freezer briefly).
- Once the Magic Shell has hardened, your Homemade Copycat Buster Bars are ready to enjoy! Serve immediately or store wrapped individually in the freezer.

Troubleshooting
- Ice Cream Melting Too Fast During Assembly: Work very quickly! Ensure ice cream is just softened enough to scoop but still very cold. Assemble in a cool environment if possible. Freeze layers between additions if needed.
- Bars Sticking to Cup Molds: Didn’t use cool water bath correctly, or dipped too long/too short. Use cool water, dip briefly (10 seconds), ensure no water gets inside. Paper cups are often easier to peel away than rigid plastic if stuck.
- Difficulty Unmolding: Ensure bars are frozen solid first. Use the cool water dip method correctly.
- Magic Shell Too Thick/Clumpy: Didn’t shake the bottle well enough before pouring, or it’s too cold. Shake vigorously! If very thick, you can briefly warm the bottle in a bowl of warm water (not hot!) until more fluid, then shake again.
- Magic Shell Not Adhering/Cracking Excessively: Bars weren’t frozen solid enough (shell needs extreme cold to set instantly and adhere well), or shell applied too thickly. Ensure bars are rock hard. Allow excess shell to drip off for a thinner coating.
Tips and Variations
- Work Quickly & Keep Cold: The key to success with frozen desserts!
- Shake Magic Shell Vigorously: Cannot stress this enough for smooth coating.
- Peanut Prep: Roughly chopping the salted peanuts can make them easier to layer and eat.
- Different Ice Cream: Try chocolate ice cream, peanut butter ice cream, or even a swirl for variations.
- Add Caramel: Drizzle a layer of caramel sauce along with the hot fudge for extra decadence.
- Different Nuts: Chopped pecans or almonds could be used, though peanuts are classic for Buster Bars.
- Homemade Magic Shell: You can make homemade chocolate shell coating with melted chocolate and coconut oil if you prefer.
- Cup Size: Adjust layers based on the size of cups you use. Standard 5-7 oz paper or plastic disposable cups work well.
Serving and Pairing Suggestions
- Serve Frozen Solid: Enjoy straight from the freezer!
- Summer Treat: Perfect for cooling down on a hot day.
- Party Fun: A fun, nostalgic treat for kids’ parties or casual gatherings.
- Indulgent Snack: When only a Buster Bar will do!
Nutritional Information
(Note: Estimated, per bar. Highly variable based on ice cream brand, fudge sauce, cup size/number of bars made.)
- Calories: 400-600+ (Indulgent treat!)
- Fat: 25-40g+
- Saturated Fat: 15-25g+
- Cholesterol: 30-60mg+
- Sodium: 150-250mg+
- Total Carbohydrates: 40-60g+
- Dietary Fiber: 1-3g+
- Sugars: 30-50g+ (Very sweet)
- Protein: 5-8g+
Homemade Copycat Buster Bars (DQ Style!)
Make amazing Homemade Copycat Buster Bars! This easy recipe layers vanilla ice cream, salty peanuts, and hot fudge sauce, all dipped in a crackly Magic Shell chocolate coating.
Ingredients
Layers & Assembly:
- ▢ ⅔ cup salted peanuts, roughly chopped or left whole, divided
- ▢ 1 (1.5 quart) container vanilla bean ice cream, slightly softened
- ▢ 1 jar hot fudge sauce (e.g., Smuckers, approx. 11-12 oz), warmed slightly if too thick for piping
- ▢ Popsicle sticks (1 per bar)
- ▢ Paper or plastic cups (approx. 5-7 oz size, quantity depends on bar size, ~8-12)
Chocolate Coating:
- ▢ 2 bottles (7.25 ounces each) Magic Shell chocolate coating
Instructions
. Prepare Cups and Ingredients (Mise en Place):
- Have all your ingredients ready and measured, as you’ll need to work somewhat quickly with the ice cream.
- Take the vanilla ice cream out of the freezer to soften just slightly (about 5-10 minutes at room temperature) so it’s scoopable but not melted.
- Line up your chosen cups (paper or plastic, around 5-7 oz size) on a quarter sheet pan or tray that will fit in your freezer. Line the pan with wax paper.
- If your hot fudge sauce is very thick, warm it very gently (microwave in short bursts or set jar in warm water) so it’s easily pipeable but not hot. Transfer some to a Ziploc bag with the corner snipped or a piping bag.
2. Assemble the Layers in Cups:
- Layer 1 (Peanuts): Place about 1 teaspoon of salted peanuts in the bottom of each cup.
- Layer 2 (Ice Cream): Add 1-2 small scoops of the slightly softened vanilla ice cream on top of the peanuts. Use the back of a spoon to press the ice cream down gently, creating a fairly even layer.
- Layer 3 (Hot Fudge): Pipe a layer or swirl of hot fudge sauce around the edge and/or over the ice cream layer.
- Layer 4 (Peanuts): Sprinkle another teaspoon of peanuts over the fudge layer.
- Layer 5 (Ice Cream): Add 1-2 more small scoops of ice cream over the peanuts. Flatten gently with the back of a spoon.
- Layer 6 (Hot Fudge): Pipe another round of hot fudge sauce over this ice cream layer.
- Layer 7 (Peanuts): Sprinkle a final teaspoon of peanuts on top of the fudge.
3. Insert Sticks and Initial Freeze:
- Carefully insert a popsicle stick into the center of each filled cup, pushing it down almost to the bottom.
- Place the sheet pan with the filled cups into the freezer. Freeze for at least 2 hours, or until the bars are completely hardened.
4. Unmold the Bars:
- Prepare a deep bowl with cool water (NOT warm or hot).
- Remove the cups from the freezer. Working one cup at a time, carefully dip the outside of the cup into the cool water for about 10 seconds. Be very careful not to let any water get inside the cup.
- Gently pull up on the popsicle stick to unmold the frozen Buster Bar. If it doesn’t release easily, dip briefly in the cool water again.
- Place the unmolded Buster Bar immediately back onto the wax paper-lined sheet pan in the freezer. Repeat the unmolding process with the remaining cups.
- Return the sheet pan with all unmolded bars to the freezer to harden completely again, for a minimum of 2 hours or up to overnight. They must be frozen solid before dipping.
5. Prepare Magic Shell and Dip Bars:
- Once the bars are frozen completely solid, prepare for dipping. Shake the bottles of Magic Shell very, very well according to package directions. This is crucial.
- Pour the Magic Shell from both bottles into a medium-deep bowl or a large (e.g., 4-cup) measuring cup that is deep enough to allow for dipping most of the bar.
- Working with one frozen Buster Bar at a time (keep the remaining bars in the freezer until ready to dip): Hold the bar by the popsicle stick and quickly dip it into the Magic Shell until fully coated.
- Allow any excess Magic Shell to drip back into the bowl for a few seconds. The shell will harden very quickly on contact with the frozen bar.
6. Final Set and Enjoy:
- Place the freshly coated bar back on the wax paper-lined freezer tray.
- Repeat the dipping process with the remaining frozen bars, working quickly.
- Allow the Magic Shell to fully harden on the bars (this takes only a minute or two at room temp, or place back in freezer briefly).
- Once the Magic Shell has hardened, your Homemade Copycat Buster Bars are ready to enjoy! Serve immediately or store wrapped individually in the freezer.
Recipe Summary and Q&A
Summary: These Homemade Copycat Buster Bars involve layering slightly softened vanilla ice cream, salted peanuts, and hot fudge sauce multiple times into cup molds with a popsicle stick inserted. The filled cups are frozen solid, then unmolded using a brief dip in cool water. The frozen bars are then quickly dipped into Magic Shell chocolate coating, which hardens instantly. They are served frozen.
Q&A:
A: It depends on the size of your cups and how much you fill them. Using a 1.5-quart container of ice cream and the other ingredients, you can likely make anywhere from 8 to 12 bars if using standard 5-7 oz cups.
Q: Why use cool water for unmolding, not warm water?
A: Warm or hot water would melt the outer layer of ice cream too quickly, potentially making the bar slushy or causing water to seep in. Cool water provides just enough temperature difference to help release the frozen bar from the cup mold without excessive melting.
Q: Can I use something other than Magic Shell?
A: Magic Shell (or similar “ice cream shell toppings”) is specifically designed to harden instantly on cold surfaces due to its oil content (often coconut oil). You could dip in regular melted chocolate, but it wouldn’t create the same thin, instantly crackly shell and would take much longer to set, likely melting the bar significantly during the process. For the true Buster Bar experience, Magic Shell is key.
Q: My Magic Shell is really thick and hard to dip into.
A: Ensure you’ve shaken the bottle extremely well. If it’s still too thick (especially if the bottle is cold), you can try gently warming the unopened bottle by placing it in a bowl of warm (not hot) water for a few minutes, then shake vigorously again before pouring into your dipping bowl.
Q: How many bars does this recipe make?

