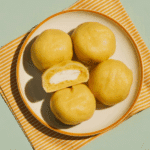
Homemade Creamsicle Mochi Ice Cream (A Fun Dessert Project!)
Learn how to make Homemade Creamsicle Mochi Ice Cream! This fun recipe features an orange sherbet and vanilla frozen yogurt filling wrapped in a soft, chewy, homemade orange mochi dough.
Ingredients
(Based on 1x column)
Creamsicle Filling:
- ▢ 10 tablespoons orange sherbet, slightly softened
- ▢ 10 tablespoons vanilla frozen yogurt, slightly softened
Orange Mochi Dough:
- ▢ Cornstarch, for generous dusting
- ▢ 1 ½ cups fine glutinous rice flour (such as Mochiko brand)
- ▢ 1 cup granulated sugar
- ▢ 1 ½ cups pulp-free orange juice
- ▢ ¼ teaspoon distilled white vinegar
- ▢ 1 drop orange gel food coloring (optional)
Instructions
Stage 1: Prepare the Creamsicle Filling Balls & Freeze Solid
1. Form the Filling Balls:
- Place an empty egg carton in your freezer to get it very cold.
- Arrange ten 8-inch square sheets of plastic wrap on your work surface.
- Scoop a tablespoon-sized scoop of the slightly softened orange sherbet into the center of each sheet of plastic wrap. Using the back of a spoon, quickly flatten each sherbet scoop into a rough 2-inch round.
- Scoop the vanilla frozen yogurt into 10 tablespoon-sized scoops. Place one scoop of frozen yogurt in the center of each flattened sherbet round.
- Working quickly with one at a time, gather the edges of the plastic wrap up and around the frozen yogurt and sherbet, twisting it to enclose the frozen yogurt completely within the sherbet, forming a small ball.
- As you finish each ball, place it into a cup of the chilled egg carton in the freezer. (If the sherbet or frozen yogurt becomes too soft to work with, return it to the freezer for a few minutes to firm up).
2. Freeze the Filling Solid:
- Once all ten creamsicle balls are formed and in the egg carton, freeze them until they are completely solid. This will take at least 3 hours, but overnight is even better.
Stage 2: Make and Prepare the Mochi Dough
1. Prepare Your Workspace:
- Line a rimmed baking sheet with parchment paper. Using a fine-mesh sieve, generously dust the parchment paper with cornstarch. This will be your surface for handling the sticky dough.
2. Mix and Microwave the Dough:
- In a large microwave-safe bowl, whisk together the glutinous rice flour, granulated sugar, pulp-free orange juice, distilled white vinegar, and the optional drop of orange gel food coloring until the mixture is completely smooth and there are no lumps.
- Cover the bowl with plastic wrap. Microwave on high power, stirring vigorously with a rubber spatula every minute, until a translucent, very thick, and very sticky dough forms. This should take a total of 5 to 6 minutes.
- Stir the finished dough once more. Set it aside, still covered with plastic wrap (to prevent a skin from forming), until it is cool enough to handle, which will take about 20 minutes.
3. Roll Out the Mochi Dough:
- Transfer the warm, sticky mochi dough to the prepared cornstarch-dusted baking sheet.
- Dust the top of the dough generously with more cornstarch.
- Using a rolling pin (also dusted with cornstarch) or your cornstarch-dusted hands, gently roll out or pat the dough into an even 12-by-18-inch rectangle that is about ⅛ inch thick.
- Cover the rolled-out dough on the baking sheet with plastic wrap and refrigerate it until the creamsicle filling balls are completely frozen solid.
Stage 3: Assemble the Mochi Ice Cream & Final Freeze
1. Cut Mochi and Wrap Filling:
- Once the filling balls are frozen solid, remove the sheet of chilled mochi dough from the refrigerator.
- Punch out 10 rounds of mochi dough using a 3 ½-inch round cutter.
- Using a dry pastry brush, dust off any excess cornstarch from both sides of each mochi round.
- Working with one at a time, unwrap one frozen creamsicle ball and position it in the center of a mochi round.
- Gently gather the edges of the mochi dough up and around the ice cream ball, stretching it slightly. Pinch the dough at the top to seal it completely around the ball.
2. Final Freeze:
- Immediately wrap each finished mochi ball individually with a new piece of plastic wrap, twisting it at the top to seal it tightly and help maintain its round shape.
- Place each wrapped mochi ball back into the egg carton in the freezer.
- Freeze again until completely solid, which will take at least 4 hours, or overnight.
3. Serve:
- When ready to serve, remove the Creamsicle Mochi Ice Cream from the freezer.
- Let each mochi ball sit at room temperature for about 5 minutes. This is a crucial step that allows the mochi dough to soften to its signature chewy, pillowy texture.
- Unwrap and enjoy this incredible homemade treat!
