Have you ever dreamed of creating light, airy, and perfectly puffed, bakery-quality cream puffs that are completely gluten-free? This incredible, from-scratch Gluten-Free Pumpkin Spice Cream Puffs recipe is your ultimate guide to mastering that seemingly impossible and impressive feat.
This isn’t just another fall dessert recipe; it’s a complete masterclass in the magic of gluten-free pâte à choux, the classic French pastry that is the foundation of cream puffs, eclairs, and gougères. We’ll demystify the entire process, showing you how to create a stunning, elegant, and festive dessert. Filled with a cloud of light and airy pumpkin spice whipped cream, these are the delicate, two-bite treats that will be the absolute star of your holiday dessert table.
Table of Contents
Table of Contents
Recipe Overview: An Elegant Gluten-Free Pastry
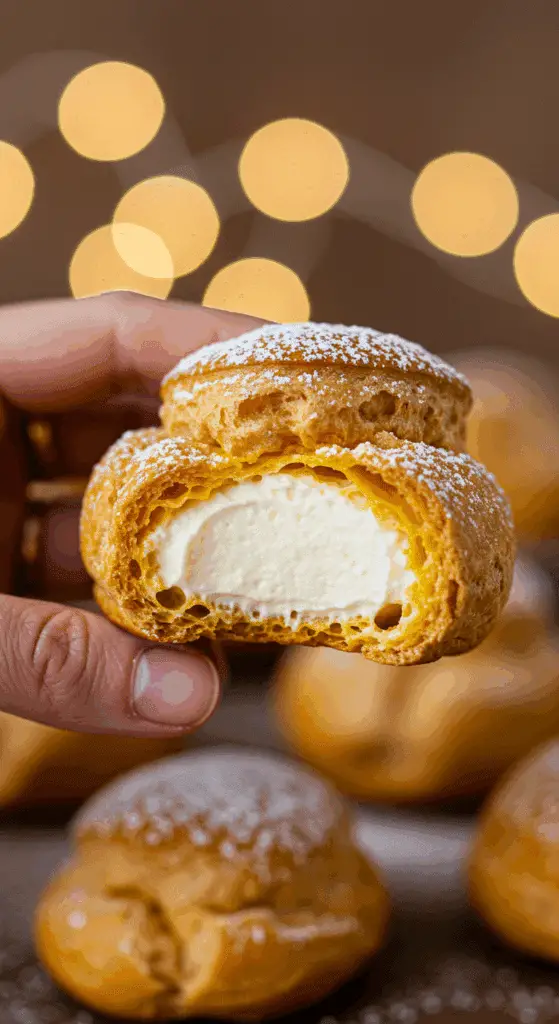
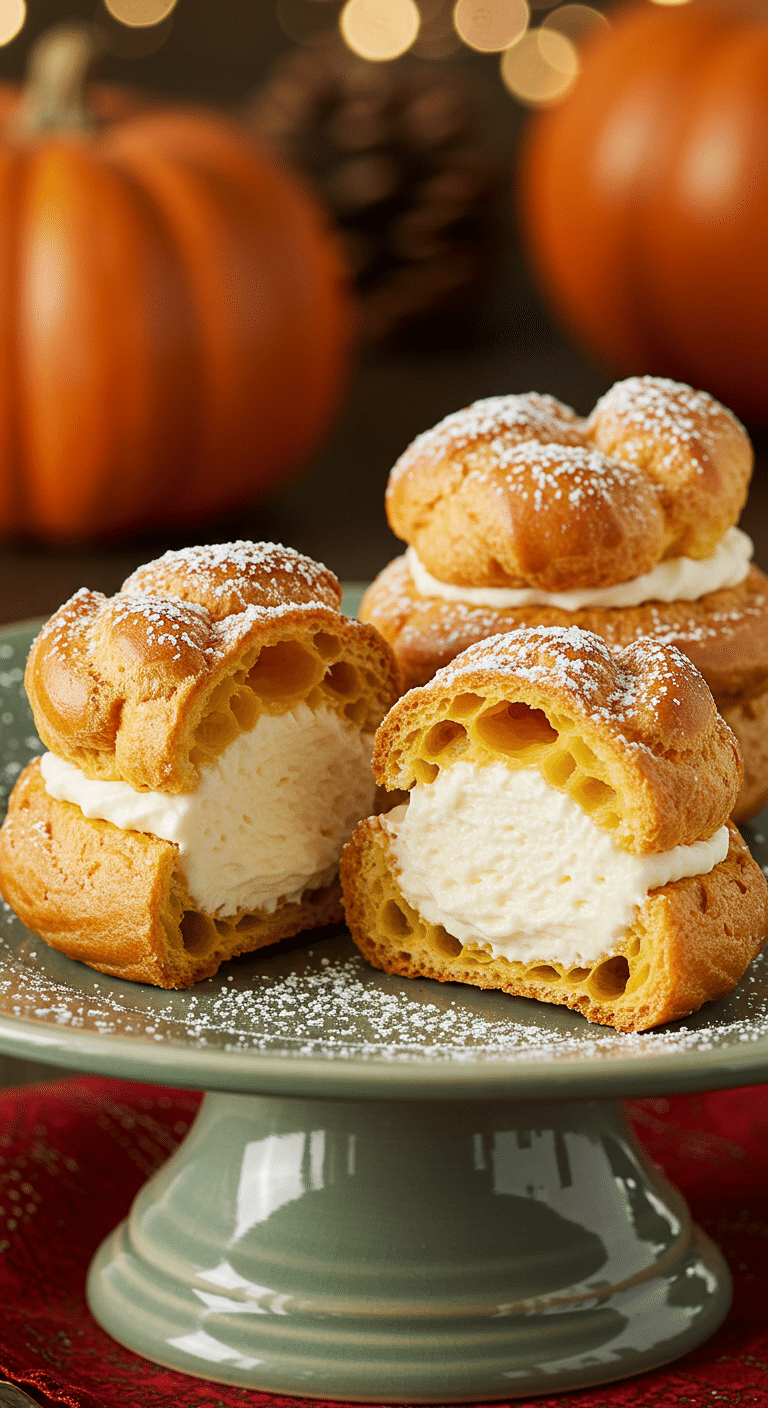
What makes these Pumpkin Spice Cream Puffs so spectacular is the brilliant, from-scratch, gluten-free choux pastry. This recipe guides you through the simple, classic technique of cooking the dough on the stovetop first, and then beating in the eggs to create a paste that puffs up like magic in the oven, creating a perfectly light and hollow shell. These crisp, delicate puffs are then filled with a simple yet delicious pumpkin spice whipped cream, creating a perfect harmony of textures and cozy fall flavors.
| Metric | Time / Level |
| Total Time | 1 hour 30 minutes (plus cooling time) |
| Active Prep Time | 45 minutes |
| Difficulty Level | Intermediate |
| Servings | About 2 dozen cream puffs |
The Essential Ingredients for These Festive Treats
This recipe is built from three perfect, from-scratch components.
- The Homemade Gluten-Free Flour Blend: The foundation of our tender pastry.
- What it is: A simple, perfectly balanced blend of white rice flour (for structure), tapioca flour (for chewiness and browning), potato starch (for a light, tender crumb), and xanthan gum.
- Xanthan Gum: This is a crucial, non-negotiable ingredient in gluten-free baking. It is a natural thickener and binder that mimics the role of gluten, providing the structure and elasticity that allows the choux pastry to stretch and puff without breaking.
- The Gluten-Free Puffs (Pâte à Choux):
- The Cooked Dough: Choux pastry starts by cooking a mixture of butter, milk, and water with the flour blend on the stovetop. This is the secret that gelatinizes the starches and allows the dough to absorb a large amount of eggs.
- The Eggs: The eggs are the key to the “puff.” When the dough hits the hot oven, the moisture from the eggs turns into a powerful burst of steam, which inflates the pastry into a beautiful, hollow shell.
- The Fluffy Pumpkin Spice Filling:
- Heavy Cream: It is crucial that your heavy whipping cream is very cold, straight from the refrigerator, to ensure that it whips up into a light, airy cream with beautiful, soft peaks.
- Pumpkin Purée & Spices: A touch of pure pumpkin purée and a classic pumpkin pie spice blend give the whipped cream a festive, cozy, and delicious fall flavor.

Step-by-Step to Perfect Gluten-Free Cream Puffs
Making choux pastry is a fun and rewarding process. Follow these detailed steps for a perfect result.
Part 1: Your Homemade Gluten-Free Flour Blend
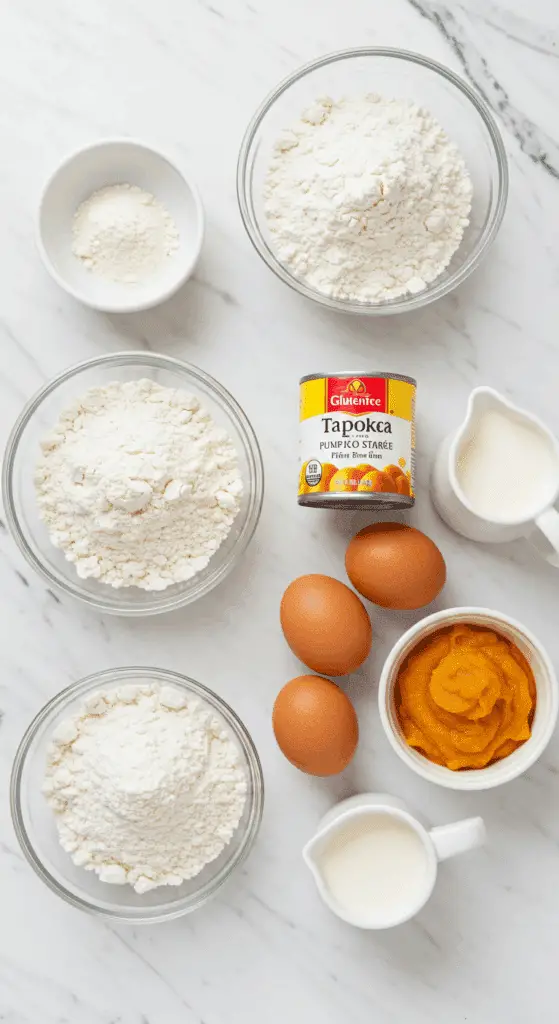
In a large bowl, make your gluten-free flour blend. Whisk together the 3 cups of white rice flour, the 1 1/2 cups of tapioca flour, the 3/4 cup of potato starch, the 1 tablespoon of xanthan gum, and the 1 1/2 teaspoons of salt. You will have more than you need for this recipe; you can store the extra in an airtight container for future baking.
Part 2: The Magic of Gluten-Free Pâte à Choux (The Puffs)
Step 1: In a small bowl, whisk the 1 tablespoon of granulated sugar, the 1/4 teaspoon of ground cinnamon, and the 1/4 teaspoon of salt together with 1 cup of your prepared gluten-free flour blend.
Step 2: Preheat your oven to 400°F (200°C) and line a large baking sheet with parchment paper.
Step 3: In a medium saucepan over medium heat, melt the 1/2 cup (1 stick) of butter together with the 1/2 cup of milk and 1/2 cup of water. Increase the heat to medium-high and bring the mixture to a rolling boil.
Step 4: Reduce the heat to low and, all at once, add the flour mixture. Use a wooden spoon to stir the dough vigorously until a smooth ball forms that pulls away from the sides of the pan. This will take about 3 minutes.
Step 5: Transfer the hot dough to a food processor and pulse it about 20 times to help it cool down slightly.
Step 6: With the motor running, stream in the 3 large eggs, the 1 large egg white, and the 3/4 teaspoon of baking powder. Continue to process until a smooth, thick, and glossy dough forms.
Step 7: Using a 1 1/2-inch ice cream scoop or two spoons, drop mounds of the dough onto your prepared baking sheet, about 2 inches apart.
Step 8: Bake until the puffs are beautifully puffed up and a deep golden brown, which will take about 25 minutes.
Step 9 (The Most Important Step!): As soon as the puffs come out of the oven, use a small, sharp knife to carefully cut a small slit in the side of each one. This crucial step allows the trapped steam inside the hollow puff to escape, which dries out the interior and prevents the delicate shells from deflating and becoming soggy as they cool.
Let the vented puffs cool completely on a wire rack.
Part 3: The Fluffy Pumpkin Spice Whipped Cream & Assembly
Step 1: In the large bowl of an electric mixer, beat the 2 cups of cold heavy cream at high speed until soft peaks just start to form.
Step 2: Add the 1/2 cup of confectioners’ sugar, the 2 teaspoons of pure vanilla extract, and the 1/2 teaspoon of ground pumpkin spice. Continue to beat on medium speed until the cream holds beautiful, soft peaks.
Step 3: Gently fold in the 1/4 cup of pumpkin purée with a spatula.
Step 4: To assemble, carefully cut the completely cooled puffs in half horizontally. Using an ice cream scoop or a piping bag, place generous mounds of the whipped pumpkin cream on the bottom half of each puff.
Step 5: Set the top halves of the puffs in place and give the finished cream puffs a beautiful, final dusting of confectioners’ sugar.

The Best Fluffy Gluten-Free Pumpkin Spice Cream Puffs
A from-scratch, gluten-free recipe for festive Pumpkin Spice Cream Puffs. The dessert starts with instructions for a homemade gluten-free flour blend, which is then used to make a classic choux pastry (pâte à choux) on the stovetop and in a food processor. The dough is scooped onto a baking sheet and baked until puffed and golden. The cooled puffs are then split and filled with a light and airy homemade whipped cream that has been flavored with pumpkin puree and pumpkin pie spice.
- Prep Time: 35 minutes
- Cook Time: 30 minutes
- Total Time: 1 hour 50 minutes (includes cooling time)
- Yield: 12-18 cream puffs
- Category: Dessert
- Method: Baking
- Cuisine: French
- Diet: Gluten Free
Ingredients
- For the Gluten-free Flour Blend:
- 3 cups (435 grams) white rice flour
- 1 1/2 cups (187 grams) tapioca flour
- 3/4 cup (123 grams) potato starch
- 1 tablespoon (8 grams) xanthan gum
- 1 1/2 teaspoons (5 grams) salt
- For the Puffs:
- 1 tablespoon granulated sugar
- 1/4 teaspoon ground cinnamon
- 1/4 teaspoon salt
- 1/2 cup (1 stick) unsalted butter
- 1/2 cup milk
- 1/2 cup water
- 1 cup homemade gluten-free flour blend
- 3 large eggs plus 1 large egg white, at room temperature
- 3/4 teaspoon baking powder
- For the Filling:
- 2 cups heavy cream
- 1/2 cup confectioners’ sugar, plus more for dusting
- 2 teaspoons pure vanilla extract
- 1/2 teaspoon ground pumpkin spice
- 1/4 cup pumpkin puree
Instructions
- Make the Gluten-Free Flour Blend: In a large bowl, whisk together the white rice flour, tapioca flour, potato starch, xanthan gum, and salt.
- Make the Puffs: Preheat the oven to 400°F and line a baking sheet with parchment paper.
- In a medium saucepan, melt the butter with the milk and 1/2 cup of water. Bring to a boil.
- Reduce the heat to low and gradually whisk in 1 cup of the prepared gluten-free flour blend, the granulated sugar, cinnamon, and salt. Stir with a wooden spoon for about 3 minutes, until a ball of dough forms.
- Transfer the dough to a food processor and pulse about 20 times to cool it down. With the motor running, stream in the eggs, egg white, and baking powder. Process until a smooth dough forms.
- Using a 1 1/2-inch ice cream scoop, drop the dough onto the prepared baking sheet. Bake for about 25 minutes, until puffed and golden.
- Using a sharp knife, cut a small slit in the side of each hot puff to allow steam to escape. Let them cool completely on a wire rack.
- Make the Filling and Assemble: Using an electric mixer, beat the heavy cream until soft peaks start to form. Add the confectioners’ sugar, vanilla, and pumpkin spice and beat until soft peaks form. Gently fold in the pumpkin puree.
- Cut the cooled puffs in half. Place a mound of the whipped pumpkin cream on each puff bottom and then set the tops in place.
- Dust with additional confectioners’ sugar before serving.
Notes
- Special Equipment: The recipe suggests using parchment paper and a 1 1/2-inch ice cream scoop.
- This recipe is entirely gluten-free, starting with a homemade multi-flour blend for the choux pastry.
- Cutting a slit in the side of the puffs immediately after they come out of the oven is a crucial step to release steam and prevent them from becoming soggy as they cool.
- The puffs must be cooled completely before they are filled with the whipped pumpkin cream.
Storage and Make-Ahead Tips
Cream puffs are a fantastic make-ahead dessert for a party.
- Make-Ahead (Best Method!): The best way to prep these ahead is to make the components separately. You can bake the empty puff shells up to 2 days in advance. Let them cool completely and store them in an airtight container at room temperature. The pumpkin cream filling can be made up to a day in advance and stored, covered, in the refrigerator. Then, you can simply assemble the cream puffs right before you plan to serve them for the best, crispiest result.
- Storage: The finished, filled cream puffs must be stored in the refrigerator because of the fresh cream filling. They are best enjoyed on the day they are made, but they will keep in an airtight container for up to 2 days.
For more recipe follow my Pinterest account
Creative Recipe Variations
- Add a Decadent Chocolate Glaze: For a beautiful presentation and a delicious flavor combination, you can dip the tops of the finished, filled cream puffs in a simple, shiny chocolate ganache.
- Make it a Classic Pastry Cream Filling: If you prefer a richer, more traditional filling, these gluten-free choux shells are a perfect vessel for a classic vanilla or a pumpkin-spiced pastry cream.
- Make them into Savory Puffs: You can omit the sugar and cinnamon from the choux pastry recipe to create a wonderful, savory puff. These can then be filled with a savory filling, like a creamy chicken salad or a goat cheese and herb mousse, to make a fantastic, elegant appetizer.
Enjoy Your Elegant Gluten-Free Pastry!
You’ve just created a truly special, show-stopping dessert that is the very definition of holiday elegance. These Gluten-Free Pumpkin Spice Cream Puffs are a perfect harmony of a light and crisp pastry and a cool, creamy, and festive filling. It’s a rewarding baking project that proves that a gluten-free diet doesn’t mean you have to miss out on classic, sophisticated pastries.
We hope you enjoy every last, perfect, and delicious bite!
If you enjoyed making this recipe, please leave a comment below or share it with a friend who loves to bake gluten-free!
Frequently Asked Questions (FAQs)
Q1: What exactly is choux pastry (pâte à choux)?
Choux pastry is a classic French pastry dough that is unique because it is cooked twice. First, the flour is cooked with liquid and fat on the stovetop to create a thick paste. Second, after the eggs are beaten in, the dough is baked in a hot oven. The high moisture content from the eggs turns into a powerful burst of steam during baking, which magically inflates the dough, creating a pastry that is light, airy, and hollow on the inside, perfect for filling.
Q2: Why did my cream puffs come out flat instead of puffy?
There are two common culprits for flat cream puffs. First, your initial dough on the stovetop may not have been cooked for long enough to dry it out properly. Second, and more commonly, you may have opened the oven door too early during the baking process. It is crucial to let the puffs bake, undisturbed, until they are fully puffed, golden brown, and structurally set. Opening the oven door too soon can cause the rising puffs to collapse.
Q3: Why do I have to cut a slit in the side of the puffs as soon as they come out of the oven?
This is a critical, professional trick that is the secret to a crisp, not soggy, cream puff. The inside of a freshly baked puff is full of hot steam. If you let it cool with that steam trapped inside, the moisture will be reabsorbed into the walls of the pastry, making them soft and soggy. Cutting a small slit allows all that steam to escape immediately, which dries out the interior and ensures your finished puff is light and crisp.
Q4: Can I make these cream puffs with regular, all-purpose flour if I am not gluten-free?
Yes, you can. Simply substitute the 1 cup of the gluten-free flour blend in the puff recipe with an equal amount of regular all-purpose flour.
Q5: Can I freeze the baked, unfilled puff shells?
Yes! The unfilled puff shells freeze beautifully. Let them cool completely, and then place them in a freezer-safe, resealable bag. They will keep in the freezer for up to 3 months. You can thaw them at room temperature and then re-crisp them in a 350°F oven for just 3-5 minutes before you fill them.

