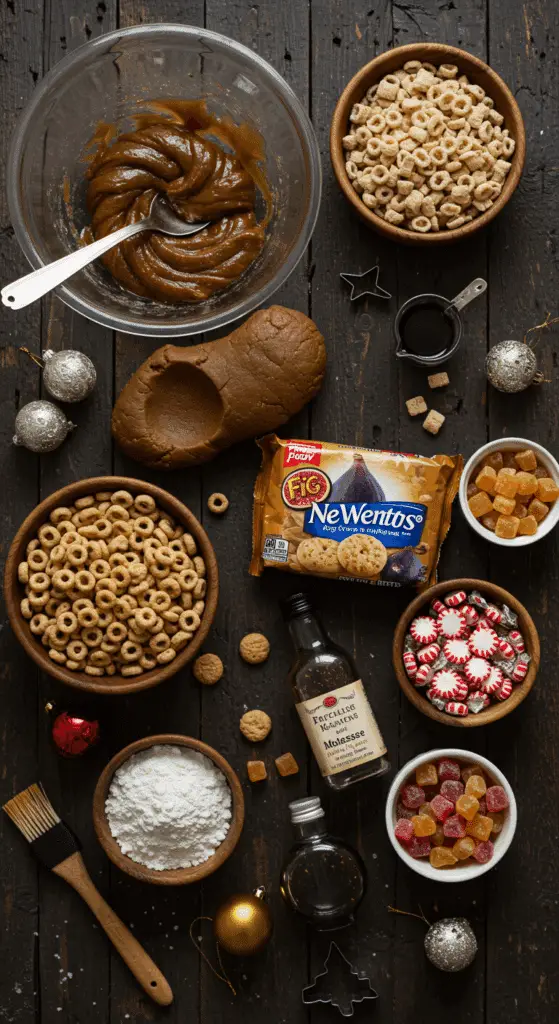
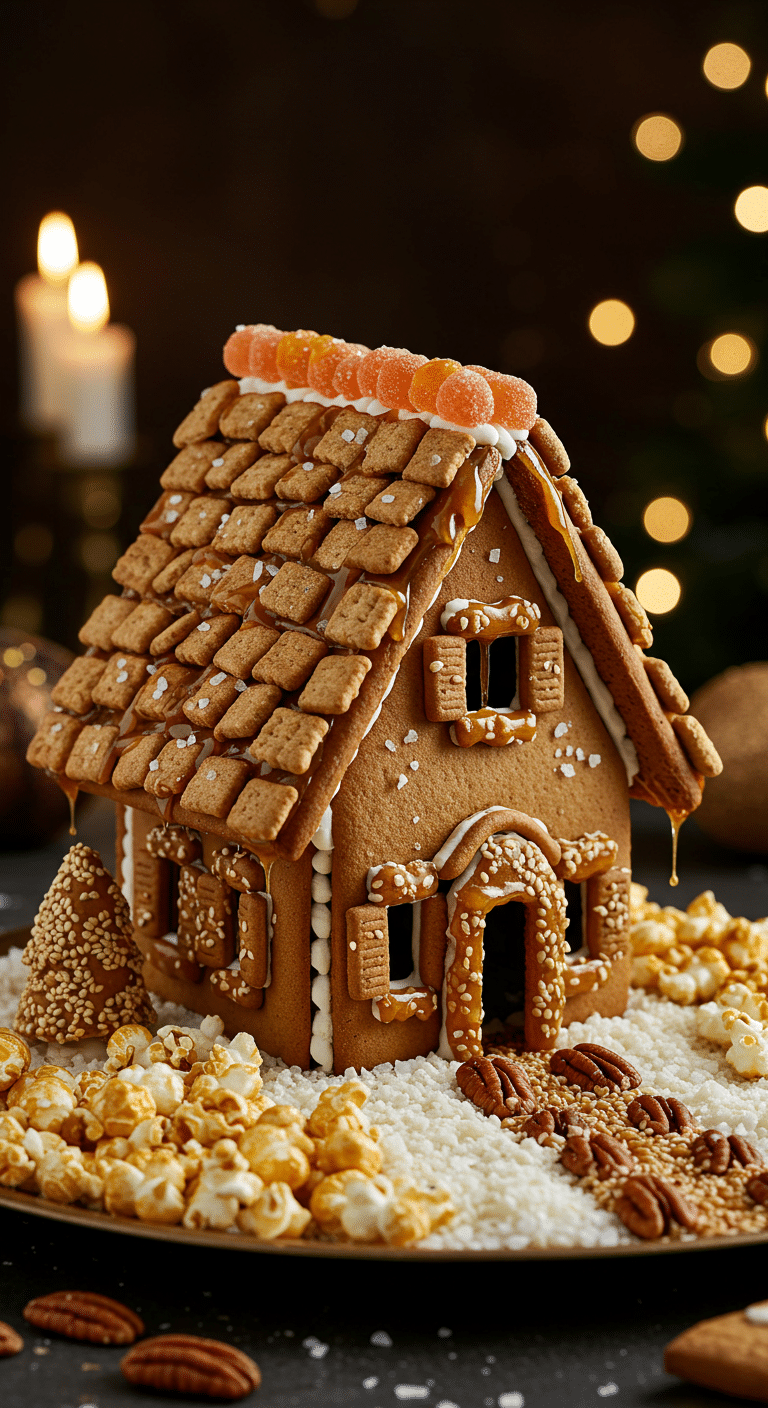
Are you ready to build the most enchanting, delicious, and truly show-stopping centerpiece for your Christmas celebration? A magnificent, edible gingerbread cottage that smells of warm spices and toasted sugar, held together not by simple icing, but by a magical, golden salted caramel mortar? This incredible, from-scratch Salted Caramel Gingerbread House is the ultimate festive project. We’re talking crisp, warmly spiced gingerbread walls, decorated with a charming array of nostalgic candies, and constructed with a glistening, amber-colored caramel that makes this a true work of edible art.
This isn’t just another gingerbread recipe; it’s a guide to your new favorite holiday tradition. We’ll show you the simple but crucial secrets to sturdy, no-spread gingerbread and the old-world magic of building with hot caramel. This is a satisfying, soulful, and deeply impressive project that is perfect for a weekend with the family and is destined to be the star of your holiday decor.
Table of Contents
Table of Contents
Recipe Overview: The Ultimate Edible Holiday Centerpiece
What makes this Gingerbread House so spectacularly unique is its brilliant, architectural design and its incredible, multi-layered textures and flavors. This recipe is a masterpiece of festive, edible art. The house itself is made from a sturdy, from-scratch gingerbread, rich with molasses and warm spices like ginger, cinnamon, and cloves. The real magic, however, is the construction. Instead of a traditional royal icing, this house is “glued” together with a from-scratch hard caramel, which sets up in seconds to create an incredibly strong and beautiful structure, sprinkled with sea salt for a sophisticated flavor. The house is then brought to life with a whole host of charming, rustic decorations: a frosted shredded wheat “thatched” roof, Fig Newton “shutters”, and a charming landscape of popcorn “snow.”
| Metric | Time / Level |
| Total Time | 6 hours (includes chilling & assembly) |
| Active Prep Time | 2 hours |
| Difficulty Level | Intermediate |
| Servings | 1 gingerbread house |
The Architect’s Workshop: The Essential Ingredients & Tools
This iconic party centerpiece uses a handful of high-quality ingredients and a few key tools to bring your gingerbread vision to life.
- The Sturdy Gingerbread Walls:
- The Spices & Molasses: A classic, warm, and perfectly balanced fall spice blend of ginger, cinnamon, nutmeg, and cloves is the key to that signature, cozy gingerbread flavor.
- Shortening & Butter: The combination of both fats is the secret to a dough that is both flavorful (from the butter) and sturdy with a crisp “snap” (from the shortening), perfect for construction.
- The Caramel Mortar (The Magical “Glue”!):
- The Secret Weapon: The brilliant and surprisingly simple “glue” is a classic hard caramel made from just sugar, water, and a touch of lemon juice. The lemon juice is a crucial secret ingredient that helps to prevent the sugar from crystallizing.1
- The Charming Decorations: This is where your inner artist can shine!
- The “Thatched” Roof: A box of frosted shredded wheat cereal makes the perfect, rustic, and snowy-looking roof tiles.2
- The “Shutters” & “Stained Glass”: Fig Newton cookies are the perfect, ready-made rustic window shutters, while colorful hard candies create the beautiful window panes.
- The Key Equipment:
- Gingerbread House Templates: These are non-negotiable for ensuring all your pieces fit together perfectly. You can easily make your own from stiff paper or a manila folder.
- A Heavy Skillet & Silicone Brush: Essential for making and working with the hot caramel “glue.”3
- Cans for Propping: A few heavy cans from your pantry are the secret weapon for propping up your walls while the caramel sets.
The Edible Architecture Masterclass: The Secrets to a Sturdy House
This recipe is all about the fun, creative construction. Here are a few simple but crucial techniques that guarantee a flawless, impressive result.
- Chill, Chill, Chill the Dough!: The number one, non-negotiable secret to gingerbread pieces that hold their shape and don’t spread in the oven is to chill your dough at multiple stages. Chilling after mixing, after rolling, and again after cutting are the foolproof, professional secrets to sharp, straight edges that will fit together perfectly.
- Decorate the Walls While They’re FLAT: This is the single most important, stress-saving tip! It is infinitely easier to pipe your icing details and attach all your beautiful candy decorations to your gingerbread panels before you assemble the house.
- Build in Stages and Support!: The most crucial step of assembly! You must build the four walls first and let them set completely before you even attempt to add the heavy roof pieces. Using your heavy cans to prop up the walls on the inside and the outside while the hot caramel sets is a brilliant and essential trick.
The Caramel Mortar Masterclass: A Guide to the “Glue”
Working with hot caramel is the most advanced part of this project, but it’s safe and easy if you follow these rules.
- SAFETY FIRST!: Hot, melted sugar is extremely dangerous and can cause severe burns.4 It is crucial that an adult handles this step and that any children or pets are kept away from the hot stove. Work slowly, carefully, and have a bowl of ice water nearby just in case of any accidental splashes.
- Preventing Crystallization: The key to a smooth, clear caramel is to prevent sugar crystals from forming.5 The recipe’s trick of adding a little lemon juice and brushing down the sides of the pan with a wet pastry brush are the essential secrets.
- Work FAST, but Reheat as Needed: The caramel will begin to harden the moment it is removed from the heat. You must work quickly. However, the beauty of a caramel mortar is that if it starts to get too hard, you can simply place the skillet back over a very low heat to gently re-melt it.

Step-by-Step to the Best Salted Caramel Gingerbread House
This fun and festive project is a joy to prepare.
Part 1: The Art of the Perfect Gingerbread Panels
Step 1: In a stand mixer, beat your butter, shortening, and sugars until light and fluffy. Beat in the molasses, vanilla, and egg. In a separate bowl, sift together your flour and all your spices. Gradually add the dry ingredients to the wet and mix until a smooth dough forms. Wrap the dough in plastic and chill it for at least 2 hours.
Step 2: While the dough is chilling, make your paper templates for the house pieces.
Step 3: Preheat your oven to 300°F ($150^{\circ}C$). Roll out your chilled dough to an 1/8-inch thickness and use your templates to cut out all your house pieces. Chill the cut-out pieces on your baking sheets for another 15 minutes.
Step 4: Bake for 30 to 35 minutes, until the pieces are crisp. Let them cool completely.
Part 2: The Festive Decorations
Step 1: Make your royal icing by beating your confectioners’ sugar and meringue powder with water until it is thick and glossy.
Step 2 (The Fun Part!): While your gingerbread panels are still lying flat, use your royal icing and your assorted candies to decorate the front, back, and side walls, and to attach the “shingles” to your two roof panels. Let all the decorated panels rest for at least 30 minutes, until the icing is set.
Part 3: The Caramel Mortar and Grand Assembly
Step 1: To make the caramel, in a medium skillet over a medium-low heat, cook your 1 1/2 cups of granulated sugar with the lemon juice and 1/4 cup of water, stirring, until the sugar has melted.6 Stop stirring and let the syrup cook until it is a deep amber color.
Step 2: Working quickly and carefully, dip the bottom edge of your front panel into the hot caramel and place it on your foil-wrapped base, using a can to prop it up. Brush caramel up one of the side edges. Dip one side of a side panel in the caramel and place it perpendicular to the front panel to form a corner. Prop this up with a can.
Step 3: Repeat this process with your second side panel and your back panel. Let the walls set.
Step 4: Once the walls are sturdy, brush the warm caramel onto the top edges of your house and the back edges of your roof panels and press the roof into place, holding it for about 30 seconds until the caramel sets.
Step 5: Use your royal icing to pipe “snow” along the seams of the roof and to create the beautiful landscape around your house.

Salted Caramel Gingerbread House (A Holiday Showstopper!)
An elaborate and festive recipe for a ‘Salted Caramel Gingerbread House,’ a showstopper edible centerpiece perfect for Christmas. This multi-day project involves creating a from-scratch, spiced gingerbread dough which is baked into panels to construct a house. Uniquely, the house is assembled using hot, molten caramel as the primary ‘glue.’ The finished structure is then intricately decorated with a salted caramel theme, featuring a ‘thatched’ roof made of frosted shredded wheat, candy windows, and a landscape of popcorn ‘snow’ and a pecan-lined walkway.
Ingredients
- For the Gingerbread:
- 3 cups all-purpose flour
- 1 tablespoon ground ginger
- 1 1/2 teaspoons ground cinnamon
- 1/2 teaspoon baking soda
- 1/2 teaspoon freshly grated nutmeg
- 1/2 teaspoon fine salt
- 1/4 teaspoon ground cloves
- 4 tablespoons unsalted butter, at room temperature
- 4 tablespoons shortening, at room temperature
- 1/2 cup dark brown sugar
- 1/3 cup granulated sugar
- 1/2 cup unsulphured molasses
- 1 large egg
- For the Royal Icing:
- 1 pound confectioners’ sugar
- 2 tablespoons meringue powder
- 1 teaspoon pure vanilla extract
- For the Caramel Glue:
- 1 1/2 cups granulated sugar
- 1/2 teaspoon fresh lemon juice
- For the Decorations:
- Peppermint hard candies, fig bars, pretzel sticks, butterscotch hard candies, French toast cereal, gummy candies, jelly beans, gummy gingerbread people, caramel-coated mini pretzels, frosted shredded wheat cereal, sea salt, pecan halves, sesame candy, popcorn
Instructions
- Make the Gingerbread Dough: Sift the dry ingredients. In a stand mixer, beat the butter, shortening, and sugars until fluffy. Beat in the molasses, vanilla, and egg. On low speed, add the dry ingredients until a smooth dough forms. Wrap the dough and refrigerate for at least 2 hours.
- Create & Bake Panels: Create paper templates for the house walls and roof. Preheat the oven to 300°F. Roll out the chilled dough to 1/8-inch thickness and cut out the panels using the templates. Chill the cutouts for 15 minutes.
- Bake the panels for 30-35 minutes until crisp. While still warm, use the templates to re-cut the shapes for precision. Let them cool completely.
- Make the Royal Icing: Beat the confectioners’ sugar, meringue powder, and 5-6 tablespoons of water with an electric mixer until thick and glossy peaks form.
- Decorate the Panels: Before assembly, decorate the cooled gingerbread panels using the royal icing to attach various candies for windows, doors, and other details. Cover the roof panels with frosted shredded wheat cereal to create a ‘shingled’ look. Let all decorations set for at least 30 minutes.
- Make the Caramel Glue & Assemble: In a medium skillet over medium-low heat, cook the sugar, lemon juice, and 1/4 cup of water, swirling the pan, until the sugar melts and turns a deep amber color (about 12-15 minutes).
- Working very carefully and quickly, dip the bottom and side edges of the gingerbread panels into the hot caramel and assemble the walls of the house on your base. Use cans to prop up the walls as they set.
- Attach the roof panels using the hot caramel. Use royal icing to fill in any seams.
- Landscape and Finish: Use the remaining royal icing to create a walkway and ‘snowdrifts’ around the house, decorating with pecans, crushed sesame candy, and popcorn. Add final candy decorations as desired. Let the entire house rest until dry.
Notes
- Special Equipment: This is an advanced project requiring printable templates, a stand mixer, piping bags, and a silicone brush.
- This is a multi-day edible craft project that requires significant time for chilling, baking, decorating, and assembly.
- The most unique and challenging part of this recipe is using hot, molten caramel as the primary ‘glue’ for construction. This step requires extreme caution as hot sugar can cause severe burns.
- Re-cutting the gingerbread panels while they are still warm is a key professional tip that ensures all the pieces will fit together perfectly.
- The article references a ‘Cook’s Note’ that is not provided in the text.
Storage and Make-Ahead Tips
- Make-Ahead: The best way to tackle this project is to break it up over several days. You can bake all your gingerbread pieces up to a week in advance and store them in an airtight container.7 You can also make all your candy decorations several days in advance.
- Storage: The finished, decorated gingerbread house will last as a beautiful (and mostly edible!) centerpiece at room temperature for up to 2 weeks.
For more recipe follow my pinterest account
Frequently Asked Questions (FAQs)
Q1: My caramel hardened too fast! What do I do?
Don’t worry! The beauty of a caramel mortar is that you can simply place your skillet back over a very low heat and let the caramel gently re-melt until it is a workable consistency again.
Q2: Can I use royal icing to build the house instead of caramel?
You can, but a royal icing “glue” will take several hours (or even overnight) to dry and become strong enough to support the roof.8 The magic of the caramel mortar is that it sets up and becomes rock-hard in just about 30 seconds, which makes the construction process much faster.
Q3: Why did my gingerbread pieces spread and lose their shape?
The most common culprit is that the dough was not chilled for long enough. The multi-stage chilling process in this recipe is the non-negotiable secret that will solidify the fats in the dough and guarantee your panels bake up with sharp, straight edges that will fit together perfectly.
Q4: Is this a good project to make with kids?
Yes and no! The decorating of the flat panels with the royal icing and the candies is a fantastic and fun activity for kids. However, the construction of the house with the hot caramel is extremely dangerous and must be done by an adult only.
Q5: Can I eat my gingerbread house?
Absolutely! While it makes for a beautiful decoration, every single component of this house is completely edible and delicious.

