Introduction & Inspiration
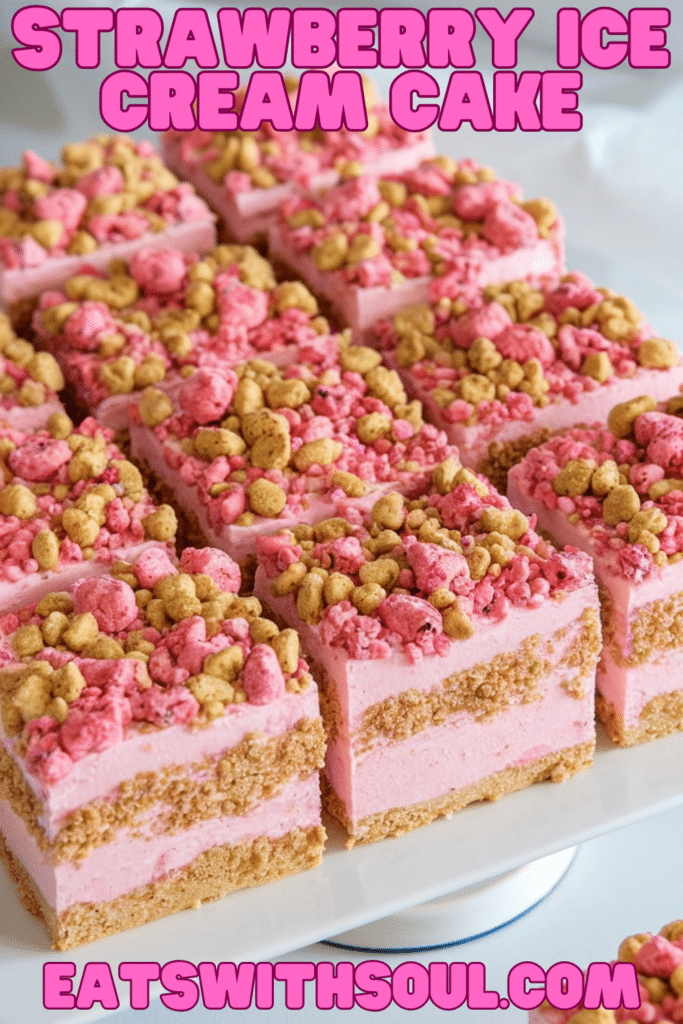
This Strawberry Ice Cream Cake is the perfect frozen dessert for celebrations or simply cooling down on a warm day. It features a delightful combination of creamy ice cream, a buttery cookie crust, and a vibrant strawberry crunch topping. It’s a fun, festive, and surprisingly easy way to create a showstopping treat.
My inspiration for this recipe comes from the classic flavors of strawberry shortcake ice cream bars, combined with the celebratory nature of an ice cream cake. I wanted a recipe that was simple to assemble using mostly store-bought ingredients, yet still felt special and homemade.
This cake is perfect for birthdays, summer parties, or any occasion that calls for a cool and delicious dessert. It’s guaranteed to be a hit with both kids and adults. It is a perfect summer dessert.
A simple and delicious dessert, perfect for celebrations.
Nostalgic Appeal
Ice cream cakes are synonymous with birthdays and celebrations, evoking happy memories of parties and childhood fun. The specific flavor combination here – vanilla, strawberry, and a crunchy cookie element – often reminds people of those beloved strawberry shortcake ice cream bars from the ice cream truck.
This cake brings together those nostalgic elements in an easy-to-make format. The layers of creamy ice cream, the familiar taste of Golden Oreos, and the bright pop of strawberry create a dessert that’s both comforting and exciting.
It’s a fun and delicious way to relive those sweet memories. Perfect to share with family and friends.
Homemade Focus
This recipe is a fantastic example of using smart shortcuts to create an impressive homemade dessert without spending hours in the kitchen. We utilize store-bought Golden Oreos, vanilla and strawberry ice cream, and frozen whipped topping to make assembly quick and easy.
However, the homemade touches – the buttery baked cookie crust and the vibrant strawberry crunch topping made with freeze-dried strawberries – elevate this cake beyond simply layering store-bought items. These elements add texture, flavor, and a personal touch.
It’s about balancing convenience with the satisfaction of creating something special. It’s the perfect approach for busy people who still want to serve a memorable, delicious dessert. A perfect recipe for beginners.
Flavor Goal
The primary flavor goal for this Strawberry Ice Cream Cake is a delightful blend of creamy vanilla, sweet strawberry, and buttery cookie crunch. The Golden Oreo crust provides a sweet, slightly salty, and crisp base.
The layers of vanilla and strawberry ice cream offer a classic, creamy, and fruity combination. The whipped topping adds a light, airy texture that separates the ice cream from the crunchy topping.
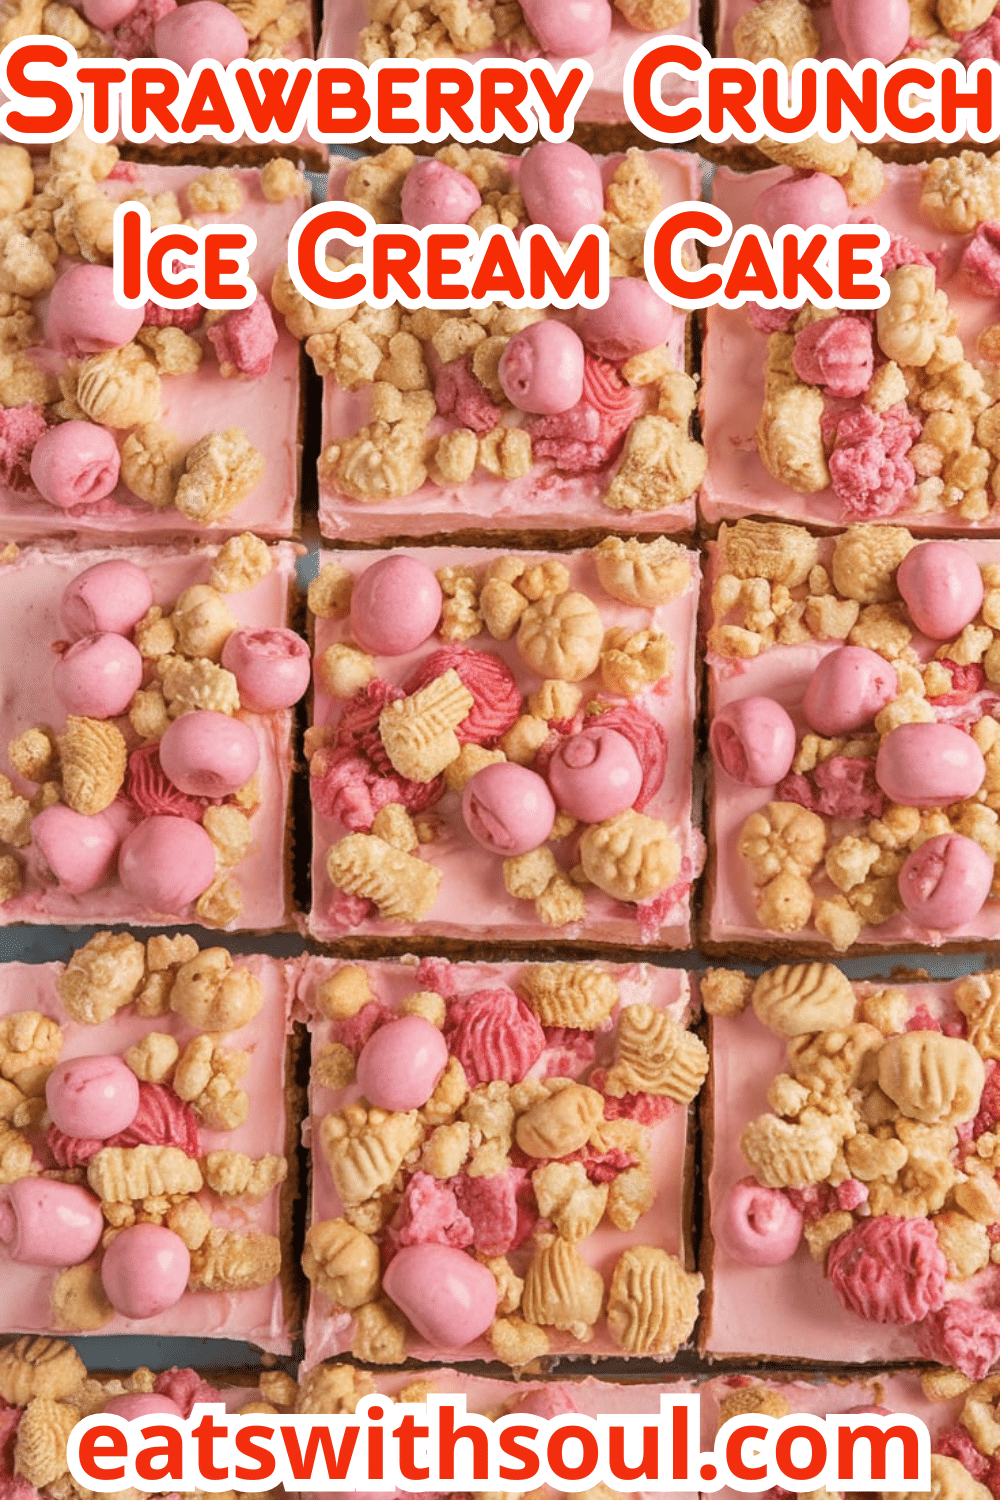
The strawberry crunch topping, a mix of crushed cookies and freeze-dried strawberries, delivers intense strawberry flavor and a fantastic contrasting texture. The overall effect is a balanced, multi-layered dessert that’s cool, creamy, crunchy, and bursting with strawberry-vanilla goodness.
A perfect combination of flavor and texture.
Ingredient Insights
For the Crust:
- Golden Oreo Cookies (Finely Crushed): Create a sweet, buttery, vanilla-flavored crust. Using Golden Oreos gives it a distinct flavor profile compared to traditional chocolate Oreos.
- Butter (Melted): Binds the cookie crumbs together and adds richness, helping the crust become firm when baked.
For the Ice Cream Layers:
- Vanilla Ice Cream (Softened): Provides a classic, creamy base layer. Softening it slightly makes it easy to spread.
- Strawberry Ice Cream (Softened): Adds the primary fruit flavor and a beautiful pink layer. Choose a good quality strawberry ice cream.
- Frozen Whipped Topping (Thawed): Creates a light, fluffy layer and makes the cake easier to slice cleanly. It also provides a base for the crunch topping to adhere to.
For the Strawberry Crunch Topping:
- Golden Oreo Cookies (Coarsely Crushed): Adds a larger crunch element compared to the crust.
- Freeze-Dried Strawberries (Coarsely Crushed): Provide intense, concentrated strawberry flavor and vibrant color without adding moisture. They also contribute to the crunch.
For Garnish (Optional):
- Fresh Strawberries: Add a fresh, beautiful finishing touch.
Essential Equipment
- 9×9-Inch Baking Pan: For assembling and freezing the ice cream cake. A square pan makes for easy cutting.
- Parchment Paper: Essential for lining the pan, allowing easy removal of the finished cake.
- Food Processor (or Resealable Plastic Bag and Rolling Pin): For crushing the Oreo cookies for the crust and topping.
- Small Bowl: For mixing the crust ingredients.
- Offset Spatula or Large Spoon: Ideal for spreading the softened ice cream layers evenly.
- Freezer Space: Ensure you have enough flat space in your freezer to accommodate the 9×9 pan during the freezing stages.
Ingredients
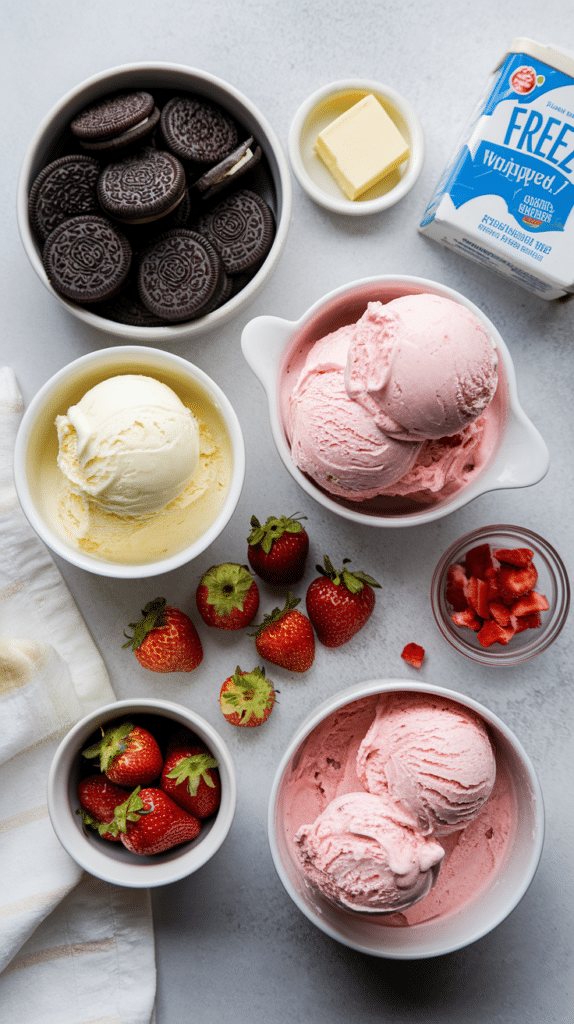
- 36 Golden Oreo cookies, divided
- 4 tablespoons butter, melted
- 3 cups vanilla ice cream, softened
- 5 cups strawberry ice cream, softened
- 1 carton (8 ounces) frozen whipped topping, thawed
- 1 package (1 ounce) freeze-dried strawberries, coarsely crushed
- Fresh strawberries, optional

Step-by-Step Instructions
1. Prepare the Crust:
- Line a 9×9-inch baking pan with parchment paper, leaving an overhang on two opposite sides for easy lifting later.
- Preheat oven to 350°F (175°C).
- Finely crush 24 of the Golden Oreo cookies using a food processor or by placing them in a bag and crushing with a rolling pin.
- In a small bowl, mix the fine cookie crumbs with the melted butter until thoroughly combined.
- Press the crumb mixture firmly and evenly onto the bottom of the prepared pan.
- Bake for 15-20 minutes, or until the crust feels firm to the touch.
- Cool the crust completely on a wire rack.
2. Layer the Ice Cream:
- Once the crust is completely cool, spread the softened vanilla ice cream evenly over the crust.
- Cover the pan (with plastic wrap or foil) and freeze until the vanilla layer is firm, at least 30 minutes.
- Spread the softened strawberry ice cream evenly over the firm vanilla layer.
- Spread the thawed whipped topping evenly over the strawberry ice cream layer.
- Cover and freeze again until the whipped topping layer is firm, at least 2 hours.
3. Make and Add the Crunch Topping:
- Coarsely crush the remaining 12 Golden Oreo cookies. You want slightly larger pieces than for the crust.
- In a small bowl, combine the coarsely crushed cookies and the coarsely crushed freeze-dried strawberries.
- Sprinkle this crunch mixture evenly over the firm whipped topping layer. Gently press down slightly if needed.
4. Final Freeze:
- Cover the cake tightly and freeze until completely firm, ideally for 8 hours or overnight.
5. Serve:
- When ready to serve, remove the cake from the freezer.
- Using the parchment paper overhangs, lift the cake out of the pan.
- Gently peel off the parchment paper from the sides and bottom.
- Let the cake stand at room temperature for about 10 minutes to soften slightly for easier cutting.
- If desired, garnish with fresh strawberries. Slice and serve immediately.

Troubleshooting
- Crust is Too Crumbly: Ensure enough melted butter was used and that the crumbs were pressed firmly into the pan. Baking helps set it.
- Layers are Mixing/Melting: Make sure each layer (especially the ice cream layers) is frozen firm before adding the next layer. Work quickly when spreading the softened ice cream.
- Cake is Difficult to Cut: Let the cake sit at room temperature for 10-15 minutes before slicing. Use a large, sharp knife dipped in hot water and wiped dry between cuts.
Tips and Variations
- Soften Ice Cream Properly: Let ice cream sit at room temperature for 10-15 minutes, just until spreadable but not melted.
- Freeze Between Layers: Don’t rush the freezing time between layers; this ensures clean layers.
- Different Cookies: Use regular chocolate Oreos, vanilla wafers, or shortbread cookies for the crust and topping.
- Different Ice Cream Flavors: Swap vanilla or strawberry for other complementary flavors like chocolate, cheesecake, or even pistachio.
- Add Sauce Layers: Drizzle chocolate sauce or strawberry sauce between the ice cream layers (ensure the layer below is frozen solid first).
Serving and Pairing Suggestions
- Serve Frozen: This cake must be served frozen, allowing only a few minutes to soften before cutting.
- Birthday Parties: An excellent and easy alternative to a traditional baked birthday cake.
- Summer Gatherings: Perfect for barbecues, picnics, and potlucks.
- With Fresh Berries:
Nutritional Information
(Note: Estimated, per serving, assuming 9 servings)
- Calories: 400-450
- Fat: 20-25g
- Saturated Fat: 12-15g
- Cholesterol: 50-70mg
- Sodium: 200-250mg
- Total Carbohydrates: 50-55g
- Dietary Fiber: 1-2g
- Sugars: 35-40g
- Protein: 4-6g
Strawberry Ice Cream Cake: A Cool and Creamy Layered Treat
Learn how to make an easy and delicious Strawberry Ice Cream Cake! This recipe features a Golden Oreo crust, layers of vanilla and strawberry ice cream, and a strawberry crunch topping.
Ingredients
- 36 Golden Oreo cookies, divided
- 4 tablespoons butter, melted
- 3 cups vanilla ice cream, softened
- 5 cups strawberry ice cream, softened
- 1 carton (8 ounces) frozen whipped topping, thawed
- 1 package (1 ounce) freeze-dried strawberries, coarsely crushed
- Fresh strawberries, optional
Instructions
1. Prepare the Crust:
- Line a 9×9-inch baking pan with parchment paper, leaving an overhang on two opposite sides for easy lifting later.
- Preheat oven to 350°F (175°C).
- Finely crush 24 of the Golden Oreo cookies using a food processor or by placing them in a bag and crushing with a rolling pin.
- In a small bowl, mix the fine cookie crumbs with the melted butter until thoroughly combined.
- Press the crumb mixture firmly and evenly onto the bottom of the prepared pan.
- Bake for 15-20 minutes, or until the crust feels firm to the touch.
- Cool the crust completely on a wire rack.
2. Layer the Ice Cream:
- Once the crust is completely cool, spread the softened vanilla ice cream evenly over the crust.
- Cover the pan (with plastic wrap or foil) and freeze until the vanilla layer is firm, at least 30 minutes.
- Spread the softened strawberry ice cream evenly over the firm vanilla layer.
- Spread the thawed whipped topping evenly over the strawberry ice cream layer.
- Cover and freeze again until the whipped topping layer is firm, at least 2 hours.
3. Make and Add the Crunch Topping:
- Coarsely crush the remaining 12 Golden Oreo cookies. You want slightly larger pieces than for the crust.
- In a small bowl, combine the coarsely crushed cookies and the coarsely crushed freeze-dried strawberries.
- Sprinkle this crunch mixture evenly over the firm whipped topping layer. Gently press down slightly if needed.
4. Final Freeze:
- Cover the cake tightly and freeze until completely firm, ideally for 8 hours or overnight.
5. Serve:
- When ready to serve, remove the cake from the freezer.
- Using the parchment paper overhangs, lift the cake out of the pan.
- Gently peel off the parchment paper from the sides and bottom.
- Let the cake stand at room temperature for about 10 minutes to soften slightly for easier cutting.
- If desired, garnish with fresh strawberries. Slice and serve immediately.
Recipe Summary and Q&A
Summary: This Strawberry Ice Cream Cake features a baked Golden Oreo crust, layered with softened vanilla and strawberry ice cream, topped with whipped topping and a crunchy mixture of crushed Golden Oreos and freeze-dried strawberries. The process involves making and baking the crust, layering and freezing the ice cream and topping components sequentially, and a final freeze before serving.
Q&A:
- Q: Can I make this in a different size pan?
- A: Yes, you can adapt it for an 8×8 pan (it will be taller) or a 9×13 pan (it will be thinner, adjust ingredient quantities slightly if needed). You can also use a 9-inch springform pan.
- Q: How far in advance can I make this?
- A: You can make this cake several days, or even up to a week, in advance. Keep it tightly covered in the freezer.
- Q: Can I use homemade ice cream?
- A: Absolutely! Homemade ice cream would make this cake even more special. Just make sure it’s softened enough to spread.
- Q: Can I skip baking the crust?
- A: You can make a no-bake crust by simply mixing the crumbs and butter and freezing it until firm (at least 30 minutes). Baking provides a slightly firmer, crispier texture.

