Are you haunted by memories of dry, bland, and disappointing Thanksgiving turkeys? Are you ready to discover the single most effective technique that professional chefs and seasoned home cooks swear by for a guaranteed juicy, flavorful, and perfectly seasoned bird every single time? The secret, my friends, is brining. And this incredible Thanksgiving Turkey Brine recipe is the ultimate guide to the most succulent turkey you’ve ever made.
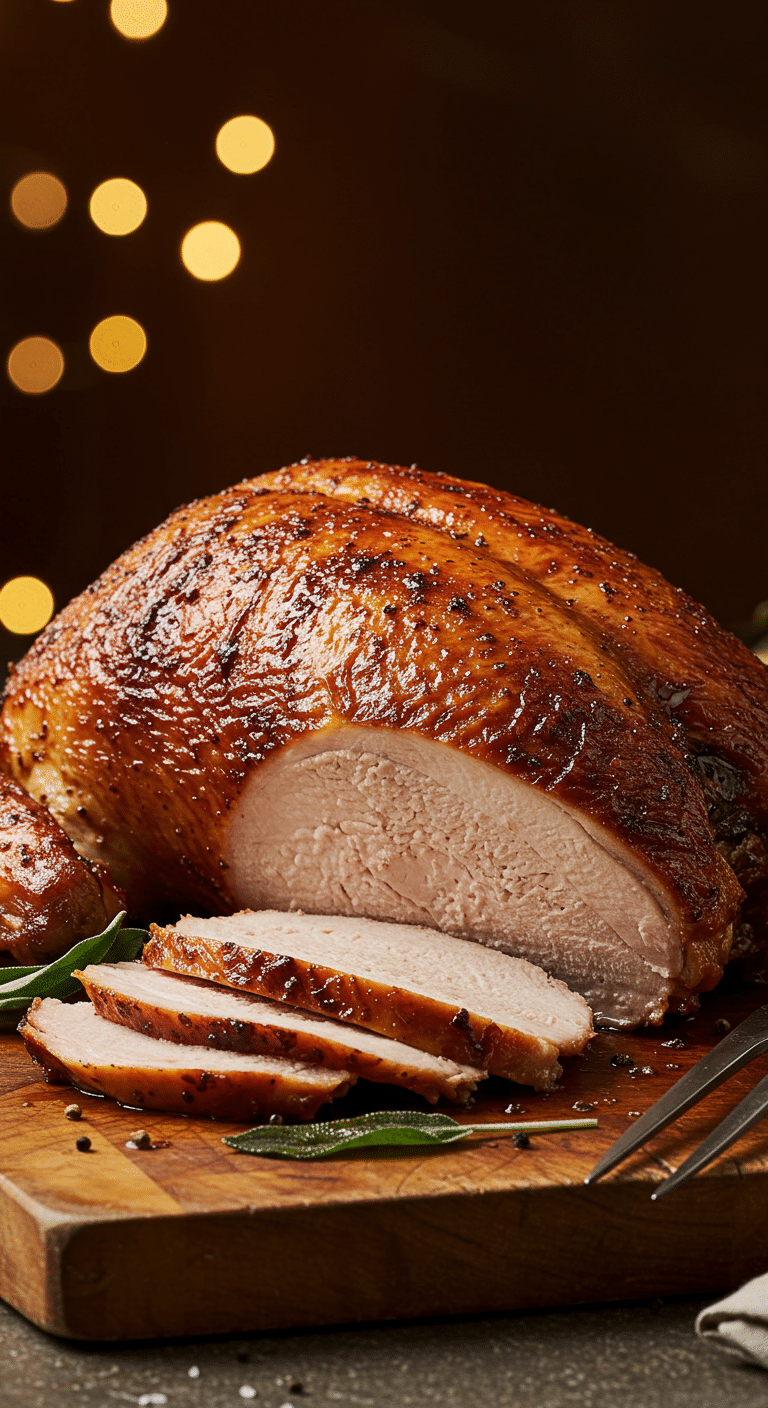
This isn’t just a recipe; it’s a foolproof insurance policy against a dry turkey. We’ll show you how to create a deeply savory and slightly sweet wet brine with a unique and delicious combination of honey, molasses, and soy sauce. This simple, overnight step infuses the turkey with flavor and moisture from the inside out. Finished with a simple lemon-zest butter under the skin, this method will give you a magnificent centerpiece with a beautiful, deep mahogany color and unbelievably moist meat.
Table of Contents
Table of Contents
Recipe Overview: The Secret to the Juiciest Turkey Ever
What makes this Thanksgiving Turkey Brine so spectacular is the simple science behind it. A wet brine is a saltwater solution that, through the process of osmosis, seasons the turkey to the bone while also helping the muscle fibers to retain more moisture during the long roasting process. This particular brine is a flavor powerhouse, with sweet notes from honey and molasses and a deep, savory umami kick from soy sauce. It’s the ultimate make-ahead step for a stress-free and incredibly delicious Thanksgiving.
| Metric | Time / Level |
| Total Time | 16 hours (includes overnight brining) |
| Active Prep Time | 30 minutes |
| Difficulty Level | Intermediate |
| Servings | 12-16 |
The Essential Ingredients for a Perfect Brine
This recipe uses a handful of powerful ingredients to create a turkey that is bursting with flavor and moisture.
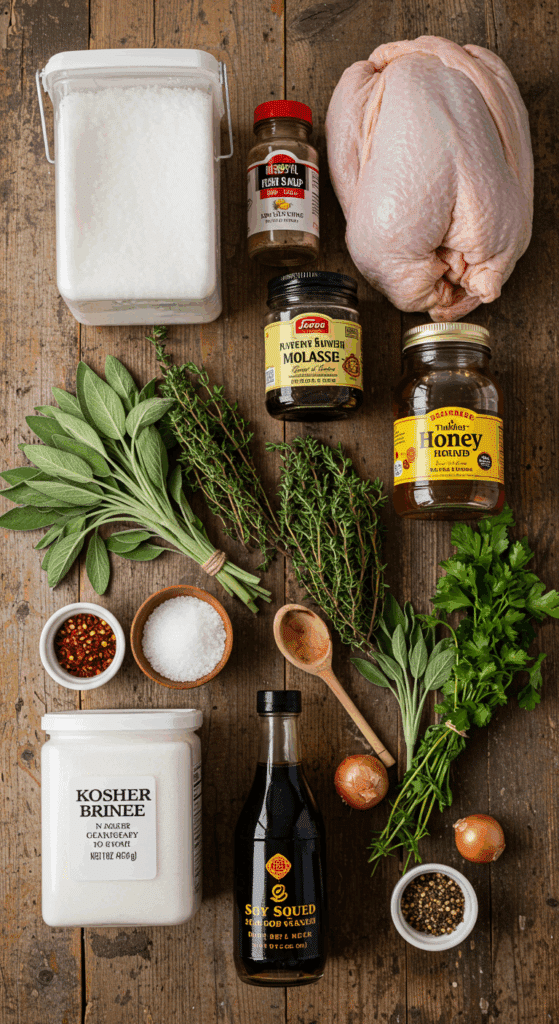
- The Brine Solution: This is the heart of our flavor infusion.
- Kosher Salt: The most important ingredient. It is crucial to use kosher salt, not table salt. The larger crystals of kosher salt dissolve easily and are less harsh than iodized table salt.
- The Sweet & Savory Flavors: A unique and delicious combination of molasses, honey, and soy sauce gives this brine its signature flavor and helps the turkey skin to develop a beautiful, deep mahogany color as it roasts.
- The Aromatics: Dried red pepper flakes, dried sage, fresh thyme, and whole garlic cloves all add layers of classic, savory, and aromatic flavor to the brine.
- A Whole Turkey: This recipe is designed for a 14- to 18-pound turkey. The most important step is ensuring your turkey is completely thawed before it goes into the brine.
- The Lemon Zest Butter: A final, simple compound butter made from softened, unsalted butter and the finely grated zest of two lemons is rubbed under the skin. This adds a final layer of richness and a bright, citrusy aroma, and it helps to make the breast meat extra moist.

Step-by-Step to the Most Flavorful Turkey
Brining is a simple process that is all about planning ahead. Follow these detailed steps for a perfect result.
Step 1: Create the Flavorful Brine Concentrate
In a medium pot, bring 3 quarts of tap water to a boil over medium heat.
While the water is heating, place the 1 pound of kosher salt in a very large bowl, a food-grade bucket, or a clean cooler that is large enough to hold your entire turkey.
Once the water is boiling, slowly and carefully pour the boiling water over the salt. Stir with a long-handled spoon or whisk until the salt is completely dissolved.
Add the molasses, honey, soy sauce, red pepper flakes, dried sage, the large bunch of fresh thyme, and the two heads of garlic to the hot salt and water mixture. Stir until all the sweet ingredients have dissolved into the hot liquid.
Step 2: Cool the Brine and Submerge the Turkey
Add the remaining 3 quarts of cool tap water to the brine concentrate and stir.
Now, add the 5 pounds of ice cubes to the brine. Pour the brine over the ice and use a large whisk to blend all the ingredients together.
Crucial Safety Tip: It is absolutely essential that your brine is completely cold (below 40°F) before you add the raw turkey. The large amount of ice in this recipe is designed to chill it down rapidly and safely.
Once the brine is ice-cold, carefully submerge your thawed turkey, breast-side down, into the brine. Make sure that the cavity of the bird fills completely with the liquid as you are submerging it. The turkey should be fully covered by the brine.
Cover the cooler or bucket and allow the bird to sit in the brine in a cool, safe place (like a garage, a cool basement, or the refrigerator if you have space) overnight, or for about 12 hours.
Step 3: Dry, Butter, and Prepare for Roasting
The next day, remove the bird from the brine. Discard the brine completely.
Now for the second most important step: pat the turkey completely and thoroughly dry with thick, absorbent paper towels. A very dry surface is the non-negotiable secret to a crispy, golden-brown skin. Take your time and make sure to dry the outside and the inside of the cavity very well.
In a small bowl, whisk together the 1 pound of softened butter and the lemon zest.
Gently lift the skin covering one breast of the turkey and use your hands to spread half of the lemon-zest butter directly on the meat, under the skin. Repeat with the other breast.
Step 4: Roast to Golden Perfection and Rest
Preheat your oven to 350°F (175°C).
Arrange the turkey on a roasting rack fitted inside a large roasting pan. Roast the turkey on the lower rack of the oven for about 3 1/2 hours.
The turkey is perfectly and safely cooked when an instant-read thermometer inserted into the thickest part of the thigh (making sure not to touch the bone) registers 170°F (77°C).
Carefully transfer the roasted turkey from the pan to a large cutting board. Tent it loosely with foil and let it rest for at least 15 to 30 minutes before carving. This essential step allows the juices to redistribute throughout the meat, guaranteeing a moist and succulent result.

The Best No-Fail Thanksgiving Turkey Brine for a Juicy Bird
A comprehensive recipe for a juicy and flavorful Thanksgiving turkey, detailing both a wet brine and the roasting process. The turkey is first submerged overnight in a complex brine made with salt, molasses, honey, soy sauce, and aromatics like thyme and garlic. After brining, the turkey is thoroughly dried, and a lemon zest compound butter is rubbed under the skin for extra moisture and flavor. The bird is then roasted until the skin is golden brown and the meat is perfectly cooked.
- Prep Time: 20 minutes
- Cook Time: 3 hours 30 minutes
- Total Time: 16 hours (includes 12-hour brining time)
- Yield: 12-18 servings
- Category: Main Course
- Method: Brining, Roasting
- Cuisine: American
Ingredients
- For the Brine:
- 6 quarts tap water
- 1 pound kosher salt
- 1 cup molasses
- 2 cups honey
- 1 cup soy sauce
- 1 tablespoon dried red pepper flakes
- 1 tablespoon dried sage
- 1 large bunch fresh thyme
- 2 heads garlic, broken into cloves, unpeeled
- 5 pounds ice cubes
- For the Turkey:
- 1 (14 to 18-pound) turkey, cleaned, innards removed
- 1 pound (4 sticks) unsalted butter, softened
- 2 lemons, zested
Instructions
- Make the Brine: In a medium pot, bring 3 quarts of tap water to a boil. In a very large bowl or bucket, place the kosher salt and carefully pour the boiling water over it, stirring to dissolve the salt.
- Add the molasses, honey, soy sauce, red pepper flakes, sage, thyme, and garlic to the saltwater mixture. Stir to blend. Add the remaining 3 quarts of cool water.
- Place the ice in a cooler or a bucket large enough to hold both the brine and the turkey. Pour the brine mixture over the ice and whisk to combine.
- Brine the Turkey: Submerge the turkey, breast side down, into the brine, ensuring the cavity fills with liquid. Cover the cooler and let the turkey brine overnight or for about 12 hours.
- Prepare for Roasting: Remove the turkey from the brine and dry it thoroughly with paper towels, both inside and out. Discard the brine.
- In a small bowl, whisk together the softened butter and the lemon zest to create a compound butter.
- Gently lift the skin covering the turkey breasts and spread half of the butter mixture directly on the meat under the skin. Repeat with the other breast.
- Roast the Turkey: Preheat the oven to 350°F.
- Arrange the turkey in a roasting pan fitted with a rack. Place it on a lower rack in the oven.
- Roast for about 3 1/2 hours, or until an instant-read thermometer inserted into the thickest part of the thigh reads 170°F.
- Remove the turkey from the oven, transfer it to a cutting board, and tent it with foil. Let the turkey rest for at least 15-20 minutes before carving and serving.
Notes
- This recipe requires a large, non-reactive container for brining, such as a food-safe bucket or a cooler.
- Thoroughly drying the turkey after brining is a crucial step for achieving crispy skin.
- Rubbing compound butter under the skin is a key technique for ensuring the breast meat stays moist and flavorful.
- Resting the turkey after roasting is essential for a juicy, tender result.
Storage and Make-Ahead Tips
A large roasted turkey is perfect for delicious leftovers.
- Make-Ahead: The entire brining process is a fantastic make-ahead step. You can also prepare the lemon-zest butter up to 3 days in advance and store it, covered, in the refrigerator.
- Storage: Store any leftover carved turkey meat in an airtight container in the refrigerator for up to 4 days. The leftover carcass and bones are a treasure—use them to make a rich and delicious turkey stock for soup.
For more recipe follow my Pinterest account
Creative Recipe Variations
This deeply flavorful brine is a wonderful base for your own creative and festive twists.
- Classic Apple Cider Brine: For a more traditional, autumnal flavor, you can swap the soy sauce and molasses for 2 cups of apple cider and use 1 cup of brown sugar instead of the honey.
- Spicy Creole-Style Brine: For a Louisiana-inspired flavor that is fantastic on a turkey, you can add 2-3 tablespoons of your favorite Creole seasoning, a few more bay leaves, and a halved head of garlic to the brine.
- Classic Herb-Forward Brine: If you prefer a purely savory and herbaceous flavor, you can omit the honey, molasses, and soy sauce. Instead, use a classic brine of water, salt, and brown sugar, and add a very large bunch of fresh sage, rosemary, and parsley to the mixture.
Enjoy Your Juiciest Turkey Ever!
You’ve just discovered the ultimate secret to a perfect holiday centerpiece. This Thanksgiving Turkey Brine is a foolproof method that takes all the guesswork and worry out of roasting a turkey and guarantees a spectacular, juicy, and incredibly flavorful result every single time. It’s a rewarding process that will make you a true holiday hero.
We hope you and your loved ones enjoy every last, perfect, succulent bite!
If you enjoyed making this recipe, please leave a comment below or share it with a friend who is ready to master their Thanksgiving turkey!
Frequently Asked Questions (FAQs)
Q1: What is the difference between a wet brine and a dry brine?
A wet brine, like this recipe, involves submerging the turkey in a saltwater solution. It adds both seasoning and a significant amount of moisture to the meat. A dry brine involves rubbing the turkey with a salt-and-spice mixture and letting it rest in the refrigerator for a few days. It also seasons the meat and helps it retain moisture, and it is known for producing an extra-crispy skin. Both methods are fantastic!
Q2: Will my turkey taste too salty from all the salt in the brine?
No, it will not. While the brine itself is very salty, the process of osmosis ensures that the turkey absorbs just the right amount of salt to be perfectly seasoned all the way through to the bone, not overly salty on the surface. It’s also important to use kosher salt, which has a cleaner flavor than iodized table salt.
Q3: My roasting pan is in the oven. What should I do with the drippings for my gravy?
The drippings from a brined turkey can be quite salty. When you are making your gravy, be sure to use a low-sodium or unsalted chicken or turkey broth. It is also very important to taste your gravy before you add any extra salt. You will likely find that the salty drippings are all the seasoning you need.
Q4: Do I have to use a cooler? Can I brine the turkey in my refrigerator?
If your turkey and the brining container will fit, you can absolutely brine it in the refrigerator. A cooler is a great, food-safe alternative that frees up a huge amount of refrigerator space during the busy holiday season. You can also use a large, food-grade brining bag placed inside a stockpot or a bucket. The most important thing is to ensure the turkey stays at a safe, cold temperature (below 40°F) for the entire brining period.
Q5: Why is it so important to dry the turkey so well after brining?
This is a critical step for achieving a beautiful, crispy skin. Any excess moisture left on the surface of the turkey will turn to steam in the hot oven. Steam is the enemy of crispiness! By patting the skin completely dry, you are ensuring that the skin will roast, not steam, which allows it to render its fat and become perfectly golden brown and crispy.

