Introduction & Inspiration
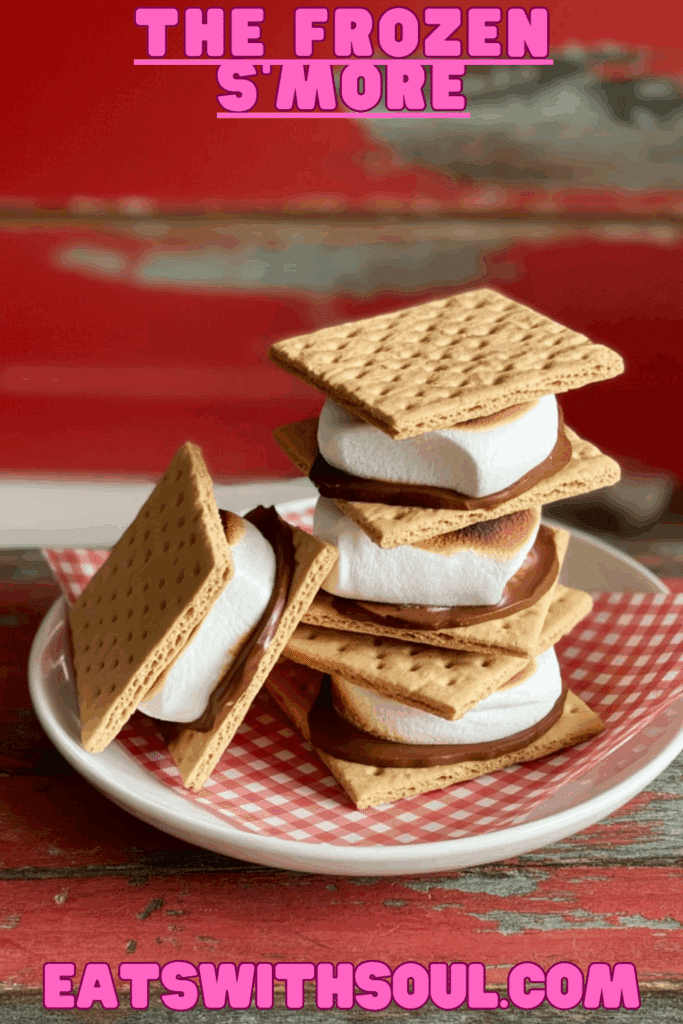
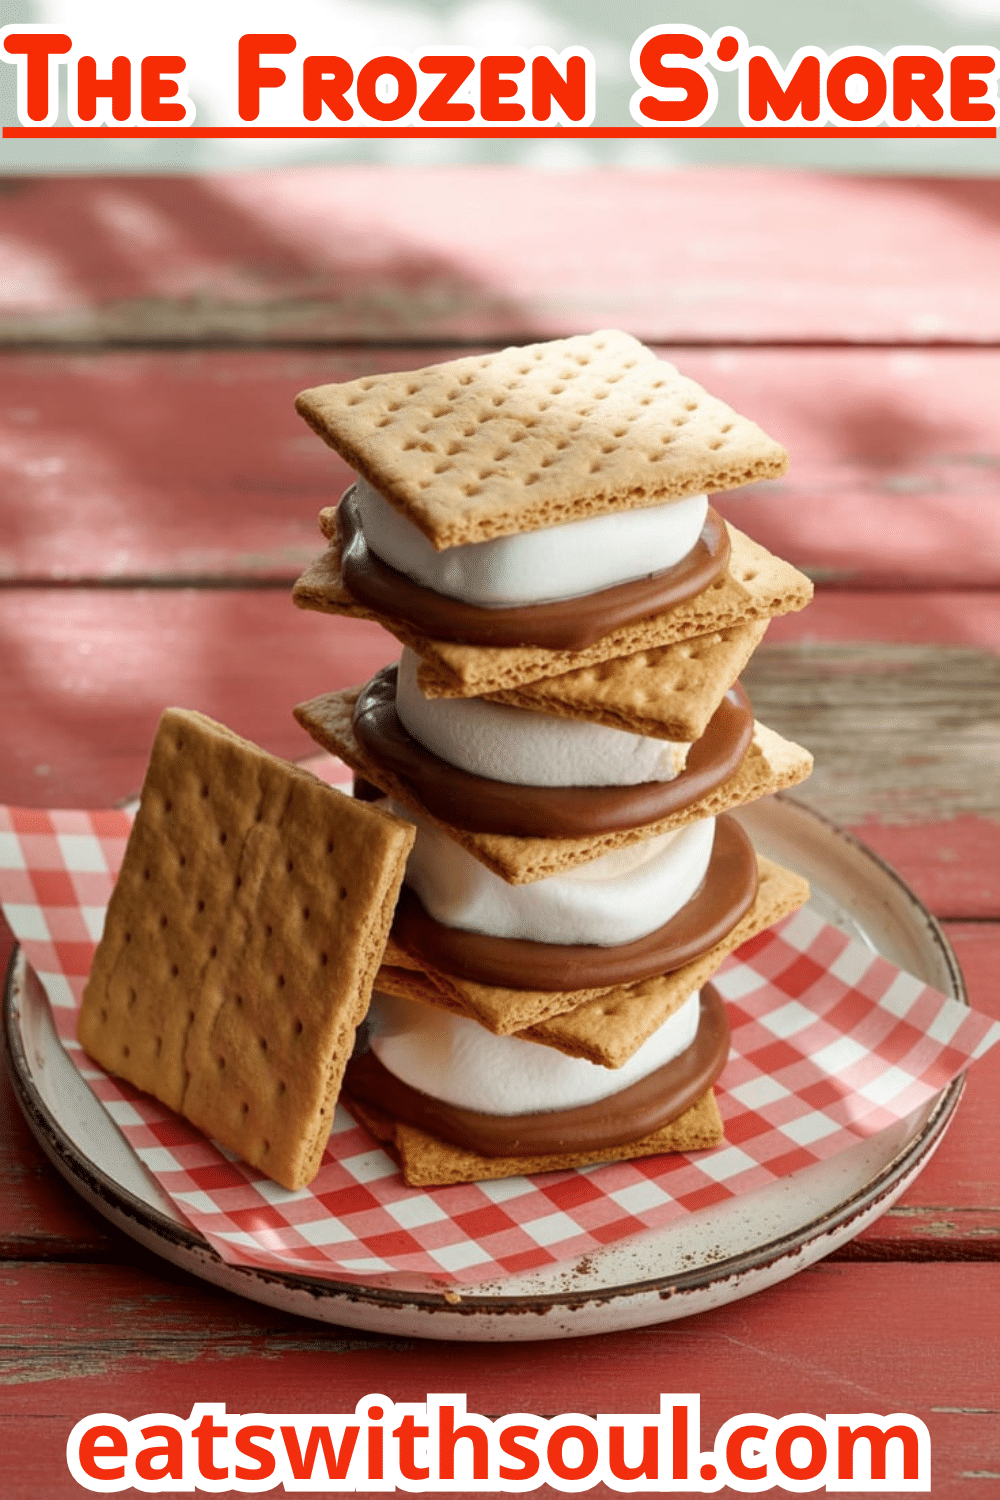
Prepare to experience the beloved flavor of a campfire s’more like never before with this incredible recipe for “The Frozen S’more”! This isn’t just an ice cream sandwich; it’s a sophisticated, multi-layered dessert that brilliantly captures the essence of the classic treat in a cool, refreshing format. Imagine crisp graham cracker squares slathered with a rich, soft chocolate spread, then filled with creamy vanilla ice cream that has been studded with smoky, chewy pieces of actual broiled marshmallows. Finished with a playful coating of soft mini marshmallows around the sides, it’s a gourmet twist on a rustic favorite.
My inspiration for this recipe comes from wanting to elevate the simple s’more into an impressive frozen dessert while keeping its soul intact. The secret is broiling the marshmallows until deeply toasted to create an authentic, smoky, caramelized flavor that infuses the entire ice cream base. It’s a bit of a project with a few stages, but the results are absolutely spectacular and so worth it.
This Frozen S’more is a fantastic treat for a summer party, a special dessert to have waiting in the freezer, or anytime you want to delight your family and friends with something truly unique and delicious. It is a perfect summer dessert recipe.
Nostalgic Appeal / Comfort Factor
S’mores and ice cream sandwiches are two of the most powerful nostalgia-inducing desserts. The s’more instantly evokes memories of crackling campfires, starry nights, gooey fingers, and the simple, joyful fun of childhood. Ice cream sandwiches are a quintessential summer pleasure, a taste of carefree sunny days and the cheerful jingle of an ice cream truck.
This recipe masterfully combines the nostalgic comfort of both of these beloved treats into one amazing creation. You get the familiar honey-graham crunch and the creamy satisfaction of an ice cream sandwich, but with the added, authentic taste of smoky, caramelized marshmallow and rich chocolate that is pure s’mores. It’s a comforting flavor profile presented in an exciting, modern, and slightly gourmet way.
It’s a dessert that feels both wonderfully familiar and impressively special, guaranteed to bring smiles to everyone’s faces. A perfect comfort food dessert.
Homemade Focus
This recipe is a wonderful celebration of creating a gourmet-style dessert from scratch through a fun, multi-step assembly process. While it starts with store-bought vanilla ice cream and graham crackers, the homemade focus shines in the creative transformation of these simple components into something truly unique.
The most important homemade step is creating the toasted marshmallow ice cream yourself. You’re taking ordinary mini marshmallows, broiling them to a deep, smoky toast to develop authentic campfire flavor, and then chopping and folding them into softened ice cream to create a completely new, flavor-infused product. You’re also making a simple yet luscious soft chocolate spread from scratch. The careful, multi-stage assembly and freezing process are what bring all these homemade elements together into a perfect frozen sandwich.
It’s about taking familiar ingredients and, through thoughtful homemade techniques, crafting them into a truly special and impressive dessert that tastes like it came from a high-end sweet shop. The homemade toasted marshmallow ice cream is key.
Flavor Goal
The primary flavor goal is to perfectly capture the complete s’mores experience – graham cracker, chocolate, and toasted marshmallow – in a cool, creamy, and crunchy frozen sandwich format. The graham cracker squares should provide that familiar sweet, honeyed crunch that forms the base of any good s’more.
The soft chocolate spread should offer a layer of rich, smooth, semi-sweet chocolate flavor that melts in your mouth. The ice cream layer is the star: the creamy vanilla base is wonderfully transformed by the smoky, caramelized, and slightly chewy pieces of the broiled marshmallows, delivering that authentic “toasted” taste. The fresh mini marshmallows pressed into the sides should provide a soft, sweet textural contrast to the crisp cracker.
The overall experience should be a delightful symphony of textures (crunchy, creamy, chewy, soft) and balanced flavors (sweet, smoky, rich chocolate, vanilla) that unmistakably tastes like a sophisticated, frozen version of a perfect s’more. A perfect balance between flavour and texture.
Ingredient Insights
For the Toasted Marshmallow Ice Cream:
- Vanilla Ice Cream: A good quality vanilla ice cream provides the creamy, sweet canvas for the toasted marshmallow flavor. The recipe calls for letting it soften at room temperature just enough to be stir-able.
- Mini Marshmallows (for toasting): These are broiled until very dark to create a deep, smoky, caramelized flavor, which is the heart of the “s’mores” taste.
For the Soft Chocolate Spread:
- Semisweet Chocolate (Chopped): Provides the rich chocolate layer. Using chopped baking chocolate or good quality chocolate chips ensures a smooth and even melt.
- Light Corn Syrup: A key ingredient that acts as a stabilizer, helping to keep the chocolate spread smooth and slightly soft (scoopable) even after being refrigerated, preventing it from becoming too hard or grainy.
- Pure Vanilla Extract & Kosher Salt: Enhance the chocolate flavor and balance the sweetness.
- Heavy Cream: Poured hot over the chocolate to create a simple, smooth ganache-like mixture.
For Assembly & Decoration:
- Graham Crackers (Split into squares): The classic “bread” for the s’mores sandwich. One standard sleeve is typically needed.
- Mini Marshmallows (untoasted): Pressed into the sides for decoration and that classic marshmallow look and soft texture.
- Vegetable Oil: For lightly brushing the baking sheet to prevent the intensely sugary broiled marshmallows from sticking.
Essential Equipment
- Baking Sheet: For broiling the marshmallows and for assembling the final sandwiches.
- Oven with a Broiler:
- Medium Stainless Steel Bowl (chilled in freezer): For mixing the ice cream. A pre-chilled bowl is a pro-tip that helps keep the ice cream cold during mixing and prevents it from melting too much.
- Cutting Board & Sharp Knife: For chopping the cooled, toasted marshmallows (oiling the knife as suggested is another great tip!).
- Resealable Container (Freezer-Safe): For freezing the prepared toasted marshmallow ice cream until solid.
- Microwave-Safe Bowl (or small saucepan): For heating the heavy cream.
- Medium Bowl: For making the soft chocolate spread.
- Small Baking Dish: For chilling the chocolate spread in a shallow layer.
- Spatula or Spoon: For mixing and spreading.
Ingredients
(Based on 1x column, makes 9 sandwiches)
Toasted Marshmallow Ice Cream:
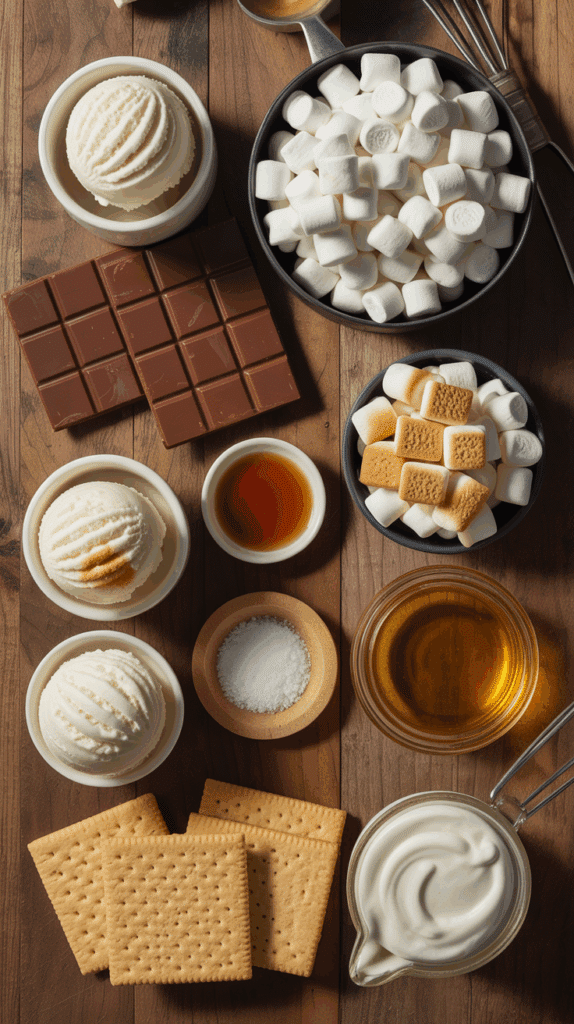
- ▢ 2 ½ cups vanilla ice cream
- ▢ 2 cups mini marshmallows
Soft Chocolate Spread:
- ▢ 3 ounces semisweet chocolate, chopped
- ▢ 1 teaspoon light corn syrup
- ▢ ½ teaspoon pure vanilla extract
- ▢ Pinch of kosher salt
- ▢ ⅓ cup heavy cream
For Assembly:
- ▢ 9 whole graham crackers, split into 18 squares (1 full sleeve)
- ▢ 2 cups mini marshmallows (the remaining from a standard 10oz bag after toasting)
- ▢ Vegetable oil, for brushing the baking sheet

Step-by-Step Instructions
Stage 1: Create the Toasted Marshmallow Ice Cream
1. Prepare for Broiling & Soften Ice Cream:
- Preheat your oven’s broiler to high. Lightly brush a baking sheet with a little vegetable oil to prevent sticking.
- Take the vanilla ice cream out of the freezer and let it sit at room temperature until it softens slightly but is not fully melted (about 10-15 minutes).
- Place a medium stainless steel bowl in the freezer to chill thoroughly. This will be used for mixing the ice cream.
2. Make the Toasted Marshmallow Component:
- Scatter 2 cups of the mini marshmallows in a single layer on the prepared oiled baking sheet.
- Place the baking sheet under the preheated broiler. Watch constantly and rotate the pan as needed, until the marshmallows are very dark, toasted, and puffy, about 3 to 4 minutes. You are looking for a deep toast to get that authentic campfire flavor.
- Let the broiled marshmallows cool completely on the baking sheet. Once cool, they may be sticky. Scrape them up from the pan, transfer them to a cutting board, and roughly chop them. (Pro-tip from the recipe: lightly oil the blade of your knife to help keep the marshmallows from sticking as you chop).
3. Combine Ice Cream & Freeze:
- Transfer the softened vanilla ice cream to the chilled stainless steel bowl from the freezer.
- Add the chopped, toasted marshmallows to the ice cream and stir with a spatula until they are well combined.
- Transfer this toasted marshmallow ice cream mixture to a resealable, freezer-safe container. Freeze until solid, which will take about 3 hours. (This ice cream can be made up to a day ahead).
Stage 2: Make the Soft Chocolate Spread
1. Create the Chocolate Ganache-like Spread:
- Put the 3 ounces of chopped semisweet chocolate, 1 teaspoon light corn syrup, ½ teaspoon pure vanilla extract, and a pinch of kosher salt into a medium bowl.
- Heat the ⅓ cup of heavy cream in a microwave-safe bowl in the microwave until it is very hot and steaming, about 1 minute.
- Pour the hot cream directly over the chocolate mixture in the bowl. Let it sit undisturbed for 2 minutes to allow the hot cream to gently melt the chocolate.
- After 2 minutes, stir the mixture gently with a whisk or spatula until all the chocolate is melted and the spread is completely smooth and glossy.
2. Chill the Chocolate Spread:
- Pour this chocolate mixture into a small baking dish (a shallow dish helps it cool and set faster) and refrigerate until it is set, about 25 minutes. The mixture should still be soft and scoopable, not hard like a candy bar. (This can also be made up to a day ahead and kept refrigerated).
Stage 3: Assemble and Freeze the S’mores Sandwiches
1. Prepare the Graham Crackers:
- Lay the 18 graham cracker squares out on a large baking sheet in a single layer.
- Spoon about a teaspoon of the chilled, soft chocolate mixture onto each graham cracker square. Gently spread it out to the edges with a small spatula or the back of a spoon, being careful not to break the delicate crackers.
2. Assemble the Sandwiches:
- Let the prepared Toasted Marshmallow Ice Cream soften slightly at room temperature for a few minutes to make it scoopable.
- Top one chocolate-spread graham cracker with about ¼ cup (a good-sized scoop) of the ice cream.
- Place a second chocolate-spread graham cracker on top, chocolate-side down, and press down gently to create a sandwich.
- Immediately press some of the remaining 2 cups of untoasted mini marshmallows into the exposed ice cream sides to decorate.
- Place the finished sandwich back on the baking sheet. Repeat with the remaining graham crackers, ice cream, and marshmallows to make 9 sandwiches in total.
3. Final Freeze:
- Immediately place the baking sheet with all the assembled Frozen S’mores into the freezer. Freeze until they are completely solid, which will take at least 1 hour.
- Once frozen solid, you can wrap the sandwiches individually in plastic wrap or foil and keep them frozen for up to 1 week for the best texture and flavor.
4. Serve:
- Serve The Frozen S’more directly from the freezer. Enjoy this incredible gourmet treat!

Troubleshooting
- Marshmallows Burning Under the Broiler: This is the biggest risk and requires constant attention! Do not walk away from the broiler, not even for a moment. Rotate the pan as needed to ensure even toasting. You are looking for a very dark toast for that smoky flavor, but black, acrid char will be bitter.
- Difficulty Chopping Sticky Toasted Marshmallows: The tip to lightly oil your knife blade is key and works wonders.
- Ice Cream Melting Too Fast During Assembly: It’s crucial to work quickly. Ensure your toasted marshmallow ice cream is frozen completely solid before you start assembling the sandwiches. Only take it out of the freezer at the very last moment when you are ready to scoop. Having all your graham crackers pre-spread with the chocolate will help speed up the process.
- Chocolate Spread is Too Hard or Too Runny: If it’s too hard after chilling, let it sit at room temperature for a few minutes to soften up so it’s spreadable. If it’s too runny, it may not have had enough chocolate or was not chilled long enough. The corn syrup is designed to help keep it from getting rock hard when chilled.
- Sandwiches Falling Apart: This can happen if you overfill the sandwiches with too much ice cream. Use a modest scoop. Press together gently but firmly. The final 1-hour freeze is crucial for solidifying the sandwich so it can be handled easily.
Tips and Variations
- Chill Your Mixing Bowl: As the recipe suggests, chilling the bowl for mixing the ice cream is a professional tip that helps keep the ice cream from melting too quickly as you fold in the toasted marshmallows.
- Work in a Cool Kitchen: If possible, assemble these on a cooler day or in a well-air-conditioned room, as the ice cream will melt fast. Work on only one or two sandwiches at a time, placing each finished one immediately back into the freezer on a cold baking sheet.
- Chocolate Choices: For a more intense, less sweet chocolate flavor, use dark chocolate (60-70% cacao) for the spread. Milk chocolate can also be used for a sweeter, creamier version.
- Add Flaky Sea Salt: A tiny sprinkle of flaky sea salt (like Maldon) on top of the chocolate spread before adding the ice cream would add a fantastic flavor contrast that elevates the sandwich even more.
- Different Cookie Bases: While graham crackers are classic for s’mores, you could certainly experiment with large, thin chocolate wafer cookies or even buttery shortbread cookies for a different take on the sandwich.
- Make Components Ahead of Time: As the recipe notes, this is a great dessert to prep in stages. Both the toasted marshmallow ice cream and the soft chocolate spread can be made up to a day ahead and kept frozen or refrigerated, respectively. This makes assembly day much quicker and easier to manage.
Serving and Pairing Suggestions
- Serve Frozen Solid: These are best enjoyed straight from the freezer for the perfect ice cream sandwich experience.
- Perfect Summer Barbecue Dessert: A fantastic, impressive no-bake dessert to cool everyone down after a grilled meal.
- Fun Party Treat: They can be made ahead and wrapped individually in plastic wrap or small bags, ready to be passed around at a party or gathering.
- With a Glass of Cold Milk: The ultimate classic pairing for anything s’mores-related or any ice cream sandwich!
Nutritional Information
(Note: Estimated, per one ice cream sandwich. This is an indulgent dessert.)
- Calories: 320-420
- Fat: 16-24g
- Saturated Fat: 9-15g
- Cholesterol: 45-65mg
- Sodium: 120-180mg
- Total Carbohydrates: 40-50g
- Dietary Fiber: 1-2g
- Sugars: 28-38g
- Protein: 3-5g
The Frozen S’more (A Gourmet Ice Cream Sandwich!)
Create the ultimate Frozen S’more! This homemade ice cream sandwich features a toasted marshmallow vanilla ice cream and soft chocolate ganache layered between graham crackers.
Ingredients
(Based on 1x column, makes 9 sandwiches)
Toasted Marshmallow Ice Cream:
- ▢ 2 ½ cups vanilla ice cream
- ▢ 2 cups mini marshmallows
Soft Chocolate Spread:
- ▢ 3 ounces semisweet chocolate, chopped
- ▢ 1 teaspoon light corn syrup
- ▢ ½ teaspoon pure vanilla extract
- ▢ Pinch of kosher salt
- ▢ ⅓ cup heavy cream
For Assembly:
- ▢ 9 whole graham crackers, split into 18 squares (1 full sleeve)
- ▢ 2 cups mini marshmallows (the remaining from a standard 10oz bag after toasting)
- ▢ Vegetable oil, for brushing the baking sheet
Instructions
Stage 1: Create the Toasted Marshmallow Ice Cream
1. Prepare for Broiling & Soften Ice Cream:
- Preheat your oven’s broiler to high. Lightly brush a baking sheet with a little vegetable oil to prevent sticking.
- Take the vanilla ice cream out of the freezer and let it sit at room temperature until it softens slightly but is not fully melted (about 10-15 minutes).
- Place a medium stainless steel bowl in the freezer to chill thoroughly. This will be used for mixing the ice cream.
2. Make the Toasted Marshmallow Component:
- Scatter 2 cups of the mini marshmallows in a single layer on the prepared oiled baking sheet.
- Place the baking sheet under the preheated broiler. Watch constantly and rotate the pan as needed, until the marshmallows are very dark, toasted, and puffy, about 3 to 4 minutes. You are looking for a deep toast to get that authentic campfire flavor.
- Let the broiled marshmallows cool completely on the baking sheet. Once cool, they may be sticky. Scrape them up from the pan, transfer them to a cutting board, and roughly chop them. (Pro-tip from the recipe: lightly oil the blade of your knife to help keep the marshmallows from sticking as you chop).
3. Combine Ice Cream & Freeze:
- Transfer the softened vanilla ice cream to the chilled stainless steel bowl from the freezer.
- Add the chopped, toasted marshmallows to the ice cream and stir with a spatula until they are well combined.
- Transfer this toasted marshmallow ice cream mixture to a resealable, freezer-safe container. Freeze until solid, which will take about 3 hours. (This ice cream can be made up to a day ahead).
Recipe Summary and Q&A
Summary: The Frozen S’more is a homemade ice cream sandwich that reinterprets the classic campfire treat. First, a unique toasted marshmallow ice cream is made by broiling mini marshmallows until very dark, then chopping them and folding them into softened vanilla ice cream, which is then refrozen until solid. A soft chocolate spread is made by pouring hot heavy cream over chopped semi-sweet chocolate, corn syrup, vanilla, and salt, then chilling this mixture until it’s set but still scoopable. To assemble, the chocolate spread is smeared onto graham cracker squares. A scoop of the toasted marshmallow ice cream is then sandwiched between two of the chocolate-spread crackers. The sides of the ice cream sandwich are decorated with fresh (untoasted) mini marshmallows, and the finished sandwiches are frozen until solid before serving.
Q&A:
- Q: Why do I have to broil the marshmallows? Can’t I just use regular marshmallows or marshmallow fluff?
- A: Broiling the marshmallows is the most crucial step for achieving the authentic “s’mores” flavor! This is what creates the deep, smoky, caramelized taste reminiscent of a marshmallow that has been properly toasted over a campfire. Simply using regular, untoasted marshmallows or marshmallow fluff in the ice cream would just add sweetness and chewiness, but you would completely miss the signature “toasted” flavor that defines this dessert.
- Q: Can I make this recipe without an electric mixer?
- A: Yes, an electric mixer is not strictly required for this specific recipe, as you are not whipping the cream from scratch for the ice cream base. You are simply stirring the toasted marshmallow pieces into already softened store-bought ice cream, which can be done effectively with a sturdy spatula or spoon.
- Q: My kitchen gets very hot in the summer. Do you have any tips for assembling these so the ice cream doesn’t melt everywhere?
- A: Absolutely! The key is to work quickly and keep everything as cold as possible. Have all your components ready to go before you take the ice cream out of the freezer: your graham crackers should be laid out and already spread with the chilled chocolate mixture, and your untoasted marshmallows for decorating should be in a bowl. Work on a cold surface if you can. Assemble only one or two sandwiches at a time, placing each finished one immediately back into the freezer on a pre-chilled baking sheet.
- Q: How long can I store these finished Frozen S’mores in the freezer?
- A: The recipe suggests wrapping them individually once they are frozen solid, and they will keep well for up to 1 week. After that, they are still perfectly safe to eat, but the graham crackers may start to absorb some moisture from the ice cream and become slightly less crisp.

