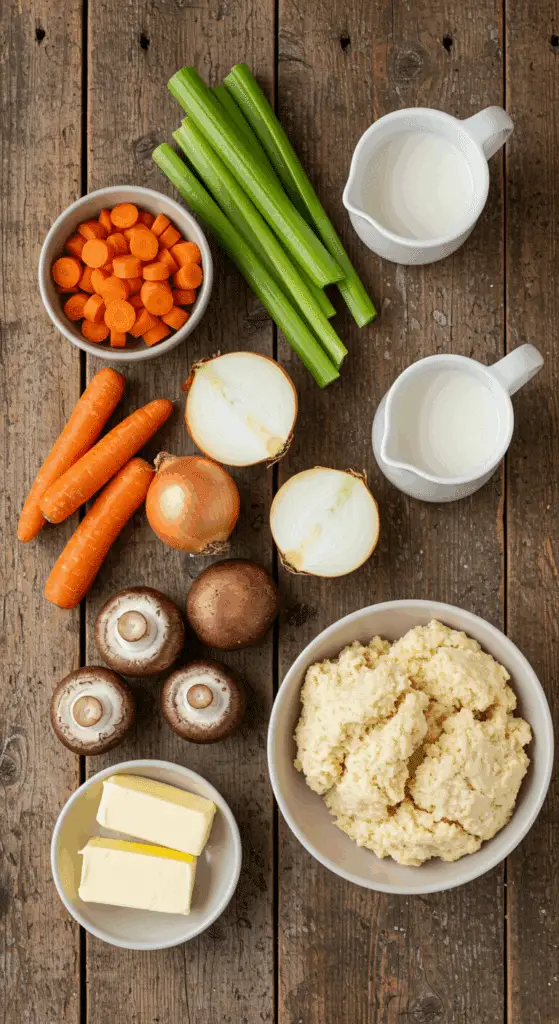
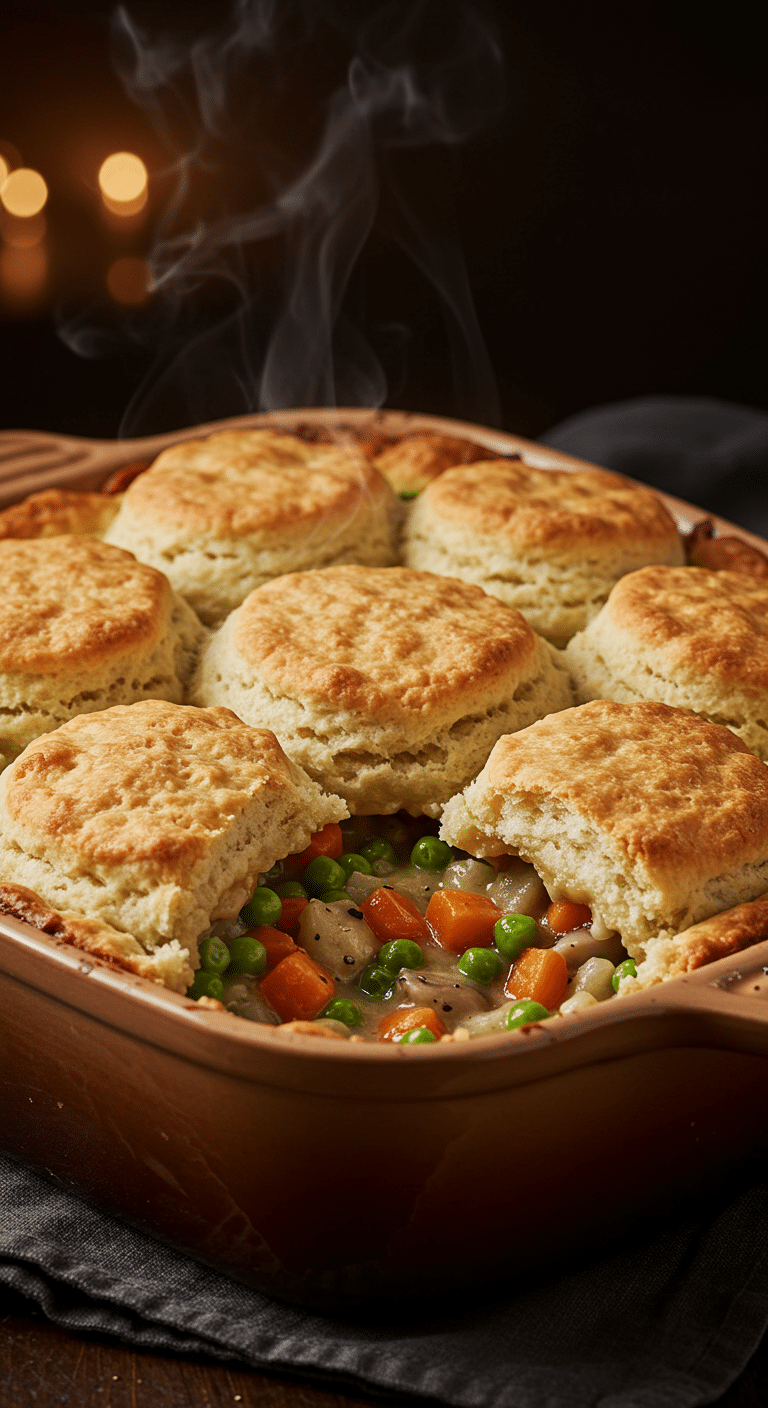
Is there any meal more cozy, more comforting, or more deeply satisfying than a classic, homemade Pot Pie, bubbling hot from the oven? This incredible, from-scratch Biscuit Vegetable Pot Pie is the ultimate vegetarian comfort food, featuring a rich, savory, and creamy filling loaded with a rainbow of tender vegetables, all crowned with fluffy, golden-brown, homemade biscuits.
This isn’t just a recipe; it’s your definitive guide to mastering a true one-dish wonder. We’ll show you the simple secrets to an incredibly rich and velvety gravy and the foolproof method for light, tender, and impossibly fluffy biscuits. This is the kind of hearty, soul-warming meal that brings the whole family to the table and makes any weeknight feel special.
Table of Contents
Table of Contents
Recipe Overview: The Ultimate Vegetarian Comfort Food
What makes this Vegetable Pot Pie so spectacular is its perfect harmony of a rich, creamy filling and a light, airy topping. The filling is a classic, savory gravy packed with a hearty medley of tender carrots, celery, mushrooms, and other delicious vegetables. But the real star is the homemade biscuit topping. Instead of a dense, heavy pastry, this pot pie is crowned with soft, fluffy biscuits that bake up to a perfect golden brown, with tender bottoms that soak up some of the delicious gravy. It’s a make-ahead and freezer-friendly meal that is perfect for a chilly evening.
| Metric | Time / Level |
| Total Time | 1 hour 15 minutes |
| Active Prep Time | 30 minutes |
| Difficulty Level | Easy |
| Servings | 6-8 |
The Essential Ingredients for a Perfect Pot Pie
This recipe is built from two perfect, from-scratch components.
- The Fluffy Biscuit Topping: The light, tender, and golden-brown crown of our pot pie.
- Cold Unsalted Butter: The absolute key to a light and fluffy biscuit. It is crucial that your butter is very cold and cut into small pieces. These cold pieces of butter will create steam as the pie bakes, which is what creates all those beautiful, tender layers.
- Baking Powder: This recipe uses a generous tablespoon of baking powder, which is the secret to a biscuit topping that rises up beautifully tall and fluffy in the oven.
- The Rich and Creamy Vegetable Filling:
- The Vegetables: A classic, savory, and aromatic blend of yellow onion, carrots, celery, and mushrooms forms the flavorful base of the filling. A bag of mixed frozen vegetables (like peas, corn, broccoli, or cauliflower) is a fantastic and convenient shortcut that is stirred in at the very end.
- The Gravy: A classic, rich, and creamy gravy made from a roux (a cooked mixture of butter and flour), savory vegetable broth, and a splash of whole milk for extra creaminess and richness. A touch of fresh or dried thyme provides the perfect, fragrant aroma.

Step-by-Step to the Best Vegetable Pot Pie
This recipe is a rewarding baking project. Follow these detailed steps for a perfect, show-stopping result.
Part 1: The Fluffy Biscuit Topping
Step 1: In a large bowl, whisk together the 2 cups of all-purpose flour, the 1 tablespoon of baking powder, and the 1/2 teaspoon of salt.
Step 2: Add the 6 tablespoons of cold, cubed butter. Using a pastry blender or your fingertips, quickly “cut” the butter into the dry ingredients until coarse crumbs form.
Step 3: Add 1 cup of the whole milk and stir with a fork until the dough just comes together. The dough will be very shaggy and a little wet.
Pro Tip: The secret to a tender, fluffy biscuit is to not overwork the dough.
Step 4: With generously floured hands, shape the sticky dough into 8 or 9 1-inch-thick discs. Place the shaped biscuits on a lined plate, cover them tightly, and place them in the refrigerator to chill while you make the filling.
Part 2: The Rich and Creamy Vegetable Filling
Step 1: In a large skillet or Dutch oven, melt the 1/4 cup of butter over medium heat. Add the 1 cup of diced yellow onion, the 1 cup of diced carrots, the 1 cup of diced celery, the 1 cup of chopped mushrooms, and the 3-4 minced garlic cloves. Cook, stirring occasionally, for about 5 minutes, until the vegetables have softened.
Step 2 (Make the Roux): Sprinkle the 1/3 cup of all-purpose flour, the 1 teaspoon of salt, the 1/2 teaspoon of pepper, and the 2 teaspoons of fresh thyme over the vegetables. Stir and cook for about 1 to 2 minutes, until the flour has absorbed all the butter and has had a chance to cook out its raw taste.
Step 3 (Make the Gravy): Slowly and gradually, while stirring constantly, pour in the 2 cups of vegetable broth and the 1/2 cup of whole milk.
Step 4: Bring the mixture to a simmer and let it cook, stirring, for 7 to 9 minutes, until it has thickened into a beautiful, rich gravy consistency.
Step 5: Remove the pan from the heat. Stir in the 2 cups of mixed frozen vegetables and the 2 tablespoons of chopped fresh parsley. Give the filling a taste and add more salt, pepper, or herbs if you think it needs it. Let the filling cool for 5 minutes.
Part 3: Assembling and Baking Your Pot Pie Casserole
Step 1: While the filling is cooling, preheat your oven to 400°F (204°C).
Step 2: Pour the prepared filling into a greased 2.5- or 3-quart baking dish, or a 9-inch deep-dish pie plate.
Step 3: Arrange your cold, prepared biscuits on top of the hot filling, squeezing them in as necessary to fit.
Step 4: Brush the tops of the biscuits with the remaining 2 tablespoons of milk.
Step 5: Bake for 25 minutes. Then, keeping the pot pie in the oven, turn the oven temperature up to 425°F (218°C) and bake for 5 to 6 more minutes, until the biscuits are a deep golden brown on top and the filling is hot and bubbly.
Let the pot pie cool for at least 5 to 10 minutes before serving.

The Best Cozy & Easy Vegetable Pot Pie (with Biscuit Topping!)
A from-scratch, vegetarian pot pie featuring a creamy vegetable filling and a homemade biscuit topping. The rich filling is made with a classic mirepoix of onion, carrots, and celery, along with mushrooms and garlic, all cooked in a savory gravy thickened with a roux and vegetable broth. A mix of other vegetables like peas and broccoli are added before the filling is topped with 8 or 9 rustic, drop-style biscuits. The entire casserole is then baked until the filling is bubbly and the biscuit topping is golden brown.
- Prep Time: 35 minutes
- Cook Time: 45 minutes
- Total Time: 1 hour 25 minutes
- Yield: 4-6 servings
- Category: Main Course
- Method: Baking, Sautéing
- Cuisine: American
- Diet: Vegetarian
Ingredients
- For the Biscuits:
- 2 cups all-purpose flour
- 1 Tablespoon baking powder
- 1/2 teaspoon salt
- 6 Tablespoons cold unsalted butter, cubed
- 1 cup + 2 Tablespoons whole milk, divided
- For the Filling:
- 1/4 cup unsalted butter
- 1 cup diced yellow onion
- 1 cup diced carrots
- 1 cup diced celery
- 1 cup roughly chopped mushrooms
- 3–4 garlic cloves, minced
- 1/3 cup all-purpose flour
- 1 teaspoon salt
- 1/2 teaspoon fresh ground pepper
- 2 teaspoons fresh thyme leaves
- 2 cups vegetable broth
- 1/2 cup whole milk
- 2 cups mixed vegetables (e.g., frozen peas, broccoli)
- 2 Tablespoons chopped fresh parsley
Instructions
- Make the Biscuit Topping: In a large bowl, whisk the flour, baking powder, and salt. Cut in the cold butter with a pastry cutter or your fingers until coarse crumbs form.
- Stir in 1 cup of milk until a shaggy, wet dough comes together.
- With floured hands, shape the sticky dough into 8 or 9 1-inch-thick discs. Place on a lined plate, cover, and refrigerate while you make the filling.
- Make the Filling: In a large, oven-safe skillet or Dutch oven over medium heat, melt the butter. Add the onion, carrots, celery, mushrooms, and garlic. Cook for 5 minutes, until softened.
- Stir in the flour, salt, pepper, and thyme and cook for 1 minute to create a roux.
- Stir in the vegetable broth and 1/2 cup of milk. Simmer for 7–9 minutes, until thickened into a gravy.
- Stir in the mixed vegetables and parsley. Remove from the heat and let cool for 5 minutes.
- Assemble and Bake: Preheat the oven to 400°F. If your skillet is not oven-safe, pour the filling into a greased 2.5- or 3-quart baking dish.
- Arrange the cold biscuits on top of the filling. Brush the tops of the biscuits with the remaining 2 tablespoons of milk.
- Bake for 25 minutes. Then, increase the oven temperature to 425°F and bake for 5–6 more minutes, until the biscuits are golden brown.
- Let the pot pie cool for 5-10 minutes before serving.
Notes
- The biscuit dough is intentionally shaggy and a little wet; keep your hands well-floured when shaping it.
- Using a large, oven-safe skillet allows this to be a one-pan meal, going from stovetop to oven.
- The two-temperature baking process ensures the biscuits cook through completely and then get a nicely browned top.
- Leftovers keep well in the refrigerator for up to 5 days.
Storage and Make-Ahead Tips
A pot pie is a fantastic make-ahead meal, perfect for a busy week or for stocking your freezer.
- Make-Ahead: You can prepare both the biscuit dough and the creamy filling up to 2 days in advance. Store them in separate, airtight containers in the refrigerator. When you are ready to eat, simply reheat the filling on the stovetop, top it with the chilled biscuits, and bake as directed.
- Storage: Store any leftovers, well-covered, in the refrigerator for up to 5 days.
- Freezing: You can freeze the entire, unbaked pot pie. Assemble it completely in a freezer-safe dish, cover it very well, and freeze for up to 3 months. You can bake it directly from frozen, adding about 30-40 minutes to the total baking time.
For more recipe follow my Pinterest account
Creative Recipe Variations
- Add a Cheesy Biscuit Topping: For a delicious, savory twist, you can add 1 cup of shredded sharp cheddar cheese to the biscuit dough along with the flour for beautiful, cheesy biscuits.
- Make it a Vegan Pot Pie: For a completely vegan version, use a high-quality vegan butter in the filling and the biscuits, and a full-fat, creamy oat milk in place of the whole milk. Be sure to also use vegetable broth.
- Add a Protein: If you have meat-eaters in your family, this recipe is a fantastic base for a classic chicken pot pie. Simply stir in about 2 to 3 cups of cooked, shredded chicken or turkey to the filling along with the mixed vegetables.
Enjoy The Ultimate Vegetarian Comfort Food!
You’ve just created a truly special dish that is the very definition of homemade comfort. This classic Vegetable Pot Pie, with its rich and creamy filling and its fluffy, golden-brown biscuit topping, is a rewarding and deeply satisfying meal that is sure to become a new family favorite. It’s the kind of timeless dish that makes any day feel cozy and special.
We hope you enjoy every last, delicious bite!
If you enjoyed making this recipe, please leave a comment below or share it with a friend who loves a good, old-fashioned comfort food meal!
Frequently Asked Questions (FAQs)
Q1: What is the secret to a fluffy, not tough, biscuit topping?
The two most important secrets are to use very cold butter and to not overwork the dough. Keeping your butter cold is essential for creating the flaky, tender layers. Not over-mixing the dough after the milk is added is crucial for preventing the development of too much gluten, which is what makes biscuits tough and dense instead of light and fluffy.
Q2: How do I keep my pot pie filling from being runny?
The key to a perfectly thick and creamy, not runny, filling is to make a proper roux. As the recipe directs, you must sprinkle the flour over your sautéed vegetables and let it cook in the butter for a minute or two. This step not only cooks out the raw taste of the flour but also allows the flour granules to absorb the fat, which is the secret that will allow them to thicken your sauce beautifully and without any lumps.
Q3: Can I use a different topping instead of the homemade biscuits?
Yes! For a classic, pastry-topped pot pie, you can use a sheet of your favorite store-bought or homemade pie crust. For an even faster shortcut, you could even use a sheet of store-bought puff pastry.
Q4: Can I freeze my baked vegetable pot pie?
Yes! A baked pot pie freezes beautifully. Let it cool completely, and then you can either freeze the whole pie or individual portions. Wrap it very well in a double layer of plastic wrap and then a layer of foil. It will keep in the freezer for up to 3 months. You can reheat it in a 350°F oven until it is hot and bubbly.
Q5: What is self-rising flour, and can I use it for the biscuits?
Self-rising flour is simply all-purpose flour that has already had baking powder and salt added to it. If you have it, you can use 2 cups of self-rising flour and omit the 1 tablespoon of baking powder and the 1/2 teaspoon of salt called for in the biscuit recipe for an even easier shortcut.

