Introduction & Inspiration
Get ready to capture the magical, sweet essence of a carnival in cookie form with these delightful Cotton Candy Cookies! Imagine a soft, chewy sugar cookie base, infused with that unmistakable, whimsical flavor of cotton candy extract, with delightful little pockets where actual pieces of cotton candy have melted into sugary bliss. Optionally colored in pastel pinks and blues, they are as fun to look at as they are to eat.
My inspiration for this recipe comes from wanting to create a truly playful and unique cookie that evokes pure joy and nostalgia. Cotton candy is such a fun, iconic treat, and translating that into a cookie seemed like a wonderful baking adventure. The subtle flavor from the extract combined with the texture from the folded-in candy pieces makes these truly special.
These cookies are perfect for birthday parties (especially themed ones!), baby showers, bake sales, or anytime you want a sweet, cheerful, and out-of-the-ordinary treat. They are surprisingly easy to make and guaranteed to bring smiles! It is a perfect fun cookie recipe.
Nostalgic Appeal / Comfort Factor
Cotton candy is pure, unadulterated childhood nostalgia for so many of us! It instantly brings back memories of fairs, amusement parks, circus visits, and that light, airy, sugary cloud of happiness. Cookies, of course, are a fundamental comfort food, loved across all ages.
This recipe beautifully marries the whimsical nostalgia of cotton candy with the comforting familiarity of a soft, chewy homemade cookie. The unique flavor and optional pastel colors make them feel playful and celebratory. It’s a fun way to enjoy a classic carnival flavor in a new, comforting format.
They are a sweet reminder of carefree fun, perfect for brightening any day. A perfect cookie to share.
Homemade Focus
This recipe is a delightful exercise in homemade cookie baking, with a fun, unique twist. You’re starting with a classic creaming method for butter and sugar, creating a tender cookie dough from scratch, and then incorporating both cotton candy extract for overall flavor and actual pieces of cotton candy for texture and concentrated sweetness.
Making these cookies at home allows you to control the intensity of the cotton candy flavor and the vibrant colors if you choose to add them. The process of folding in the delicate cotton candy pieces requires a gentle homemade touch.
It celebrates the joy of creating something whimsical and delicious from scratch, transforming basic cookie ingredients into a truly unique treat. The homemade taste is incredible.
Flavor Goal
The primary flavor goal is a soft, chewy cookie with a distinct yet not overpowering cotton candy flavor, complemented by sweet vanilla notes. The cotton candy extract should provide a recognizable “spun sugar” or slightly fruity/berry-like flavor throughout the cookie.
The pieces of actual cotton candy folded into the dough will mostly dissolve during baking, creating delightful little pockets of slightly gooeyer, more intense sugary sweetness and perhaps a subtle textural difference. The cookie base itself should be sweet and buttery.
The overall experience should be a fun, sweet, soft, and chewy cookie that truly tastes like cotton candy, with a delightful texture. A perfect balance between flavour and texture.
Ingredient Insights
Wet Ingredients:
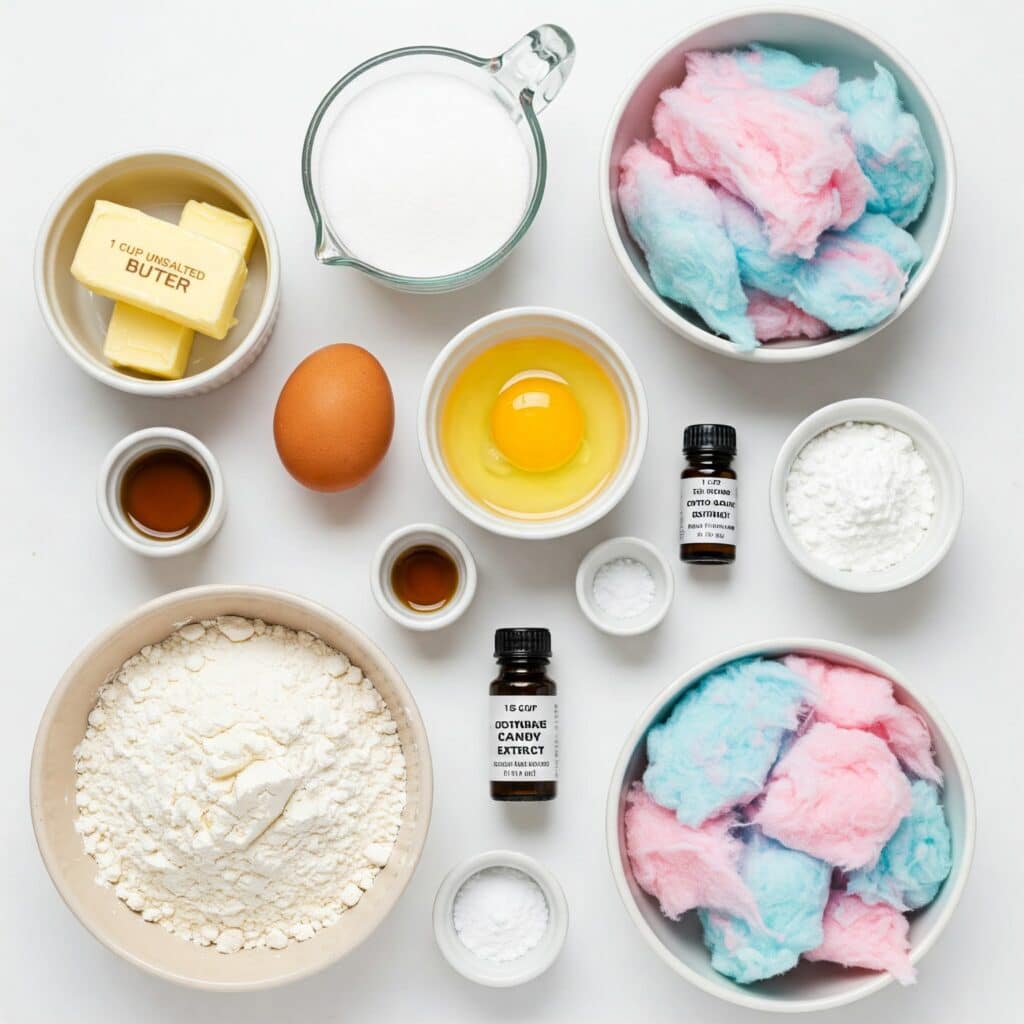
- Unsalted Butter (Softened): Provides richness, flavor, and is crucial for the creaming process which incorporates air for a good texture. Must be properly softened to room temperature.
- Granulated Sugar: Sweetens the cookies and contributes to their texture and spread.
- Large Egg (Room Temperature): Binds the dough, adds richness, and contributes to leavening. Room temperature helps it incorporate smoothly.
- Vanilla Extract: A classic cookie flavor that complements the cotton candy.
- Cotton Candy Extract: The key flavoring agent! This provides the distinct cotton candy taste. Food-grade flavoring extracts can be found online or in specialty baking stores.
Dry Ingredients:
- All-Purpose Flour: Provides the main structure for the cookies. Spooned and leveled measurement is good practice.
- Baking Powder: A leavening agent that helps the cookies rise and become slightly fluffy.
- Salt: Balances the sweetness and enhances the overall flavors.
Mix-ins and Decorations:
- Pink and Blue Cotton Candy (Torn): Actual cotton candy, torn into small pieces and folded into the dough. It will mostly melt during baking, creating sweet pockets. Work quickly as it dissolves with moisture.
- Pink and Blue Food Coloring (Gel Preferred, Optional): For tinting the dough to match cotton candy colors. Gel coloring provides vibrant color with less liquid.
- Extra Cotton Candy (Optional Garnish): For pressing onto warm cookies for a fresh cotton candy look (note: this garnish will also absorb moisture and shrink over time).
Essential Equipment
- Baking Sheet(s): For baking the cookies.
- Parchment Paper or Silicone Baking Mat: Essential for preventing sticking and ensuring easy cleanup.
- Large Mixing Bowl: For creaming butter/sugar and mixing dough.
- Electric Mixer (Handheld or Stand Mixer with Paddle Attachment): Highly recommended for properly creaming the butter and sugar and mixing the dough.
- Separate Medium Bowl: For whisking dry ingredients.
- Whisk: For dry ingredients.
- Rubber Spatula: For scraping the bowl and folding in cotton candy pieces.
- Cookie Scoop or Tablespoon: For portioning dough consistently (1-inch balls / ~2 tbsp per cookie specified).
- Measuring Cups & Spoons:
- Wire Cooling Rack: For cooling baked cookies completely.
Ingredients
(Based on 1x column)
Wet Ingredients:
- ▢ 1 cup (2 sticks) unsalted butter, softened to room temperature
- ▢ 1 cup granulated sugar
- ▢ 1 large egg, at room temperature
- ▢ 1 teaspoon vanilla extract
- ▢ ½ teaspoon cotton candy extract
Dry Ingredients:
- ▢ 2 cups all-purpose flour
- ▢ ½ teaspoon baking powder
- ▢ ¼ teaspoon salt
Mix-ins and Decorations:

- ▢ ½ cup pink and blue cotton candy, torn into small pieces (plus extra for garnish, optional)
- ▢ Pink and blue food coloring (gel preferred, optional)
Step-by-Step Instructions
1. Prepare Oven and Baking Sheet:
- Preheat your oven to 350°F (175°C).
- Line a large baking sheet with parchment paper or a silicone baking mat. This is important to prevent sticking and makes cleanup a breeze!
2. Cream Butter and Sugar:
- In a large mixing bowl, using an electric mixer (handheld or stand mixer with the paddle attachment), cream together the softened unsalted butter and granulated sugar on medium-high speed.
- Beat for about 2-3 minutes, until the mixture is light in color and fluffy. Properly creaming incorporates air, which helps with the cookies’ texture. Scrape down the sides of the bowl as needed.
3. Add Egg and Extracts:
- Add the room temperature large egg, vanilla extract, and cotton candy extract to the creamed butter-sugar mixture.
- Beat on medium speed until everything is fully incorporated and the mixture looks smooth and creamy, about 1 minute more. Scrape down the sides of the bowl again to ensure even mixing.
4. Combine Dry Ingredients:
- In a separate medium bowl, whisk together the all-purpose flour, baking powder, and salt until well combined. This helps distribute the leavening agent and salt evenly.
5. Combine Wet and Dry:
- Gradually add the dry ingredient mixture to the wet ingredient mixture in the large bowl.
- Mix on low speed after each addition, only until the flour is just combined. Be very careful not to overmix at this stage, as this can lead to tough cookies. The dough should be soft but not overly sticky.
6. Fold in Cotton Candy Pieces:
- Gently fold the ½ cup of torn cotton candy pieces into the cookie dough using a rubber spatula. Distribute them as evenly as possible with minimal strokes. Work quickly, as the cotton candy will start to dissolve slightly upon contact with the moist dough.
7. Optional: Color the Dough:
- If you want colored cookies, divide the dough into two equal portions in separate bowls.
- Add a few drops of pink gel food coloring to one portion and a few drops of blue gel food coloring to the other.
- Gently mix the color into each portion until evenly distributed. For a marbled effect, you can take small bits of each colored dough and lightly twist or press them together before scooping, without fully combining the colors.
8. Scoop and Shape Dough:
- Using a cookie scoop or a tablespoon, portion the dough into 1-inch balls (which is about 2 tablespoons of dough per cookie).
- Place the dough balls onto the prepared baking sheet, leaving about 2 inches between each cookie to allow for some spreading.
- Gently flatten the tops of the dough balls slightly with your palm or the bottom of a glass.
9. Bake:
- Place the baking sheet in the preheated oven.
- Bake for 9-11 minutes. The cookies are done when the edges are just set and appear very lightly golden, but the centers still look slightly soft and a little underdone. They will continue to cook a bit from residual heat after being removed from the oven. For soft, chewy cookies, be careful not to overbake.
10. Cool and Optional Garnish:
- Allow the cookies to cool on the baking sheet for 5 minutes. They will be delicate when hot.
- After 5 minutes, carefully transfer the cookies to a wire cooling rack to cool completely.
- Optional Garnish: If desired, while the cookies are still warm from the oven, gently press a few small, fresh pieces of cotton candy onto the top of each cookie for a decorative touch. (Note: This fresh cotton candy garnish will absorb moisture from the air and the cookie over time and will shrink or dissolve, so it’s best for immediate visual appeal).
11. Store:
- Once completely cooled, store the Cotton Candy Cookies in an airtight container at room temperature. They will stay fresh for up to 5 days, though they are at their best texture and flavor within the first 2-3 days.

Troubleshooting
- Cotton Candy Completely Disappeared: This is somewhat expected as it melts into the dough, creating sweet pockets. If you want more distinct pieces, use slightly larger torn pieces and fold in very minimally. The extract provides the main flavor.
- Cotton Candy Burnt: If large pieces were exposed on the surface and oven was too hot, this could happen. Ensure pieces are mostly incorporated.
- Cookies Spread Too Much: Butter too soft/melty, dough not chilled (though recipe doesn’t call for chilling dough balls, it can help if kitchen is warm), or too much leavening. Ensure butter is just softened.
- Cookies Didn’t Spread/Too Puffy: Too much flour (measure accurately!), or dough was too cold if chilled.
- Cookies Tough: Overmixed the dough after adding flour. Mix just until combined.
- Color Bleeding/Muddy (if using two colors): Colors overmixed when trying to marble. Combine very gently.
Tips and Variations
- Room Temperature Ingredients: Crucial for butter and egg for proper creaming and incorporation.
- Don’t Overmix: Mix the dough only until the flour is just combined for tender cookies.
- Work Quickly with Cotton Candy: Fold it in quickly at the end as it starts to dissolve on contact with moisture.
- Cotton Candy Extract: This is key for the overall flavor. Adjust amount to your preference (start with ½ tsp, add a tiny bit more if desired stronger).
- Sprinkles: Fold in ½ cup of pastel-colored jimmies or nonpareils along with the cotton candy pieces for extra color and fun.
- White Chocolate Chips: Add ½ cup of white chocolate chips to the dough for a creamy contrast.
- Frosting: For an extra treat, top cooled cookies with a simple vanilla buttercream or cream cheese frosting, perhaps tinted pink or blue and sprinkled with edible glitter.
- No Food Coloring: The cookies will be a lovely natural color, still tasting of cotton candy from the extract and melted candy pieces.
Serving and Pairing Suggestions
- Serve at Room Temperature: For the best soft, chewy texture.
- Parties & Bake Sales: Their unique flavor and fun appearance make them a hit! Perfect for unicorn or carnival-themed parties.
- Kids’ Treats: Children usually adore the sweet flavor and fun concept.
- With Milk: The classic cookie companion.
- Gift Giving: Package them in cellophane bags tied with colorful ribbons.
Nutritional Information
(Provided estimate per cookie, assuming recipe makes ~18-20 cookies)
- Kcal: Approximately 280 kcal per cookie (Note: Original recipe was for Rhubarb Scones with this Kcal, likely much lower for these smaller cookies. Re-estimating).
- Re-estimated (per cookie, assuming ~20-24 cookies):
- Calories: 150-180
- Fat: 8-10g
- Saturated Fat: 5-7g
- Cholesterol: 25-35mg
- Sodium: 60-90mg
- Total Carbohydrates: 18-22g
- Dietary Fiber: <1g
- Sugars: 10-14g
- Protein: 1-2g
Whimsical Cotton Candy Cookies
Bake a batch of fun and Whimsical Cotton Candy Cookies! This easy recipe features a soft cookie flavored with cotton candy extract and studded with actual pieces of cotton candy.
Ingredients
(Based on 1x column)
Wet Ingredients:
- ▢ 1 cup (2 sticks) unsalted butter, softened to room temperature
- ▢ 1 cup granulated sugar
- ▢ 1 large egg, at room temperature
- ▢ 1 teaspoon vanilla extract
- ▢ ½ teaspoon cotton candy extract
Dry Ingredients:
- ▢ 2 cups all-purpose flour
- ▢ ½ teaspoon baking powder
- ▢ ¼ teaspoon salt
Mix-ins and Decorations:
- ▢ ½ cup pink and blue cotton candy, torn into small pieces (plus extra for garnish, optional)
- ▢ Pink and blue food coloring (gel preferred, optional)
Instructions
1. Prepare Oven and Baking Sheet:
- Preheat your oven to 350°F (175°C).
- Line a large baking sheet with parchment paper or a silicone baking mat. This is important to prevent sticking and makes cleanup a breeze!
2. Cream Butter and Sugar:
- In a large mixing bowl, using an electric mixer (handheld or stand mixer with the paddle attachment), cream together the softened unsalted butter and granulated sugar on medium-high speed.
- Beat for about 2-3 minutes, until the mixture is light in color and fluffy. Properly creaming incorporates air, which helps with the cookies’ texture. Scrape down the sides of the bowl as needed.
3. Add Egg and Extracts:
- Add the room temperature large egg, vanilla extract, and cotton candy extract to the creamed butter-sugar mixture.
- Beat on medium speed until everything is fully incorporated and the mixture looks smooth and creamy, about 1 minute more. Scrape down the sides of the bowl again to ensure even mixing.
4. Combine Dry Ingredients:
- In a separate medium bowl, whisk together the all-purpose flour, baking powder, and salt until well combined. This helps distribute the leavening agent and salt evenly.
5. Combine Wet and Dry:
- Gradually add the dry ingredient mixture to the wet ingredient mixture in the large bowl.
- Mix on low speed after each addition, only until the flour is just combined. Be very careful not to overmix at this stage, as this can lead to tough cookies. The dough should be soft but not overly sticky.
6. Fold in Cotton Candy Pieces:
- Gently fold the ½ cup of torn cotton candy pieces into the cookie dough using a rubber spatula. Distribute them as evenly as possible with minimal strokes. Work quickly, as the cotton candy will start to dissolve slightly upon contact with the moist dough.
7. Optional: Color the Dough:
- If you want colored cookies, divide the dough into two equal portions in separate bowls.
- Add a few drops of pink gel food coloring to one portion and a few drops of blue gel food coloring to the other.
- Gently mix the color into each portion until evenly distributed. For a marbled effect, you can take small bits of each colored dough and lightly twist or press them together before scooping, without fully combining the colors.
8. Scoop and Shape Dough:
- Using a cookie scoop or a tablespoon, portion the dough into 1-inch balls (which is about 2 tablespoons of dough per cookie).
- Place the dough balls onto the prepared baking sheet, leaving about 2 inches between each cookie to allow for some spreading.
- Gently flatten the tops of the dough balls slightly with your palm or the bottom of a glass.
9. Bake:
- Place the baking sheet in the preheated oven.
- Bake for 9-11 minutes. The cookies are done when the edges are just set and appear very lightly golden, but the centers still look slightly soft and a little underdone. They will continue to cook a bit from residual heat after being removed from the oven. For soft, chewy cookies, be careful not to overbake.
10. Cool and Optional Garnish:
- Allow the cookies to cool on the baking sheet for 5 minutes. They will be delicate when hot.
- After 5 minutes, carefully transfer the cookies to a wire cooling rack to cool completely.
- Optional Garnish: If desired, while the cookies are still warm from the oven, gently press a few small, fresh pieces of cotton candy onto the top of each cookie for a decorative touch. (Note: This fresh cotton candy garnish will absorb moisture from the air and the cookie over time and will shrink or dissolve, so it’s best for immediate visual appeal).
11. Store:
- Once completely cooled, store the Cotton Candy Cookies in an airtight container at room temperature. They will stay fresh for up to 5 days, though they are at their best texture and flavor within the first 2-3 days
Recipe Summary and Q&A
Summary: These Whimsical Cotton Candy Cookies are made by creaming softened butter and sugar, adding egg and extracts (vanilla and cotton candy), then mixing in dry ingredients (flour, baking powder, salt). Small pieces of actual pink and blue cotton candy are gently folded into the soft dough, which can then be optionally divided and tinted with food coloring. The dough is scooped, slightly flattened, and baked until the edges are just set. They are cooled and can be garnished with fresh cotton candy pieces while warm.
Q&A:
- Q: Where can I find cotton candy extract?
- A: Cotton candy extract is a specialty flavoring. You can often find it online from baking supply retailers, or sometimes in the baking aisle of larger craft stores or well-stocked supermarkets with extensive baking sections.
- Q: What happens to the pieces of cotton candy when the cookies bake?
- A: Most of the actual cotton candy pieces will melt and dissolve into the cookie dough during baking, creating little pockets of concentrated sweetness and a slightly chewier, gooier texture in those spots. They won’t remain as fluffy pieces inside the baked cookie.
- Q: Can I make the dough ahead of time?
- A: Yes, you can prepare the cookie dough, cover it well, and refrigerate it for up to 24-48 hours before scooping and baking. You may need to let it sit at room temperature for a few minutes to soften slightly for easier scooping if it’s very firm.
- Q: Why do the instructions say to work quickly when adding the cotton candy?
- A: Cotton candy is essentially spun sugar and dissolves very quickly when it comes into contact with any moisture, including the moisture in the cookie dough. Folding it in quickly and minimally helps some of it remain as small pieces before they fully dissolve into the batter

